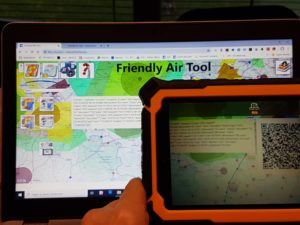
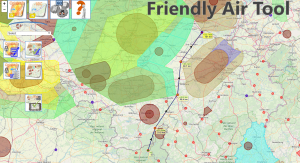
Friendly Air Tool instruction
This tool provides features for pilots around the world, additional features for pilots in the BPC region (Belgian Paragliding Cup= Belgium, North of France, West of Germany), and specific features for the BPC validation and scoring.
Please read the disclaimer in the bottom of this page.
Here are the instructions for using this great tool…
“How to” …. for any pilot
Load the Openair file with the airspace zones corresponding to the day you want to fly.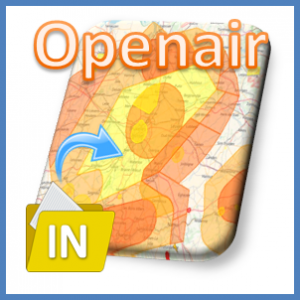
Check how to get the Openair file of your region in the “Openair In” button description above.
Click on “Go” button to launch the analysis process of the Openair file.
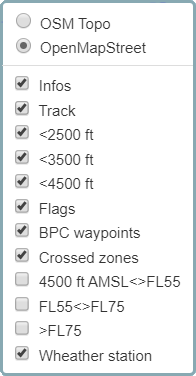
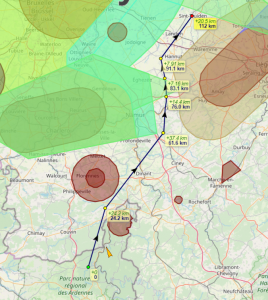
Check the airspace zones along the route you are intending to follow. If necessary and depending on the altitude you intend to fly, activate the upper levels of airspace zones display.

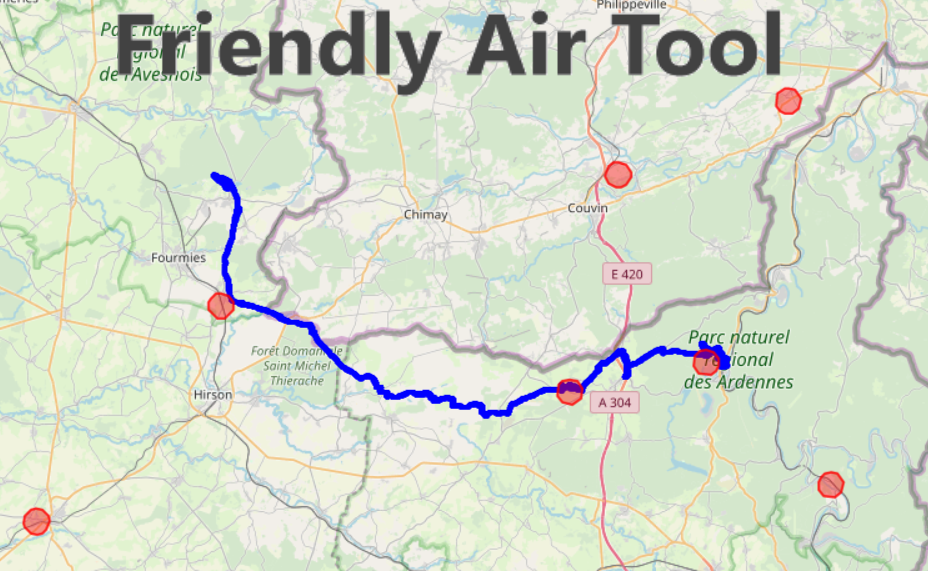
Load the IGC file of the flight you want to view.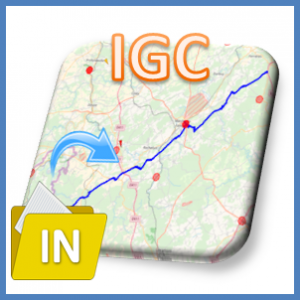
Click on “Go” button to launch the analysis process of the IGC file 
It will display it…
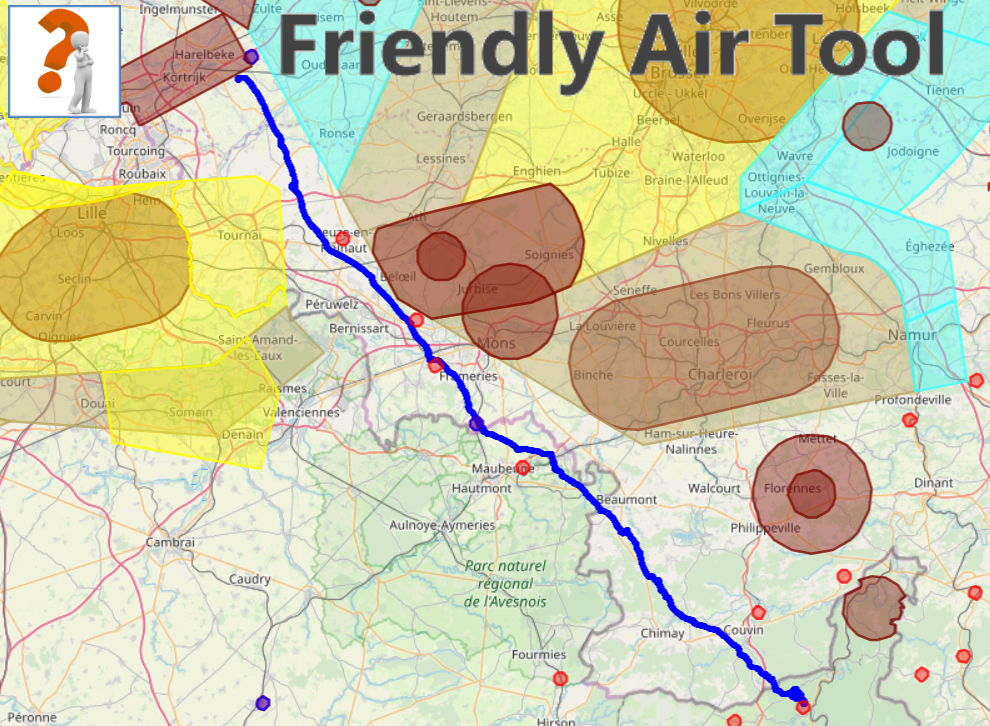
Load the openair file corresponding to the day of the flight you want to check.
Load the IGC file of the flight you want to check.
Click on “Go” button to launch the analysis process.
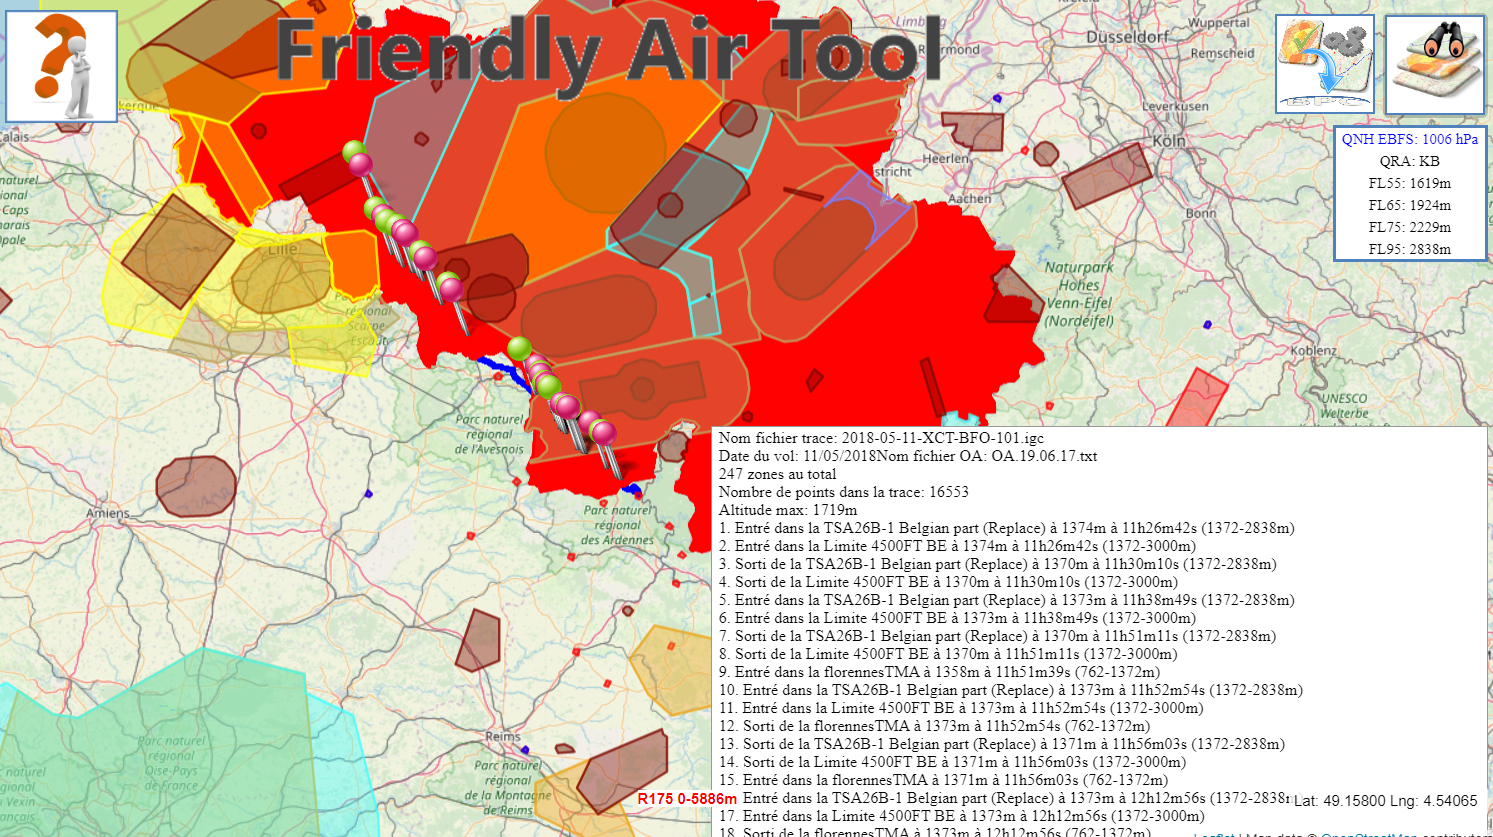
It will analyse the flight, check the compliance with the airspace zones, display the flight, display the airspace zones and indicate
if there is any airspace infringement …


Load the openair file that you want to modify.
Read more details how to get an openair file in the button description above.
Click on “Go” button to launch the analysis process.
It will analyse the openair file and display the airspace zones

Click on the “Modify zones” button to remove zones that are displayed.
Read more details regarding this button above.


Once you have finished your modifications, click on the openair Out button to export the modified openair file.
Read more details regarding this button above.
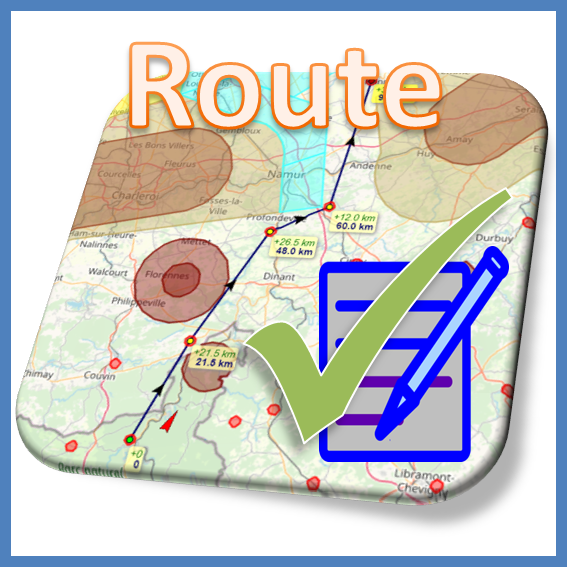
Click on the “Route generator” button.
Click on the map on the take off to create your first waypoint, click on the map for each turnpoints you want to create and that allow you to avoid airspace zones. Once finished, click again on the last turnpoint to close the route creation mode.
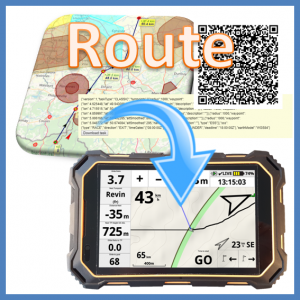
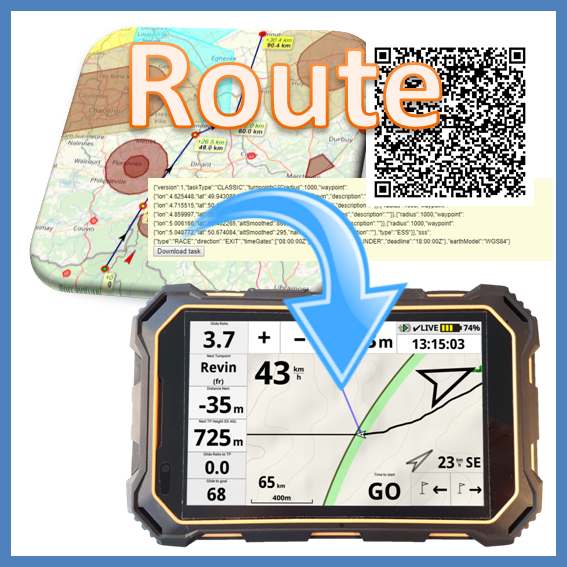
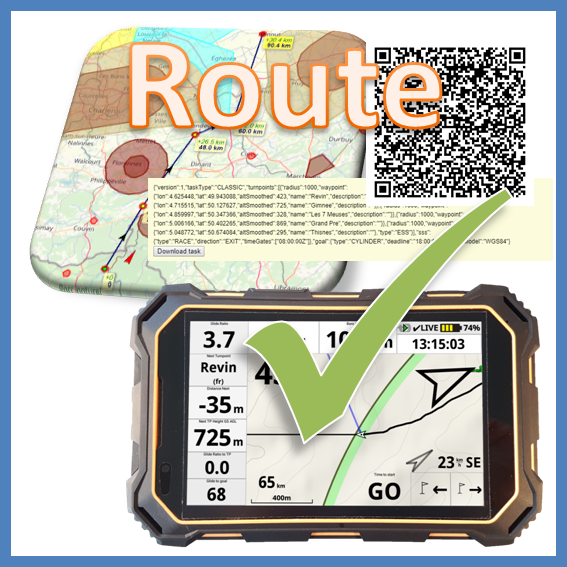
Click on the “Route generator export” button.
With XCTrack, go to Menu/Navigation/Competition task. You can scan the QR code or import the file you would have downloaded in order to share it by email/whatsapp or any other means.
Fly and enjoy your flight, well prepared. Just follow the direction given by the arrow!


“How to” …. for belgian and north of France pilots
Select the validated openair file with the airspace zones.![]()
Check above more details about this select drop down list.
Note1: two apps (AIR³ Manager for AIR³ and Openair Manager for any android device (free)) are available to let pilots directly get such validated openair file from a google drive into their instrument.
Note2: for pilots that are not flying in Belgium/North of France: such process can be duplicated in any region with a team of pilots looking after a given region, publishing validated openair files to their specific google drive and getting them with one of these 2 apps. Contact us to know more about this if you are interested. Watch the Air³ Airspace tuto in the videos’ page to know more about this.
Click on “Go” button to launch the analysis process of the Openair file.
Check the airspace zones along the route you intend to fly. If necessary and depending on the altitude you intend to fly, activate the upper levels of airspace zones display.
Select a validated openair file for Belgium and North of France.
Check details about how these files are validated in the button description above.
Two apps (AIR³ Manager for AIR³ and Openair Manager for any android device (free)) are available to let pilots directly get such validated openair file from a google drive.
Note for pilots that are not flying in Belgium/North of France: such process can be duplicated in any region with a team of pilots looking after a given region, publishing validated openair files to their specific google drive and getting them with one of these 2 apps. Contact us to know more about this if you are interested. Watch the Air³ Airspace tuto in the videos’ page to know more about this.
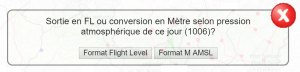
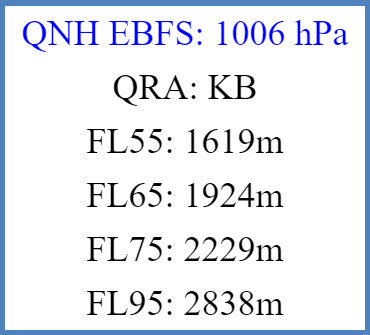
Once an openair file is selected in the list, the “Openair Out” button becomes available to directly download the validated openair file. The openair file can be downloaded either based on FL or AMSL altitude (based on the QNH of EBFS (Florennes).


Load the IGC file of the flight you want to check.
Click on “Go” button to launch the analysis process.
It will analyse the flight, check the compliance with the airspace zones, display the flight, display the airspace zones and indicate
if there is any airspace infringement …
“How to” …. for BPC pilots
Select the validated openair file with the airspace zones.![]()
Check above more details about this select drop down list.
Note1: two apps (AIR³ Manager for AIR³ and Openair Manager for any android device (free)) are available to let pilots directly get such validated openair file from a google drive into their instrument.
Note2: for pilots that are not flying in Belgium/North of France: such process can be duplicated in any region with a team of pilots looking after a given region, publishing validated openair files to their specific google drive and getting them with one of these 2 apps. Contact us to know more about this if you are interested. Watch the Air³ Airspace tuto in the videos’ page to know more about this.
Click on “Go” button to launch the analysis process of the Openair file. 
Check the airspace zones along the route you intend to fly. Identify the BPC waypoints you intend to turn. If necessary and depending on the altitude you intend to fly, activate the upper levels of airspace zones display.

Click on the “Route generator” button.
Click on the map on the take off to create your first waypoint, click on the map for each BPC waypoint you want to reach and that allows you to avoid airspace zones. Once finished, click again on the last turnpoint to close the route creation mode.
Clicking on any area within 1000m of the BPC waypoints will center to the exact location of the BPC waypoint and name the waypoint the same BPC waypoint name once exported.
Click on the “Route generator export” button.
With XCTrack, go to Menu/Navigation/Competition task. You can scan the QR code or import the file you would have downloaded in order to share it by email/whatsapp or any other means.
Fly and enjoy your flight, well prepared. Just follow the direction given by the arrow!


Load the IGC file of the flight you want to check.
Click on “Go” button to launch the analysis process.
It will analyse the flight, check the compliance with the airspace zones, display the flight, display the airspace zones and indicate
if there is any airspace infringement …

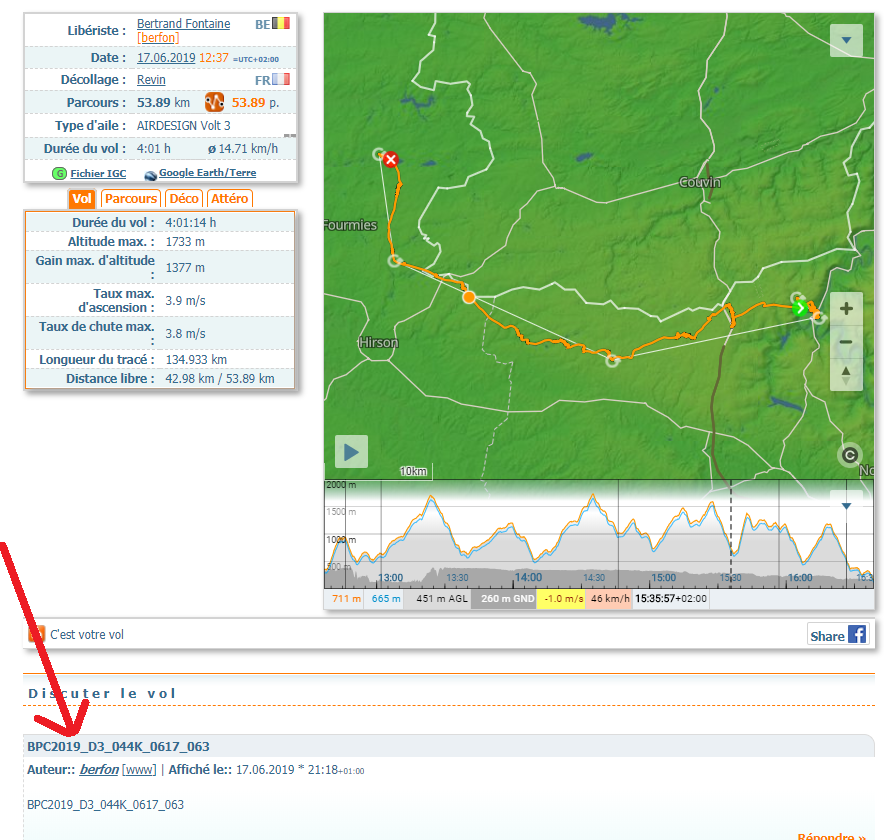
Once the flight is v alidated, a new button appears on the top right of the screen to let you check the waypoints reached, the distance flown before reaching the waypoint and generate a validation code accordingly. Click on it and a new webpage will open.


Buttons


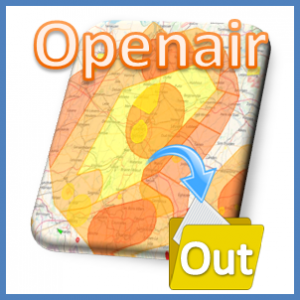
Once airspace zones (openair) only are loaded (through the Openair IN button or by selecting the validated openair file in the list), the “GO” button turns into this one.
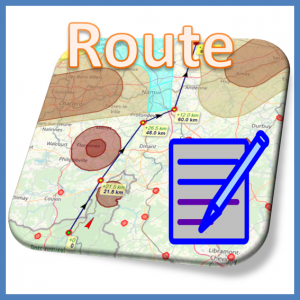
Once the flight (igc) file only is loaded, the “Go” button turns into this one.


Select validated openair files. A team of pilots is checking everyday the info regarding airspaces zones activation (Notam, Azba, …) for the BPC region (Belgium, north of France and west Germany). Based on these checks, the pilot publishes a validated openair file on a google drive so that pilots flying in that region can take advantage of it. These validated openair files are synchronized with the Friently Air Tool so that pilots can directly get that validated openair file directly from this list.
Two apps (AIR³ Manager for AIR³ and Openair Manager for any android device) are available to let pilots directly get such validated openair file from a google drive. Such process can be duplicated in any region with a team of pilots looking after a given region, publishing validated openair files to their specific google drive and getting them with one of these 2 apps. Contact us to know more about this if you are interested.
Once an openair file is selected in the list, the “Openair Out” button becomes available to directly download the validated openair file. The openair file can be downloaded either based on FL or AMSL altitude (based on the QNH of EBFS (Florennes).

Disclaimer: This tool and the openair files are provided to you for convenience but is provided as is with no guarantee of any sort. The Openair files provided doesn’t substitue for the obligation to perform your own pre-flight analysis, using the information provided by the relevant authority .