fbpx
October 15, 2019

XCTrack Widgets Manual

Comprehensive XCTrack Pro widgets manual that is completed by the XCTrack videos tutorial and the XCTrack Pro Manual.

XCTrack Pro integrated in AIR³ works the same way as any other XCTrack.

AIR³ is provided with customized and pre-configured pages according to the pilot profile that has been selected with AIR³ Manager.

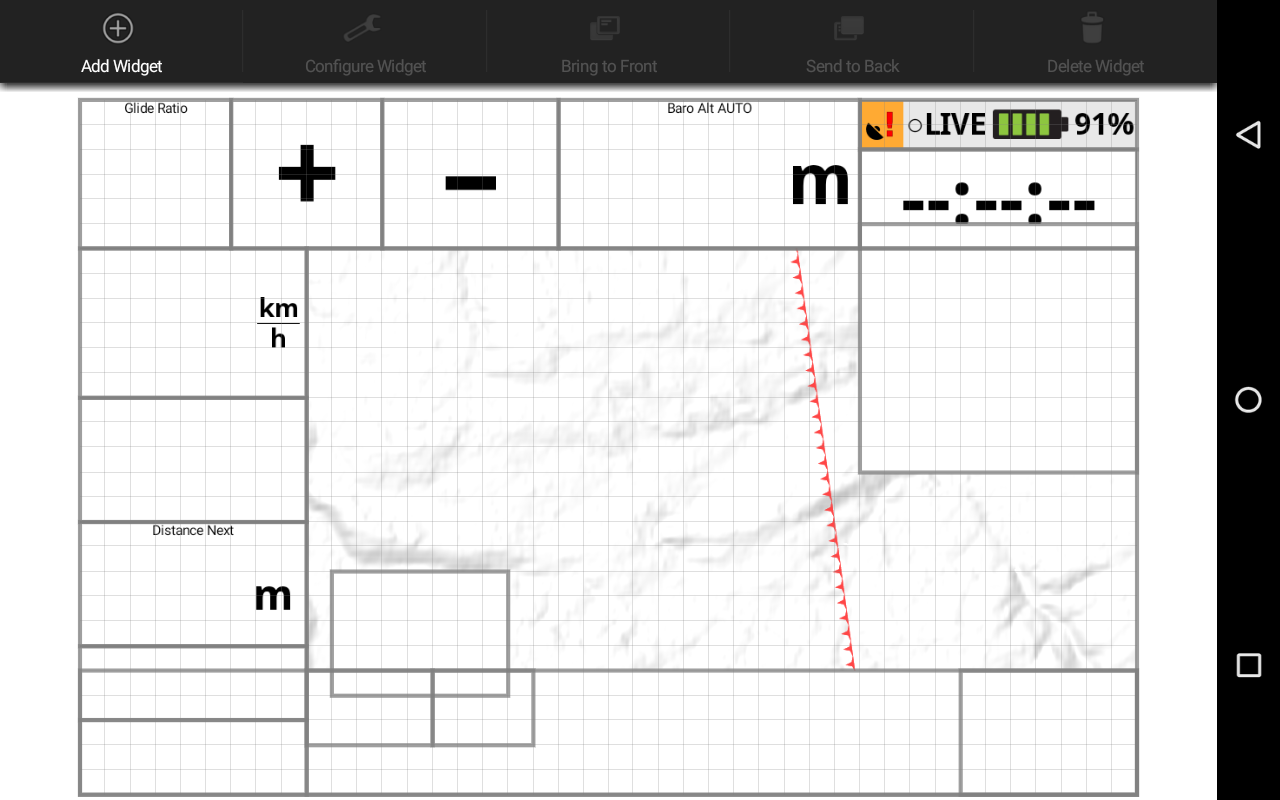
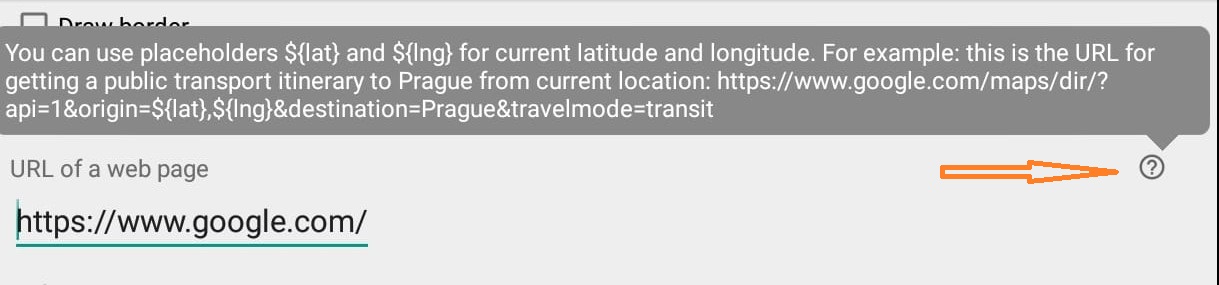
However, the different preconfigured pages of XCTrack Pro set by AIR³ Manager can be customised to fit any pilot’s needs. Widgets can be added, removed, resized or configured differently. To access that customization functionnality, read more details about how to access Menu/customize. Once in that customize mode, select a widget and either click on the “configure widget” button on top or click once again in the center to enter the configuration mode. Watch the following short video …

If you have made a mess, changing the widgets, configuring them differently… and you want to reset these pages back as they were originally defined… you can easily do so with AIR³ Manager. Go to the Menu of AIR³ Manager (top right corner), click on XCTrack interface and click on “reset”. After restarting XCTrack, all pages will be reset.

General information regarding widget configuration

For most widgets, you can decide if you want to draw a border around the widget, show the title, determine the background transparency and configure the specific settings of the widget.


If you place a widget on a map for example, readability may be affected by the background/map behind the information to read, unless you decrease the background transparency.

<- – – –  100% transparency

0% transparency – – – – >

In the settings window of some widgets, you can get additional information through tooltips. Just click on the small question mark next to some tricky widget settings, and you will read additional information directly provided.

In Menu/Preferences/Display/Theme, you can select the main theme for XCTrack pages. You can choose between 5 different display themes.

For each widget, you can decide to use the main theme selected for XCTrack in this menu or to use a specific theme for the selected widget. This is for example convenient to use Black theme for the main theme, in order to benefit from the energy saving linked to that specific theme, use a white theme for maps to increase the readability of the map thanks to the color information provided and use the eInk theme for the thermal assistant in order to benefit from the circles size displayed according to the thermal strength.

In Menu/Preferences/Display/Widget Titles, you can change the Widget titles size, color (Pro), font, outline and outline color (Pro). These settings will be applied to all widgets.

In Menu/Preferences/Display/Widget Titles, you can change the Widget titles size, color (Pro), font, outline and outline color (Pro). These settings will be applied to all widgets.

By using the Pro version of XCTrack, you can also choose a Custom title for each widget.

You could for example decide to rename the “Speed” widget title “Ground speed” to make sure you do not mix with “Air speed”, or “Wind speed”.


Click on the appropriate button to access the desired subsection:

en_USEnglish