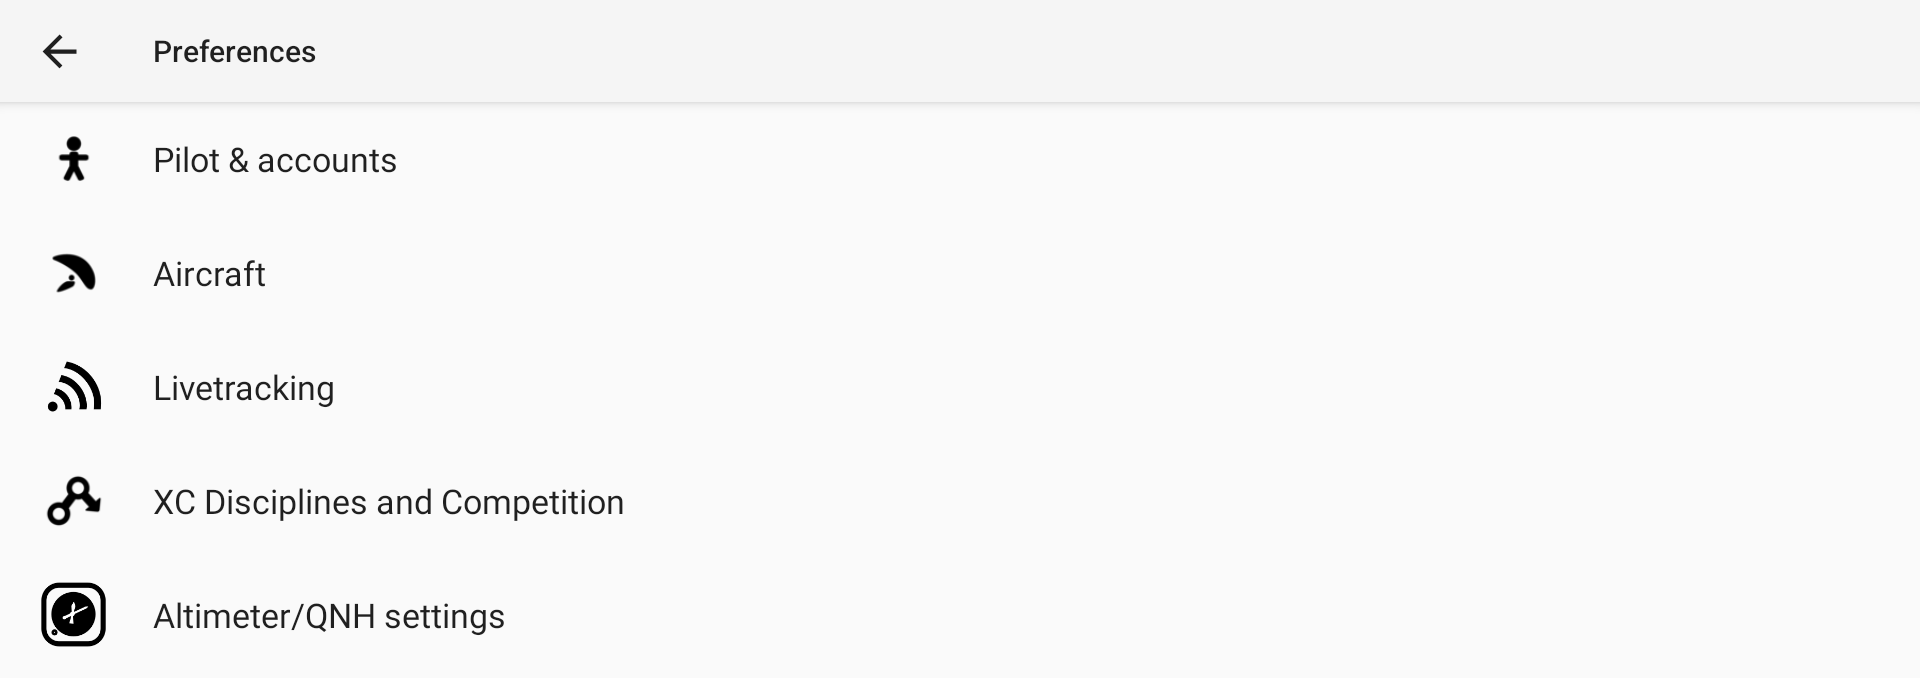
This page describes several subsections of the Preferences menu of XCTrack. Check the other sections to learn more about the different features of XCTrack.
Videos have been produced to explain the different features of XCTrack Pro. Check the videos tuto page to learn quickly how to use XCTrack Pro.
Click on the + sign to read the details.
Indicate your full name, the username you have registered on xcontest.org, your password and click on “login” to check that your details are correct (need an internet connection).
If you have not yet registered, Register on Xcontest website for cloud flights and advanced XCTrack features.

To access advanced features provided by third parties, you can enter your login credentials. These credentials are related to the third party and are not the credentials used to connect to Xcontest. Please refer to the third-party website for more details.

Read also other details regarding Livetracking Menu in Menu/Livetracking, as well as regarding the Livetracking widget in the Livetracking subsection of the XCTrack pro widgets manual.
Read also this FAQ that explain the differences between Livetracking, Fanet and Flarm technologies.
Xcontest Livetracking sends your positions every 60 seconds to a server and obtains the positions of other pilots 20 km away. If you want to see a track from another pilot using Livetracking, you can select a flight and then you get the track from another pilot and its position when the server obtains his data.
You can send messages to other pilots. Very little data consumption, around 100 KB / hour.
In parallel, you can also be visible to other aircrafts through the Safesky network. Read below for more details about electronic conspicuity.
An internet connection is required to have the livetracking features or the electronic conspicuity working (Fanet doesn’t require an internet connection if you want to see and be seen by others around you).
With AIR³, the easiest way to get internet is to use a SIM card with data.
Alternatively, you can share your internet connection provided by your phone (wifi, bluetooth or USB ethernet) but this method is more complex to setup.
If you have any difficulty regarding Livetracking, check this FAQ.
Enable Xcontest Livetracking
Enable Livetracking to use the XContest livetracking features. By enabling livetracking, a new Livetracking menu appears to access the livetracking features while flying.
Livetracking can only work if you are logged into XContest. If it is not yet the case, go to Preferences/Pilot to login.

Position sharing enabled
If either Livetracking or Electronic Conspicuity is (are) enabled, next time you will start XCTrack, a new window will appear, asking if you agree to share your position. Sharing your position is obviously required for the Livetracking and/or Electronic Conspicuity to work. If you disable your position sharing (until next start of XCTrack), you won’t be able to be seen. However, if Livetracking is enabled, the Livetracking menu will still be available, in order to select pilots to see on the map, or to send a message. XCTrack will automatically enable position sharing after your take off once flight conditions are clearly detected (altitude above ground, speed,…)
Claim to Xcontest automatically
Once you have activated Livetracking, you also have the possibility to enable automatic claim of your flight 1 minute after landing. Read more details about automatic and manual flight claim on Xcontest website in the Tracklogs page of XCTrack Pro Manual.
The flights are analysed by the server and only real flights will be claimed. If you want to test the Livetracking feature by using your car or by walking, the server will detect that this is not a real flight and you won’t be able to automatically claim to Xcontest.
Edit quick messages buttons
Click on “Edit quick messages buttons” to access the quick messages buttons interface.
AIR³ is preloaded with different messages buttons. You can easily delete, edit them or create new ones.
Click on the + sign to create a new one.
Swipe right to edit

Swipe left to delete

Hold and move to change the position of the buttons

Electronic Conspicuity
You have the opportunity to be seen on the Safesky network and therefore be more visible to others.
You can set the time between sending your position information. The frequency of sending data would increase the chance of avoiding a collision with another aircraft, but would also increase the total volume of data used.
By default, your username is used to identify you.
With the Pro version you can be seen anonymously.
If you are using an AIR³ with the Fanet and Flarm module, XCTrack will read your module ID (make sure XCTrack can communicate with the module and you have enabled Fanet/Flarm data in the internal sensors properties of Menu/Preferences/Connections & Sensors) and automatically fill in the hexadecimal Flarm/Fanet ID. This allows the system to prevent you from being seen multiple times by your Fanet/Flarm system or by the XCTrack/Electronic Conspicuity mechanism.
Check the Electronic Conspicuity status in the status bar.


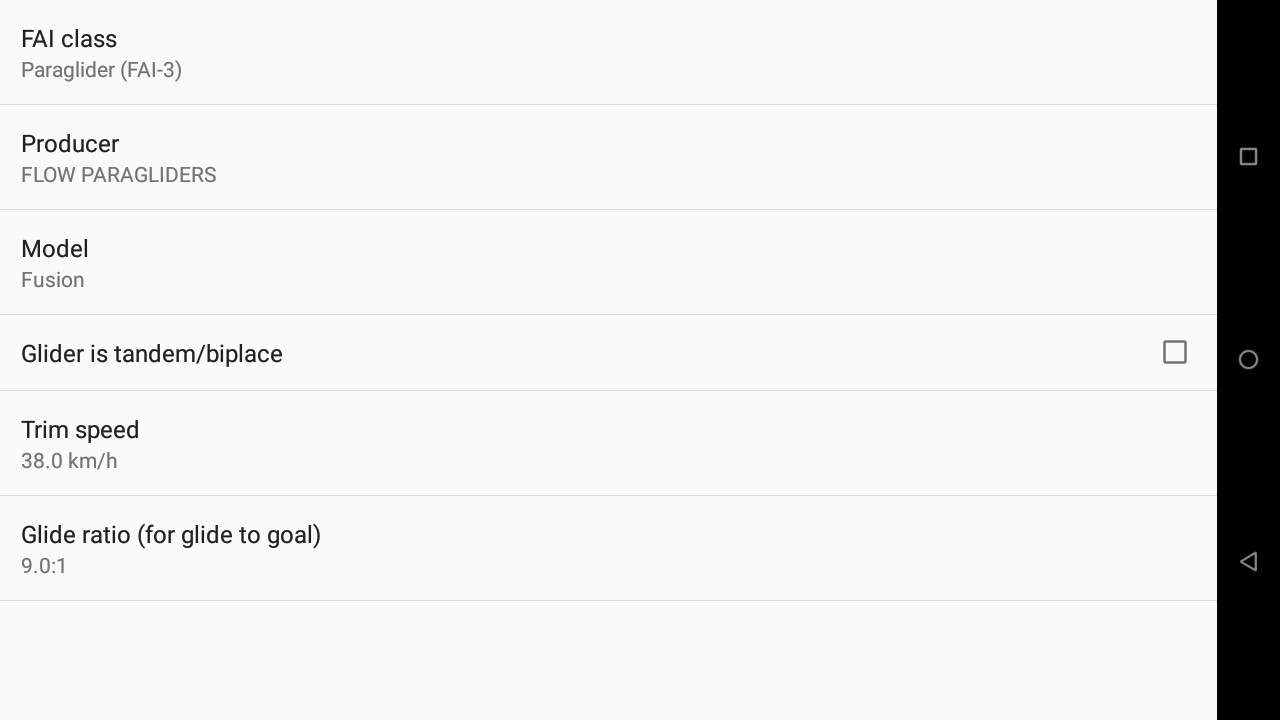
Set your aircraft (will be indicated within your flight when you upload your flight on Xcontest.org).
Set the trim speed and glide ratio.
Note that these two settings will be taken into account for the computation of different information during the flight.
Read more details about the influence of these parameters in the XCtrack Pro widgets manual. Example: Mark glide distance in the Map configuration of the XC map widget of the Xcontest subsection, Side view widget of the Navigation subsection, Mark glide distance in the Map configuration of the Task Map widget of the Competition subsection, Altitude over goal widget in the Competition subsection.
Set the XC parameters to determine how to determine if a triangle is closed or not and the multiplicative factor in case of flat triangle or FAI triangle.
Note the multiplicative factors of Xcontest World here.

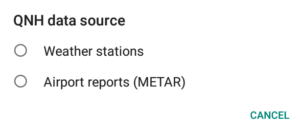
This section allows you to set the QNH for all barometric altitude widgets. See Wiki for more details about pressure altitude, Flight levels and QNH influence.
You can set the QNH automatically or manually.

With the Pro version, you can automatically set the QNH from internet. You can decide to get the QNH either from nearest “Airport report” (Metar) or from the nearest weather station.

XCTrack syncs at start and then tries to sync every hour. If there is no signal, XCTrack tries more frequently until it gets the data.
Once the QNH is correctly set, the barometric altitude of the take-off should correspond to the known altitude.

Without the Pro version, you can set automatically the QNH before launch thanks to the GPS altitude. GPS altitude is known to not be as accurate. It is therefore recommended to set the
QNH either from internet or manually.
XCTrack syncs at start and then tries to sync every hour. If there is no GPS signal, XCTrack tries more frequently until it gets the data.

If you do not select to set automatically the QNH, you can also adjust it manually.

Airspaces: force use of GPS altitude:
Some competitions require the use of GPS altitude instead of Flight Levels for airspace infringement check.
Example, an airspace with a floor situated at FL55 should correspond to 1676m of GPS altitude, no matter the QNH.
With a high QNH, such Flight Level should be considered at a higher gps altitude and therefore allowing pilots to fly higher than 1676 m if the FL was considered as pressure altitude. By forcing the use of GPS altitude, these Fligth Levels are converted to GPS altitude.
This setting is the same as the one you can set in Menu/Preferences/Airspaces/Settings (see below for more details).
Next section