This page describes several subsections of the Preferences menu of XCTrack. Check the other sections to learn more about the different features of XCTrack.
Videos have been produced to explain the different features of XCTrack Pro. Check the videos tuto page to learn quickly how to use XCTrack Pro.
Click on the + sign to read the details.
More information regarding airspace can also be found in the XCTrack Pro widgets manual. Read details about Airspace proximity in the Navigation subsection.
2 types of source can provide information for airspace to XCTrack: information coming from airspace.xcontest.org (see Web tab below) or information coming from an openair file (see Files tab below).
Airspace zones activation can either be determined based on a schedule (usually indicated in the AIP (Aeronautical Information Publication)), and/or based on Notam (Notice to Airmen). In order to know if a given prohibited zone is active or not, the pilot is supposed to read information in the AIP and check the Notams. Airspace.xcontest.org is a tool that is based on algorithms that analyse all these information in order to determine the status of each zone. This is fully automatic, but as any "robot", it may contain errors.
An Openair file does not contain any info about scheduled activations for airspace zones. XCTrack not only gets information about the activated zones, but also the schedule for many countries (not all supported countries). Therefore, if your country is supported by XCTrack, including Notam support, we strongly recommend getting the airspace info from XCTrack, instead of an external Openair file.
The Web tab lists all the countries for which you can get airspace information from airspace.xcontest.org. To get the airspace information of a given country, first check the box next to the desired country and click on the “refresh” button to download the available information from airspace.xcontest.org (internet connection required). At each start of XCTrack, you will get the updated information downloaded (internet connection required). If you want the info to be updated after XCTrack is running, you will need to manually “refresh” in this menu.
Be aware that the Automatic data synchronisation in Android settings/accounts/accounts should be enabled. Otherwise, XCTrack will fail to automatically update the airspace info.
The countries containing Airspace zones activation determined by algorithms analysing Notams, NOTAM is indicated below the country.


Obstacles (ski lifts, cables, etc.) can also be downloaded for specific countries separately.
When the airspaces are not updated often enough, XCTrack switches to failsafe mode and displays all the airspaces as if they were all active. You can check the validity of airspaces by clicking on the country in the web tab of Menu/Preferences/Airspaces. This will bring up a new window, containing the validity period on top.
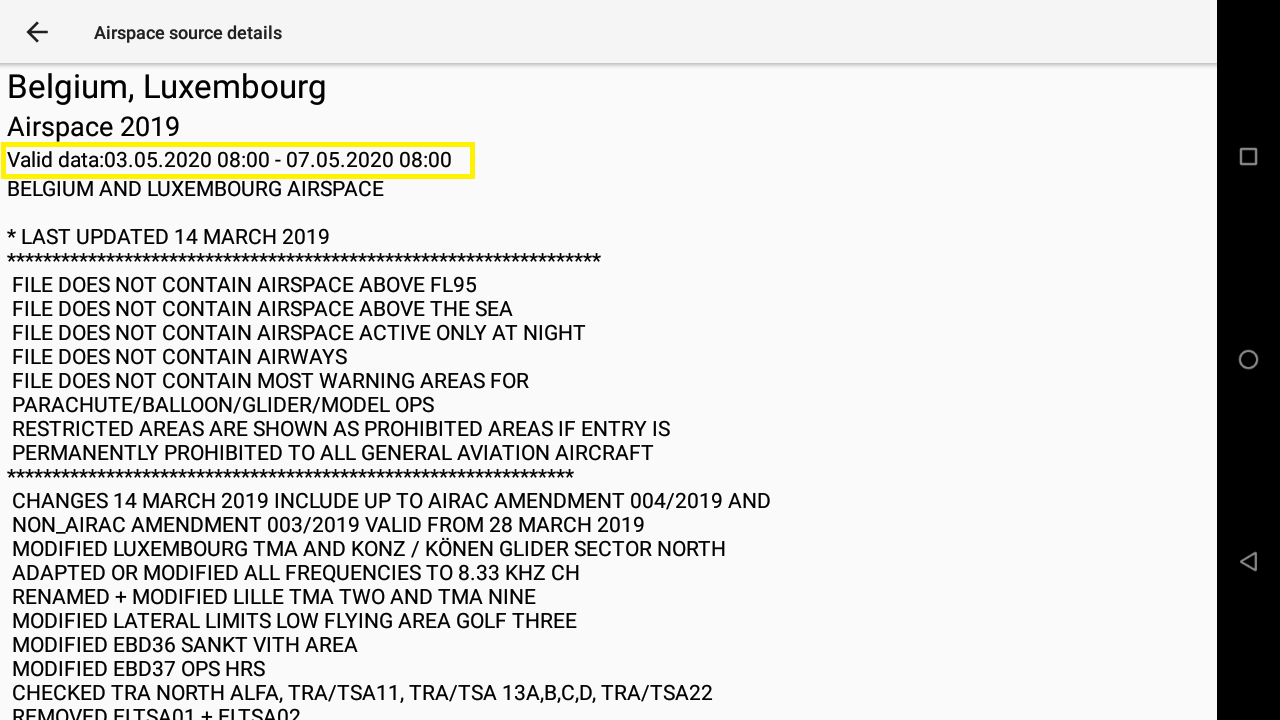
If the information is not recent enough, you will get a message “Valid data: up-to-date activations not available”.
If you want to update the information, just go back to the Web tab and click the “Refresh” button at the bottom after verifying that the country for which you want updates is enabled.

The Activate tab lists all the different airspace zones either downloaded from the Web tab or provided by the Openair file activated in the files tab.
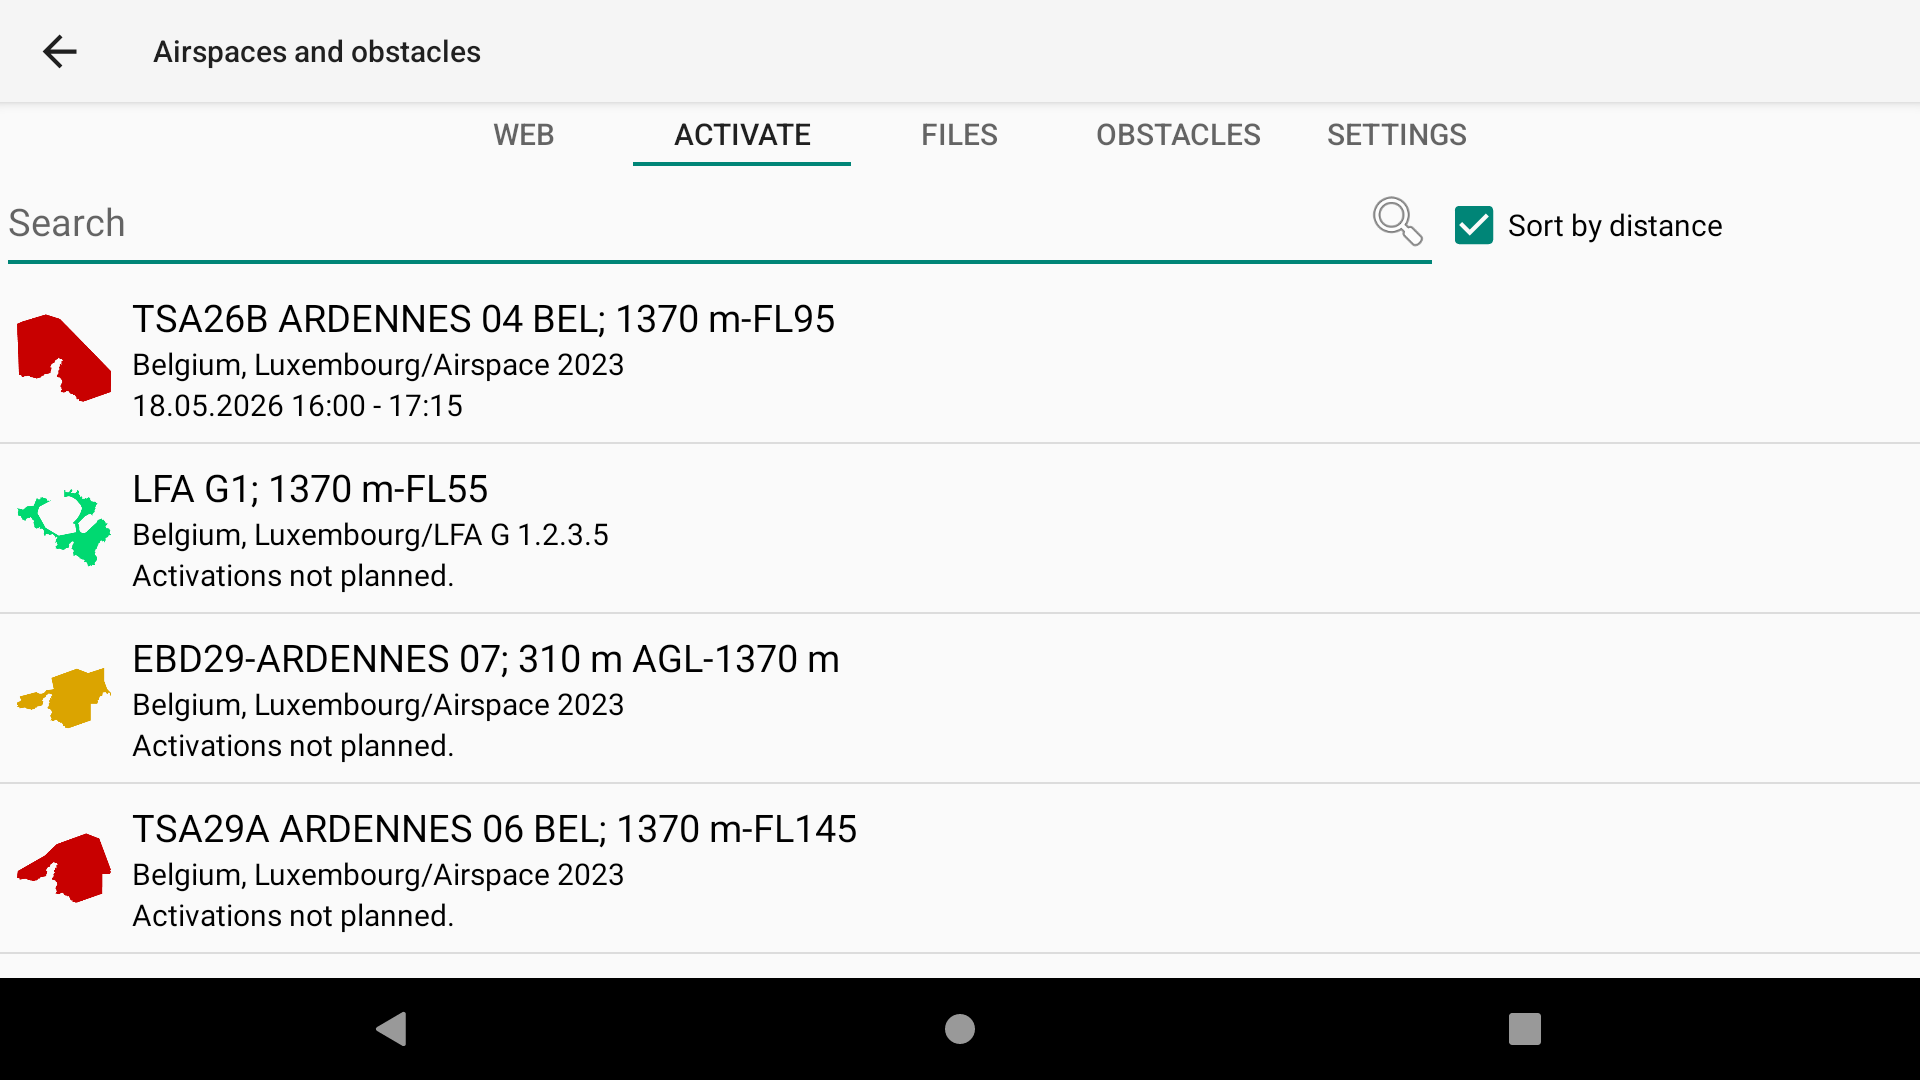
By clicking on a given zone, you can change its status.
By default, all zones are set on Automatic. For airspace zones that come from an Openair file, this means “active”. For airspace zones coming from airspace.xcontest.org, a schedule is provided together with the airspace zone, so that the activation status will be virtually active or disabled depending on such schedule. The airspace is shown on the map (read below explanations about color code) when it is active or will be active in the near future, hidden when it is not.
If you need to change the status, choose between disabled (for today or permanently) or active (for today or permanently).
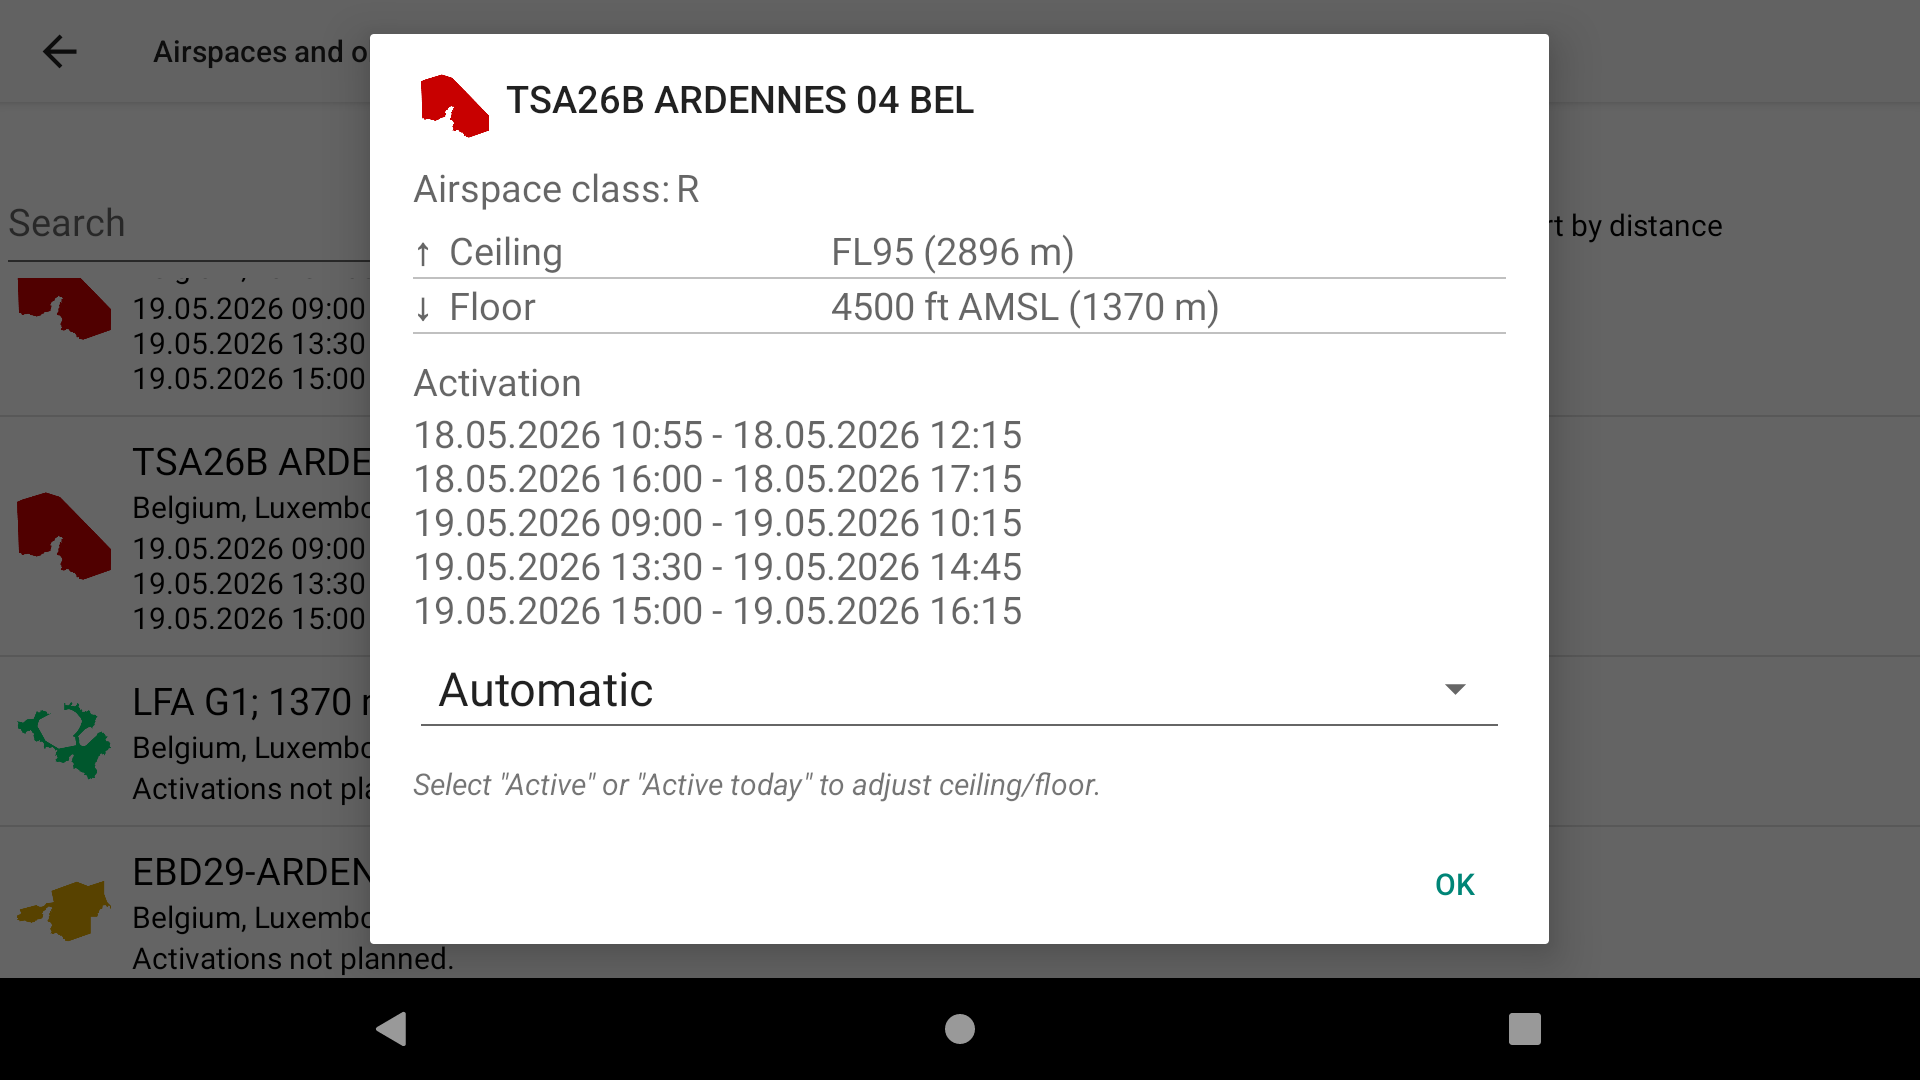
Airspace zones that will be activated in the near future will be displayed with ‘grey’ color on the map and in the side view. You will get a warning 15, 10 and 5 minutes before the airspace is activated if you happen to be just inside it.

XcTrack works with 4 ‘airspace’ types – Red (restricted), Orange (warning), Green (glider area) and Purple (obstacle).
A restricted zone (red) is drawn on the map, shown in the Airspace proximity widget and the Side view widget when active and generates events when you get near/inside. This zone will be greyed when it will be activated in the near future (see explanations above).
The orange zone (warning) is only shown on the map and the Side view widget but not in the Airspace proximity widget. No event is generated when you get near/inside. This zone will be greyed when it will be activated in the near future (see explanations above).
The green zone is shown on the map and the Side view widget and works in an ‘inverse’ manner – that one is designed for the gliding window airspace inside otherwise prohibited areas.
Using an OpenAir file, an AC Q zone is drawn orange, an AC W zone is drawh green, others are red. There is no schedule available with Openair files.
As indicated in the Main features page, you can also reach the Airspace zones directly on the map, through the contextual menu. Read more how to reach the zone through the contextual menu in the Main features page of XCTrack Pro Manual.

Note regarding zone activation: as indicated in the Web tab info, when the airspaces are not updated often enough, XCTrack switches to failsafe mode and displays all the airspaces as if they were all active. You can check the validity of airspaces by clicking on the country in the web tab of Menu/Preferences/Airspaces. This will bring up a new window, containing the validity period on top.
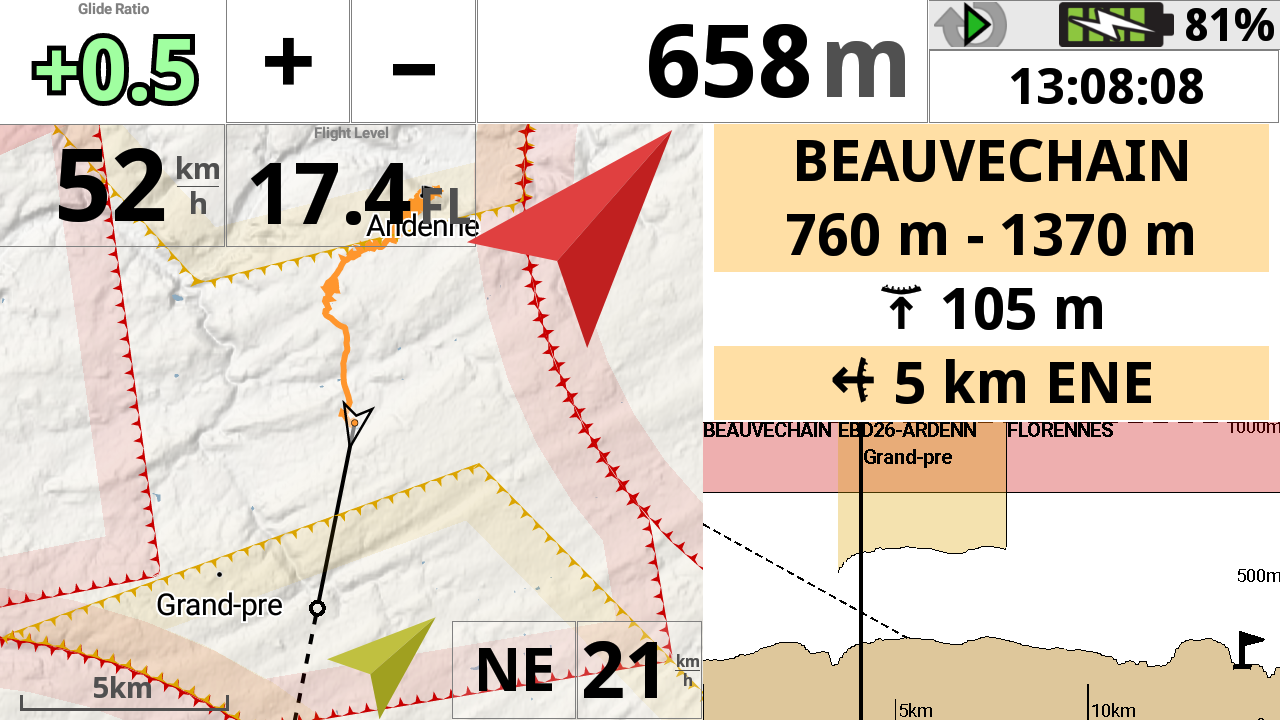
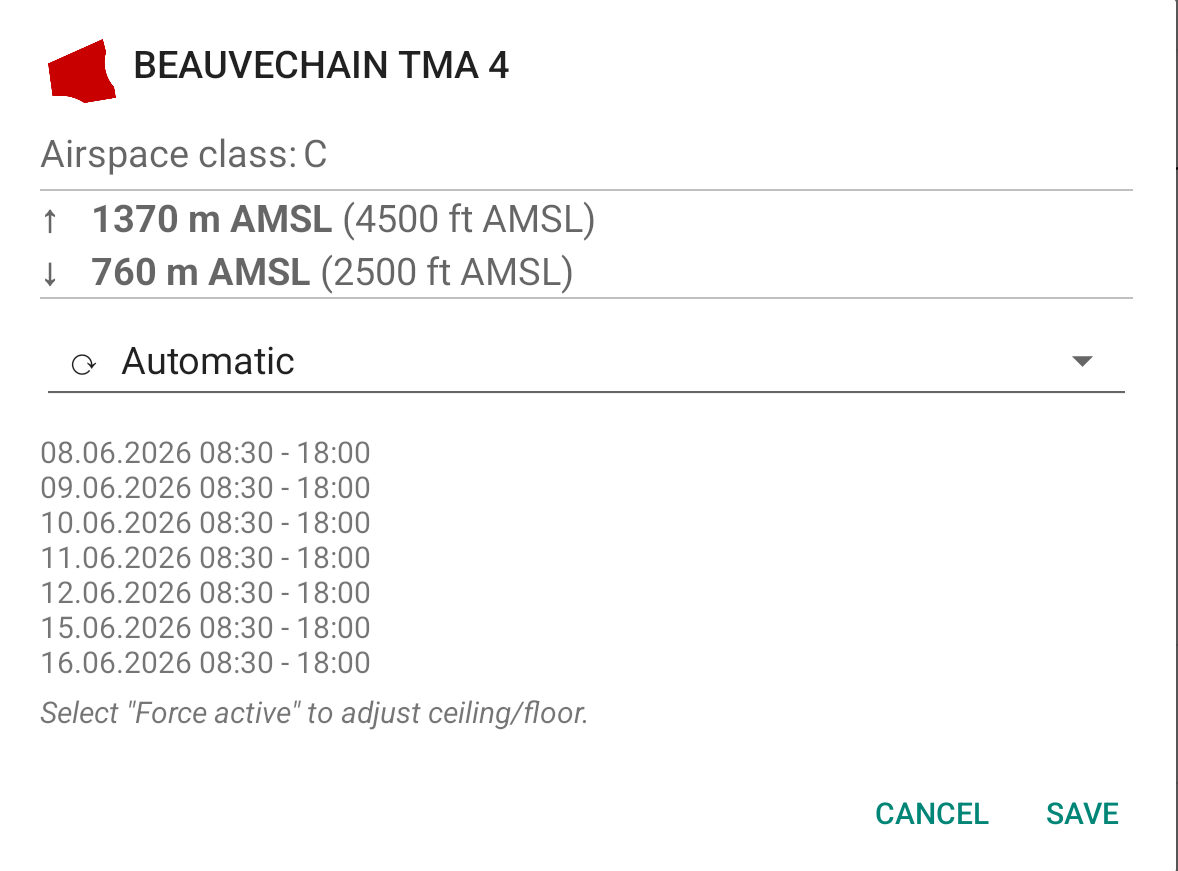
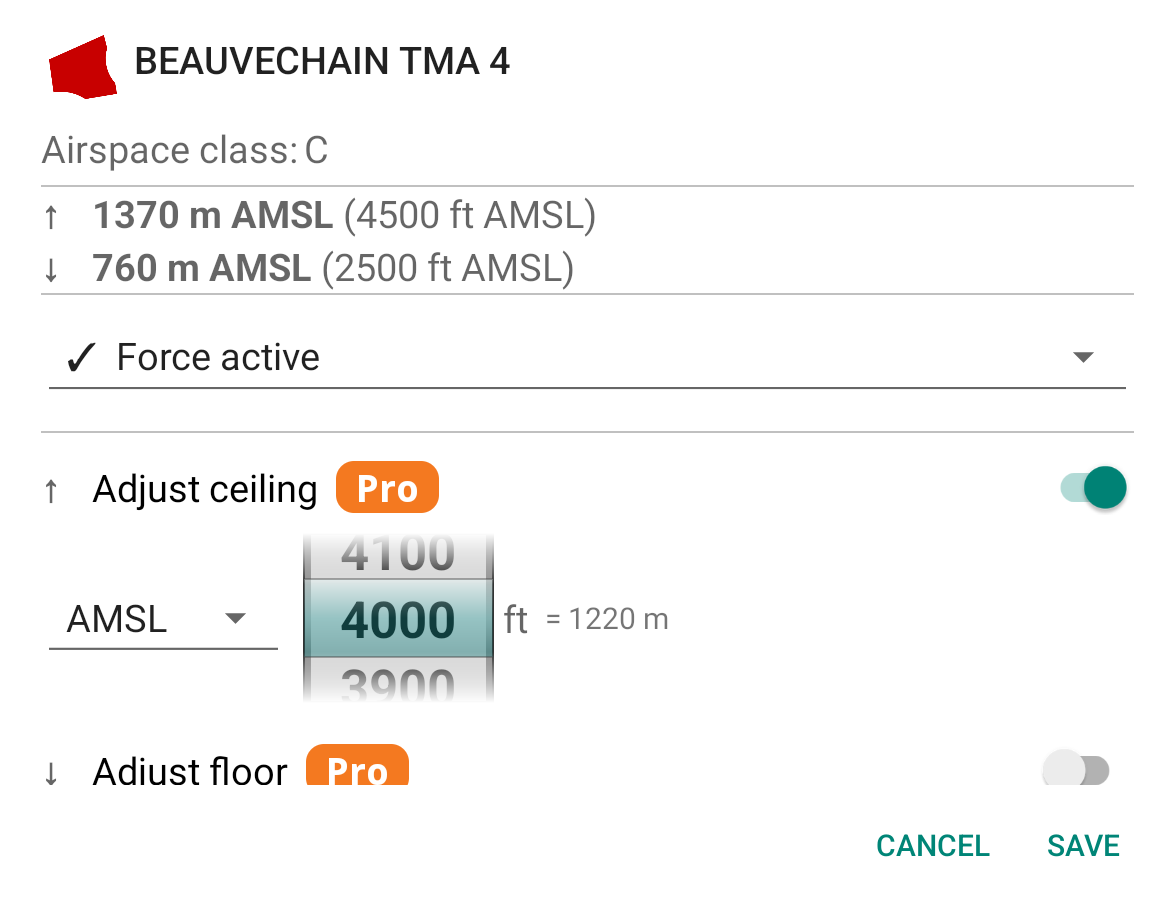
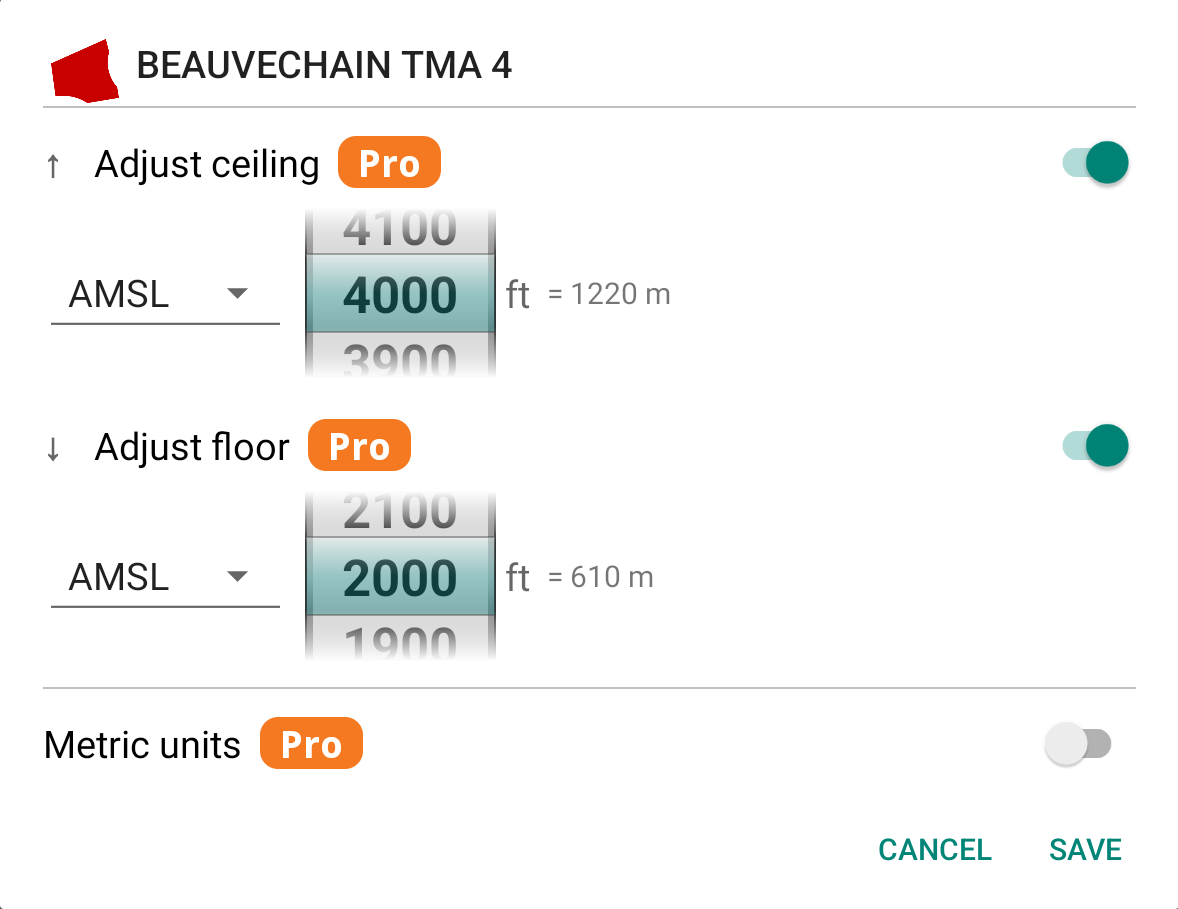
You can select an airspace either by going to Menu > Preferences > Activate or by performing a long press in panning mode. A dialogue box will then appear, allowing you to customise its behaviour as well as manually adjust the ceiling and/or floor.
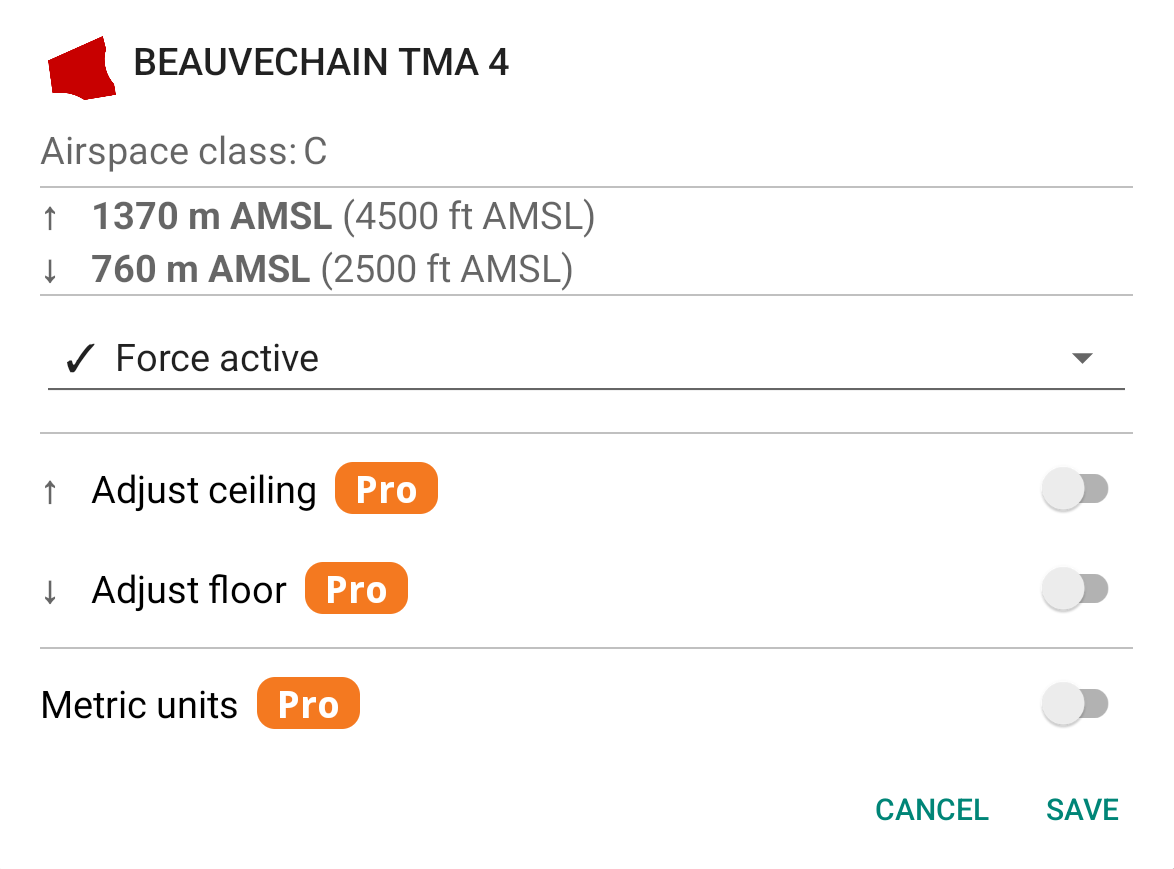
(Pro) When Force active is selected, you can additionally adjust the ceiling and/or floor of the airspace to better reflect the actual active portion. This is useful for example when a NOTAM activates only part of the vertical extent of an airspace. Simply enable Adjust ceiling or Adjust floor and scroll to the desired altitude. Enable Metric units to enter the value in meters instead of feet.
Openair files are text files containing information about Airspace.
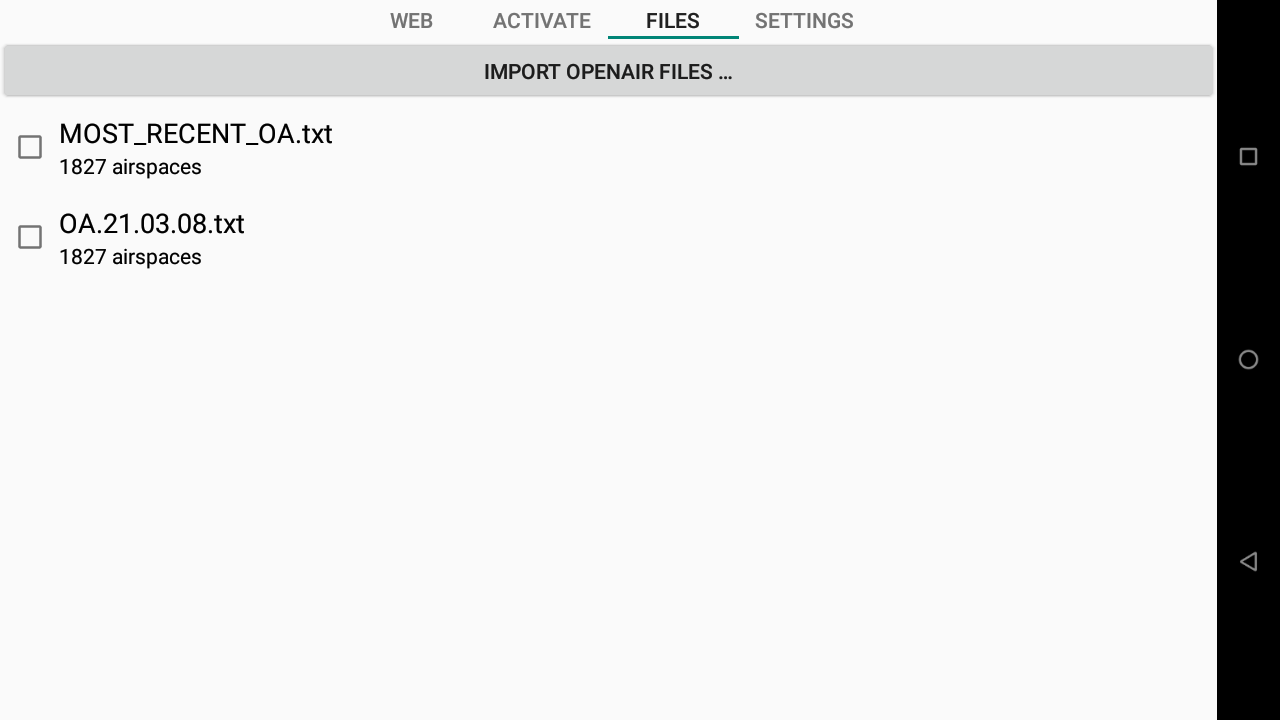
All files located in the Airspaces folder of XCTrack will be listed in the Files tab. Click on the one you want to activate to enable it.
You can import an OpenAir file into the right folder by clicking on the Import Openair Files button on top.
If you want to delete an OpenAir file, keep your finger for 1 sec and confirm.
Most_recent_OA.txt is a file used by AIR³ Manager to update the Openair file you can get through the Openair update mechanism. See more details in the Openair2AIR³ page
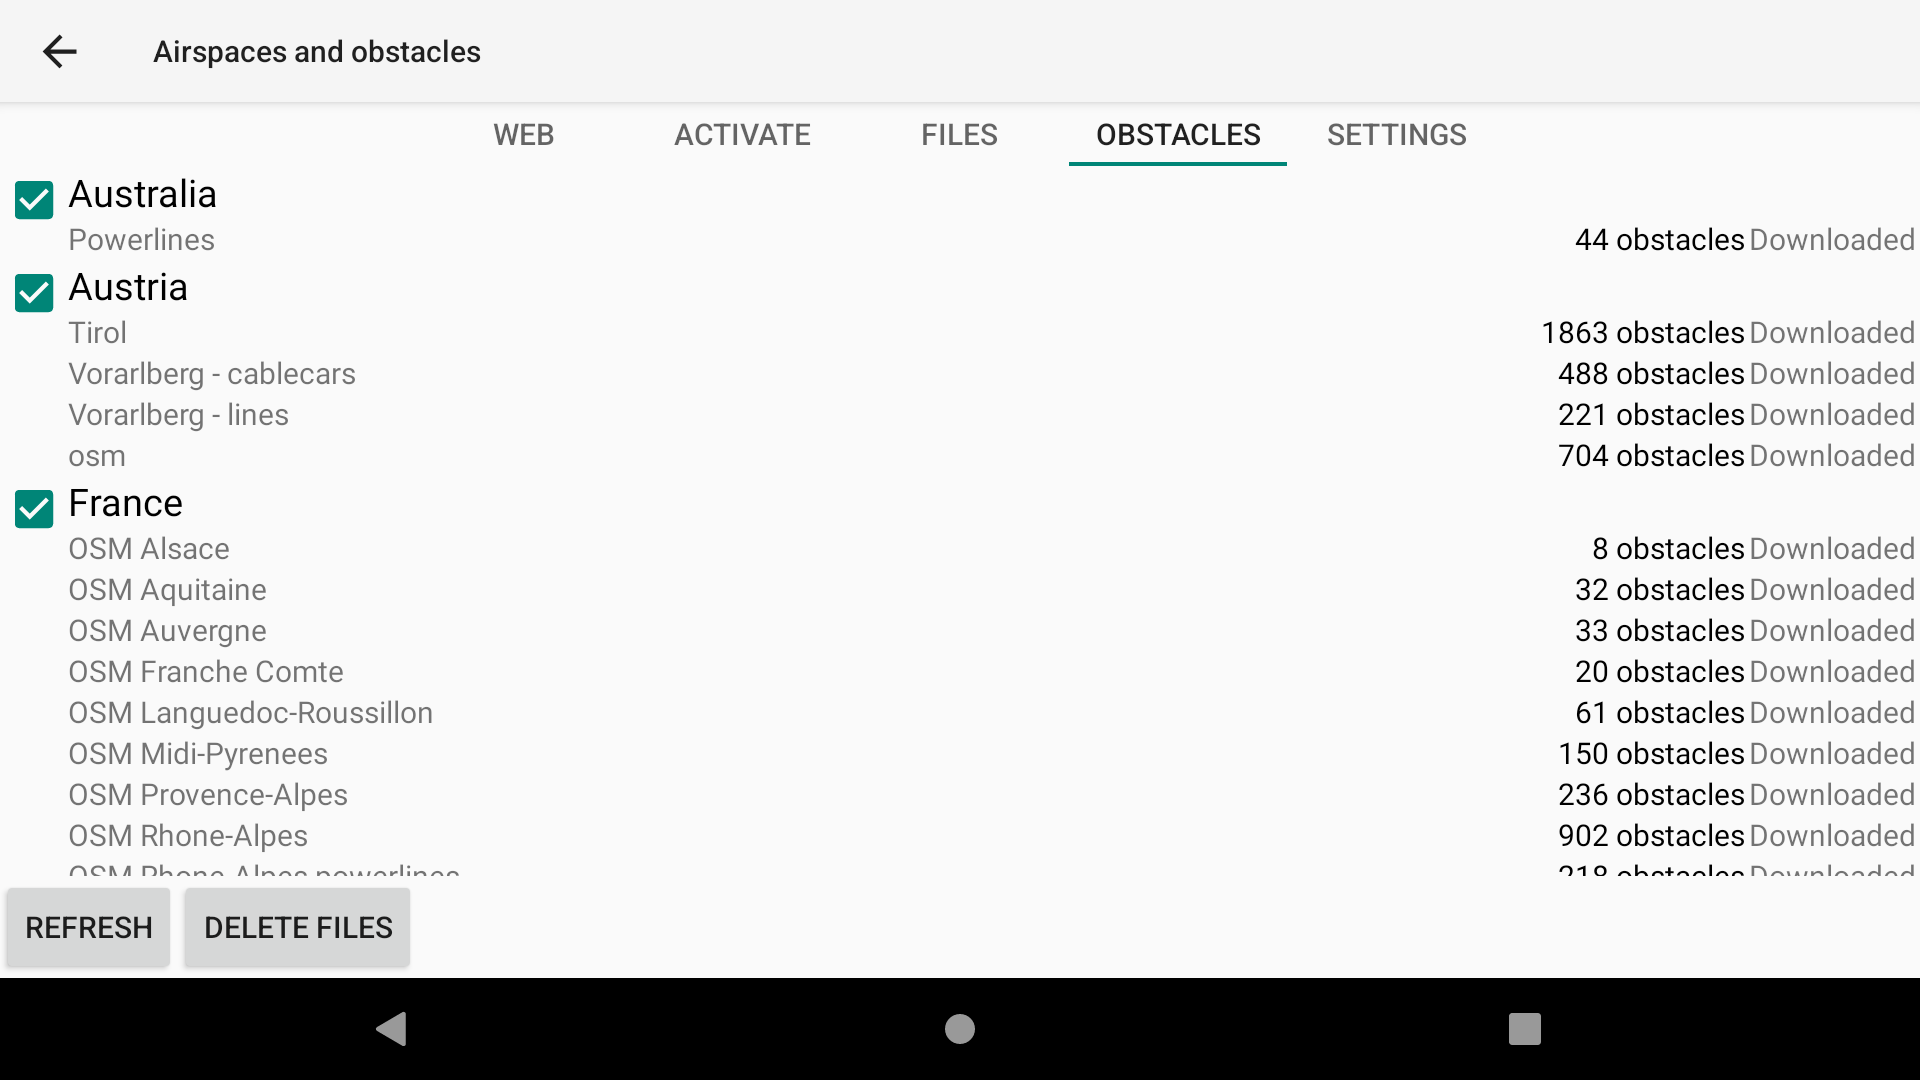
In order to use the Obstacles alerting, you need to select the country concerned in the Menu/Preferences/Airspaces/Obstacles. All countries are selected by default. Unless you deselect it, it’s selected.
Obstacles are downloaded if your device is connected to internet. In the Obstacles tab, you can select or deselect supported countries to be included in the Obstacles detection mechanism.
If you want to delete the Obstacles data previously downloaded, just tap on “Delete files”.
Obstacles of selected countries are refreshed at every start of the app, should there be any change made to the database. Alternatively, you can also refresh manually the Obstacles database by clicking on “Refresh”.
You can adjust the behavior of the Obstacles detection system based on the different Obstacle settings in Menu/Preferences/Airspaces/Settings. See more details below.

You can enable or disable the sound related to the Obstacle warning in Menu/Preferences/Sound in the Flight section.
You can enable or disable the visual warning through the map in the map configuration of the XC Map widget or the Task Map widget.
Obstacles detection mechanism: the algorithm calculates a possible collision with an obstacle based, on one side, on the ‘Glide ratio’ (set in Menu/Preferences/Aircraft) and your real glide ratio (the lower value is chosen) and on the other side on the ‘gliding speed’ (set in Menu/Preferences/Aircraft) and your real speed (the higher value is chosen) to determine the time to reach the obstacle. If you are turning, the calculated polygon is ‘slanted’ and widened (quite significantly) in the direction you are turning.
If an obstacle is found in the polygon within the time set in the Menu/Preferences/Airspaces/settings, the altitudes are checked. An intersection with an obstacle is computed. If you arrive lower than the obstacle altitude + safety margin, an alert is generated.

In the map configuration of the XC Map widget or the Task Map widget, an option “Show alert screen when approaching an obstacle” can be activated or deactivated. The enabled option will change a map into a special ‘zoomed in’ mode when you get near an obstacle, so that you could see clearly where you are and where is the obstacle.
You can either decide to use the “Automatic zoom in emergency obstacle mode” or select the map scale you want to apply in case of alert when approaching obstacle.

Border rendering
If you disable this option, you will only get straight lines to determine the limits of the airspace zone. When you are close to it, it might be difficult to identify on which side of the line is the zone. With shark’s teeth, it is easy to identify it (teeth are placed on the side of the zone). When the scale of the map is large enough, you may want to disable this option for readability reason. You can therefore determine under which scale the shark’s teeth should appear on the map.
Fill rendering
Another way to identify more easily the zone is to use the fill rendering.
If you choose “Full”, the entire zone will be filled. Full filling may help you to make sure you can identify if you are vertically within the zone (inside, below or above)…. but this may decrease the readability.
“Border zone only” is used to only fill a portion of the zone, next to the limit of the zone.
In order to improve the readability, you may set the opacity of airspace filling with the slider.

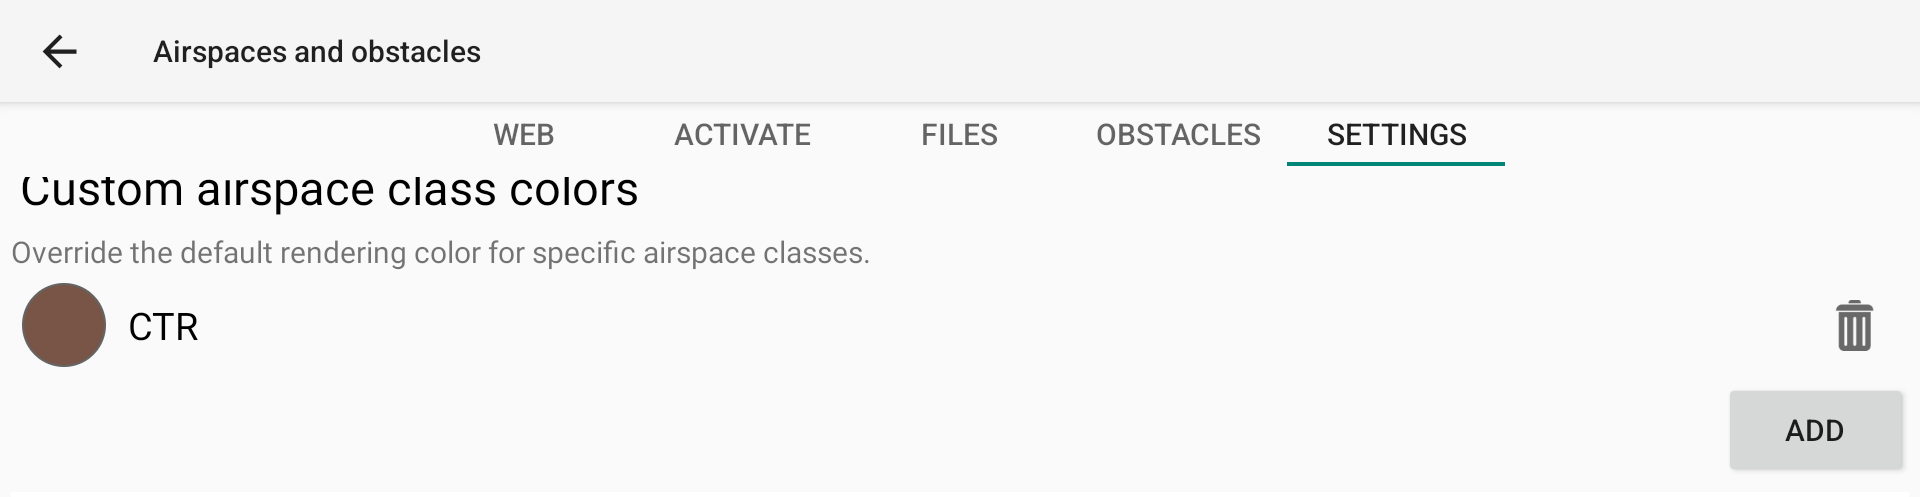
Custom airspace class color
By using this feature, XCTrack will overide the default rendering color for specific airspace classes.
Click Add to add a new airspace class color.

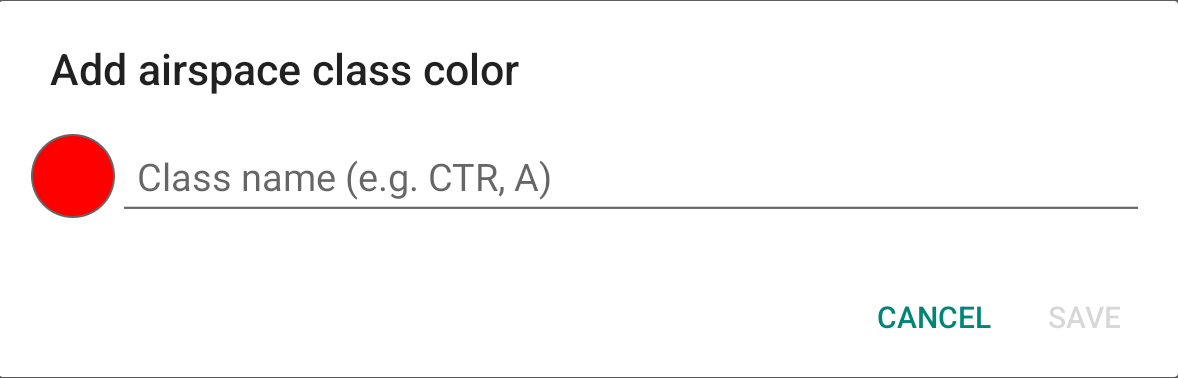
Enter the airspace class and select a colour.

Altitude Measurement: Force use of GPS altitude
As described in the Altimeter/QNH settings above, some competitions require the use of GPS altitude instead of Flight Levels for airspace infringement check.
Example, an airspace with a floor situated at FL55 should correspond to 1676m of GPS altitude, no matter the QNH.
With a high QNH, such Flight Level should be considered at a higher gps altitude and therefore allowing pilots to fly higher than 1676 m if the FL was considered as pressure altitude. By forcing the use of GPS altitude, these Fligth Levels are converted to GPS altitude.
This setting is the same as the one that can be found in Menu/Preferences/Altimeter&QNH above.

Obstacle alerting
Explanations about obstacles detection mechanism can be found in Menu/Preferences/Airspaces/Obstacles
You can set specific settings related to the behaviour of the Obstacle alerting mechanism.
- You can enable or disable the Obstacle alerting mechanism
- You can suppress next possible event for the time set, to avoid getting too many warnings
- You can set the flight time to collision, according to your current gliding speed or the Trim speed indicated in Menu/Preferences/Aircraft (the higher value is chosen)
- You can set the altitude safety margin to clear obstacle in order to only activate the obstacle alerting mechanism if your projected point of collision is within the obstacle altitude + safety margin.
Note that, even if you activate the option “Show alert screen when approaching obstacle” in the map configuration of the maps, nothing will happen if you have not activated the Obstacle alerting mechanism.

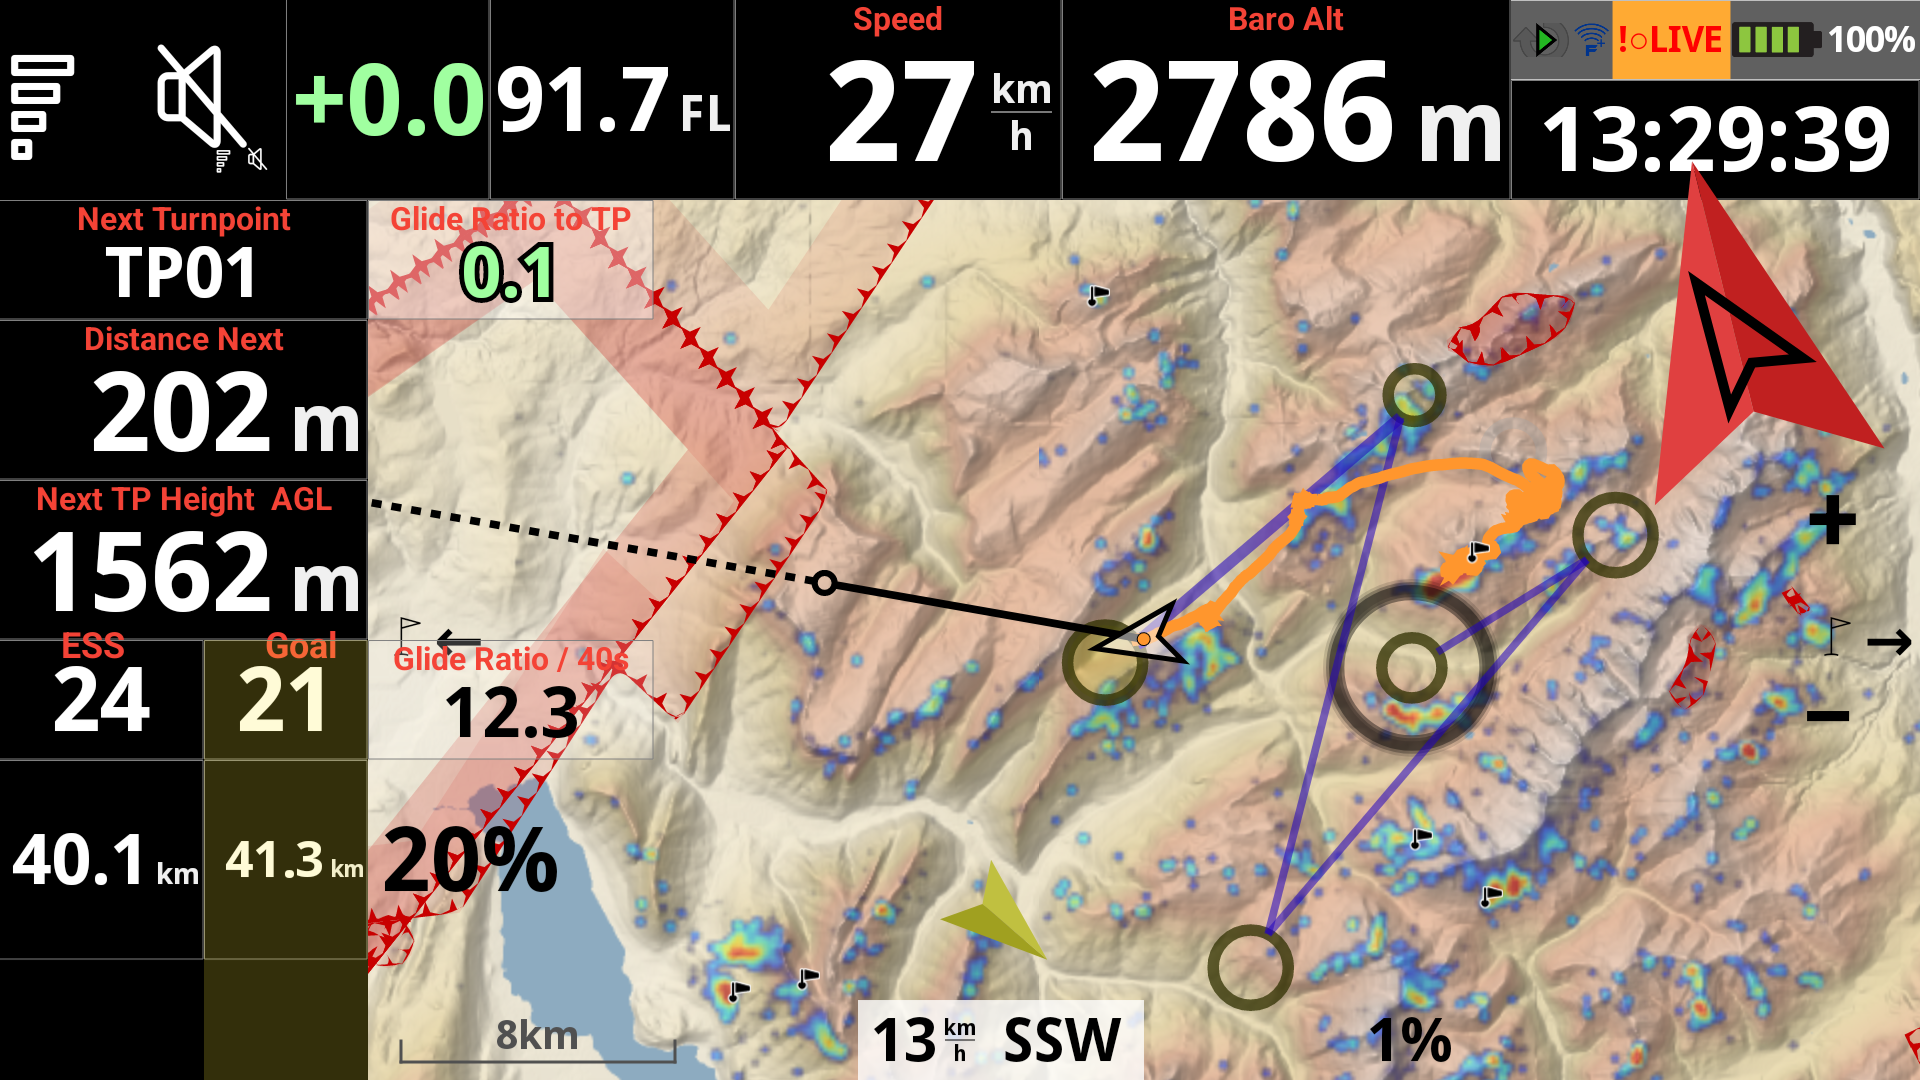
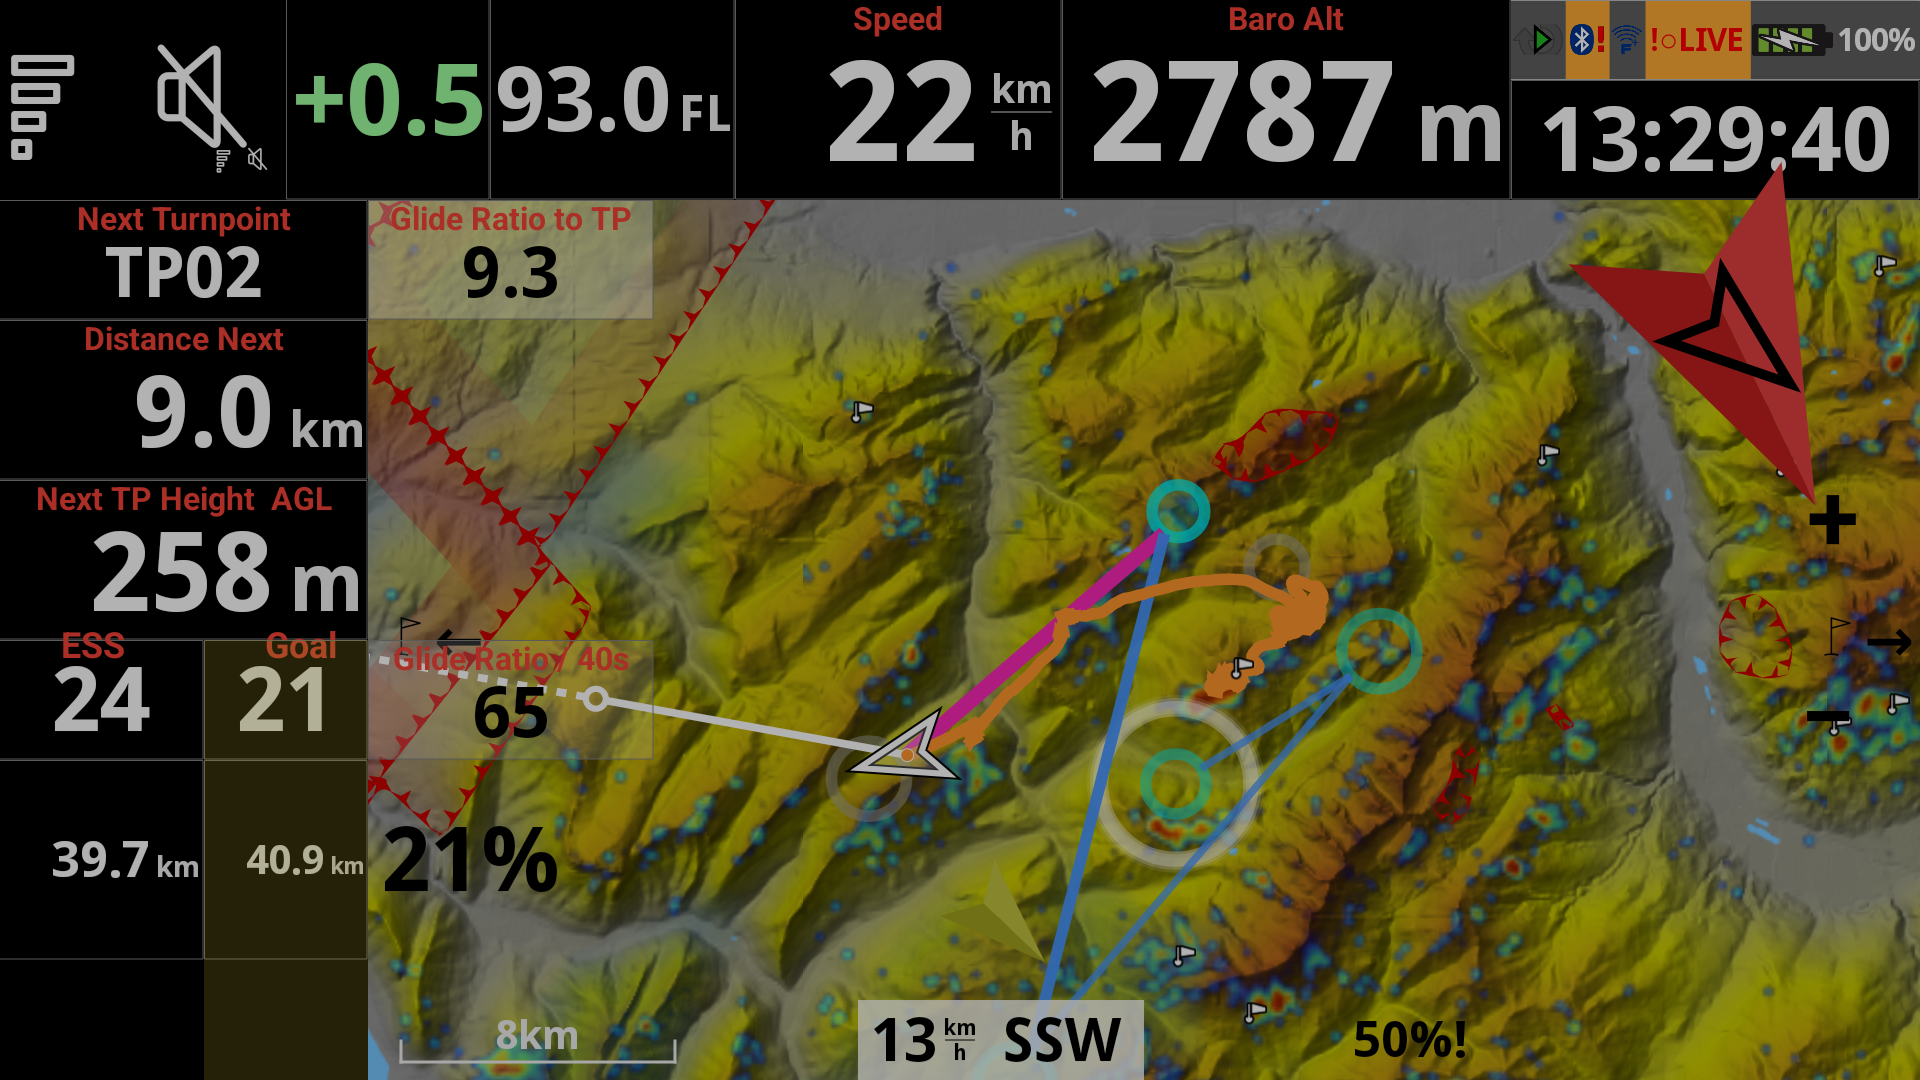
The pink line on the map corresponds to the obstacle if you have selected “Show only” or “Show and alert”.
The warning on top of the screen corresponds to the obstacle alert if you have selected “Alert only” or “Show and alert”.

Labels on map
For readability purposes, you may want to change what is displayed and for which map scale, vertical borders of airspace zones are displayed.
The first option is to skip “AMSL” shortcut in labels.
The second option is used to make sure you still get the vertical borders for temporary airspaces, even if it is supposed to not be displayed based on the option to only show the labels below a given scale.
The third option allows you to show the labels for obstacles or not.
If you disable the option “show for map scale below XX”, the labels will always be displayed. Otherwise, they will only be displayed for map scale below the set distance.
If you want to avoid labels on all the maps (Xc map, Task map or thermal assistant widgets), set the lowest value for the “show for map scale” slider.

Event triggering
Once you get close to an obstacle or a restricted airspace, you can trigger events and combine the event triggering with a warning display.
As indicated in the description of the Airspace proximity widget of the navigation subsection of the XCTrack Pro widgets manual, different colors (color code) are used depending on your proximity with the airspace zone.
A ‘scaled distance’ is used to determine the level of proximity with the airspace zone. Vertical distance and horizontal distance are taken into account to determine the ‘scaled distance’ with a ratio of 4:1, giving more importance to vertical distance proximity versus horizontal distance proximity.
If you cross a prohibited airspace zone, a purple warning event will be triggered (Airspace crossed).
If the pilot is below the airspace zone (horizontal distance away from the border of the zone is 0 m), a red warning event will be triggered (Airspace is really close) once the vertical distance is 100 m. An orange warning will be triggered (Airspace is close) once the vertical distance is 500 m. These vertical distance limits will decrease while you are away from the zone.
For each warning event triggered, you can decide to show an event notification overlay and also suppress next possible event for a defined period.
In the Flight subsection of Menu/Preferences/Sound explained here below, you can enable a sound in relation with these events.
In the Mapping of events subsection of Menu/Preferences/Automatic actions explained here below, you can link an action to the triggered events.
Do not confuse these “warning colors” with the Airspace colors described here above in the Airspaces description (red for restricted, orange for warning, purple for obstacles).

Nearby airspace discovery
Set how far you want XCTrack to look for a nearby airspace. This will affect maximum distance settings in Airspace proximity widget described in the navigation subsection of the XCTrack Pro widgets manual.

Read details about XC map in the Xcontest subsection and about Task map in the Competition subsection in the XCTrack Pro widgets manual.
2 types of maps can provide information to XCTrack: ground altitudes (Elevation/Terrain) directly downloadable from XCTrack and Road maps.
Maps and elevation files are preinstalled with AIR³, based on your location. However, as maps are large files, you may want to add or remove maps. You can free up memory by removing some pre-installed maps. You can use a SD card to extend the memory capacity. Optionnaly with AIR³, you can purchase a 128 Gb SD-card with pre-installed country maps of the world.
RoadMaps provide a lot of information while you navigate. Cities, roads, rivers, forests, railways,…
Read below more about the way Roadmap, Terrain, Roadmap theme type, Terrain type ("Road map and terrain Style" is the combination of both the Roadmap theme type and Terrain type) contribute to the final rendering of the map widget.
To download elevation files, just click on the country and click on “Download” (internet connection required).
Refer to the Map Configuration of the XC Map widget or the Task Map widget in the XCTrack Pro Widgets manual for more details on how to render terrain on the map.

Terrain type
Terrain type is the way Terrain is rendered. 3 types: LIGHT, DARK or XCONTEST.
Here below, the map widget is set with no Roadmap, only Terrain with the three Terrain types.
LIGHT
DARK
XCONTEST
The Roadmap tab allows you to manage your Roadmaps and/or to select a custom Roadmap theme type.
Refer to the Map Configuration of the XC Map widget or the Task Map widget in the XCTrack Pro Widgets manual for more details on how to render Roadmap.
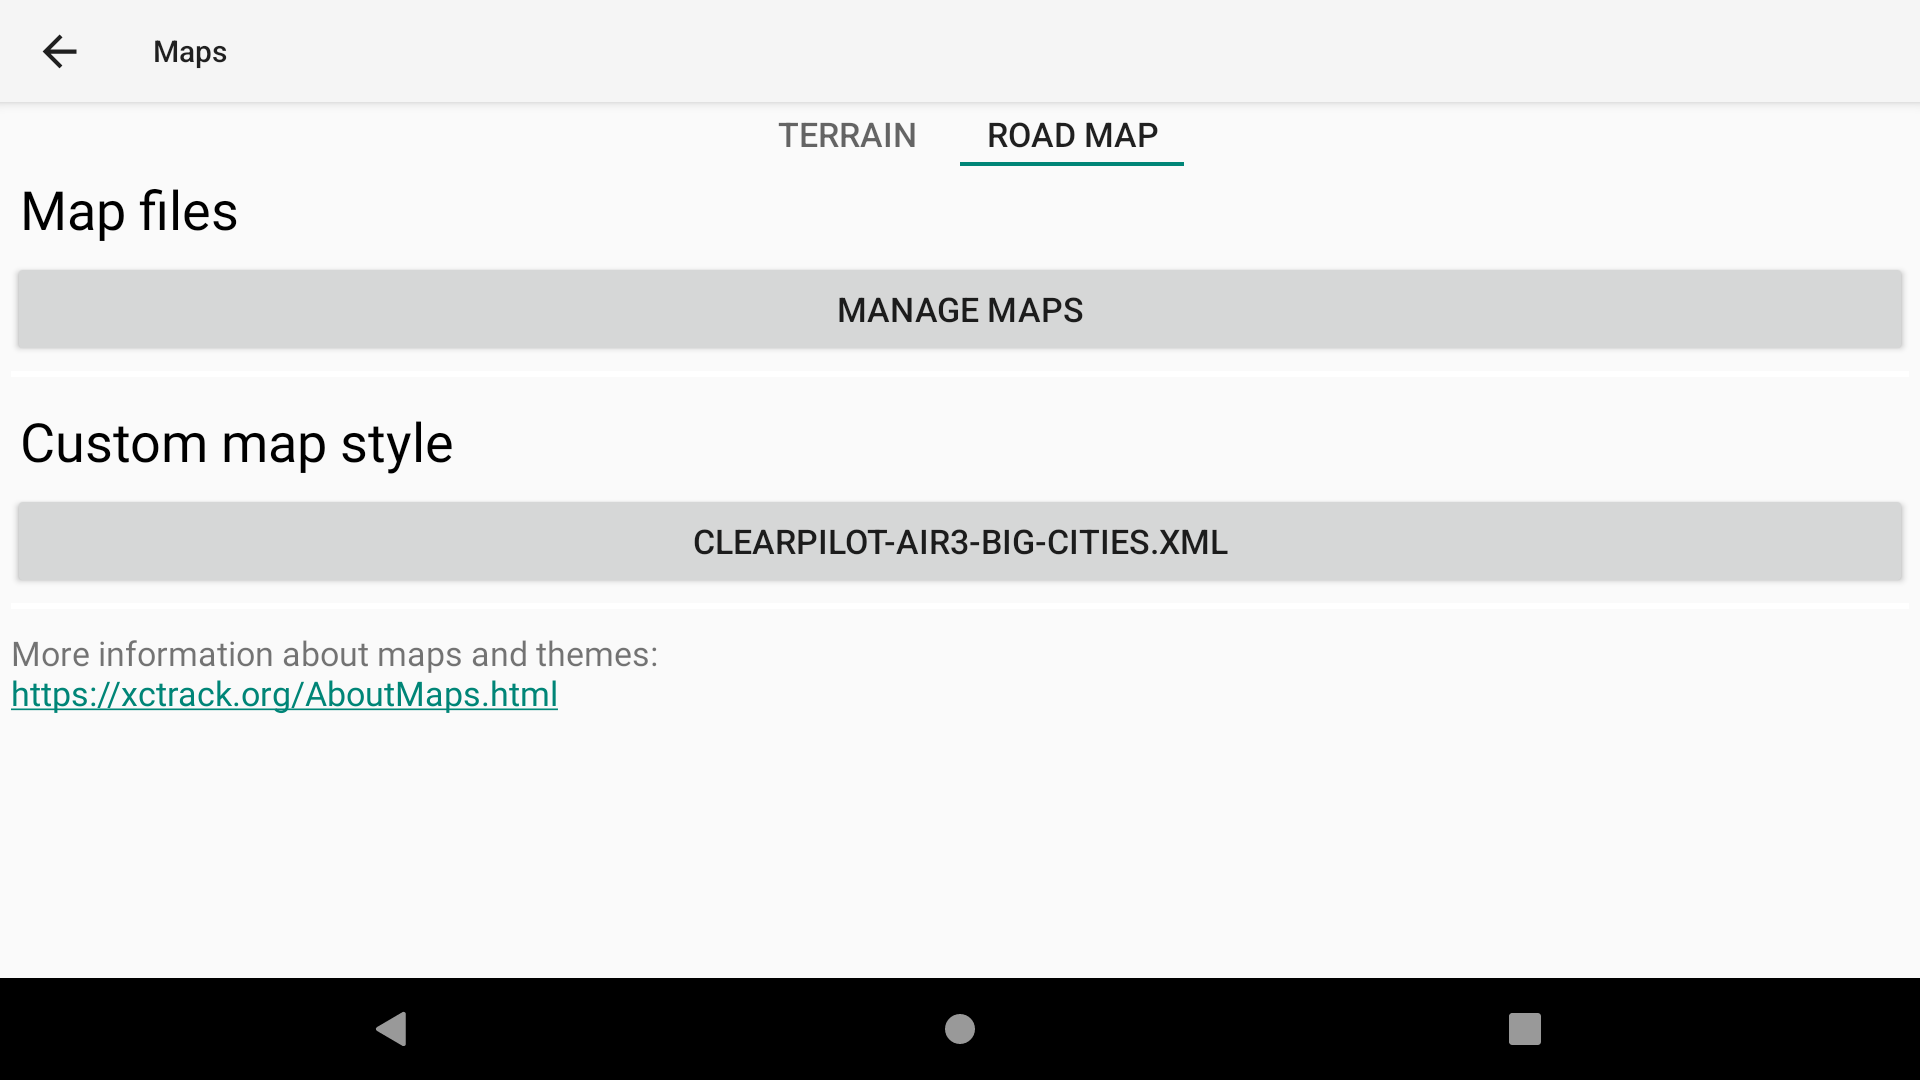
Custom map style
You can choose between different map theme styles directly in the map configuration section of the map widgets. Refer to the Map Configuration of the XC Map widget or the Task Map widget in the XCTrack Pro Widgets manual for more details.
You can also use a custom map theme type by customizing an XML file and selecting it here.
As of version 0.9.12, AIR³ comes with a custom map style that takes advantage of the new terrain types (requires transparent map theme type).
This version also includes cities that are larger than the default style.
Using larger font to display cities

MAP files
To add new Roadmaps, you can either download new Roadmaps from internet or import existing RoadMap files (for example located on a SD card), within the Map manager (see details below).
Roadmaps are located in the RoadMap subfolder of the Map folder amongst the XCTrack subfolders.

To add new Roadmaps, remove or limit the selection of Roadmaps with the Map manager…
Click on “Manage maps” button in Menu/Preferences/Maps/Roadmap to launch Maps Manager.
The Maps Manager allows you to
- change the storage where the Roadmaps are located (only if a SD card has been inserted for new Android version)
- select which Roadmaps XCTrack should load at start or delete any available Roadmap (left window)
- view details of processing a Roadmap download and extraction
- download new Roadmaps
- import new Roadmaps
- Download from OpenAndroMaps and others


1/ Change the storage where RoadMaps are located
Depending on the version of Android you are using, you can change the storage where Roadmaps are located. With recent Android version, you can only select if you want to use the internal memory or the SD card (if the device has any).
With older version of Android, you can choose the directory where the Roadmaps are located. Click first on the pencil to enter the directory selection window. Click on the 3 dots if you want to change the main memory support (change to SD card if the device has any). Select the directory where the Roadmaps are located.


2/ Manage available Roadmaps
The main window on the left allows you to select which Roadmaps XCTrack should load at launch.
If you want to delete a Roadmap file, you can either use the File Manager to remove the file from directory where Roadmaps are located, or directly click on the trash in this Maps manager to delete the Roadmap file.

3/ Download new Roadmaps
If you want to download new Roadmap files from the internet,
- click the Download Map button in the Maps manager
- browse the different options to find the continent and then the country you want to download
- confirm the Map download
Remember that Roadmap files are large files. The download process can take a lont time.


4/ Check the process
During the process, you can check details in the right window. If the map has been downloaded but the processing stage fails (for example there is no space left on the device), you can manually reprocess the downloaded file or delete it. When the downloaded zip is processed (= extracted to a map folder), it is deleted and disappears from that second list on the right.
When the process has finished, the new Roadmap is available in the list of available countries in the left window.

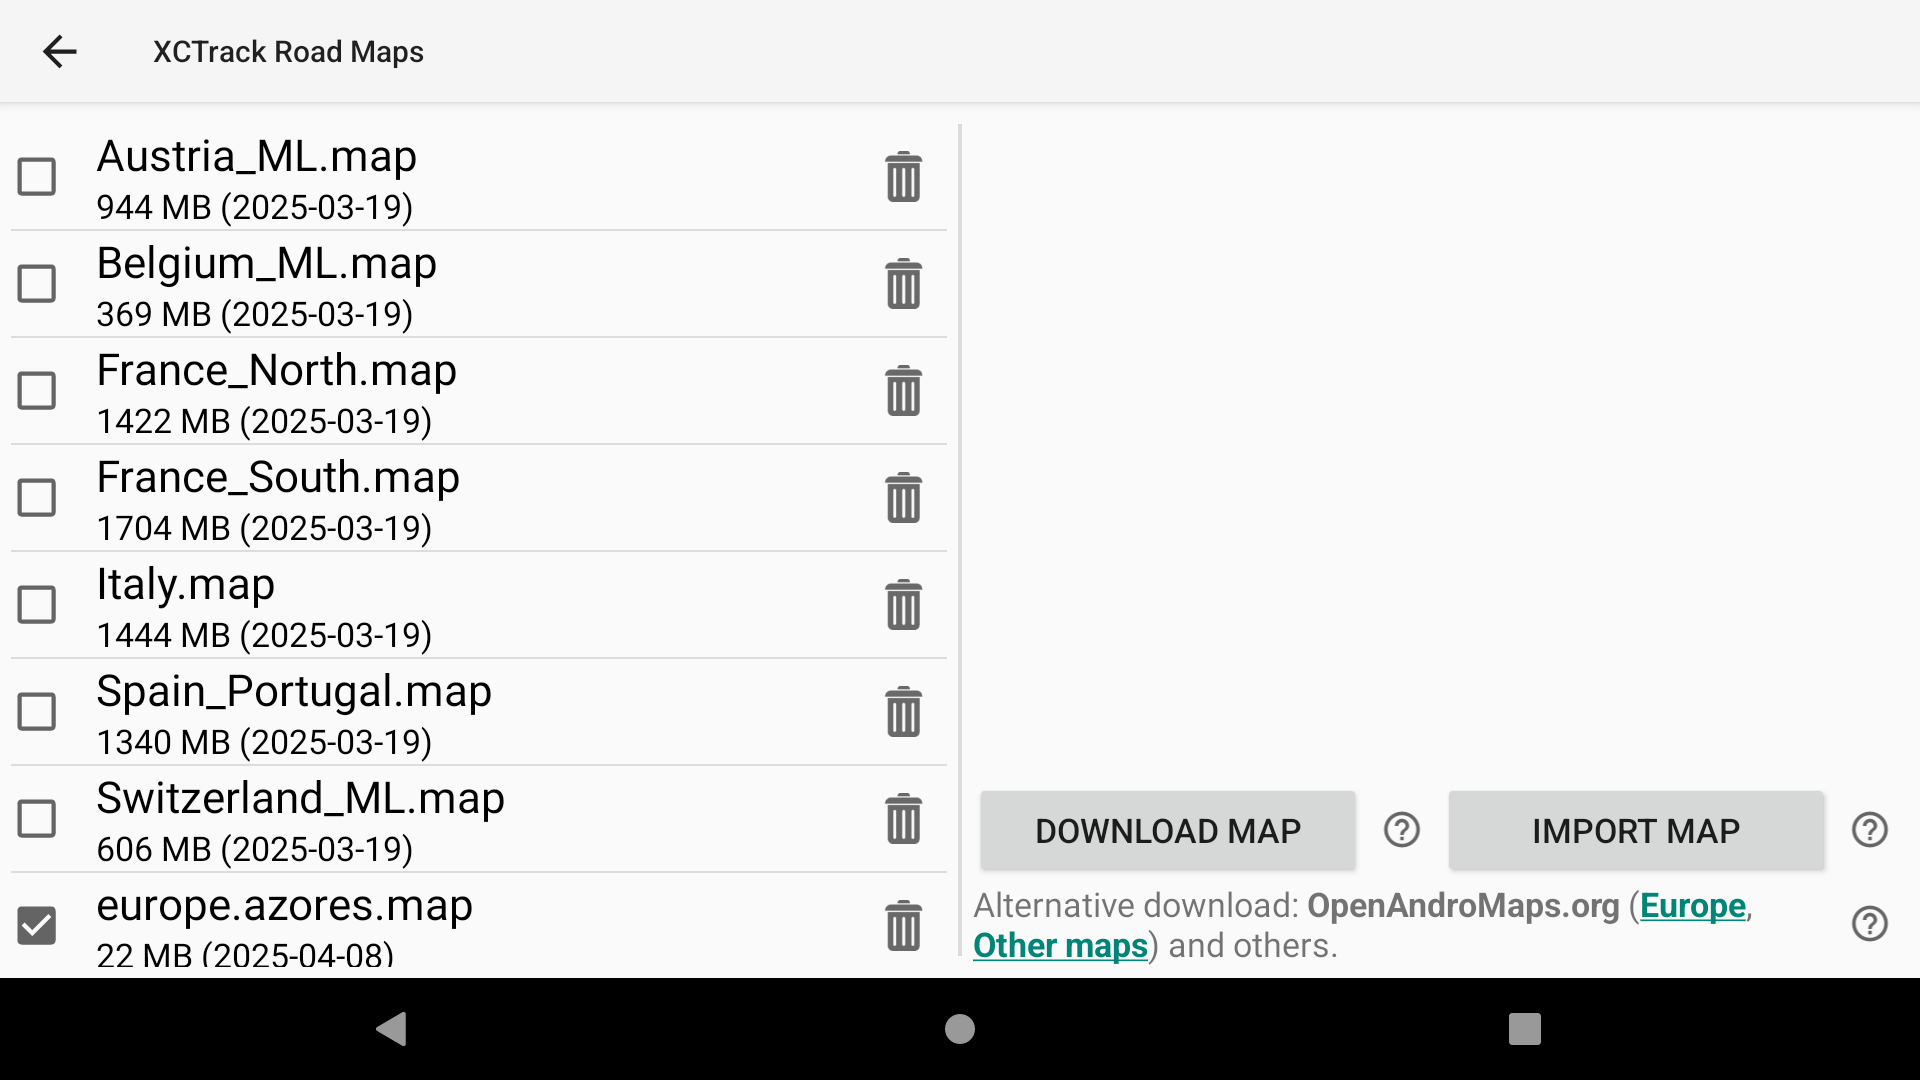
5/ Import Maps
If you are not patient enough to download these RoadMaps, an alternative is to get a 128 Gb SD-card with pre-installed coutry maps of the world. This way, you only need to get the large country file you need directly from the SD-card. In order to do so, click on IMPORT MAP and select the country file located in the SD Card. This process will copy the file in the XCTrack Roadmap folder.
6/ Install from other sources
You can still download files from external sources. On Openandromaps, click on the “+” sign to expand the different download options. Click on “Others map”. The download process will begin. XCTrack will extract the map file and place it in the correct location.
See next section for more details about Acoustic vario.
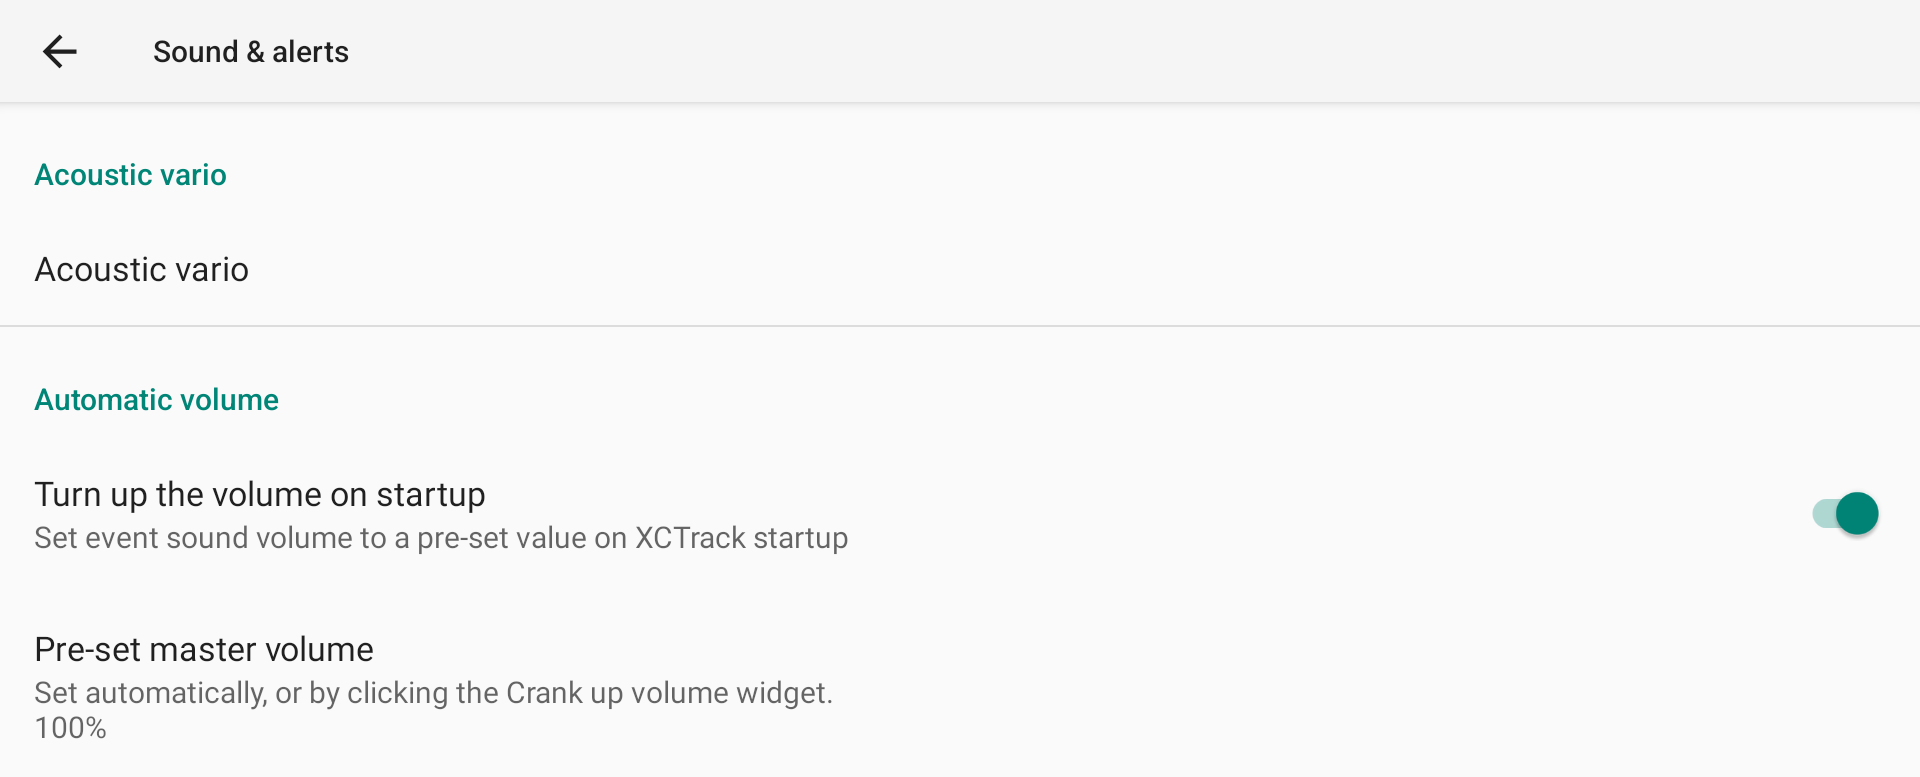
Automatic volume
By selecting "Turn up the volume on startup", you can set the sound volume of the system to a defined level. The sound event volume is therefore determined by this setting. No matter what was the sound volume of the system, this setting allows to define a specific sound volume.
The percentage of acoustic vario volume, described underneath, is a portion of the system volume set by this specific feature. For example, if the Pre-set volume is 50% and the Acoustic vario volume is 50%, you will get 25% volume out of the maximum.
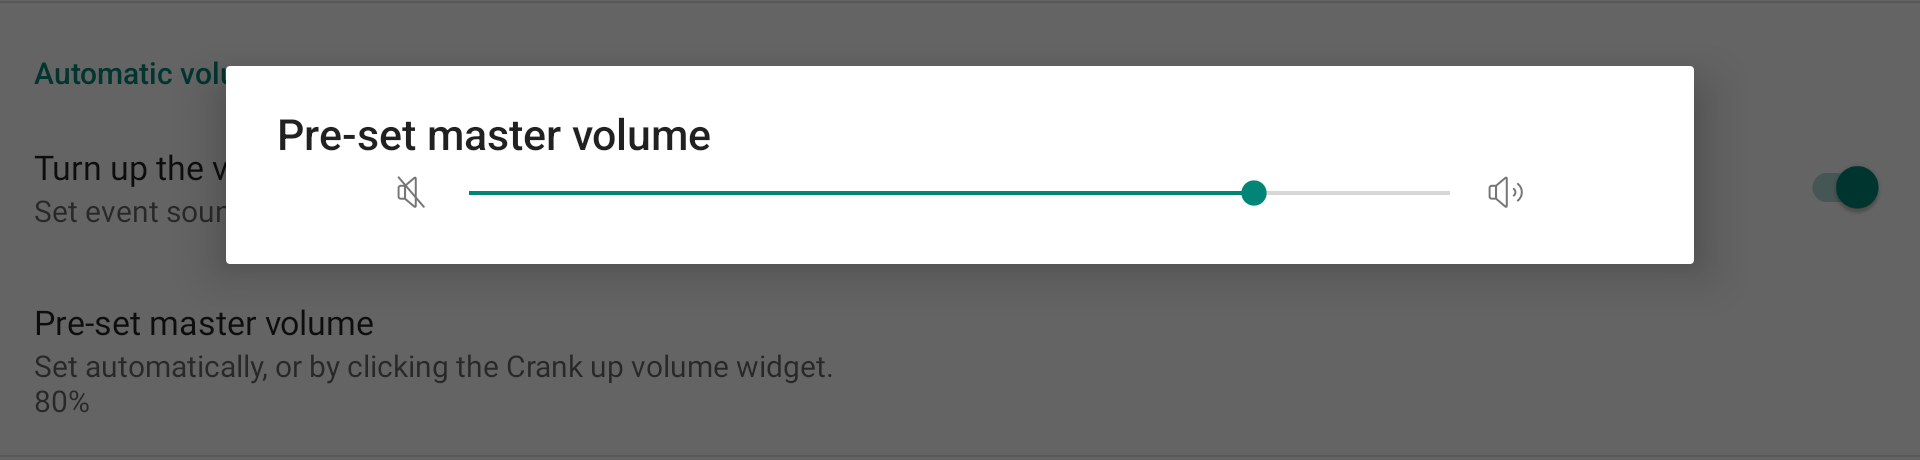
"Pre-set master volume" corresponds to the percentage that XCTrack sets in the system as the system reference percentage. It is also the percentage that will be set when you click the Volume Reminder widget, which appears when the media volume is below the preconfigured target volume set in this section.
During the flight, when XCTrack is active, the volume buttons are usually used as physical buttons by XCTrack (zoom in/out, turn page, etc.). To change the volume, use the media volume widget, which increases or decreases the volume in increments based on the available Android media volume steps.
When you launch XCTrack for the first time, a window prompts you whether you want to maximize the system volume. Click Yes to set it to the maximum or click No if you do not want to increase the volume to the maximum. If you click “No”, the system volume will not be changed. Remember that the level of the Acoustic Vario is a percentage of the system volume. If the system volume is set to 50% and you choose “No”, the acoustic vario set to 50% will produce a sound that is 25% of the maximum.
You can have the system remember your choice not to have to answer the question on every launch. Go to Menu/Preferences/Sound if you want to change your choice.

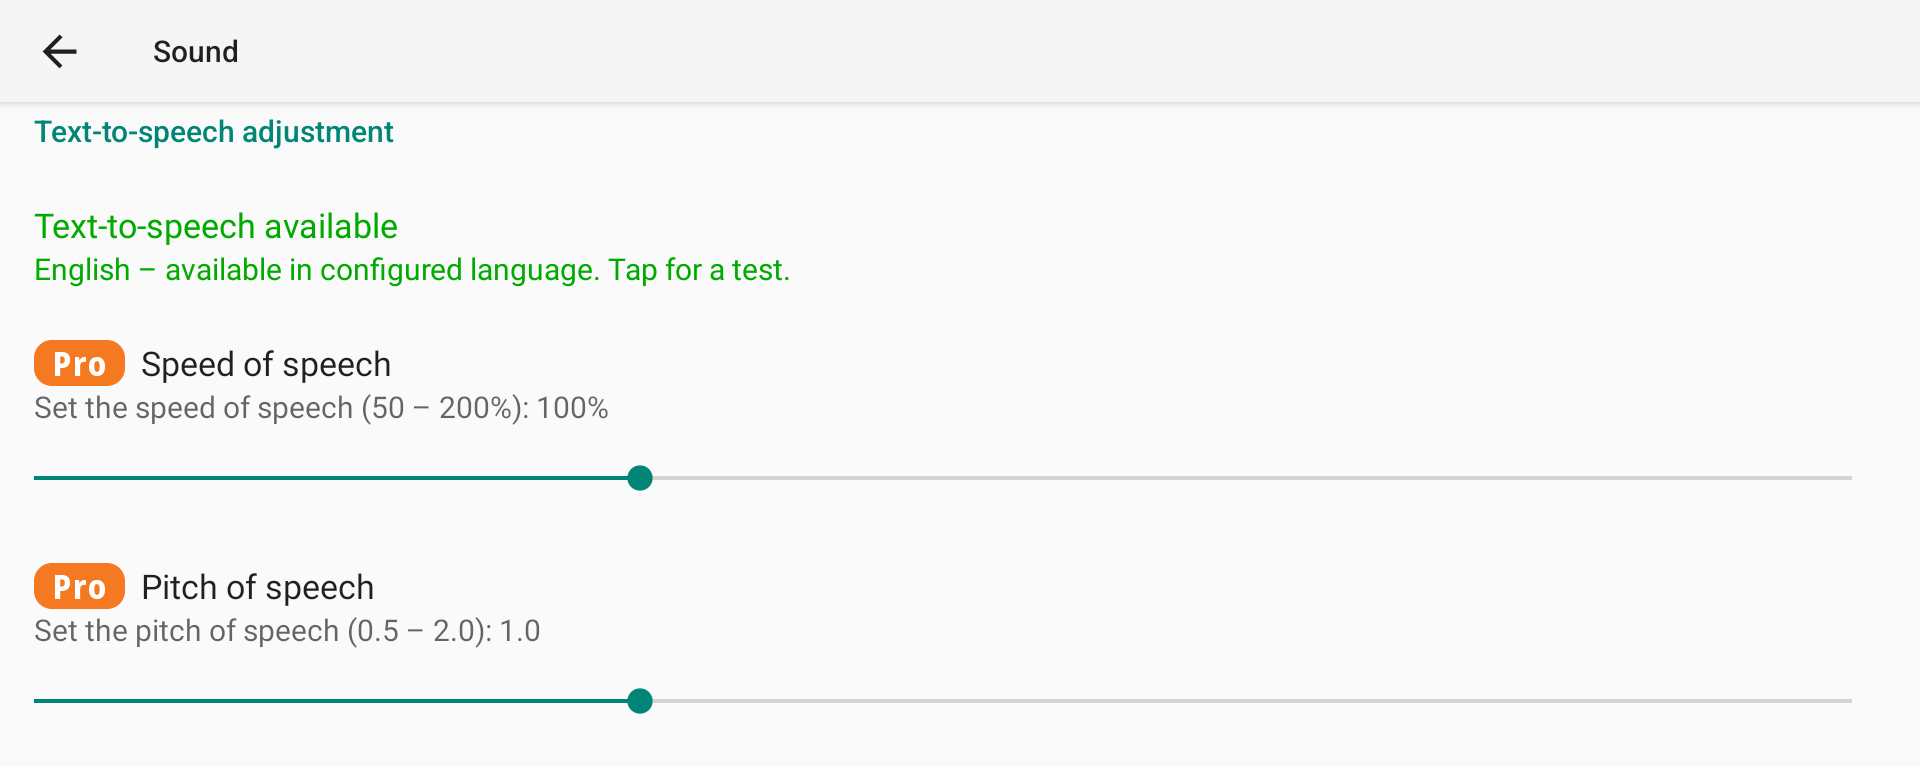
Text to speech adjustment
The text-to-speech engine corresponding to the Android system should be present by default. Tap on the text "Text-to-Speech" to test if you can hear the system pronounce the language.
To use a different language, change the language in Menu > Preferences > Display, or change the app language in Android settings.
With the Pro version of XCTrack, you can adjust the speech speed and pitch.
Events - System - Alerts
Depending on the situation, XCTrack produces multiple types of events: takeoff, landing, battery, Bluetooth connection, airspace proximity, competition phases, Live Tracking, etc.
If you have enabled "Announce events by intent" in the Menu > Preferences > Android Integration section, these events will also be sent to a listening app, such as AIR³ XCT Add-On.
In the System section, you can customize the sound, spoken message, and on-screen notification.
To customize the repetition of events related to airspace (crossing an airspace border, airspace red warning, or airspace orange warning), go to Menu > Preferences > Airspaces and Obstacles > Event Triggering, as explained in the Airspaces section in the Settings tab above.

Events - System - Alerts
You can turn each event on or off completely with the main switch.
You can easily check three items for each event: the selected sound, text-to-speech, and notifications.
The notification is the text that will briefly appear at the top of the app.
To edit one of these behaviors, tap on the event.


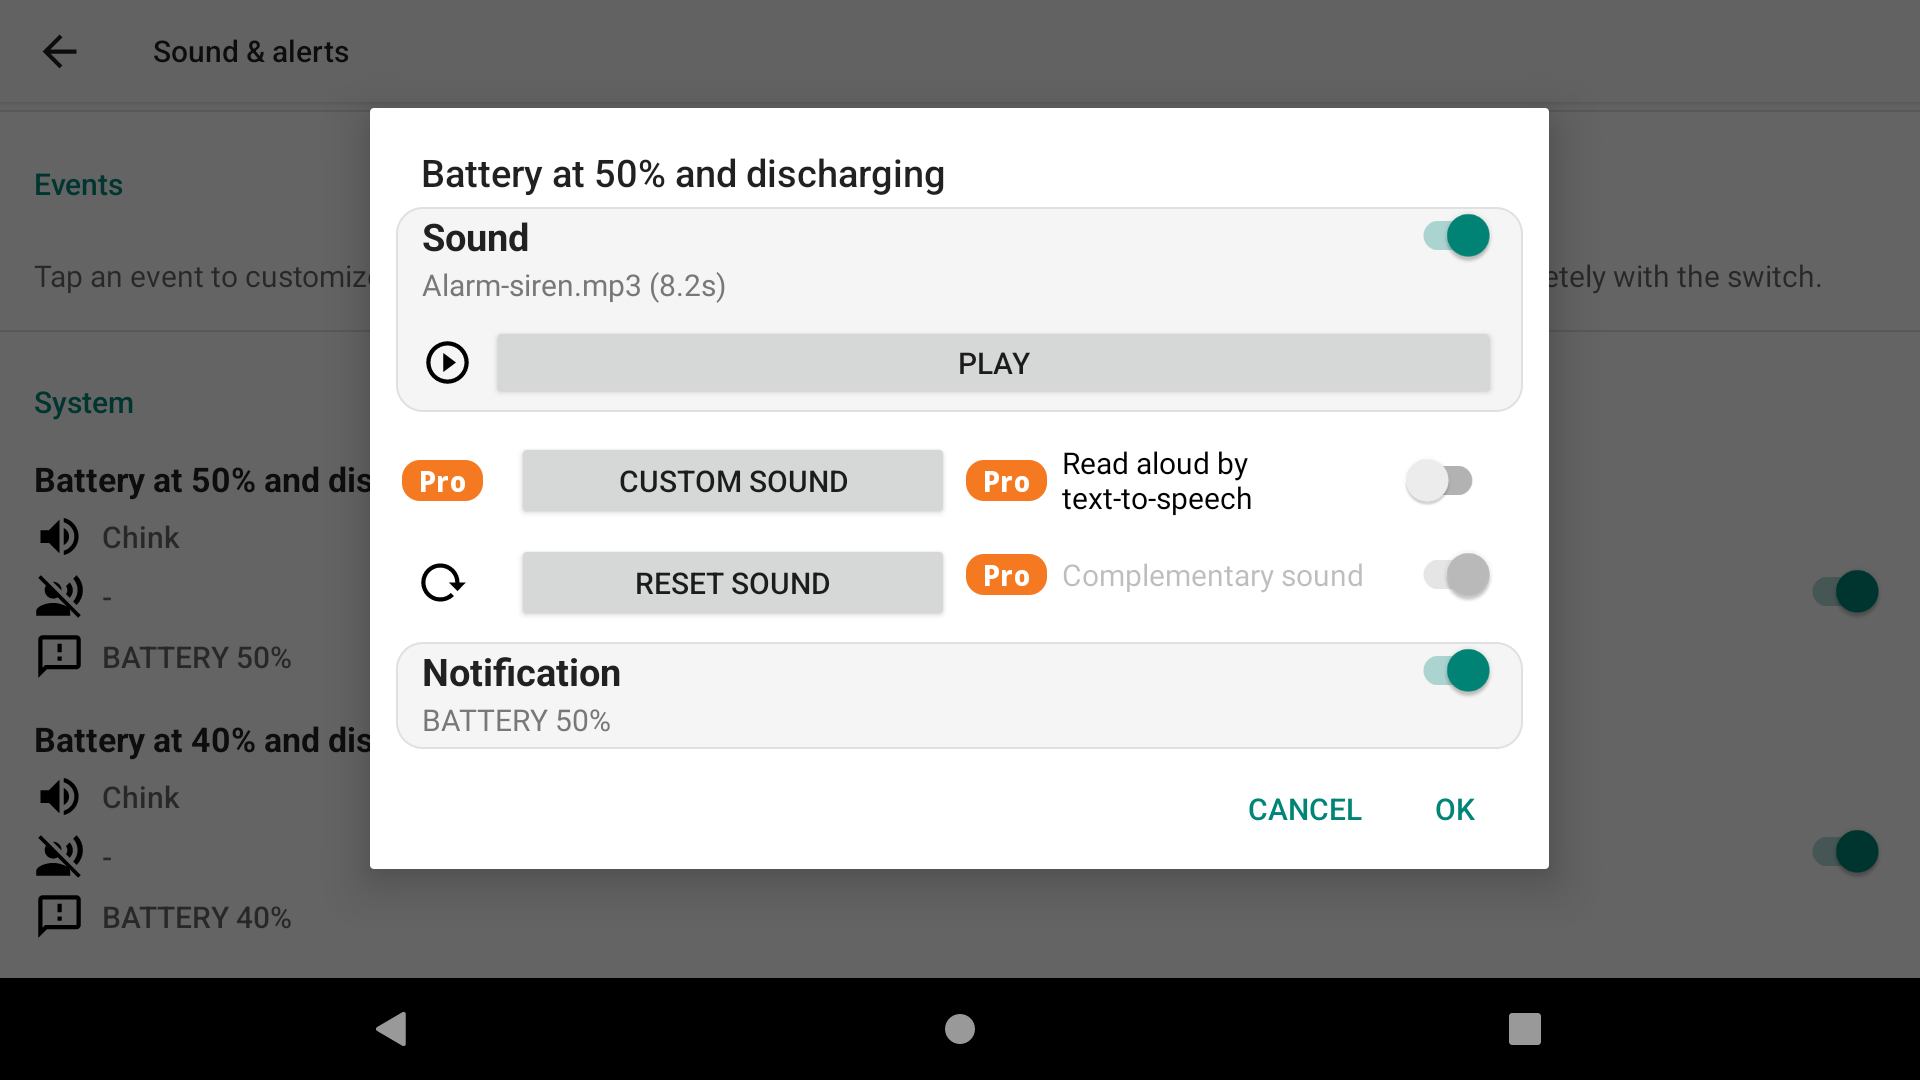
Default: chink!
For most of the events, the default setting is the simple "chink" sound.
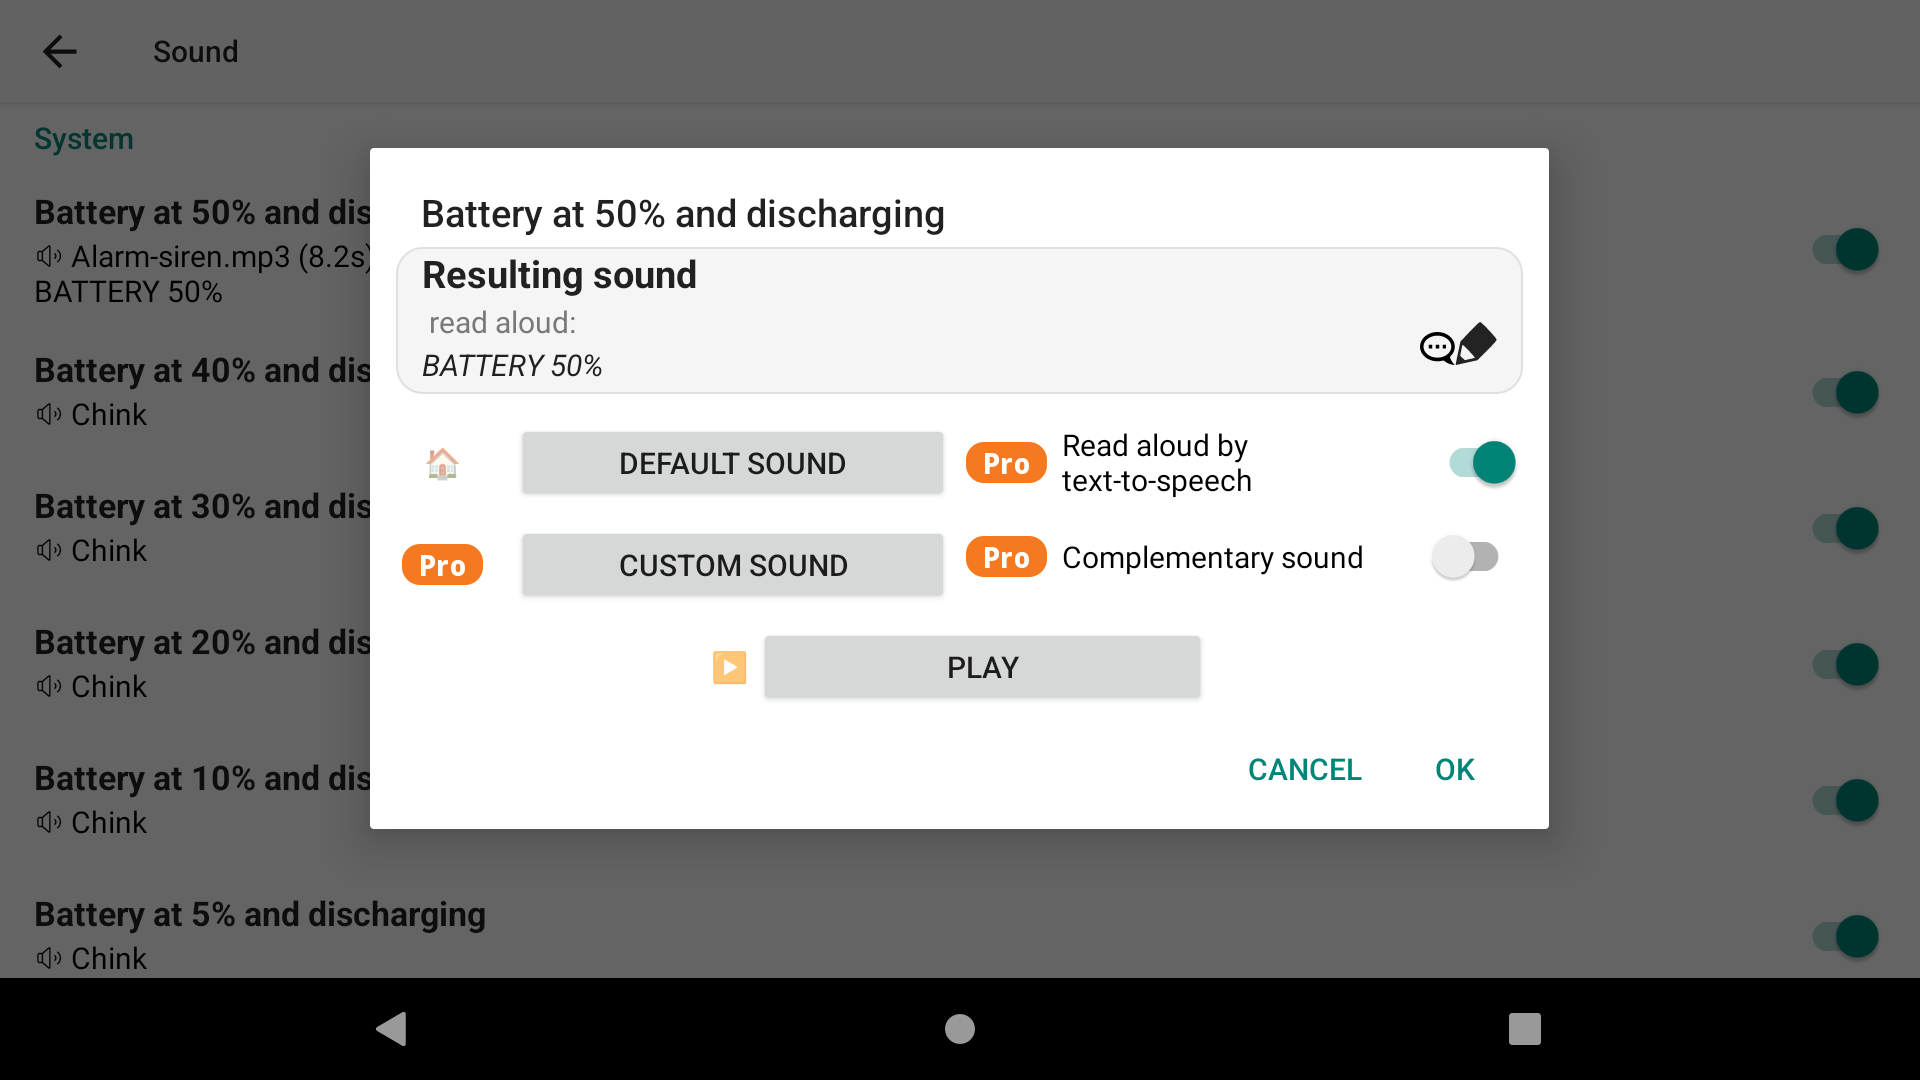
Text-to-speech
Or you could decide to only have the Text-to-speech

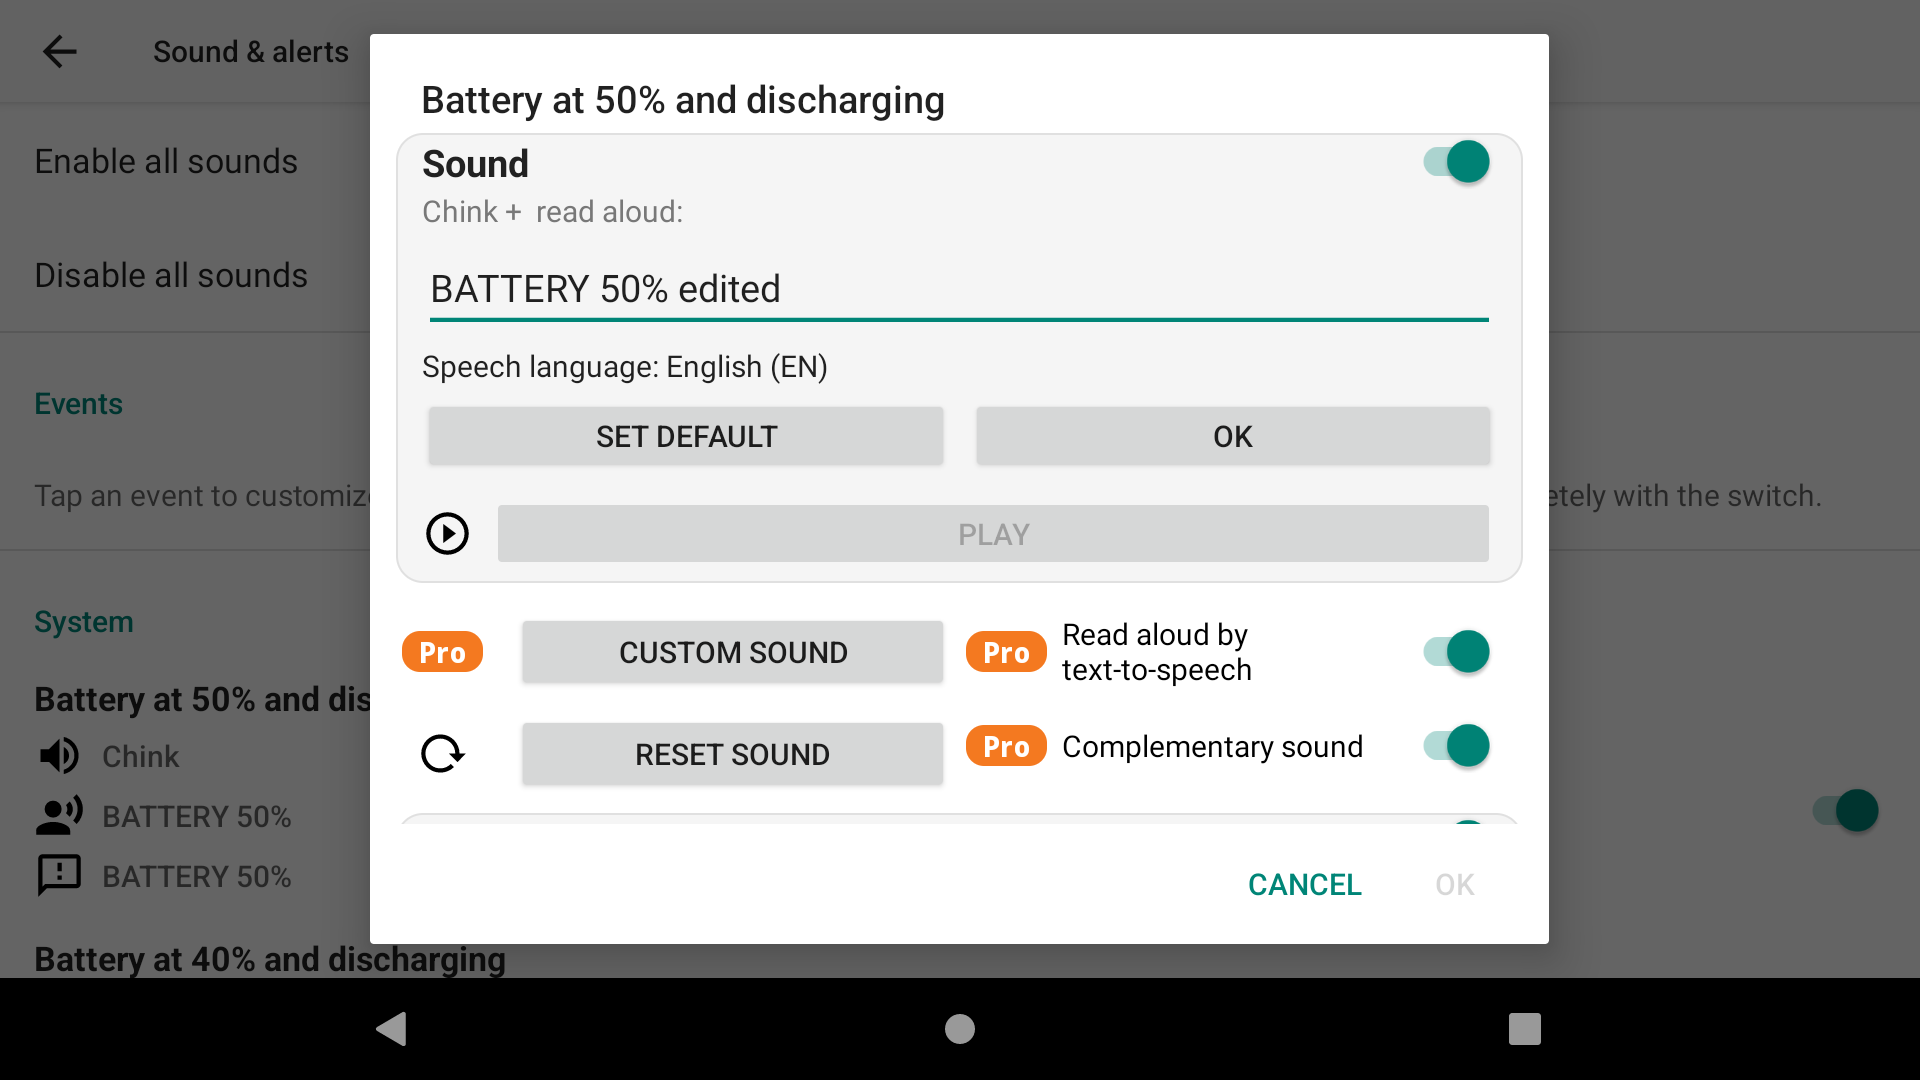
Chink + Text-to-speech
You can use both the default sound and the default text-to-speech. Just enable the switches.
Custom sound
Click the Custom Sound button to select a sound file saved on your device. Then, click Play to listen to it.
Custom Text-to-speech
Click on the pencil to edit the text that will be pronounced by the text-to-speech engine.
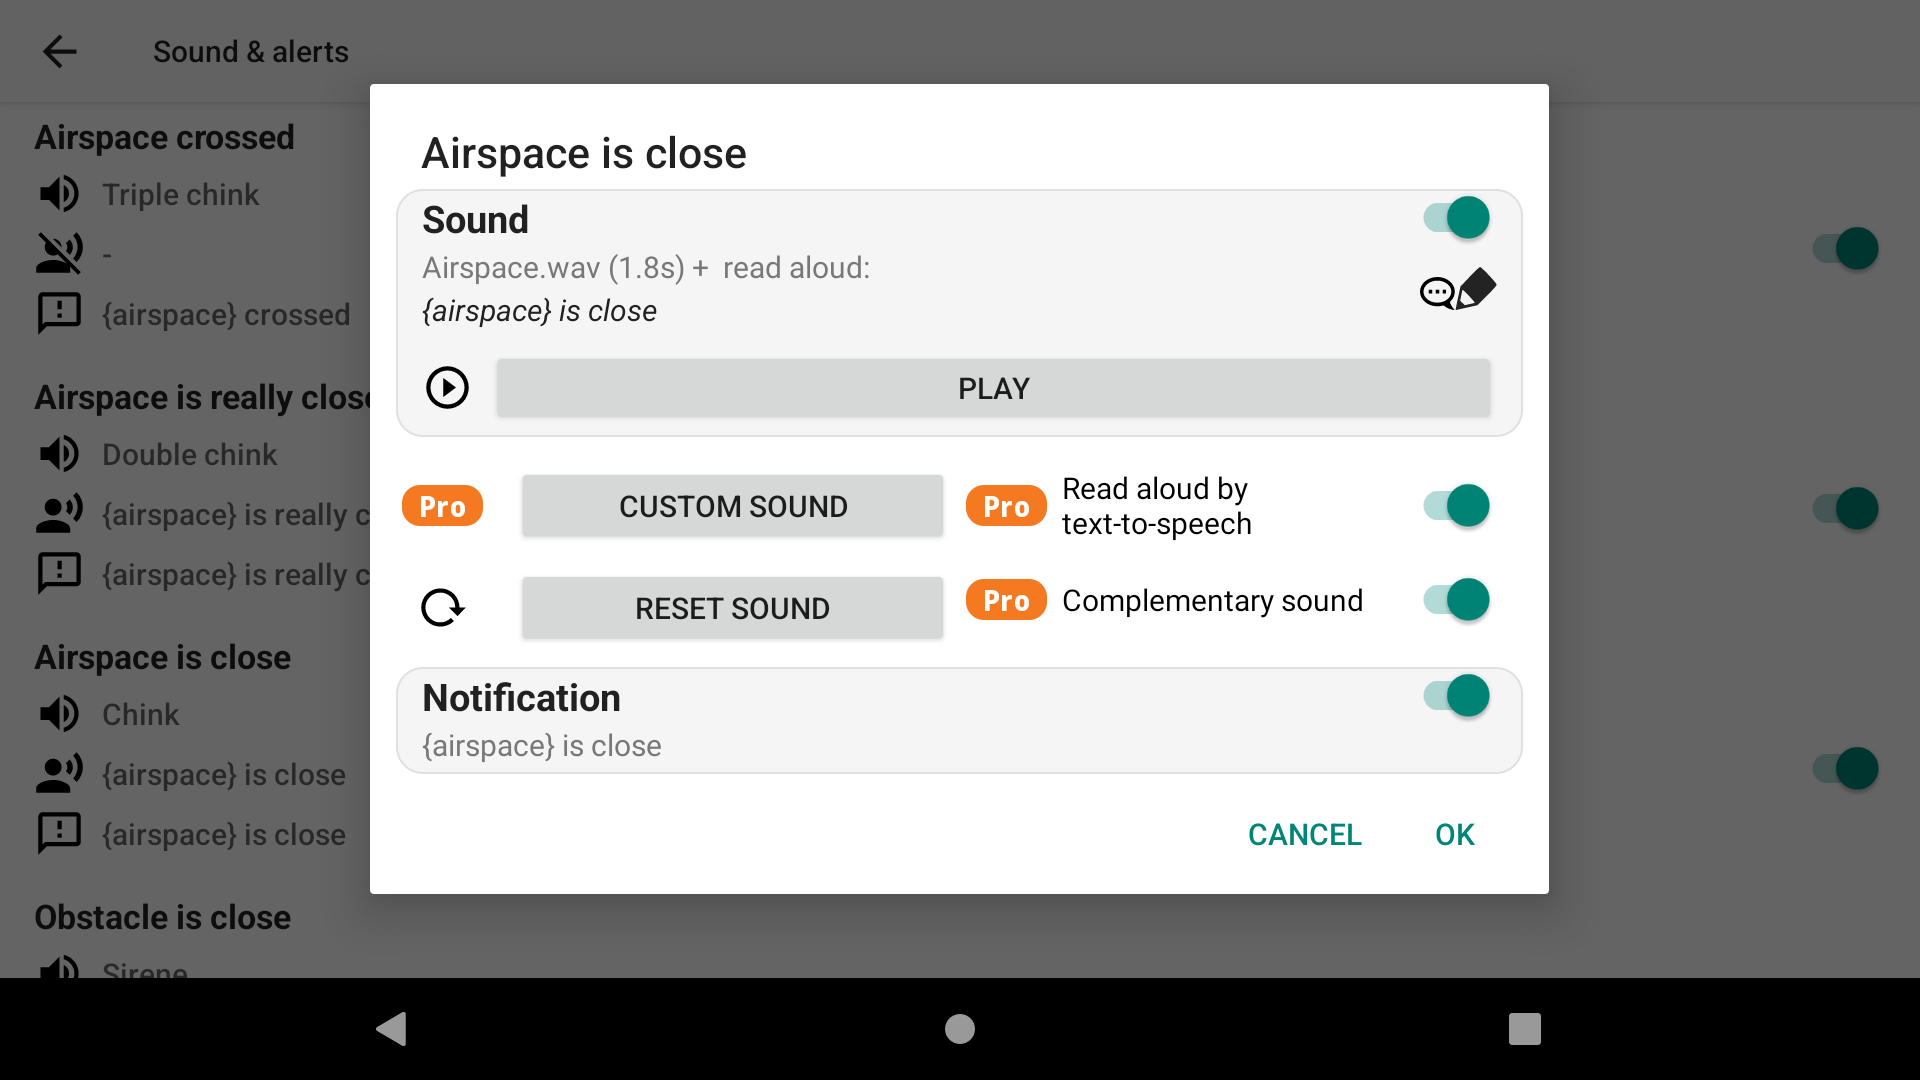
Specific events with placeholder
Placeholders are included in certain events to specify particular information, such as the airspace you are close.
Acoustic vario can be enabled or disabled. It requires a pressure sensor (external or internal). We recommend to always use the internal very performing pressure sensor of the AIR³. Watch and listen to the video comparing AIR³ vario with its competitors here.
You can also use the vario button widget explained in the Action buttons subsection of the XCTrack Pro widgets manual to enable or disable the vario sound. Note that both the vario and the weak lift indication (thermal sniffer) are enabled or disabled with this setting.
Mute audio when not flying
Enable it to avoid unwanted sound before takeoff. Once the takeoff is detected (see more details in Automatic actions section below), the vario sound will be unmuted.
Warn if baro data not available
When the pilot uses an external device connected to XCTrack for Acoustic vario, XCTrack will warn the pilot if the device is disconnected. Listen to the disconnected warning sound.
You can enable or disable this sound. Check also more details in the Connections & Sensors subsection below.
See next section for more details about Custom sound.
Volume indicates the percentage of volume based on the current OS volume. If the Android volume is 100% and the volume of vario is 50%, you will get a volume of 50%. If the Android volume is 50% and the vario volume is 50%, you will get 25% volume. To make sure you always have the same volume while flying, it is recommended that you activate the option Set volume to maximum that is detailed in the Android integration section below. Otherwise, the sound volume may be different depending on the way the Android volume has been set prior to your flight.
Lift Audio threshold is the value for which the vario will start making a sound to indicate a lift. This is also the upper limit of the weak lift indication.
Sink Audio threshold is a value that can help you identify a fall in a descending air mass. An easily recognizable specific sound will be played when you reach this value.

Weak lift indication volume is the way to identify weak air mass going up. It is a ‘double beep’ on the same tone. It beeps in the (-0.5, lift threshold) range. It beeps only when the short average > long average, as to avoid sudden double-beeps during lift and also suggest that you are moving to a faster-lifting air. Remember that in calm conditions, you are supposed to go down. If you are not going down (example – 0.1 m/s of vertical speed), it means that you are flying in an ascending mass of air.
If you don’t want to hear the weak lift indication, set the volume to 0%. If you want to hear it, set a volume. The percentage indicates the percentage of volume based on the current OS volume. If the Android volume is 100% and the volume of weak lift indication is 50%, you will get a volume of 50%. If the Android volume is 50% and the weak lift indication volume is 50%, you will get 25% volume. To make sure you always have the same volume while flying, it is recommended that you activate the option Set volume to maximum that is detailed in the Android integration section below. Otherwise, the sound volume may be different depending on the way the Android volume has been set prior to your flight.
Averaging interval is used to compute a value to determine ascent or descent, out of the data that are provided by the pressure sensor (see Menu/Preferences/Connection & Sensors/Calibrate here below. Note that the averaging interval of the acoustic vario has no influence on the averaging interval that can be set in the Vertical speed widget, the Vario Bar or the Glide Ratio explained in the Flying subsection of the XCTrack Pro Widgets manual. Acoustic vario and these widgets both use data from pressure sensors, but different strategies can be adopted to obtain average info. You may want to get a very short average for acoustic vario, but want to have visual information on the strength of the thermal based on a much larger time interval.
Average lift indication can be enabled or disabled if you have not activated the Custom sound described here below (Classic mode). Average lift indication is a feature that changes the “color” of the tone depending on the strength of the lift. The tone changes once you get in the 0.5-1.5m/s range (averaged in the value set in the next feature, 10 s by default), and then from 1.5-2.5 it starts doing ‘tik-tak’, 2.5-3.5 ‘tik-tak-tak’ etc.
Averaging interval for strength indication is the value taken into account by the average lift indication described here above.

Custom sound is a Pro feature of XCTrack. If you are using a standard version and want to get the custom sound, consider subscribing (see more details in the section Subscription & Pro below.
To access the custom sound features, start by enabling it (click on the menu).
Dynamic frequency
Can be enabled or disabled. By enabling it, the frequency will change during the time interval set in the Cycle/Duty explained below depending on the variation of your lift/descent.
Reset to profile
Gives you access to specific profiles.
Save/load sound profile
Save your favourite profile once you are happy with your customisations. The saved profile can be found in the SoundProfiles folder of XCTrack (see files with .xcvsp extension).

Custom sound
You can customize the vario sound through 3 different parameters: frequency, cycle and duty.
Click on the parameter you want to change. You can set a value for each step going from a descent of 7 m/s to a lift of 7 m/s. For each step, you can either slide up or down your finger to increase or decrease the value, or directly set a value manually by tapping on the number on top.
Frequency
Frequency changes the pitch of a tone (Hz).
Cycle
Cycle is a total duration of a tone and a pause (ms).
Duty
Duty is the proportion of a tone duration in each cycle (%)

To listen to the vario sound, unmute by tapping on the speaker button.
You can decide to hear the vario sound either based on the pressure sensor info provided to XCTrack, or by using the slider at the bottom, allowing you to test the sound for the different steps of lift or descent.
Another way to hear the custom sound is to replay one of your flight. Read more details how to replay a tracklog in the Tracklogs page.
The slider contains a thick portion. This corresponds to the range between the sink audio threshold and the lift audio threshold. If you have not set a value for the weak lift indication volume, this means that you will not hear any vario sound between these two values. Read more about the Weak lift indication volume, the sink audio threshold and the lift audio threshold here above.

Next section