Jump directly to the right topic: Automation rules – Instant Lift, Weak Lift and Vario Sound – Custom sound – XCTrack Intent Launcher Widget – Add a new custom trigger event – Launch an App – GoPro – Zello Configuration – Telegram Configuration – Safe Landing Reporting – Export Tracklog
GoPro configuration
GoPro Camera Control
GoPro cameras are widely used by pilots to capture their flights. With AIR³ XCT Addon, you can automatically control your GoPro camera during flight using XCTrack events, widgets, or buttons (physical or Bluetooth remote control).
Prerequisites:
- A compatible GoPro camera (Hero 5 and newer models)
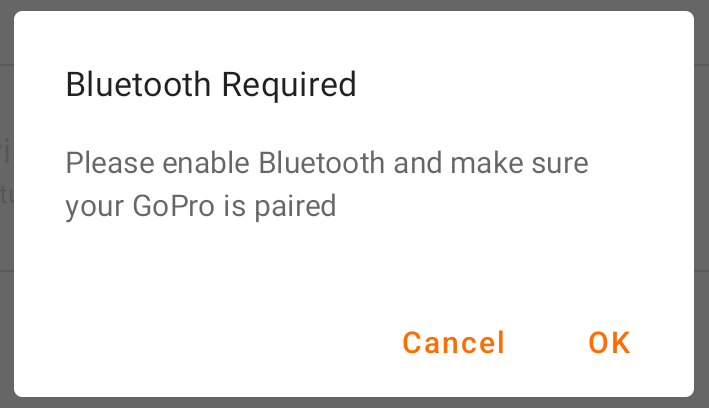
- Bluetooth enabled on your AIR³ device (you will be reminded by the app)
- Your GoPro paired with your AIR³ via Bluetooth (see below for instructions)
Setup Instructions:
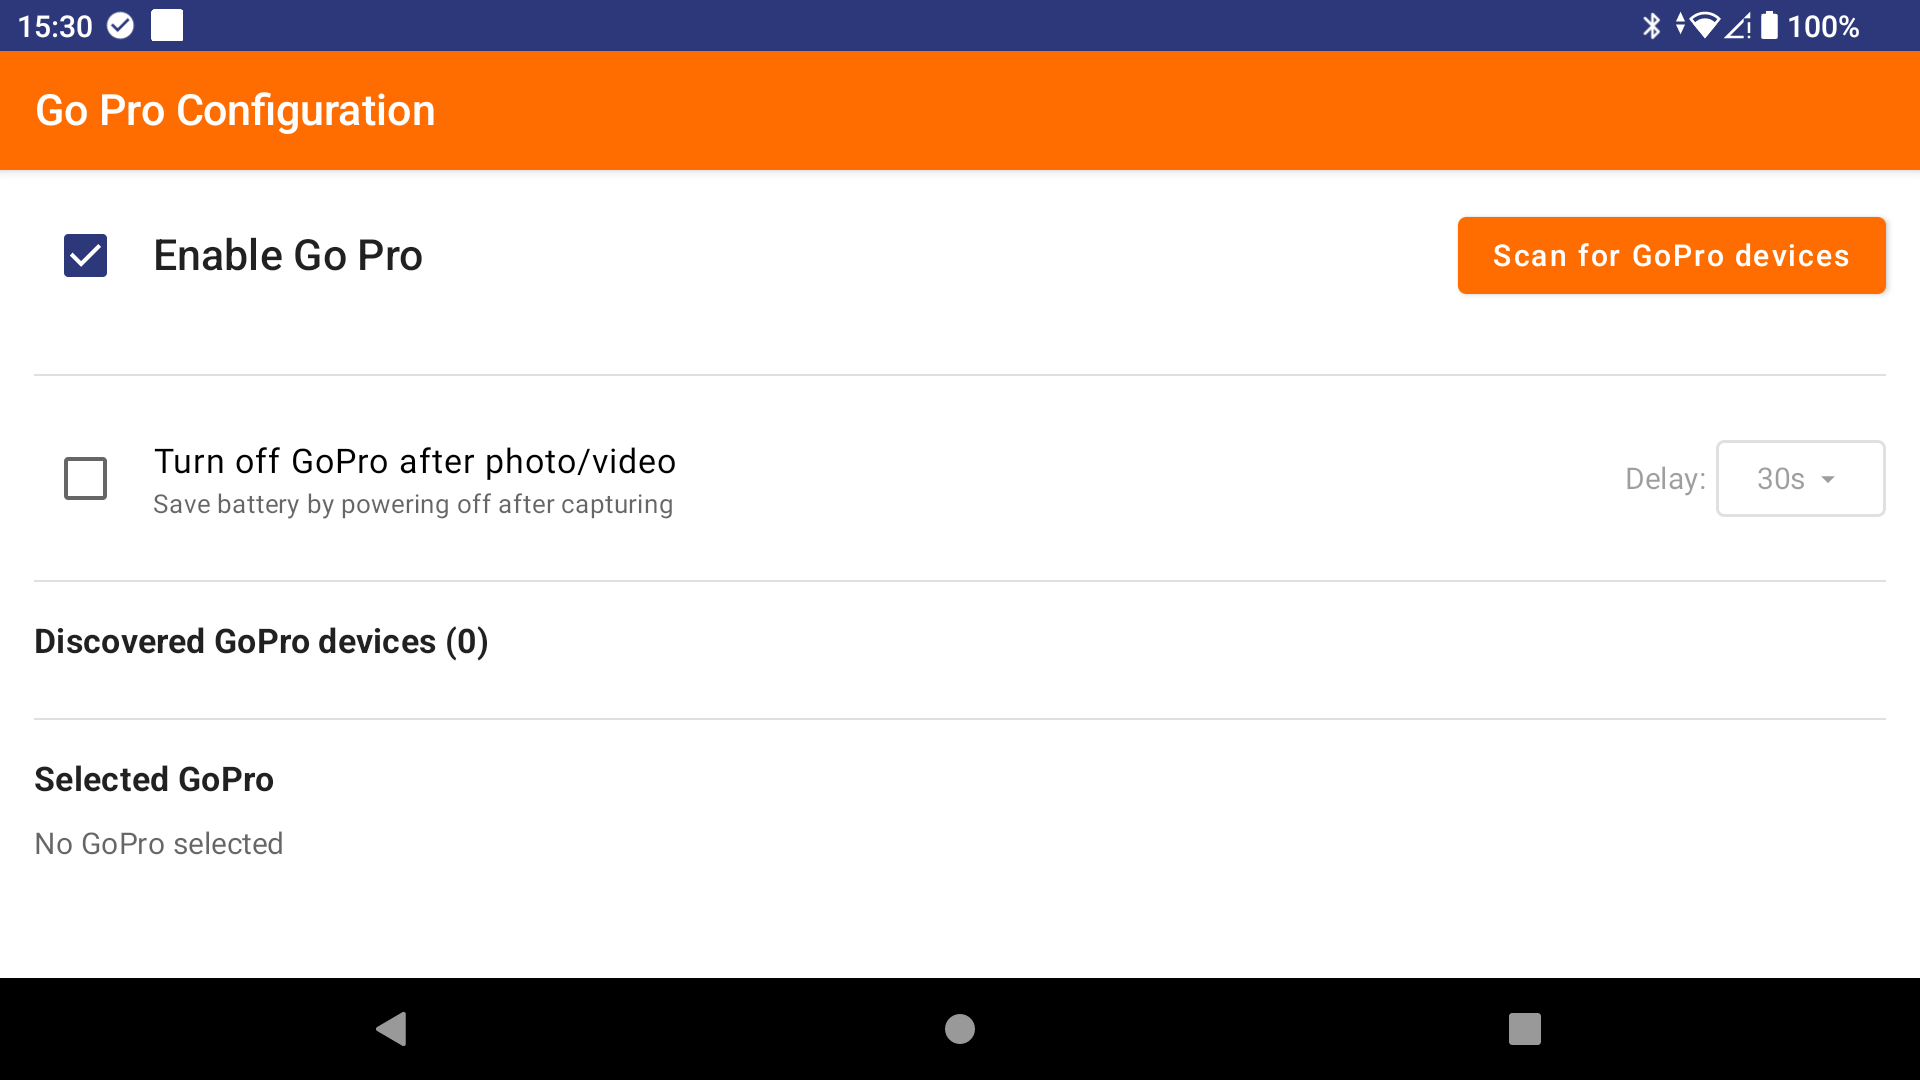
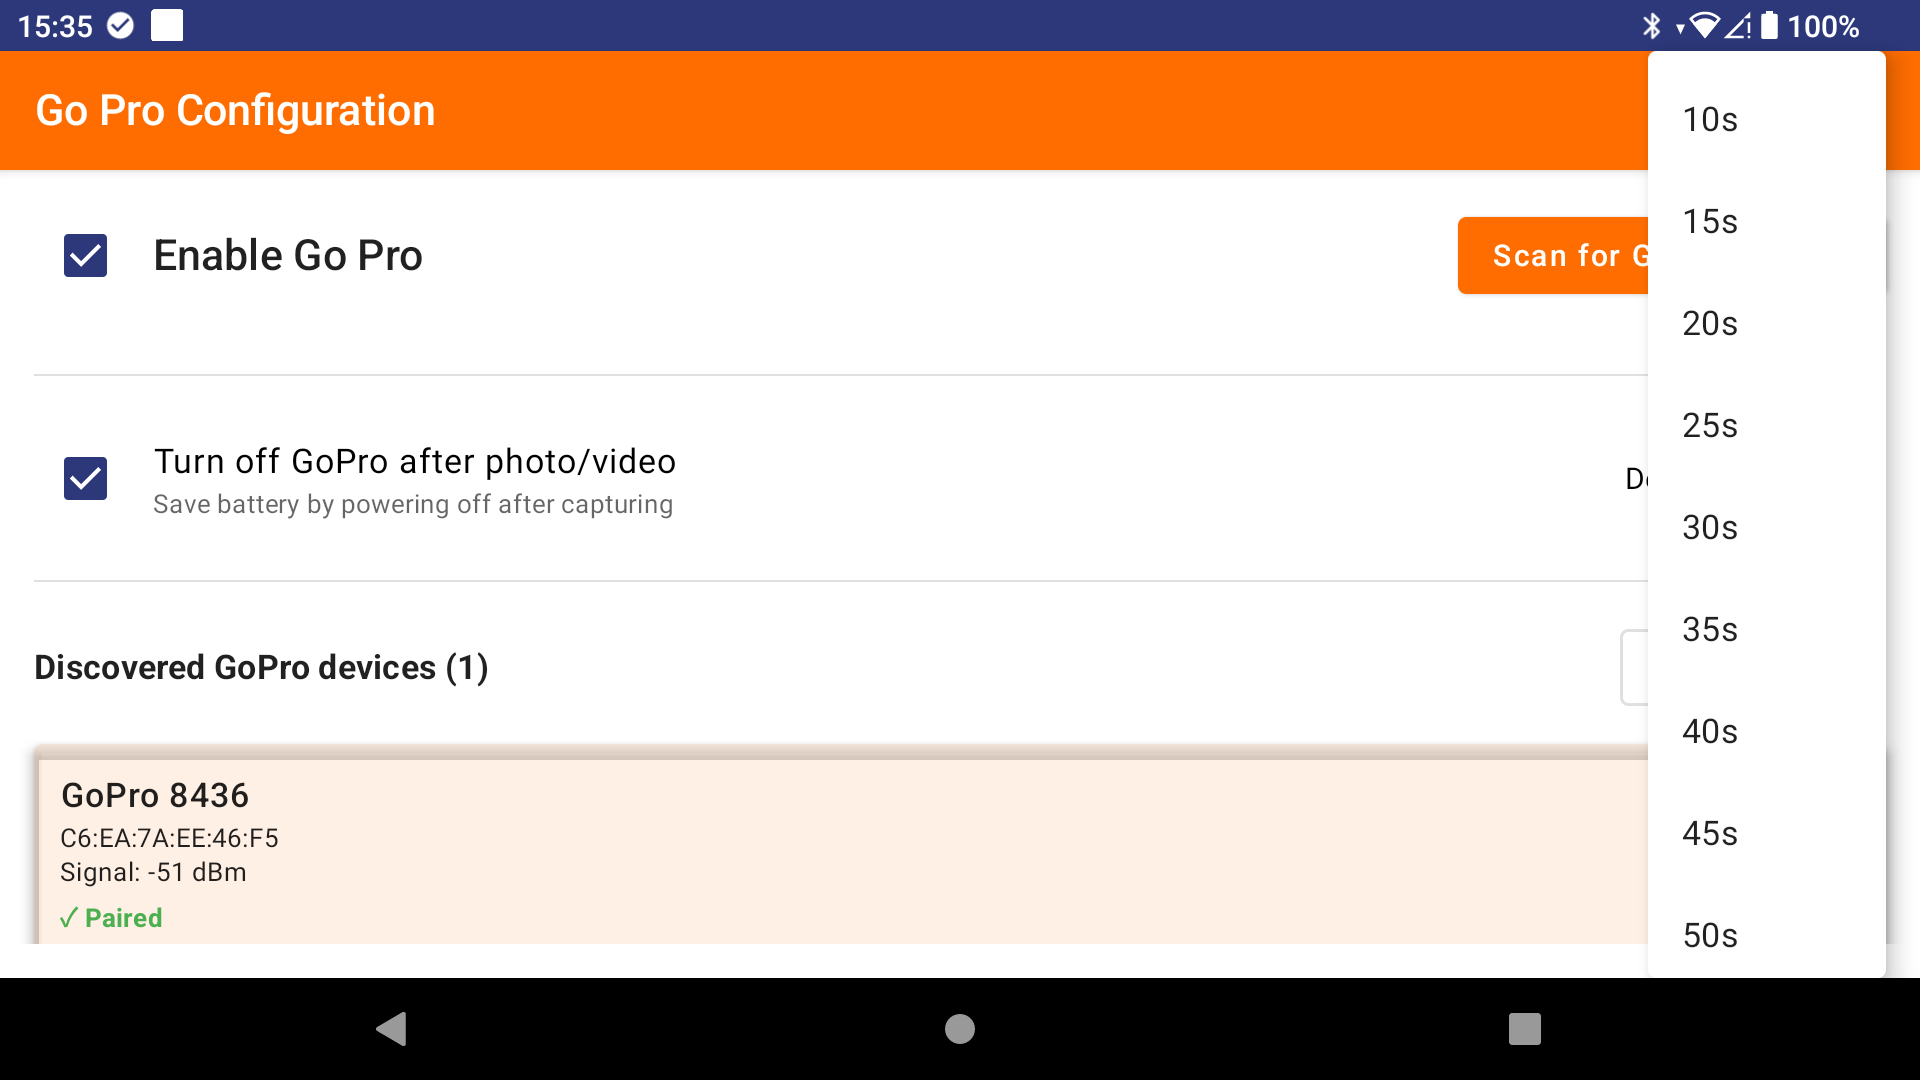
- Enable GoPro: Open AIR³ XCT Addon, go to Settings, and click on “Go Pro Configuration button”. Enable the GoPro feature using the checkbox.
- Enable Bluetooth: If Bluetooth is not enabled, the app will prompt you to enable it.

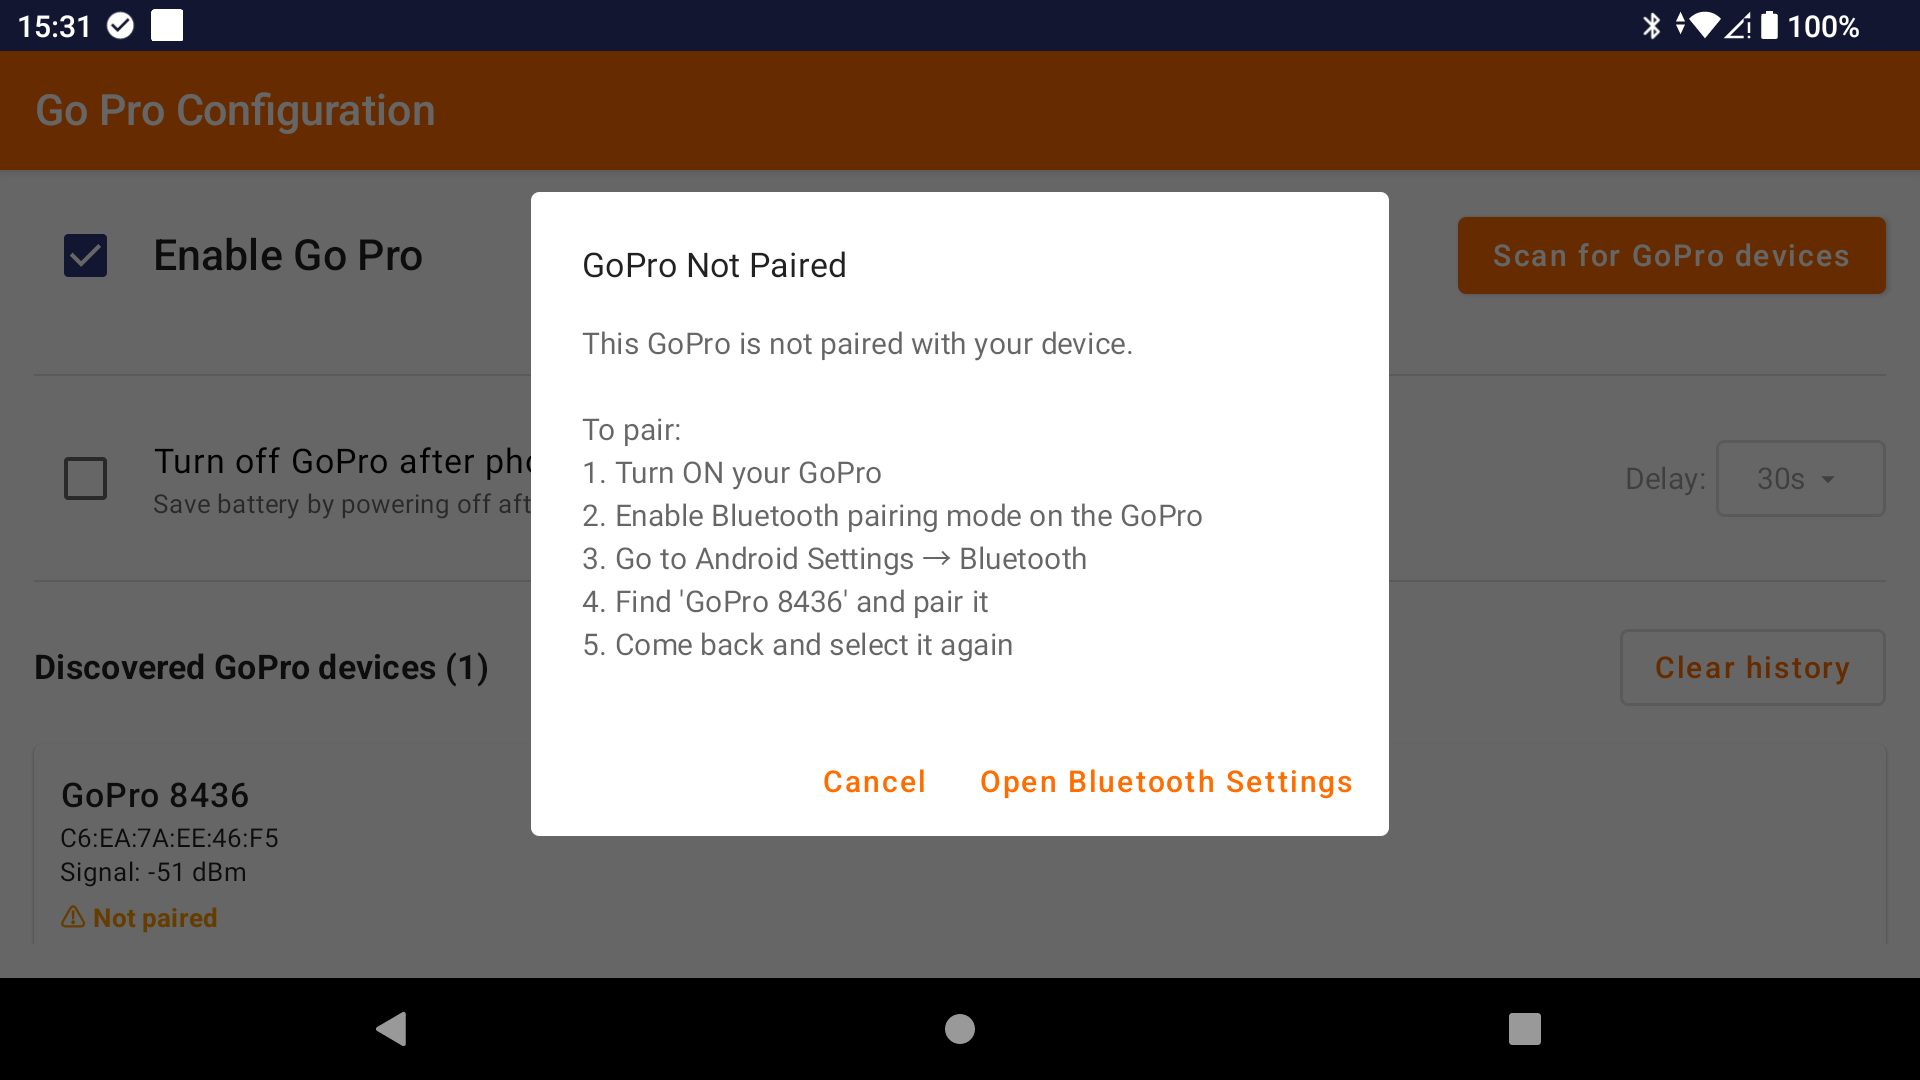
- Pair your GoPro: If not already done, pair your GoPro with your AIR³ device through Android Bluetooth settings. The app will guide you to the Bluetooth settings if your camera is not paired. Make sure your camera is in paring mode before starting the scan.
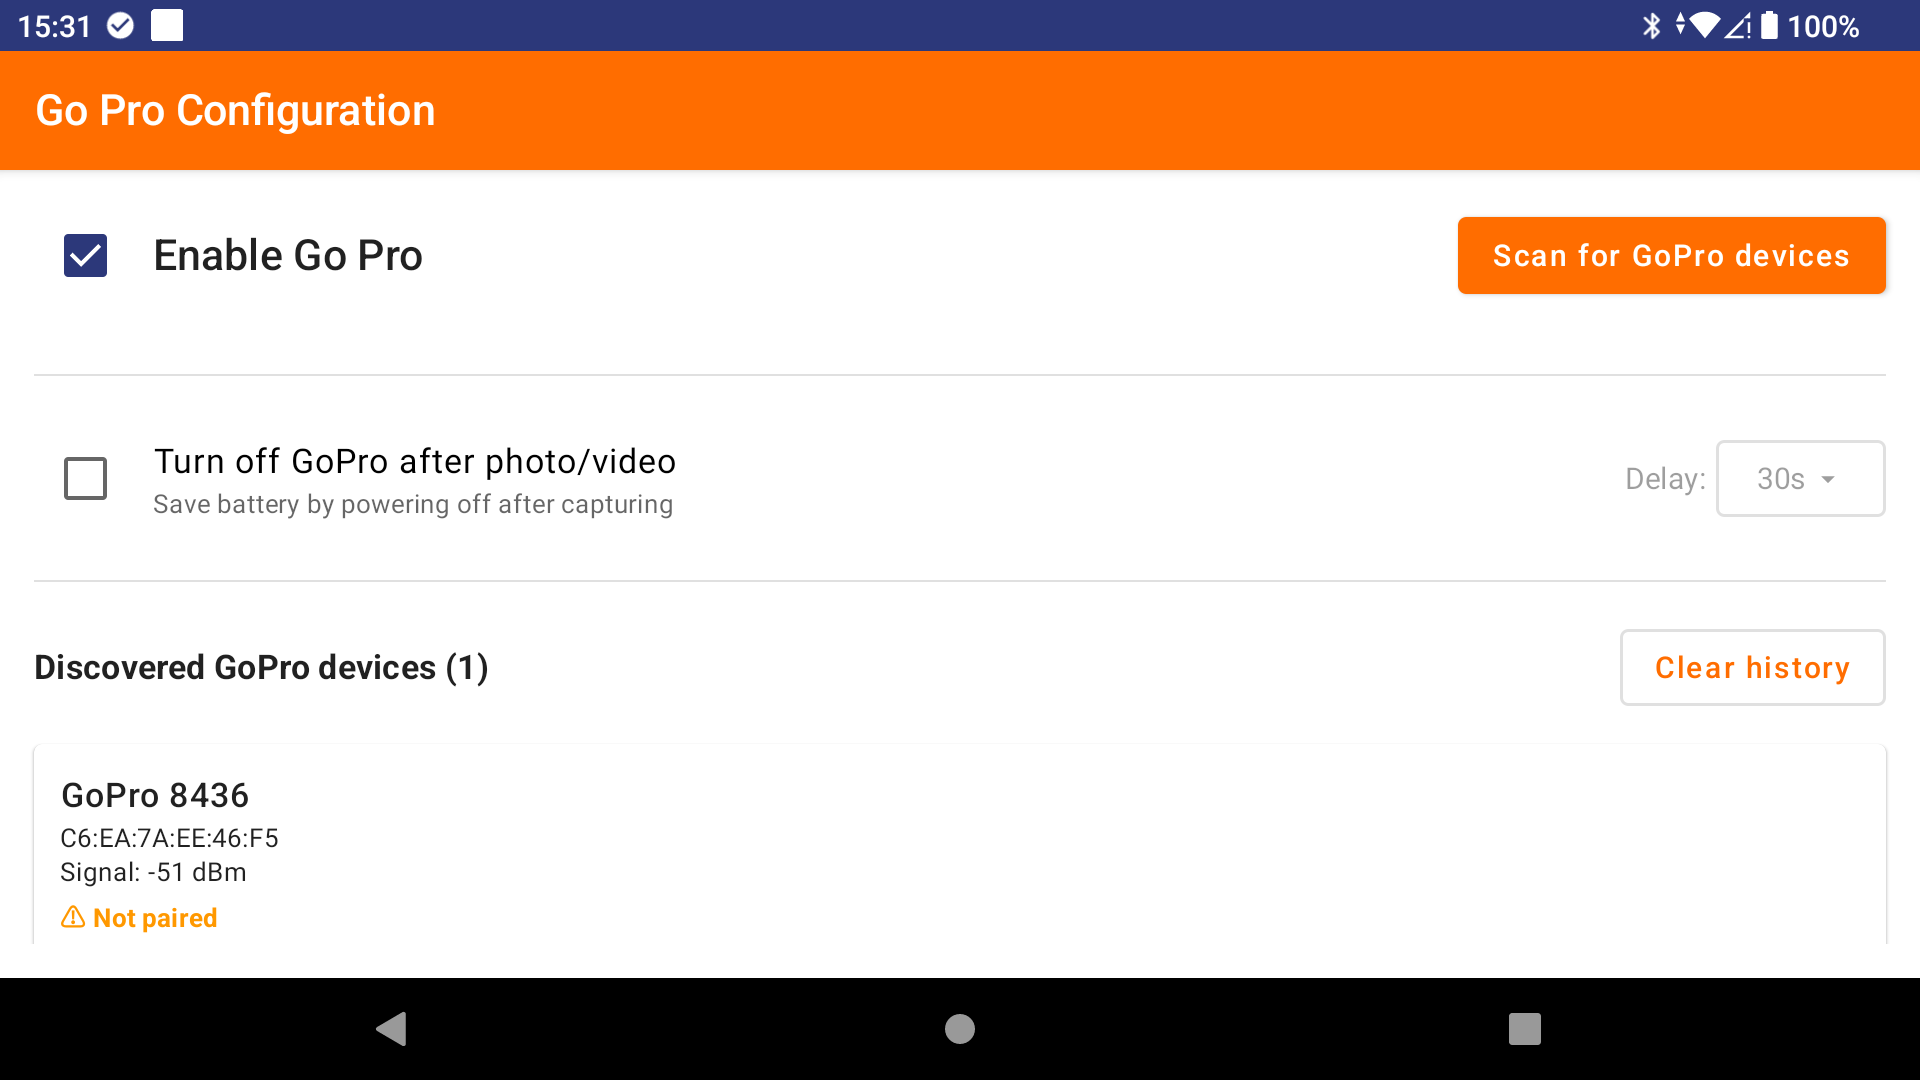
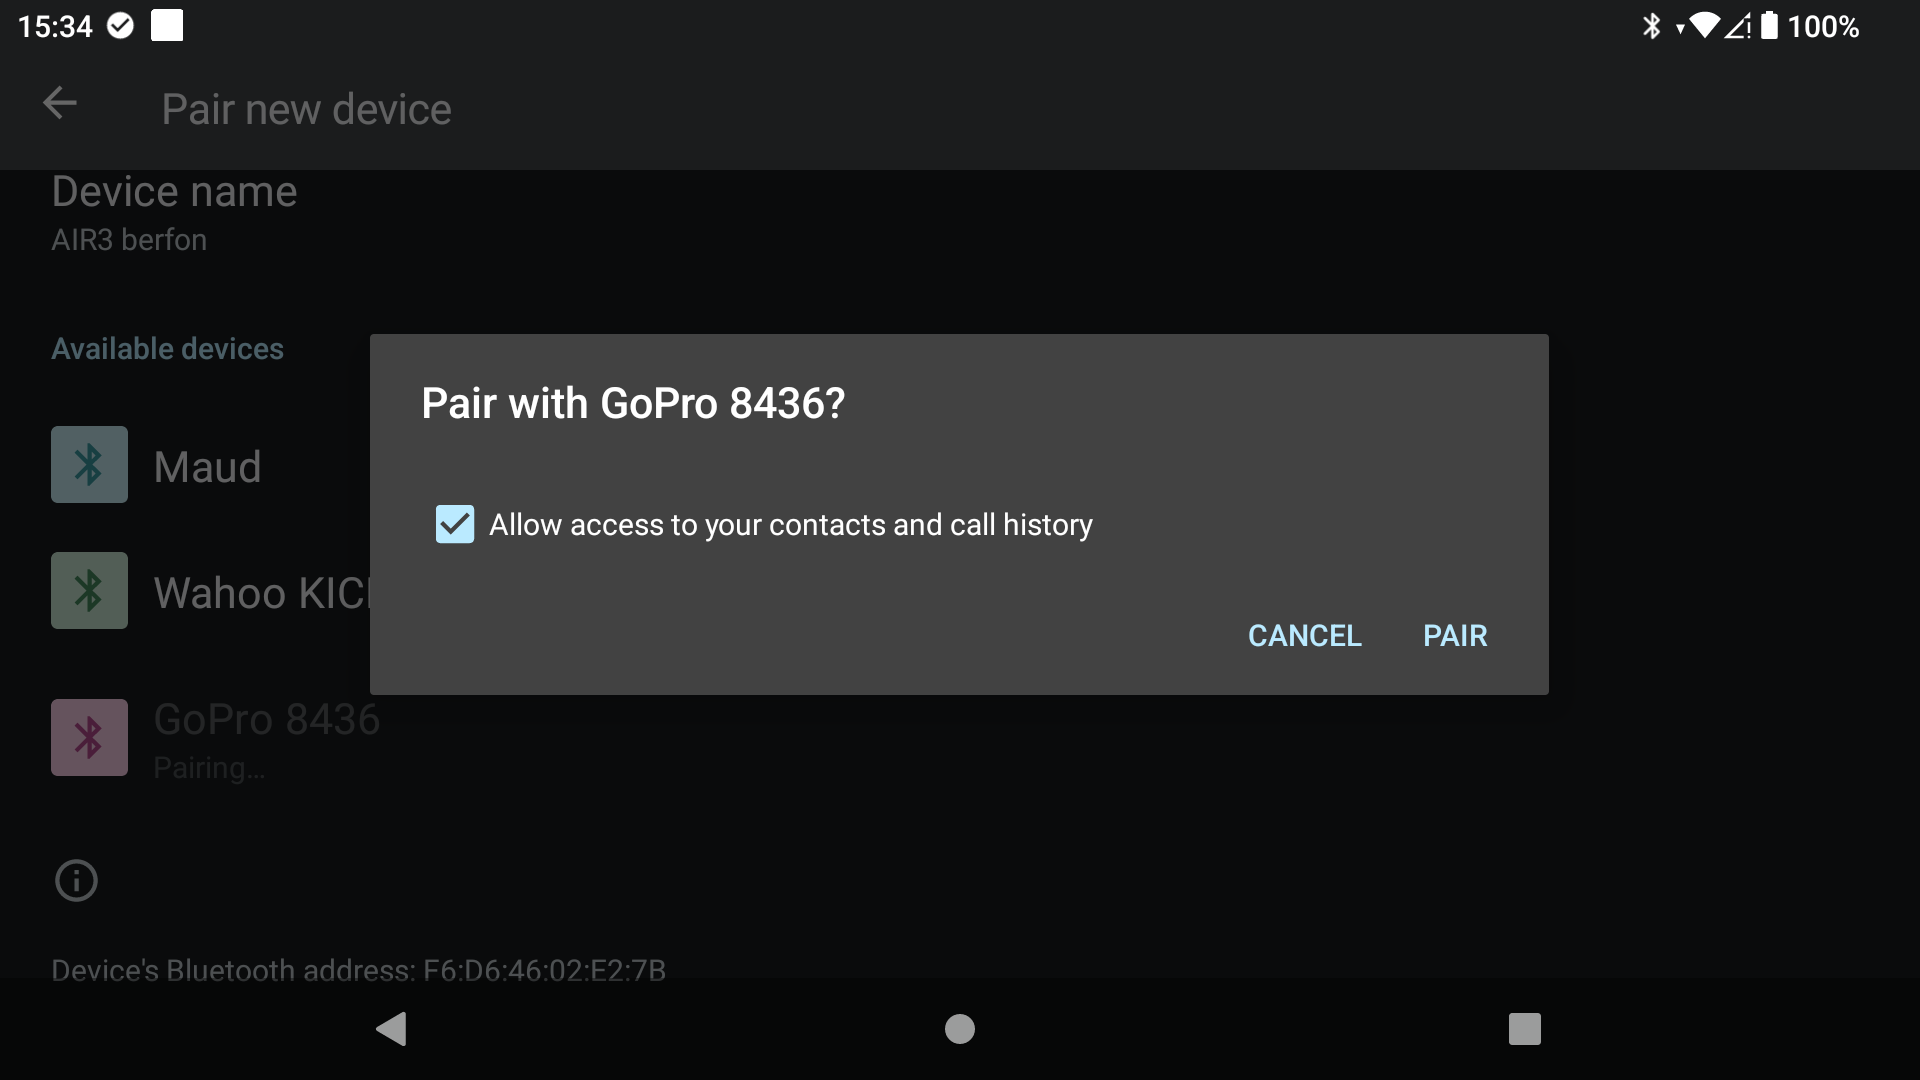

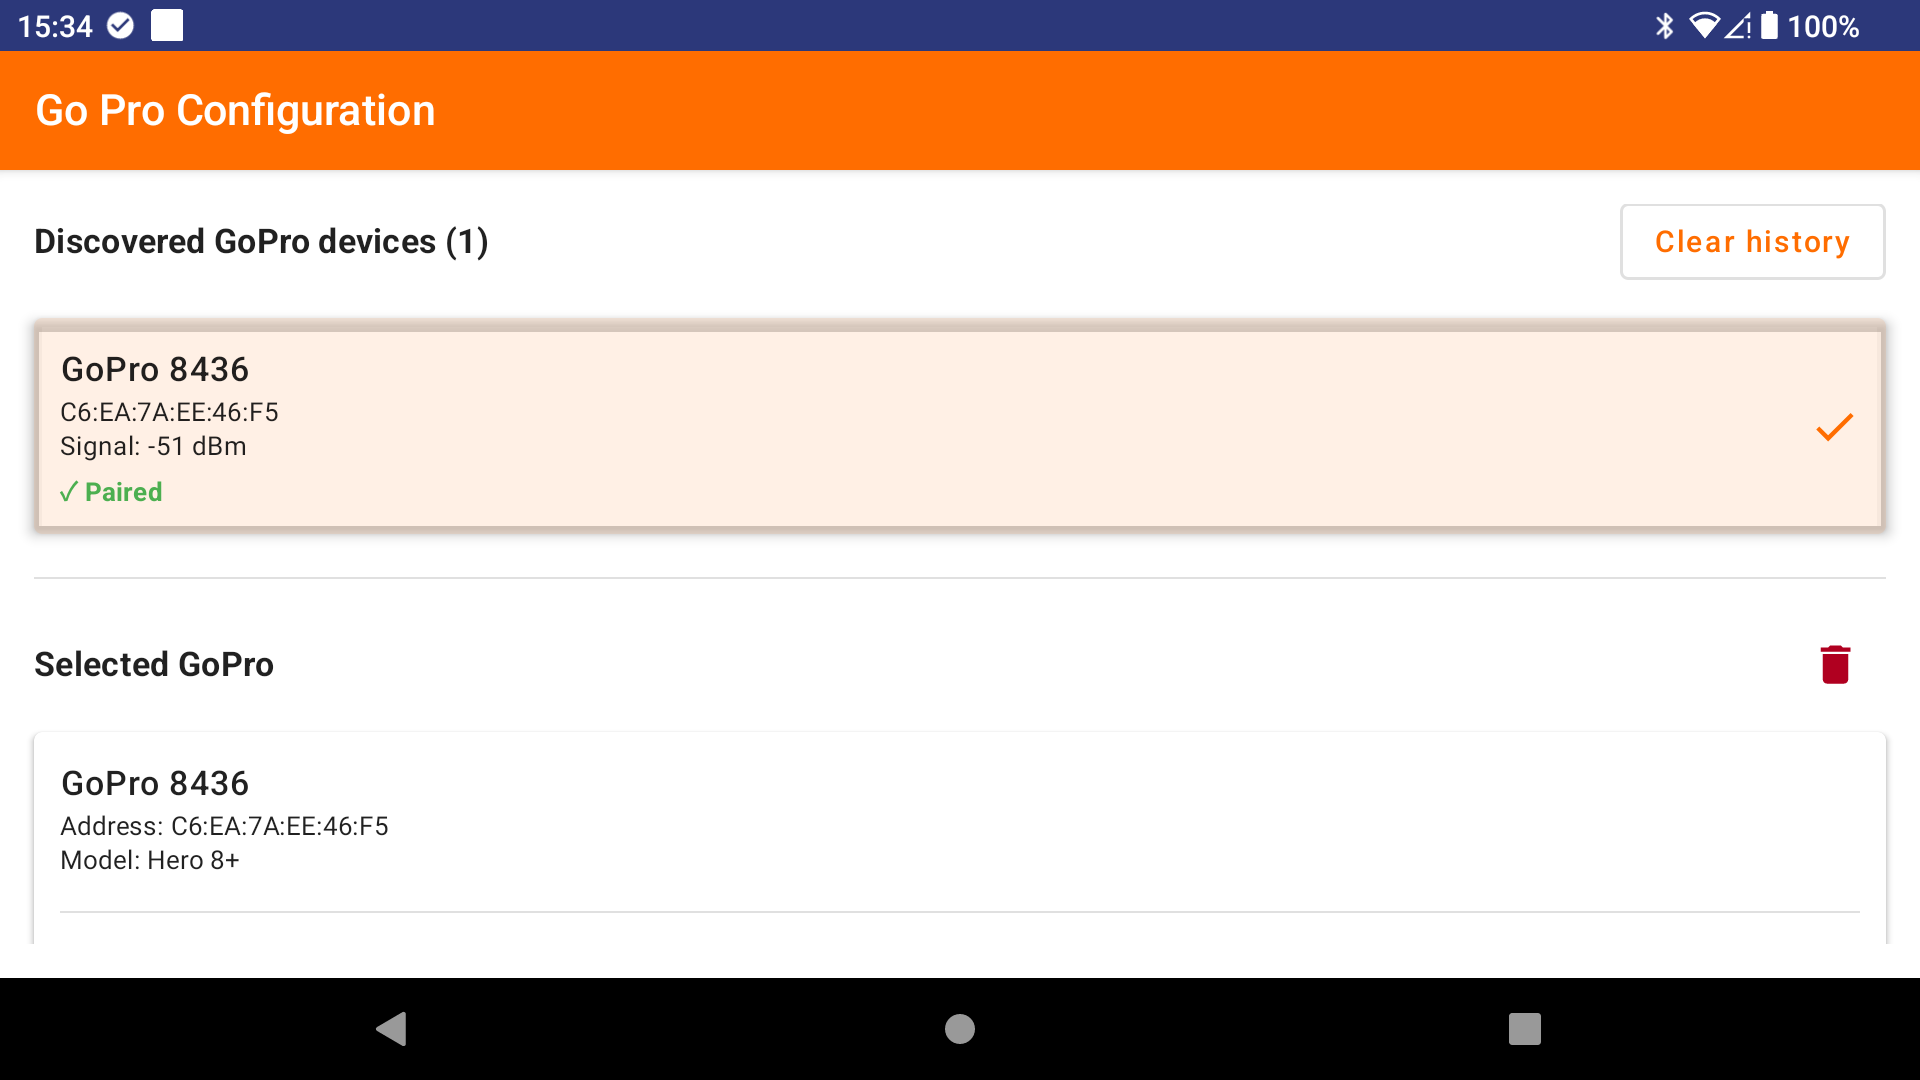
- Scan and select your camera: Click the “Scan for GoPro devices” button and select your GoPro from the list of discovered devices.
- Configure for older cameras (Hero 5/6/7 only): If you have a Hero 5, 6, or 7, enable the “Force old protocol” checkbox for proper compatibility.
- Power management (optional): You can enable the automatic power-off feature to save battery. When enabled, the GoPro will automatically turn off after a configurable delay (10-120 seconds) following a stop recording command or after taking a photo.
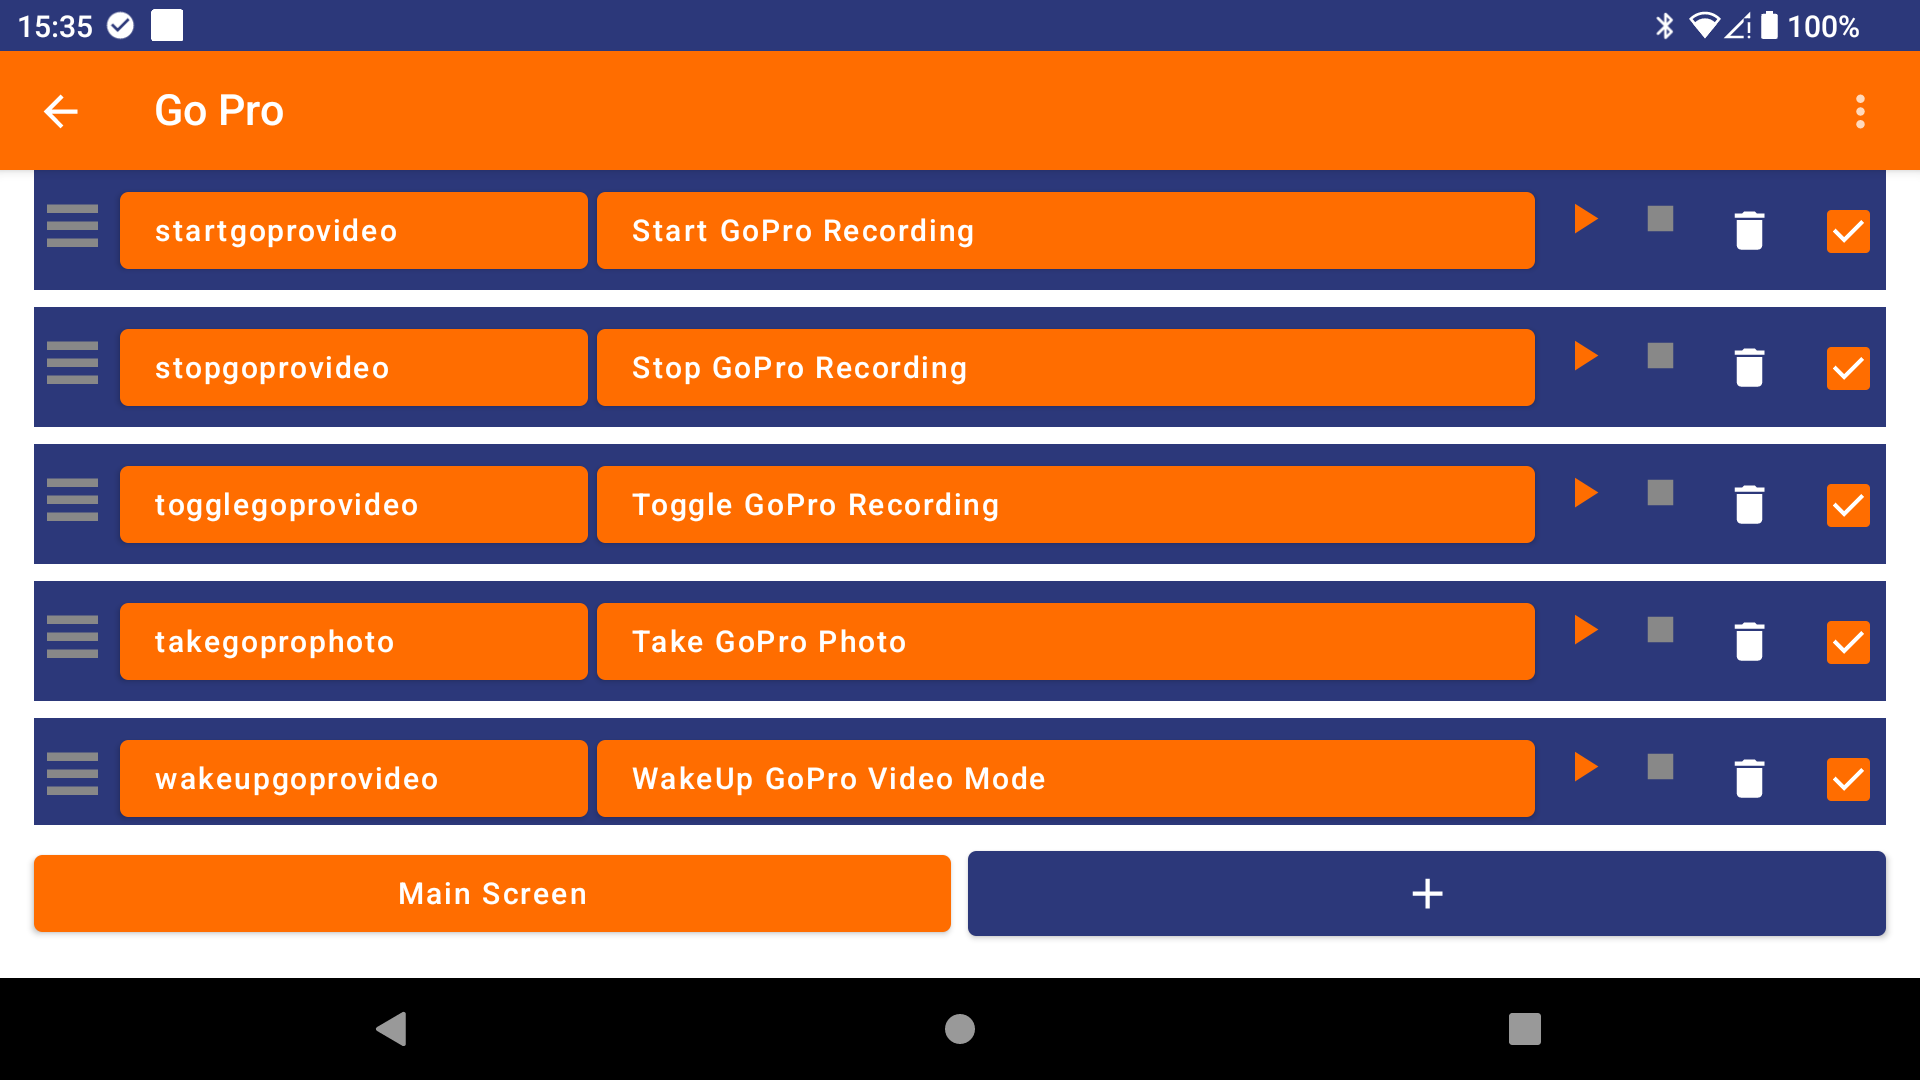
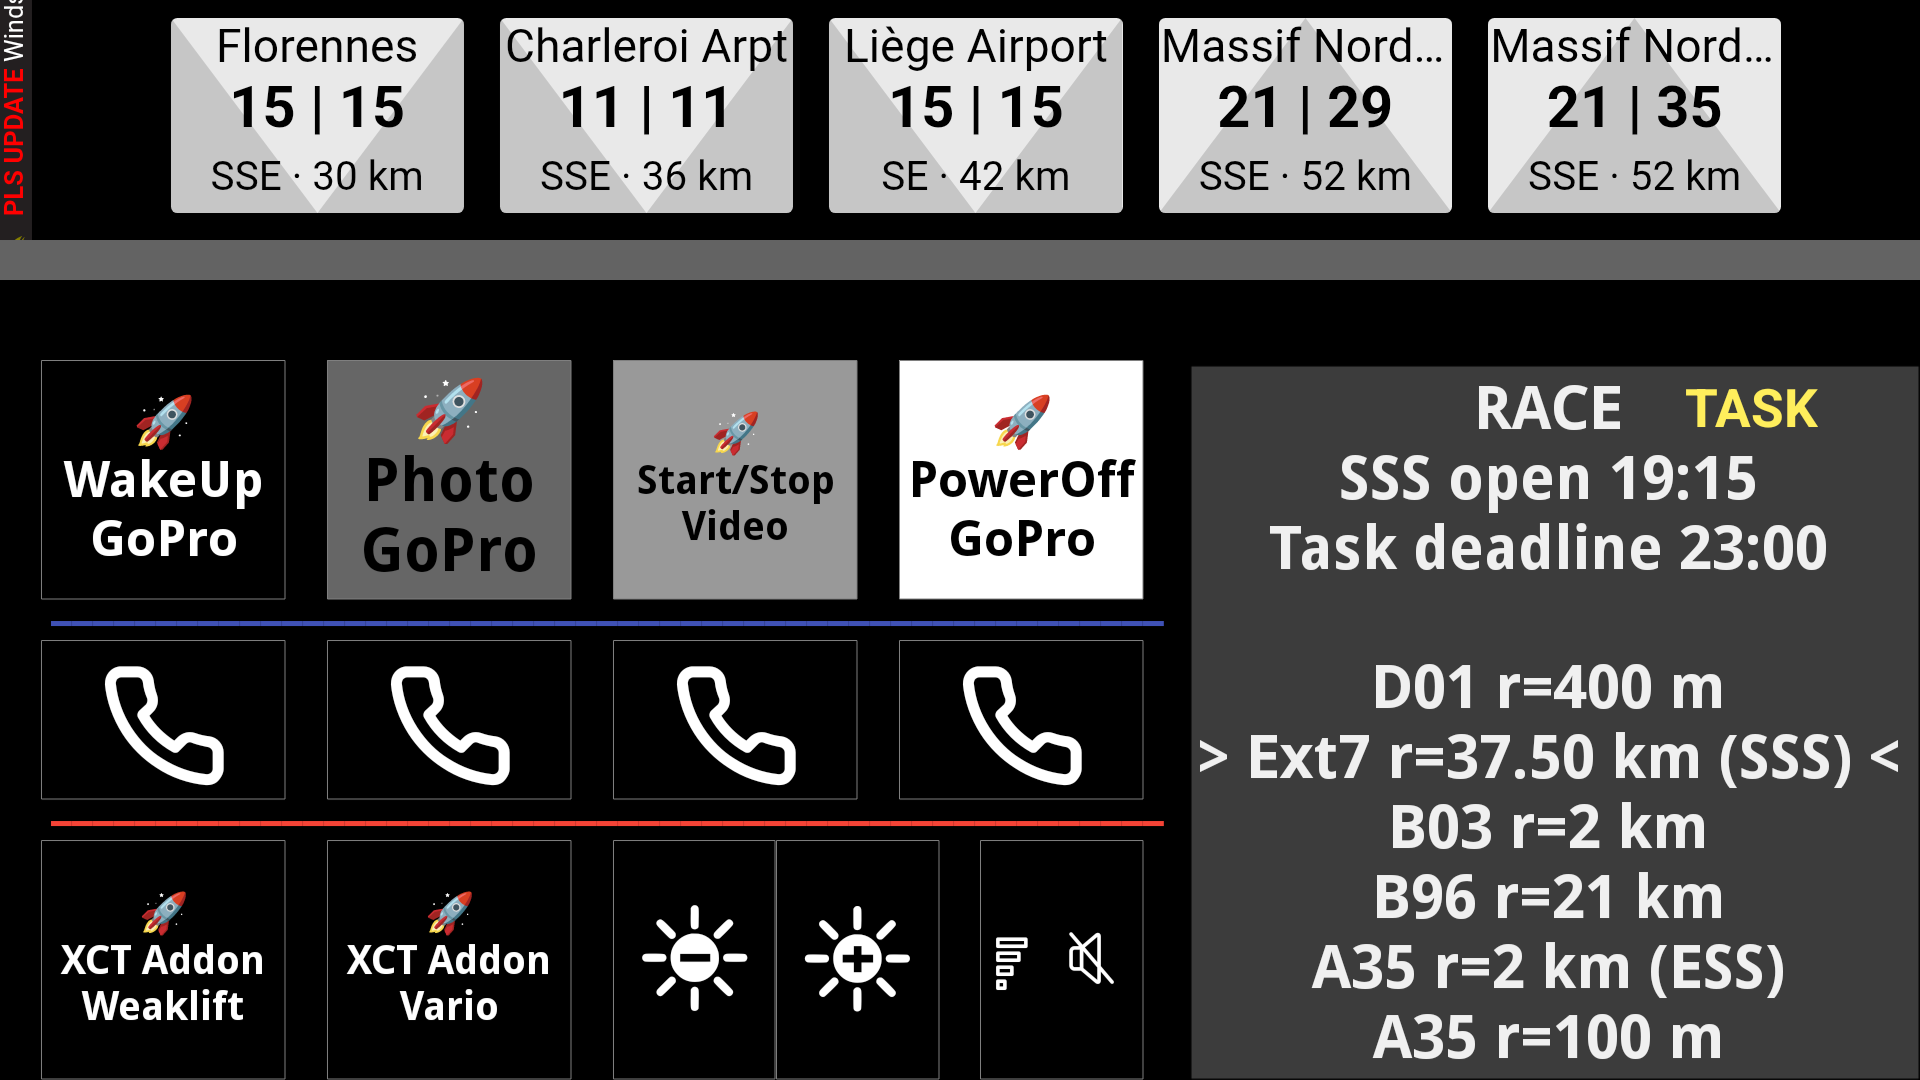
- Check automation rules: Go back to the main interface and navigate to the “GoPro” group to see the created automation rules. Seven rules are automatically created for different GoPro actions.
- Test your setup: Click the play button (▶) next to each action to test it. Important: If your camera has been turned off for a long time, you will need to manually power it on first. After the initial manual start, the camera should wake up automatically when you trigger photo or video commands.
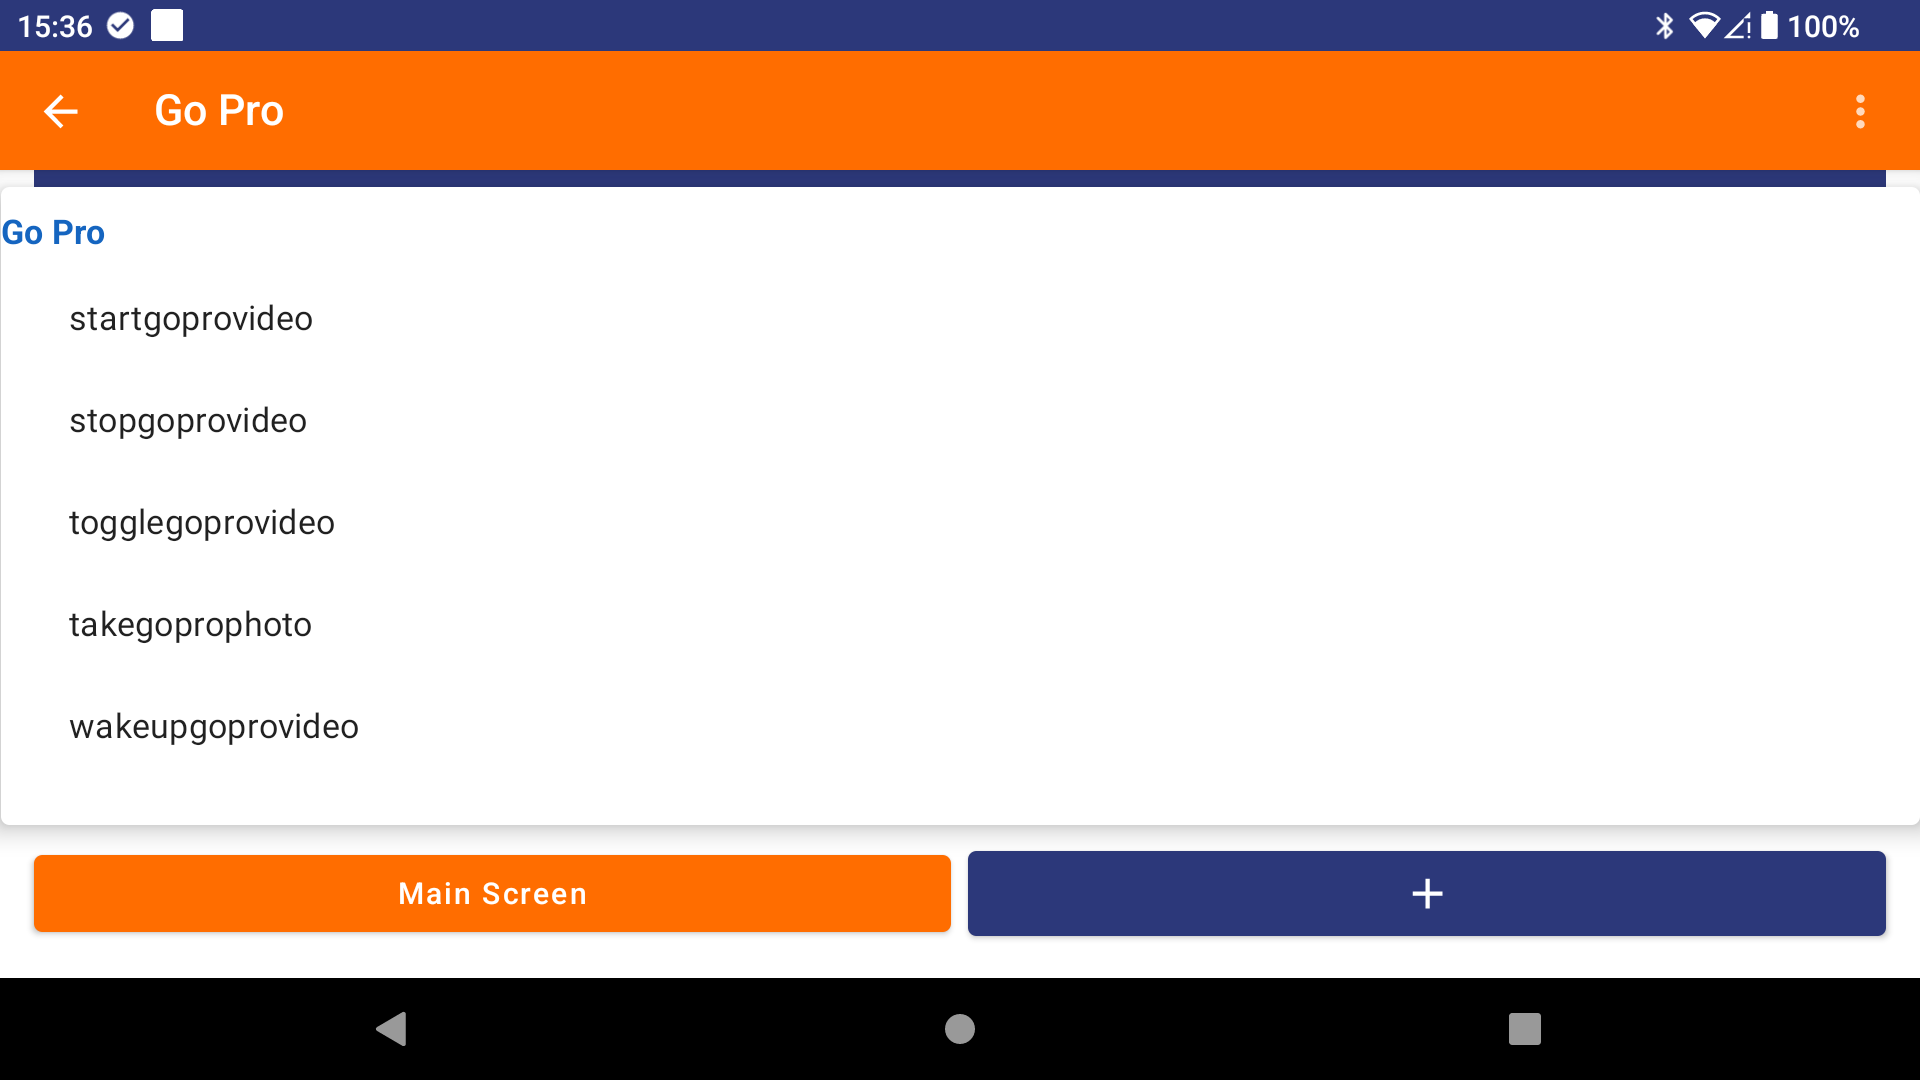
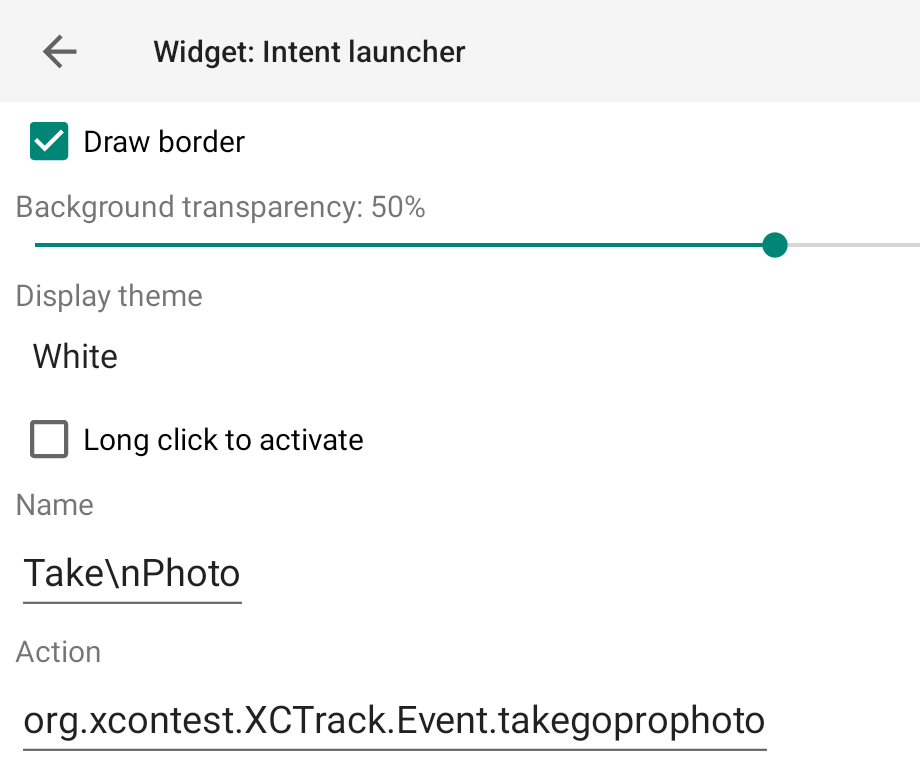
- Create XCTrack widgets: Go to XCTrack and create widgets using the “Launch intent” widget type. Configure each widget with the exact event names created by AIR³ XCT Addon:
startgoprovideo– Start video recordingstopgoprovideo– Stop video recordingtogglegoprovideo– Toggle video recording (start/stop)takegoprophoto– Take a photowakeupgoprovideo– Wake up GoPro in video modewakeupgoprophoto– Wake up GoPro in photo modepoweroffgopro– Power off GoPro
Tip: It is advised to remove the long click action in the widget configuration.
- Final test: Once the widgets are created, test each one by clicking on them to ensure proper communication with your GoPro.
You are ready to go! Your GoPro will now respond to XCTrack events and widget triggers automatically during your flights.
Zello configuration
Zello is a convenient way to communicate with others, similar to radio communication, except it is internet-based.
With AIR³ XCT Addon, you can communicate through Zello using either a XCTrack widget or a button (physical or with a Bluetooth remote control).
Once you have installed Zello and created a Zello account, test first your Zello setup before configuring XCTrack and AIR³ XCT Addon for Zello.
IMPORTANT NOTE: You need to set Zello’s battery optimisation to ‘Unrestricted’ so that it keeps running in the background and can receive communications sent by XCTrack through the AIR³ XCT add-on.
Go to Settings > Apps > Zello > Battery to check this.
To communicate with Zello, you need to have defined the channel or the person you want to talk to. Set it as default to automatically load Zello with this conversation and not forget to start the communication channel you want to talk to.
Once Zello has been set up, go to Settings and click on the Zello Configuration button.
Enabling Zello creates two new automation rules: one triggered by clicking an XCTrack widget (based on an XCTrack intent launcher widget configured with ‘Zello’ as the event name), and one triggered by an XCTrack button intent (based on a hardware button click caught by XCTrack and configured in the key bindings/launch Android intent). Both triggers are combined with the Zello PTT feature.
Select the Expert-Zello profile in AIR³ Manager to automatically generate Zello-related custom widgets.


If you want to be able to use Zello through a BT button in addition or instead of a widget, in XCTrack Preferences/Key bindings, select Launch android intent. Click on the physical button you want to use.
XCTrack will catch this button event and will share it with AIR³ XCT addon.


Clicking on the play button in the automation rule will send an initial call to Zello.
At this stage, Zello should not work.
Then, go to Zello Options. Click on Settings, then Push to Talk buttons.
A new button called ‘Hardware button’ should now be visible (created by clicking on the play button in the automation rule with Zello PTT defined as the task).
Click on the ‘Hardware button’. Change the ‘Push to talk’ button action from ‘Hold to talk’ to ‘Toggle’.
You can now go back to the AIR³ XCT add-on and test the play button again. This time, you should hear the ascending sound indicating the start of your message, and clicking a second time should produce the descending sound indicating the end of your message.
If you do not click a second time within the timeout delay, the app will do it for you.
Note that you can also enable or disable the timeout through a special widget, as defined in the Expert-Zello profile of AIR³ Manager.
Once this is working through the play button in the AIR³ XCT add-on, you can test it directly in XCTrack, either with the Zello widget or the button you have defined.


Thanks to the AIR³ Manager settings, make sure to automatically launch the AIR³ XCT Add-On and Zello on boot, so that everything will work smoothly every time the unit is started.

It is possible to use a Bluetooth headset with Zello while still using the AIR³ speakers for audio output.
Once your Bluetooth headset is connected, go to Android Settings > Sound & vibration on your AIR³, click on ‘Play AIR³ XCT Add-on’ and select ‘This phone’.
Then open Zello and select the group you want to use. In the bottom left corner, click on ‘Audio device’ and select ‘Bluetooth’.
When talking through Zello, it is recommended that you turn off the Vario sound temporarily to avoid interference.


Telegram configuration
In order to use the telegram tasks (Send your position, send a message to a telegram group, sendTelegram message and position), the pilot name must be filled in. Once you have added your pilot name, you will have the opportunity to proceed with the Telegram authentication. Follow the steps and send /start to the Telegram bot to finish the authentication.
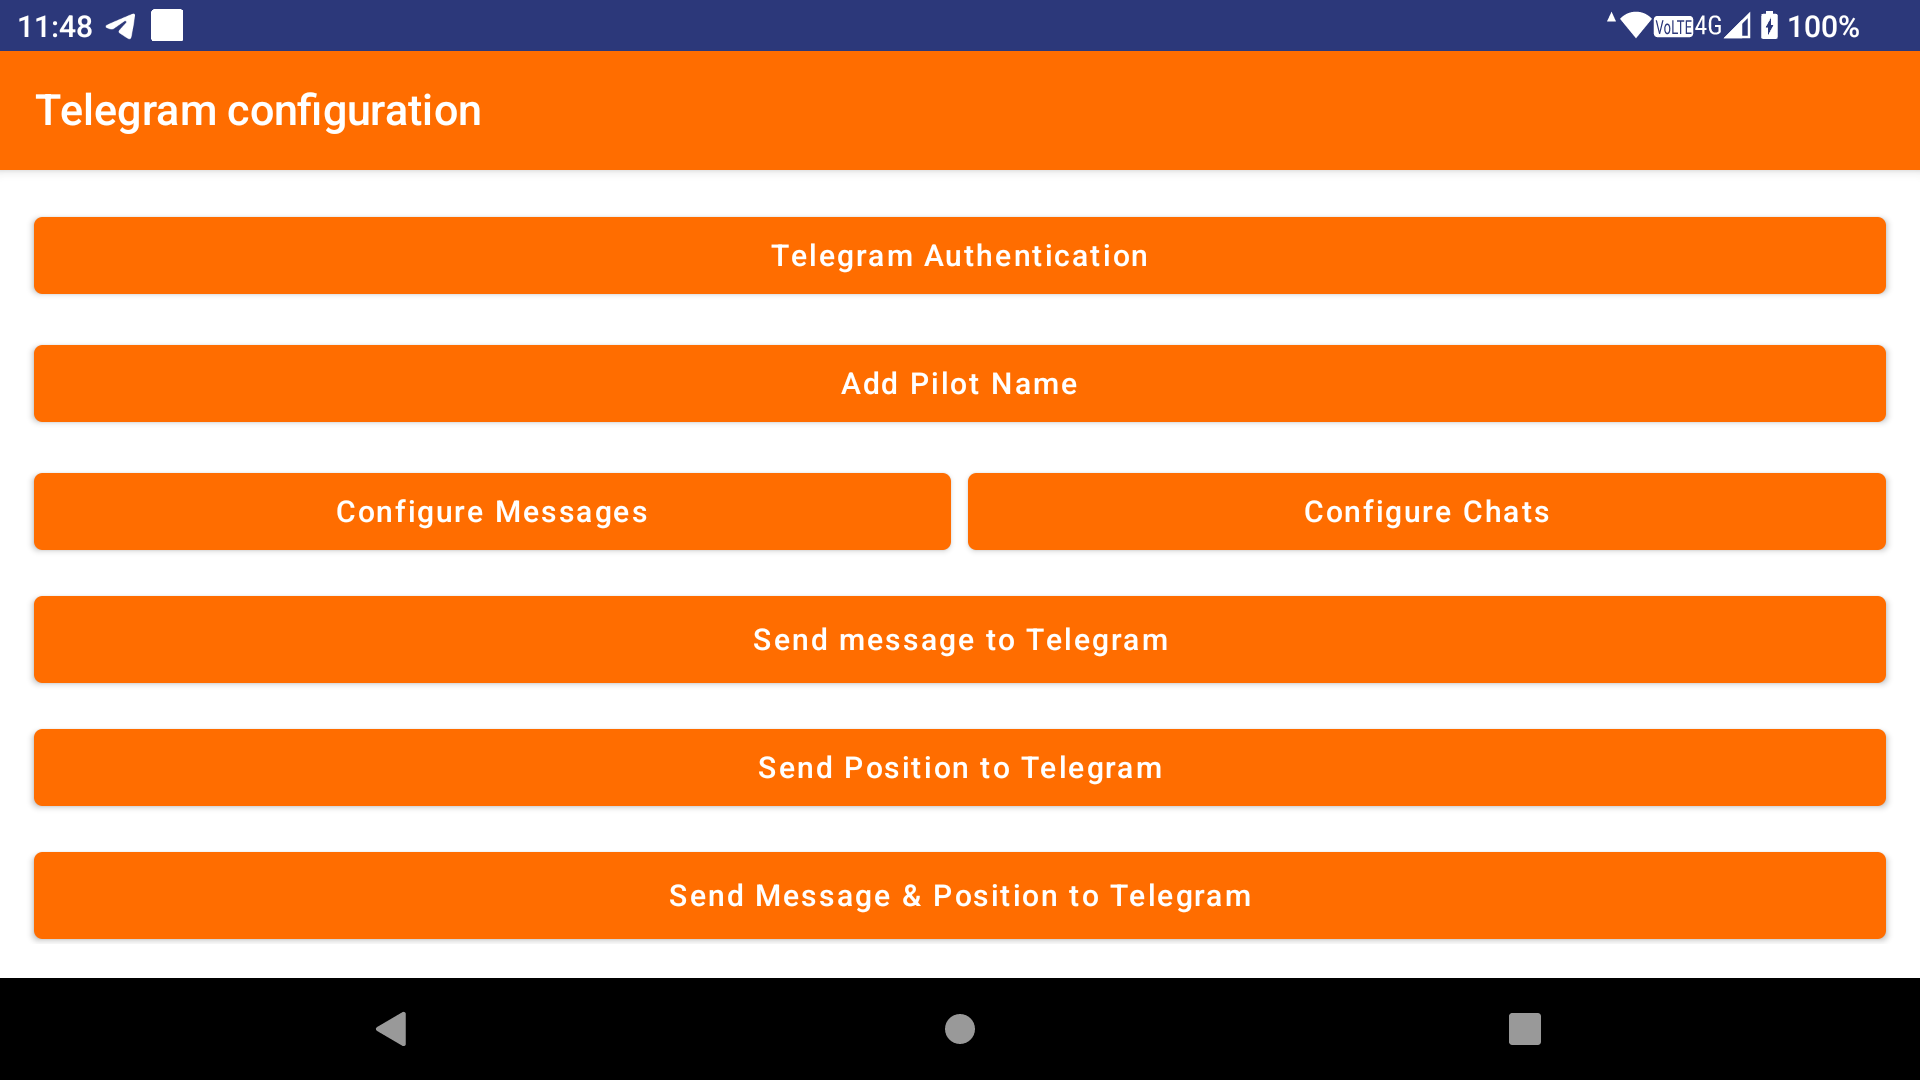


Once you have finished the authentication, you can add or modify a message to send through Telegram. Read on to find out how to use predefined messages in Telegram tasks.
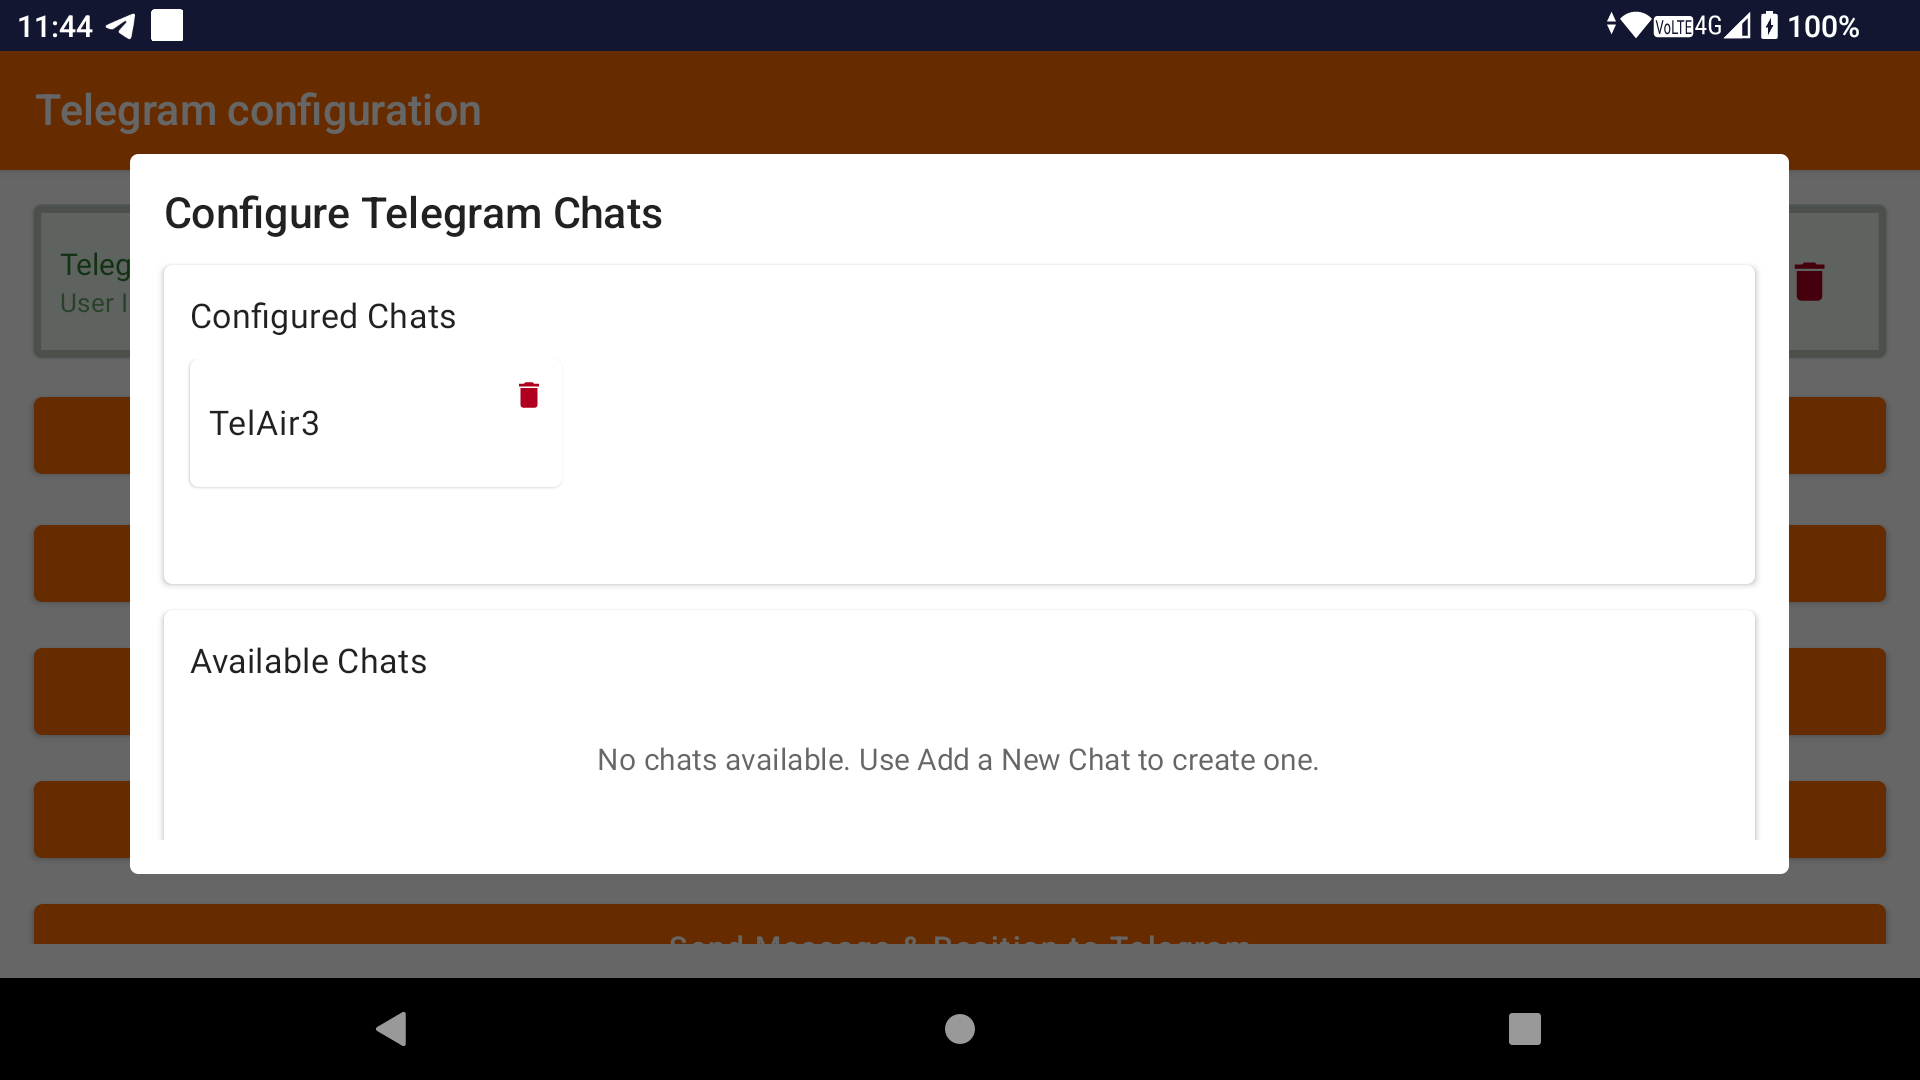
Before setting up a task to send a message, your location or both via Telegram, you will need to configure a chat with the Telegram bot and activate it.
Click on ‘Configure Chats’. Click on Add a New Chat.


If you have not yet added the bot to a chat, click ‘Add bot to chat’. Please note that you require admin permission for the Telegram group in order to add the bot.
Select the relevant chat and click on the ‘v’ in the top right corner to add the bot. Click on ‘Add Bot’.
Click on the ‘/’ on the right to list the commands, then click on ‘/start’.
If you only want to activate a chat that already has the bot, click on ‘Select chat with bot’. Select the relevant chat. Click on the ‘/’ on the right to list the commands, then click on ‘/start’.


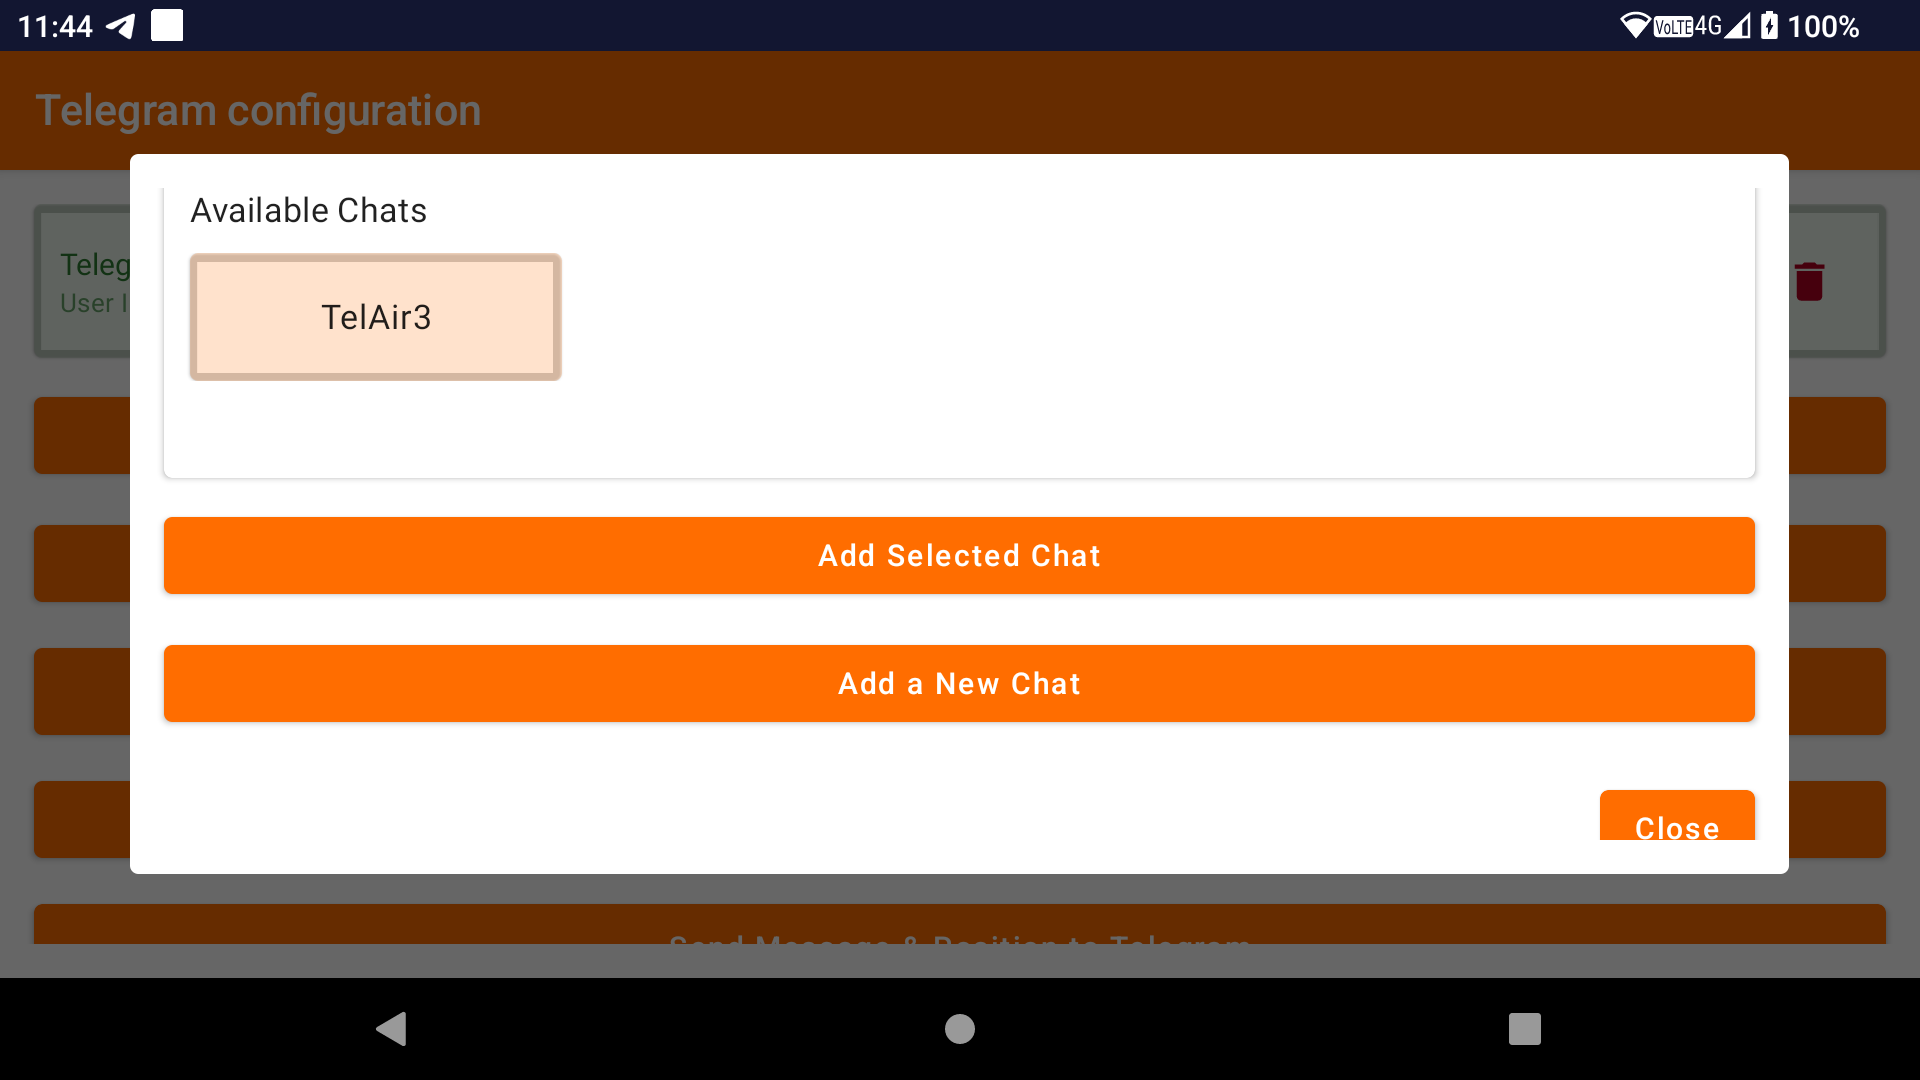
Once you return to the ‘Configure chats’ page, you will see the newly configured chat in the ‘Available chats’ list.
Select it by clicking on it, then click on ‘Add Selected Chat’. The chat will then appear in the ‘Configured Chats’ list. It is now available for selection in Telegram tasks.
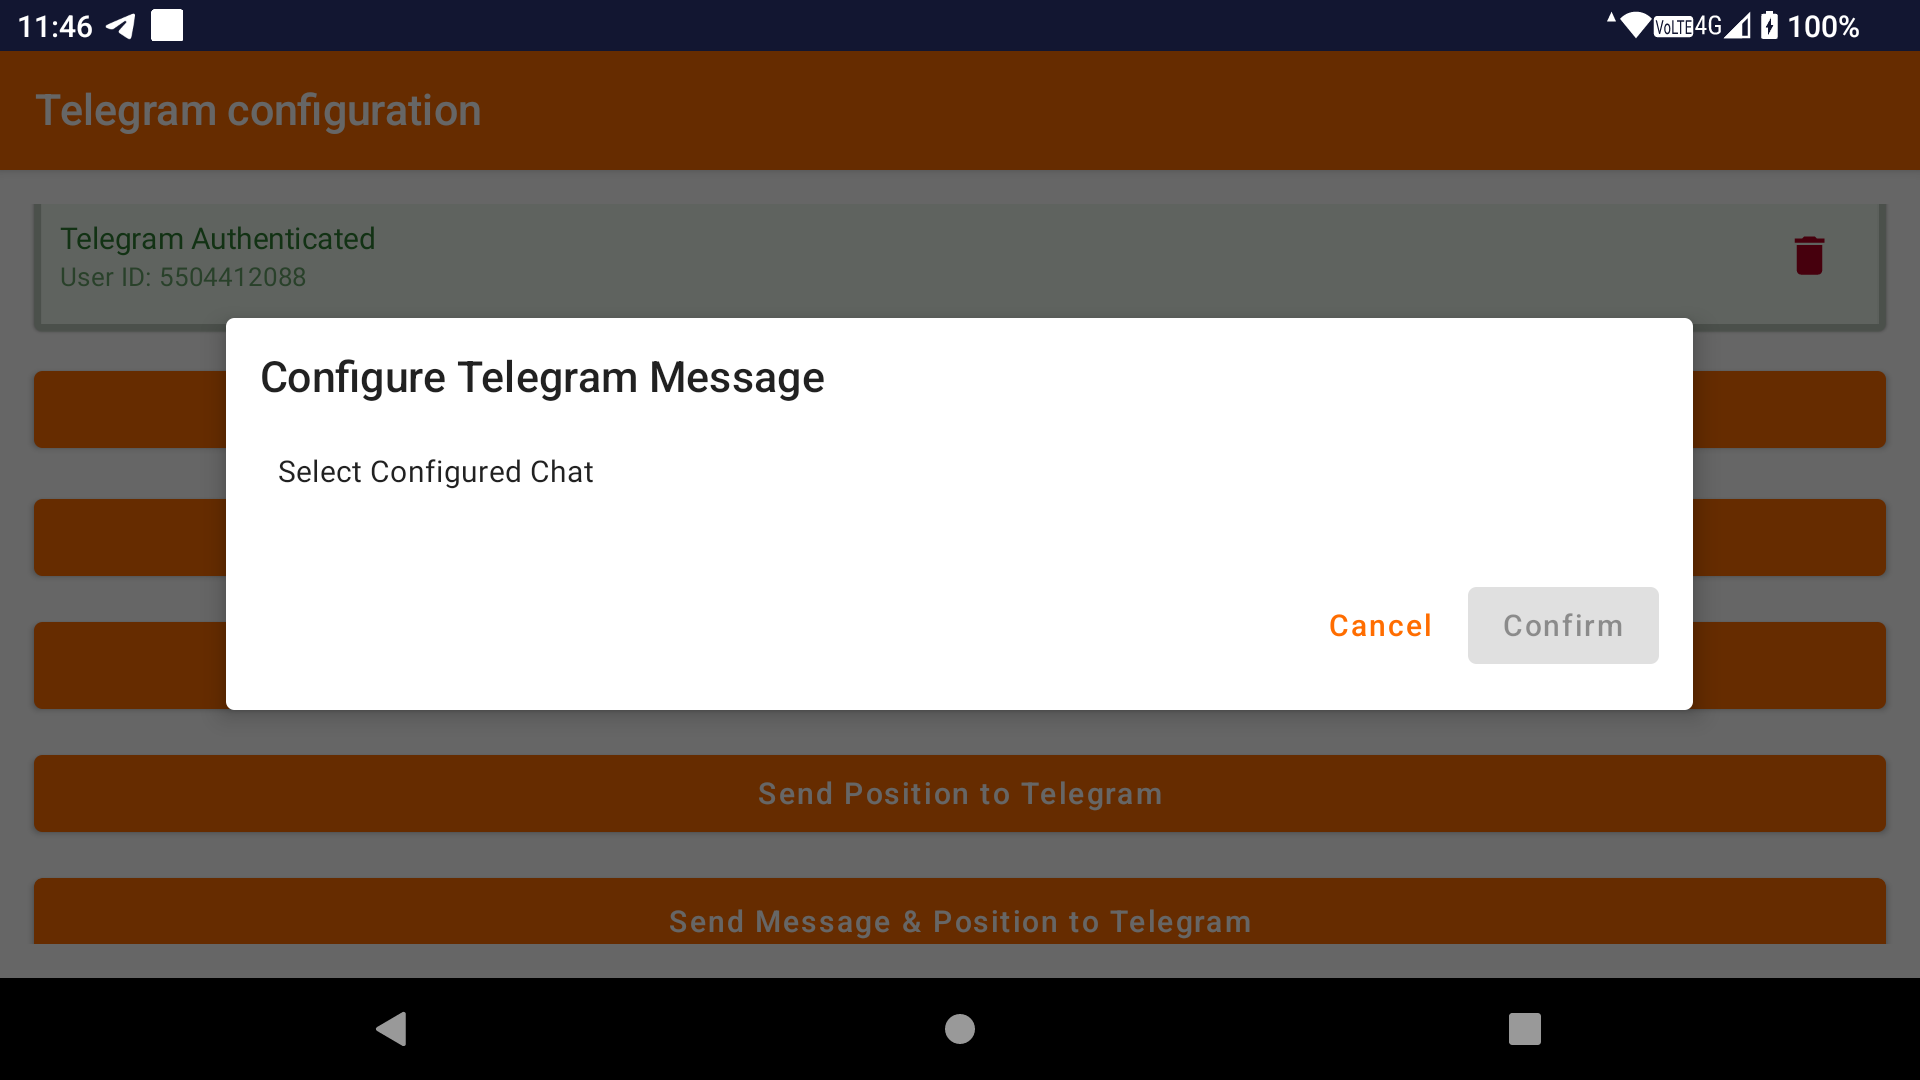
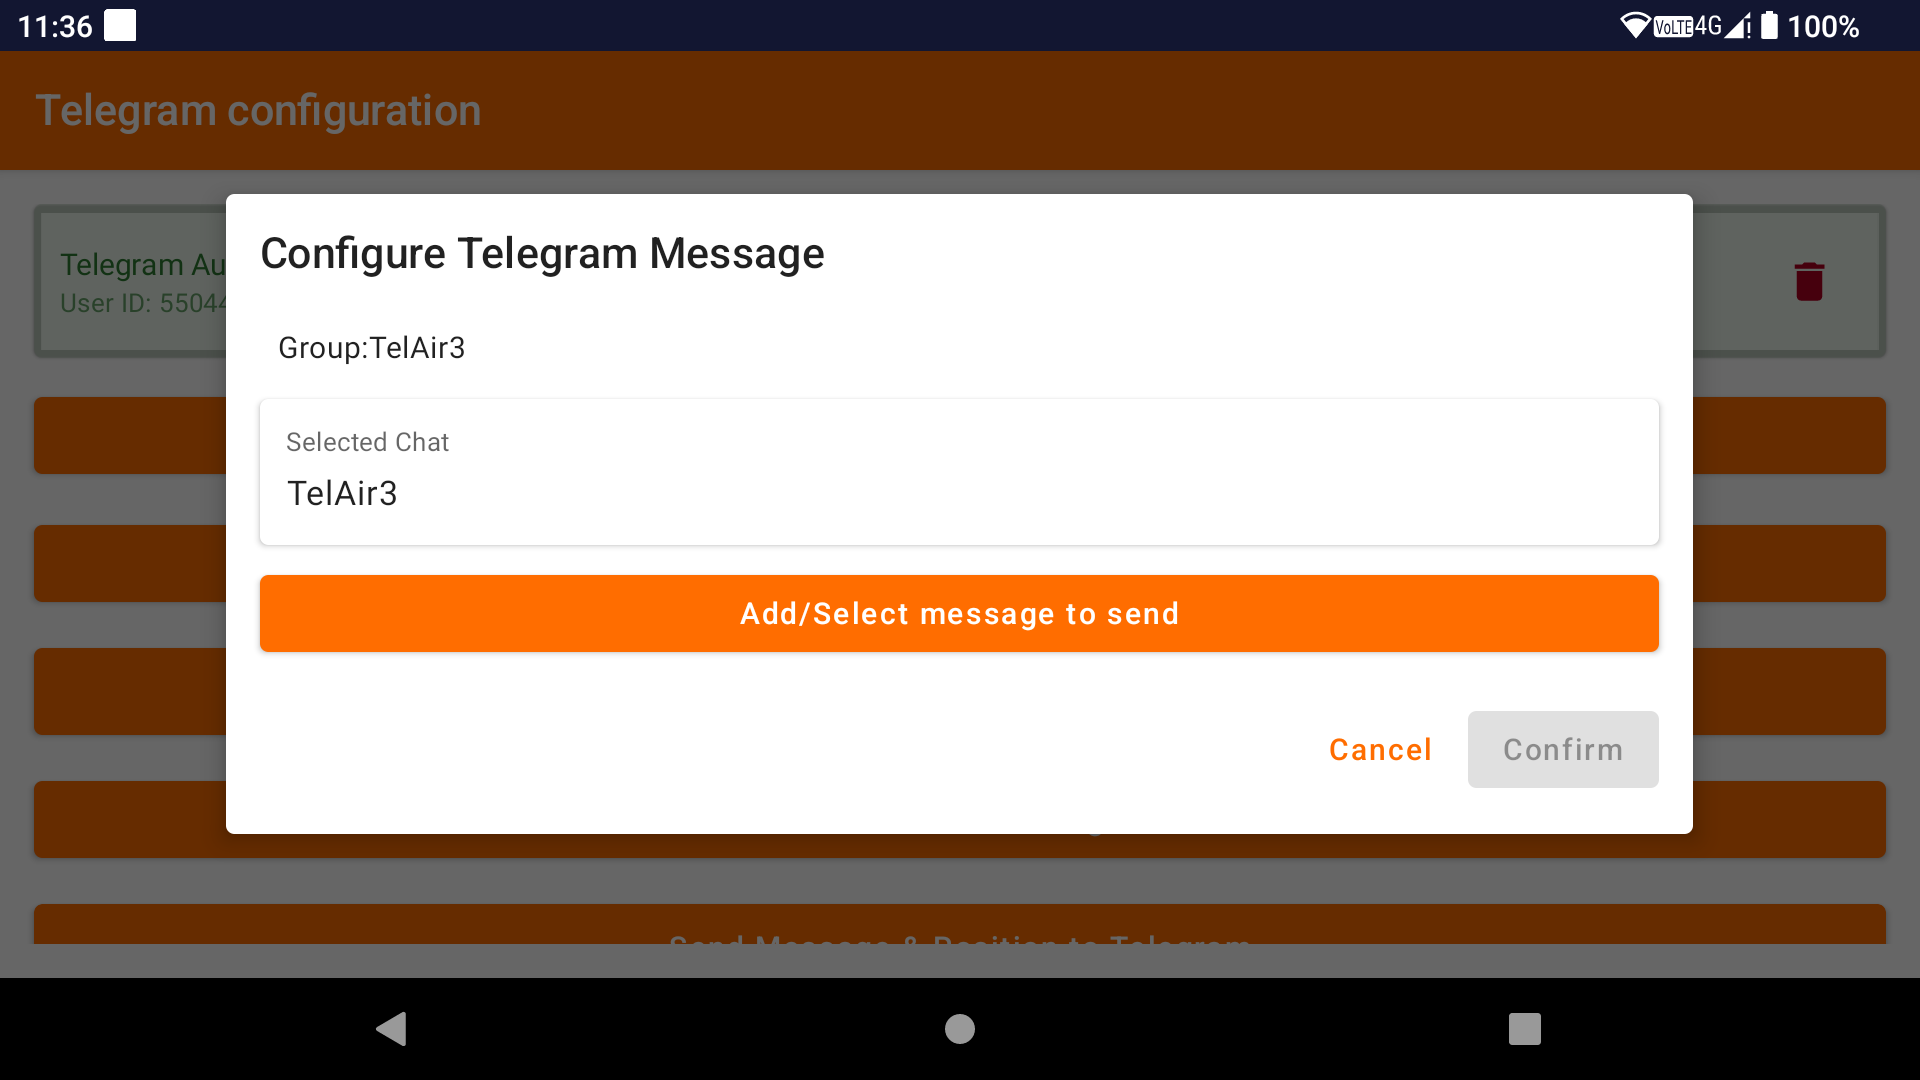
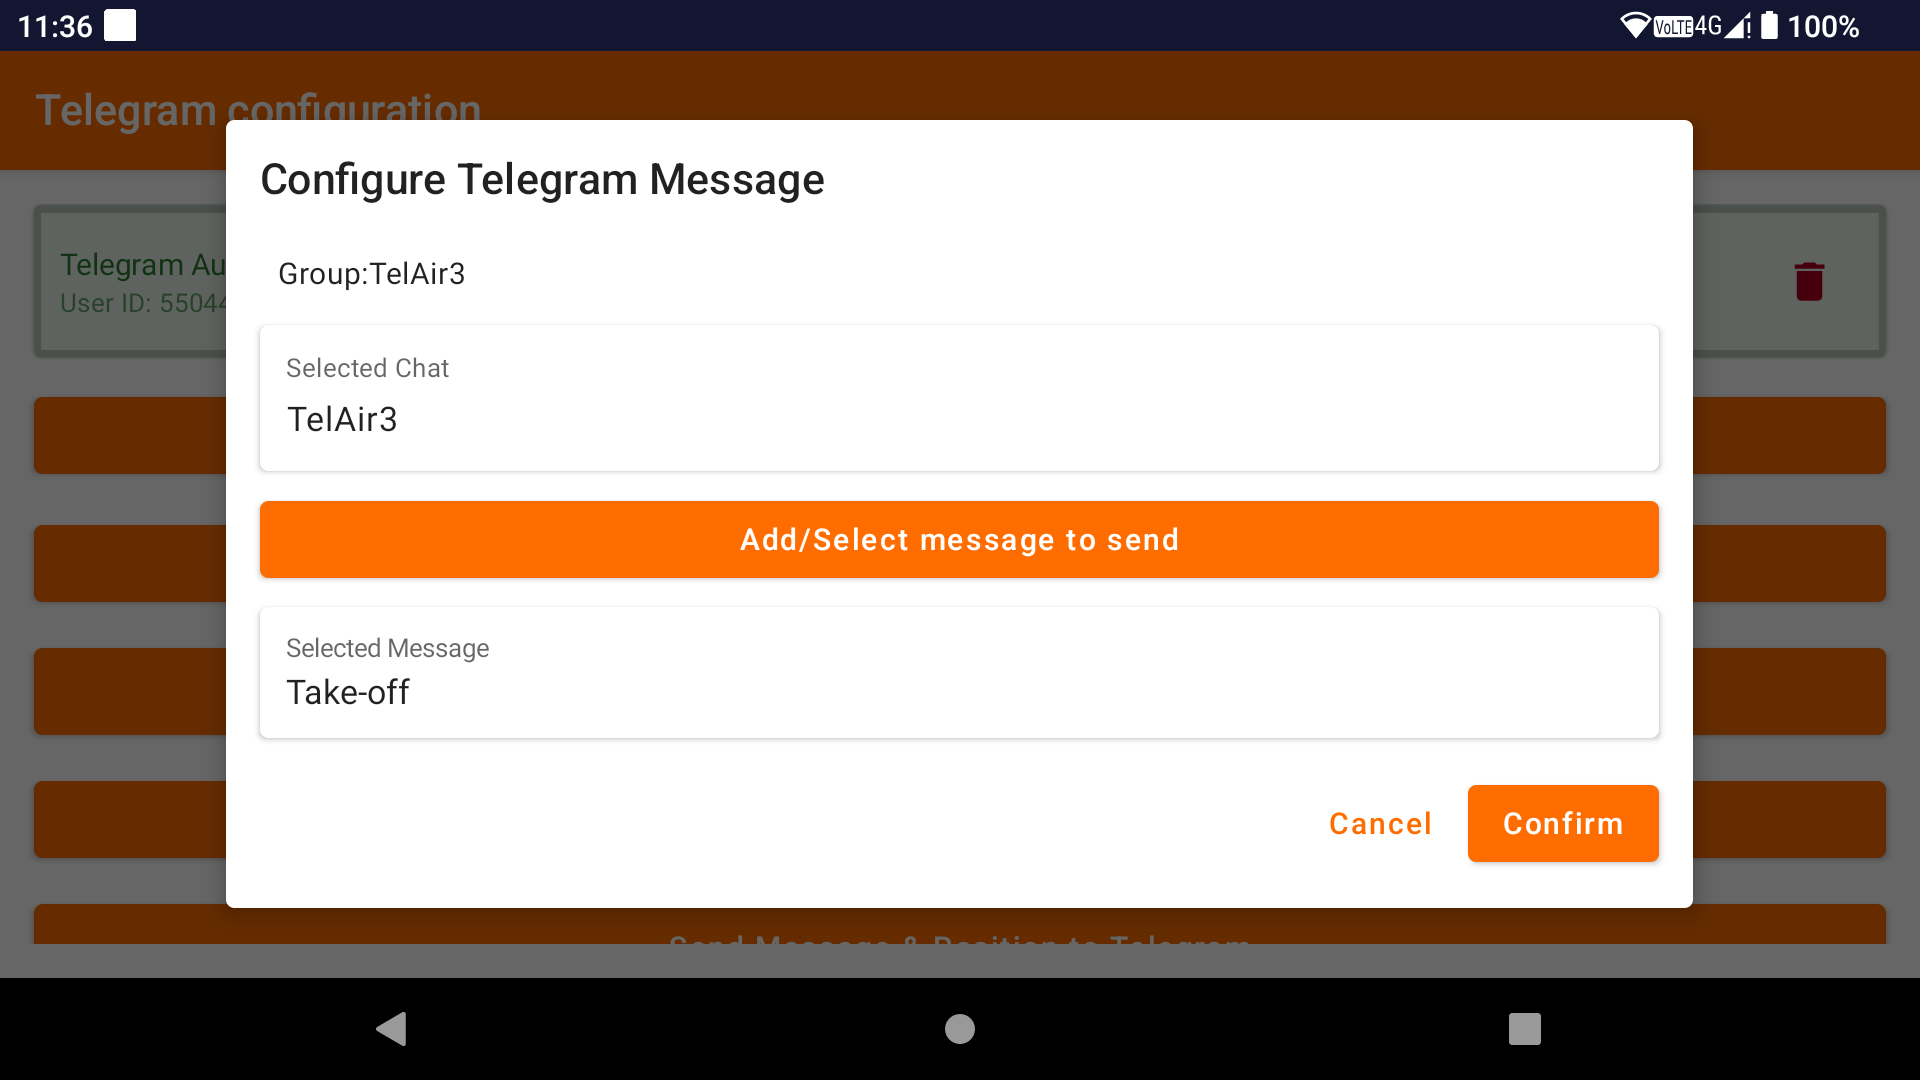
To send a message to a Telegram group, click on ‘Send message to Telegram’.
Select the chat to which you want to send the message.
Select the preconfigured message that you want to send, then click ‘Confirm’.
A new task will be created. Go back to the ‘Settings & Tasks’ setup screen and you will see this new task in the configured tasks.
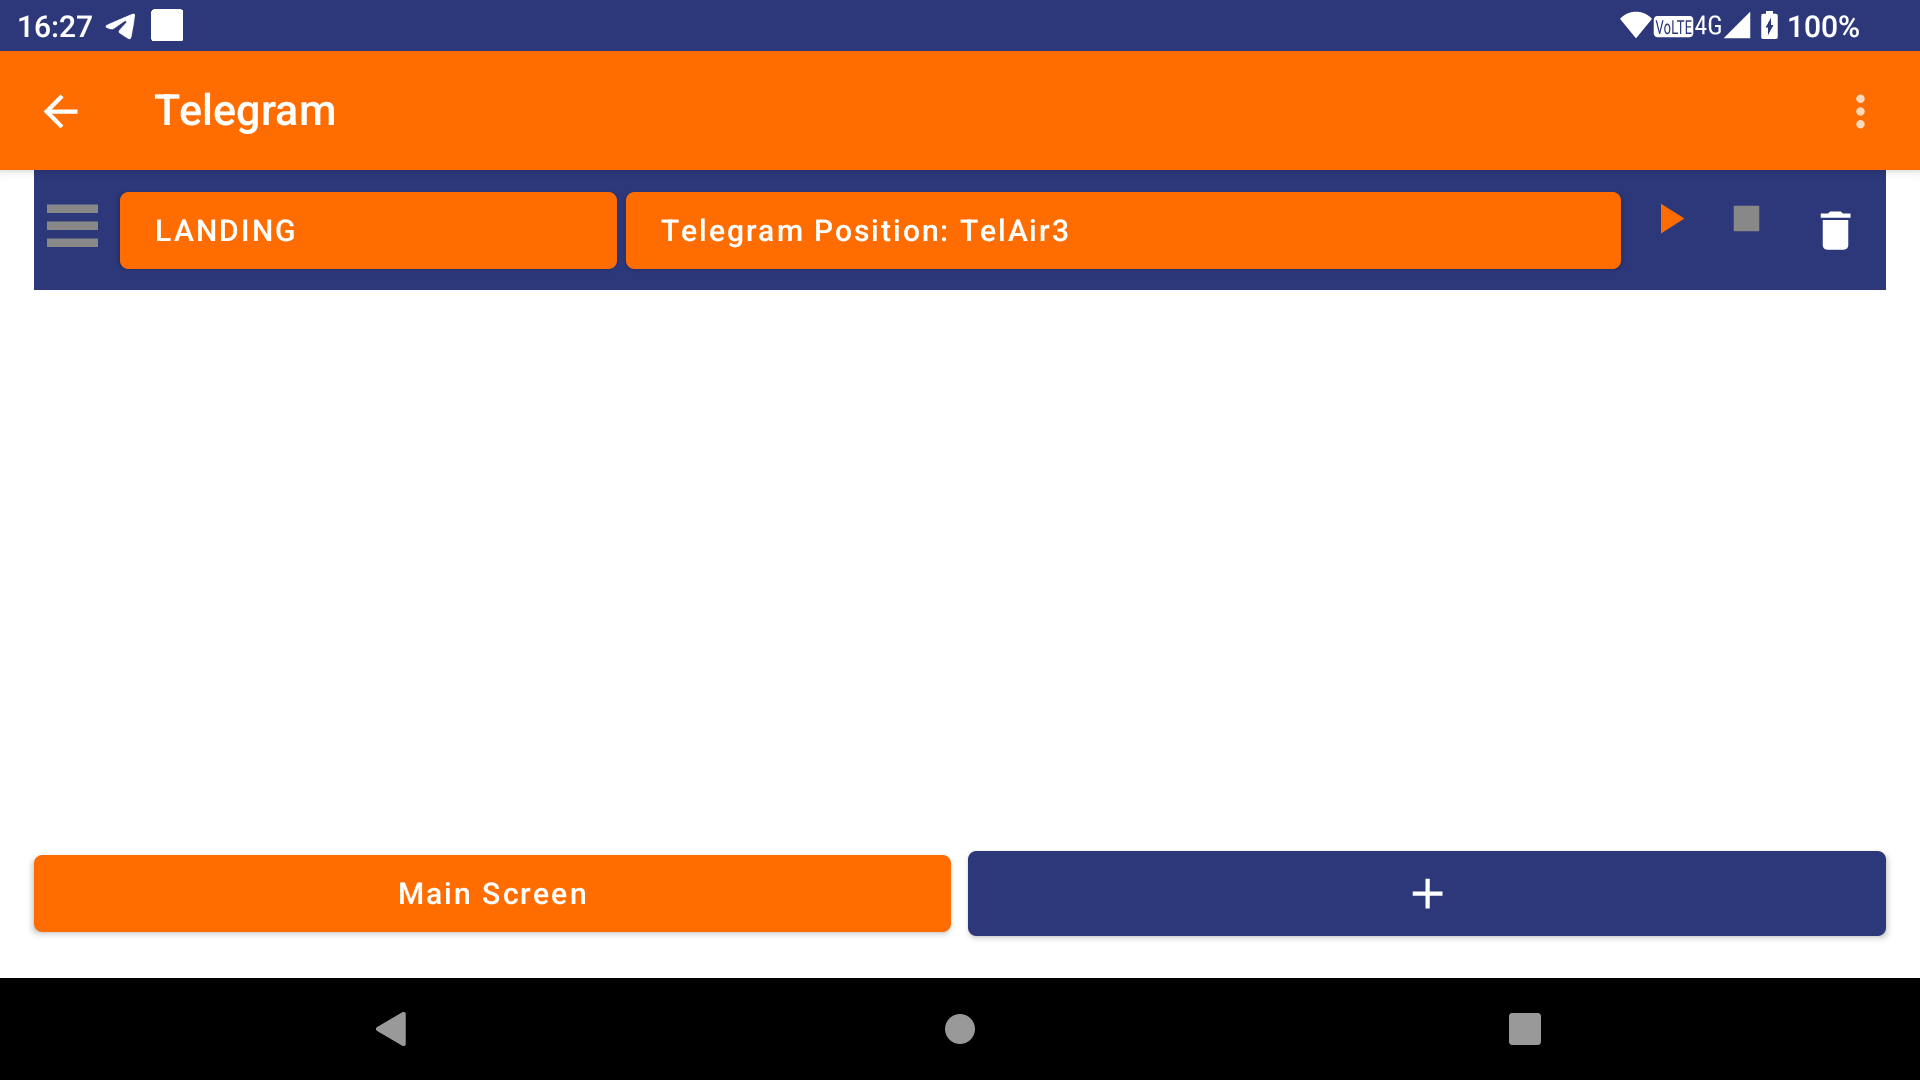
To create a new automation rule, go to the main screen where you can define an automation rule, click on ‘Telegram’, then the ‘+’ sign. After selecting the event that is supposed to trigger the task, you will be able to select this new task by clicking ‘Select task’.

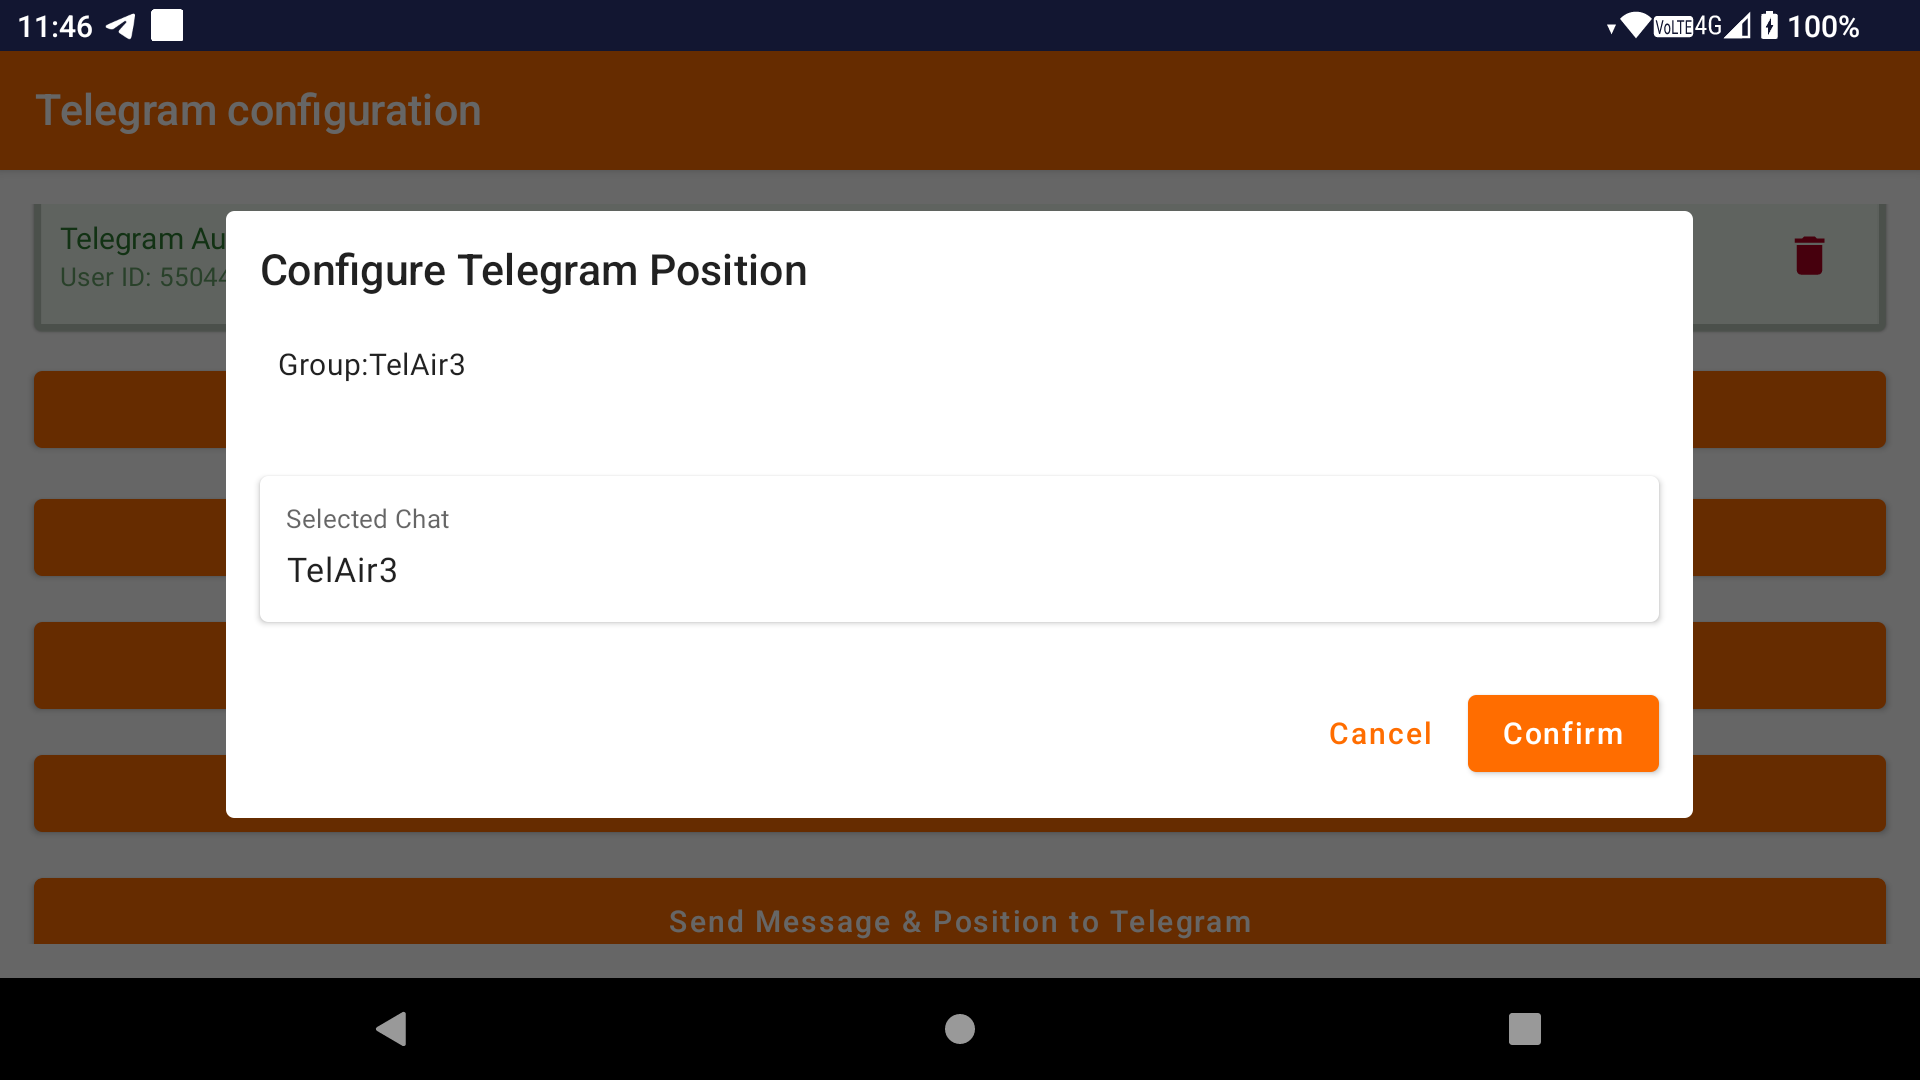
To send your location to a Telegram group, click on ‘Send position to Telegram’.
Select the chat to which you want to send your position.
Click ‘Confirm’.
A new task will be created. Go back to the ‘Settings & Tasks’ setup screen and you will see this new task in the configured tasks.
To create a new automation rule, go to the main screen where you can define an automation rule, click on ‘Telegram’, then the ‘+’ sign. After selecting the event that is supposed to trigger the task, you will be able to select this new task by clicking ‘Select task’.
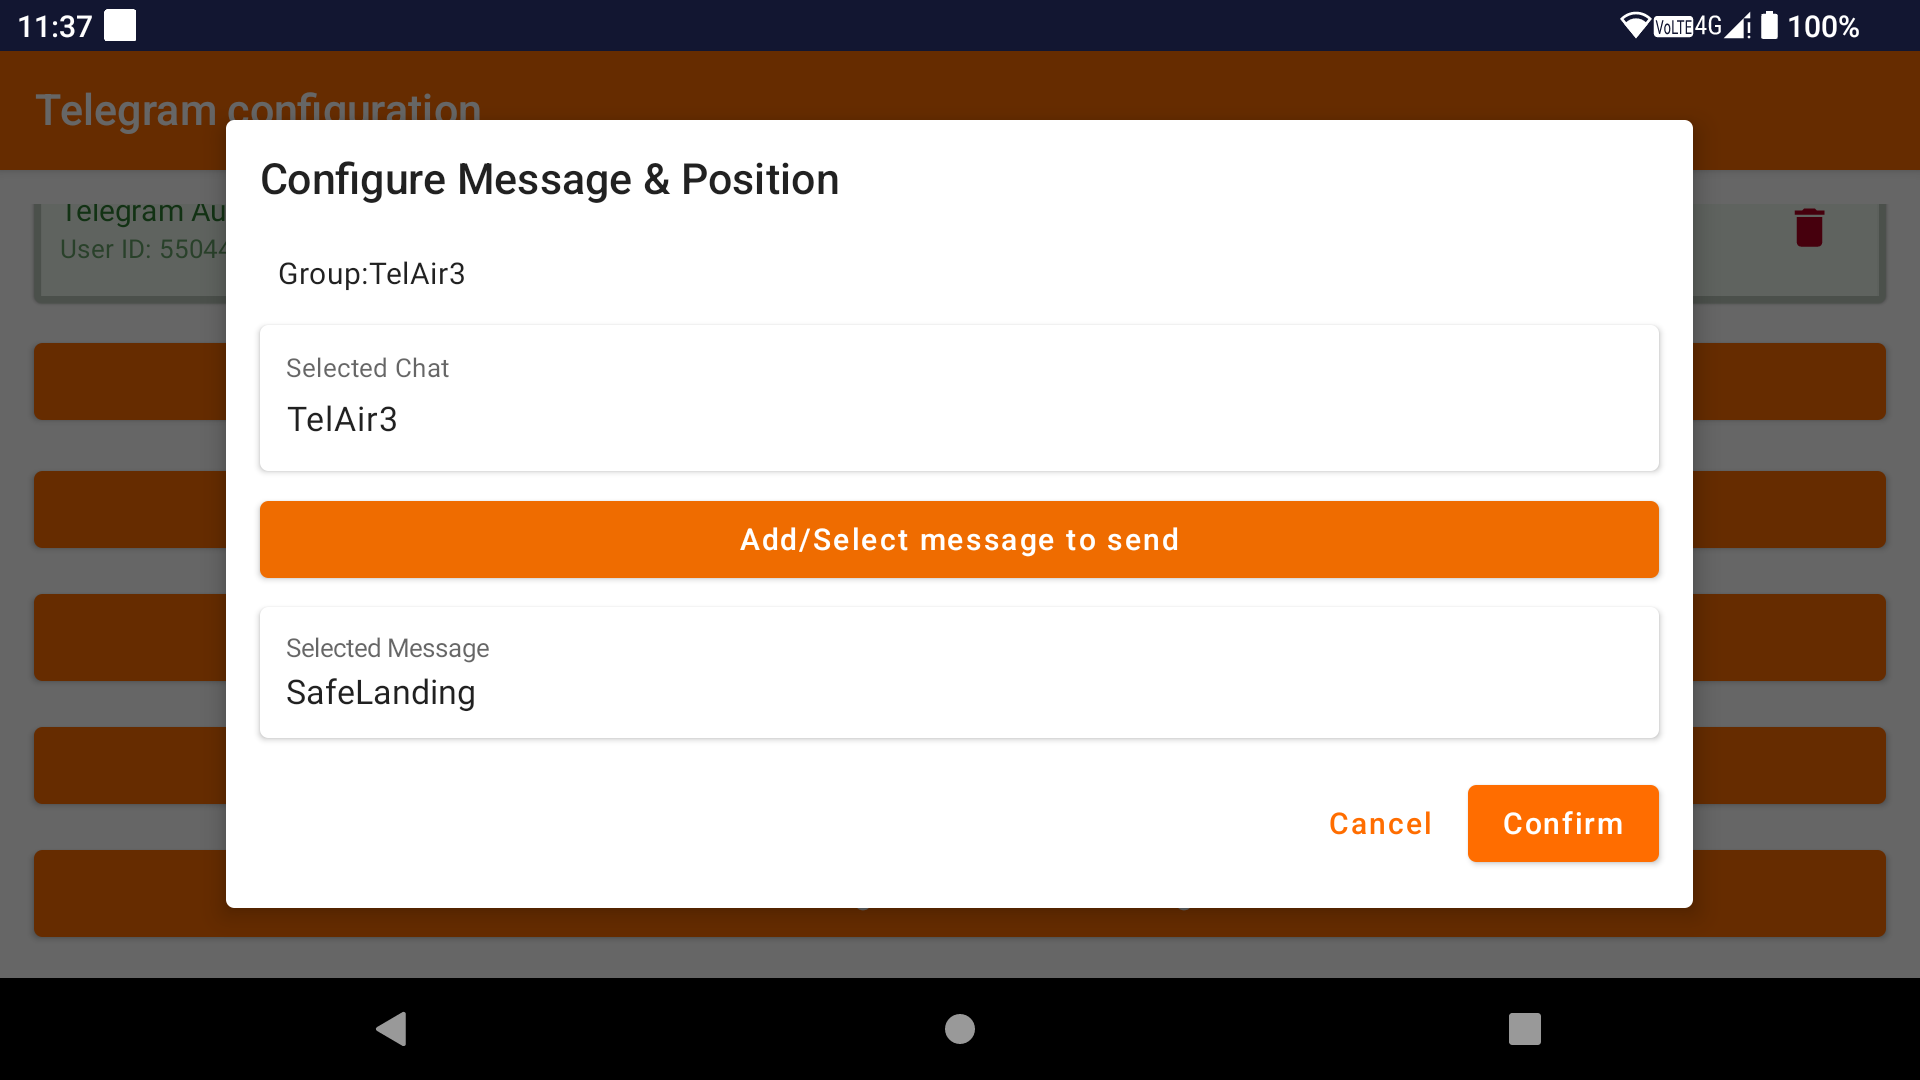
To send a message and your location to a Telegram group, click on ‘Send Message & Position to Telegram’.
Select the chat to which you want to send the message and your position.
Select the preconfigured message that you want to send.
Click ‘Confirm’.
A new task will be created. Go back to the ‘Settings & Tasks’ setup screen and you will see this new task in the configured tasks.
To create a new automation rule, go to the main screen where you can define an automation rule, click on ‘Telegram’, then the ‘+’ sign. After selecting the event that is supposed to trigger the task, you will be able to select this new task by clicking ‘Select task’.

The Safe Landing Reporting feature allows you to send a message and your location to a specific Telegram chat if you do not report that you have landed safely. To be able to select it in the Safe Landing Reporting configuration, make sure you have configured at least one task called ‘Send Message & Position to Telegram’.