This page describes the Navigation menu of XCTrack. Check the other sections to lean more about the different features of XCTrack.
Videos have been produced to explain the different features of XCTrack Pro. Check the videos tuto page to learn quickly how to use XCTrack Pro.

Click on the + sign to read the details.
Click on the Waypoints button in the upper right to access the waypoints features.

Waypoints used in navigation are read from waypoint files, can be created in XCTrack (from the map or by creating a new one manually) or can be imported from a task/route (from a QR code or a file).
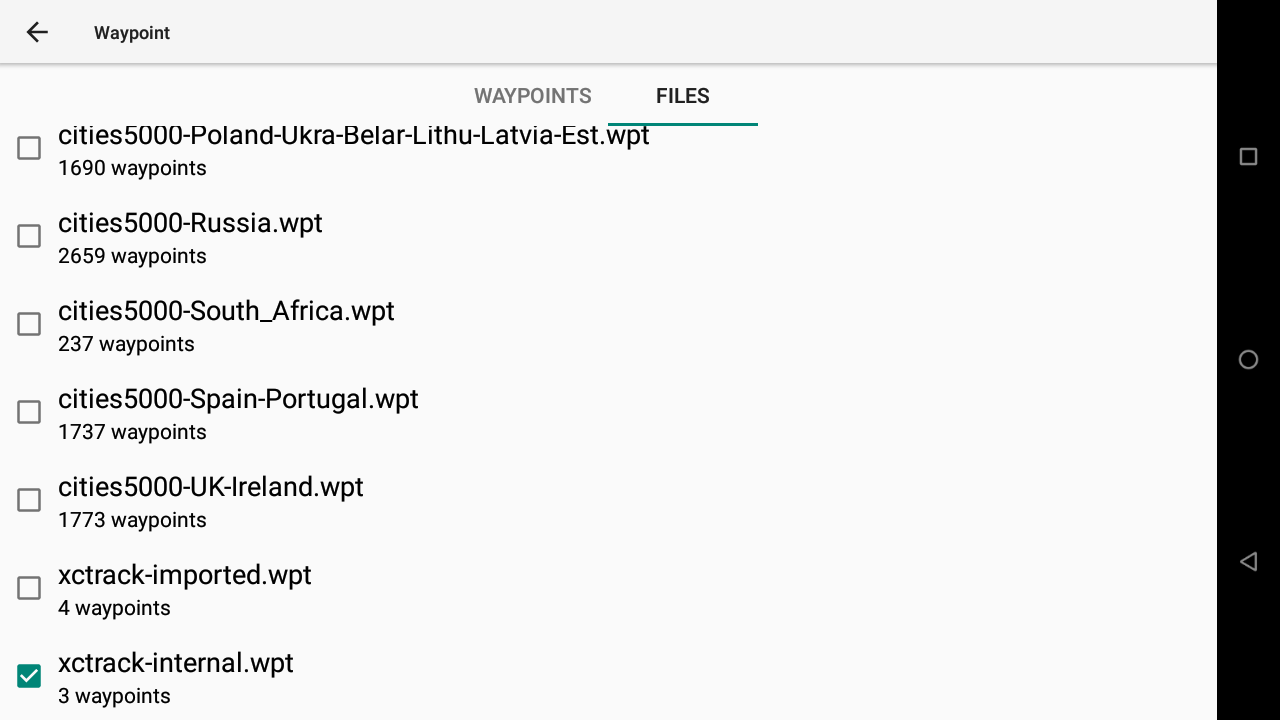
To activate an imported waypoint file, go to the Files tab.

Places
AIR³ is provided with waypoints of cities of 5000 inhabitants or more for all countries. Activate the one corresponding to your country if you want to quickly navigate to one of these.
Alternatively, you can enable “cities” (and/or “takeoffs”) in the Places section of the files tab. This will actually list larger cities only.

Sort waypoints in list by
You can sort the waypoints listed by name or by distance.
Sorting by distance is convenient while flying, so that you quickly get the waypoints around you.
Sorting by name is convenient when you have a long list of waypoints to find the one you are looking for, sorted alphabetically.

Files
XCTrack lists the Waypoint files located in in the Waypoints folder of XCTrack. Several files can be used at once. Supported waypoint file formats:
- Compe GPS ‘’.wpt’’
- Format UTM ‘’.wpt’‘,’‘.utm’’
- GpsDump (GEO) Format ‘’.wpt’’
- OZI Explorer ‘’.wpt’’
- Seeyou ‘’.cup’’
- XCSoar/WinPilot/Cambridge format ‘’.dat’‘,’‘.xcw’’
The file name/extension does not really matter, the right format is automatically detected based on the file contents.
Watch the Competition tuto video in the video tutos’ page that shows how to copy a waypoint file into the right waypoint folder and activate it.
If you have downloaded waypoints through a compressed file (.zip or .rar for example), you will need to uncompress the file first before placing it in the Waypoints folder of XCTrack. You may use an app such as Zarchiver to do that. Open the app, open the compressed file and “extract” the waypoint file out of the compressed file. Depending on where you have extracted the waypoint file, you may need to copy/paste it from its location to the waypoint folder of XCTrack with the File manager.

Imported waypoints
There is one special file in the Waypoints directory of XCTrack, called ‘’’xctrack-imported.wpt’’’.
This file is created by XCTrack when importing a task. The file format is GpsDump (GEO) encoded in utf-8.
Read more details how to import or scan a task in the “Competition task (route)” or “Create a route/task with the Friendly Air Tool and scan the QR code generated into AIR³ easily” sections below.

By only selecting the XCTrack-imported.wpt file in the Files tab, you will only see the content of such file in the Waypoints tab.

Waypoints from this imported task are stored in the XCTrack-imported.wpt file.

If you want to edit a waypoint imported from a task, you have first to “Copy this waypoint to internals”. Read more details how to edit waypoints in the Waypoints section below.

Don’t forget to enable xctrack-internal.wpt in the Files tab to make sure you can select the copied waypoint to Internals.
Select the waypoint to edit in the Waypoints tab. Make sure you select the right waypoint by looking at the Waypoint file it belongs to (last line of the details).
Read more details how to edit a waypoint in the Waypoints section below.


Internal waypoints
There is one special file in the Waypoints directory of XCTrack, called ‘’’xctrack-internal.wpt’’’. This file serves as a storage for XCTrack “internal” waypoints. It is created and edited by XCTrack by creating a new waypoint, editing waypoints or by copying a waypoint to internals. The file format is GpsDump (GEO) encoded in utf-8. You can modify this file by hand, but be careful:
- do not modify the file while XCTrack is running – it can result in losing your edits or any strange behaviour
- do not make errors in the file, it could lead to losing some waypoints You can replace the file with another file in any format, which XCTrack understands. It will be converted to GpsDump format on the first edit.
Once the waypoints file is enable, go back to the waypoints tab to see the waypoints.

Same list sorted by distance.

AIR³ is provided with a perpetual licence of XCTrack Pro. One of the very useful feature of XCTrack Pro is the ability to search Waypoints. Just type a couple of characters of the waypoint you are looking for and the search feature will directly filter the waypoints that contain the characters you have just entered.
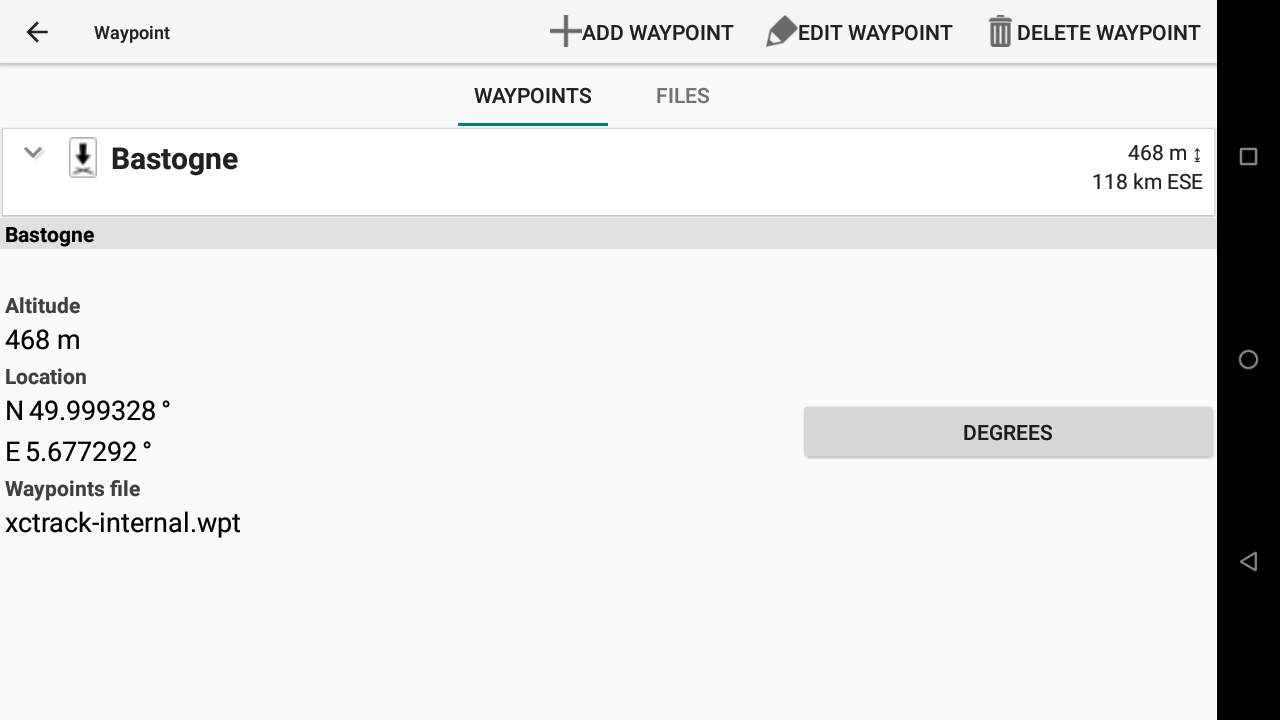
Once the waypoint selected, you can change the location units: Degrees, Deg°Min’, Deg° Min’ Sec” or UTM.
You can read the distance from your location to the waypoint, the altitude and the waypoint file to which the waypoint belongs.

If you want to edit the waypoint, you will need first to “copy waypoint to internals“.
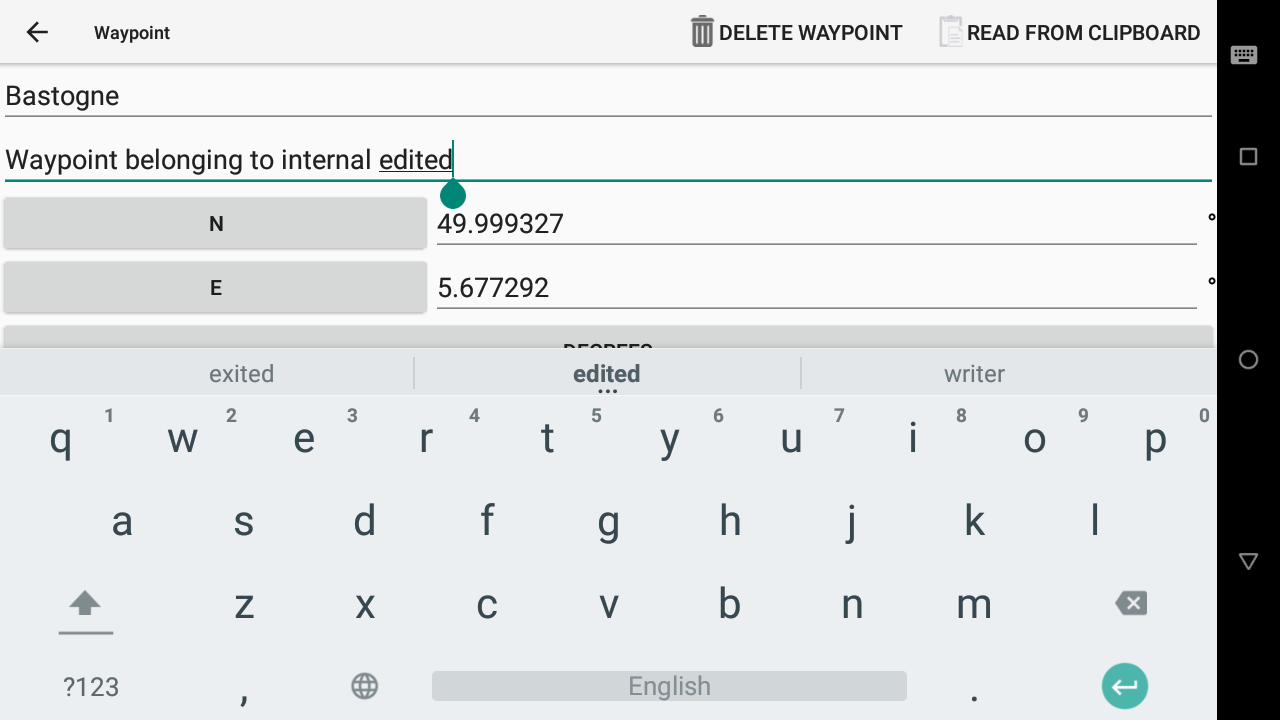
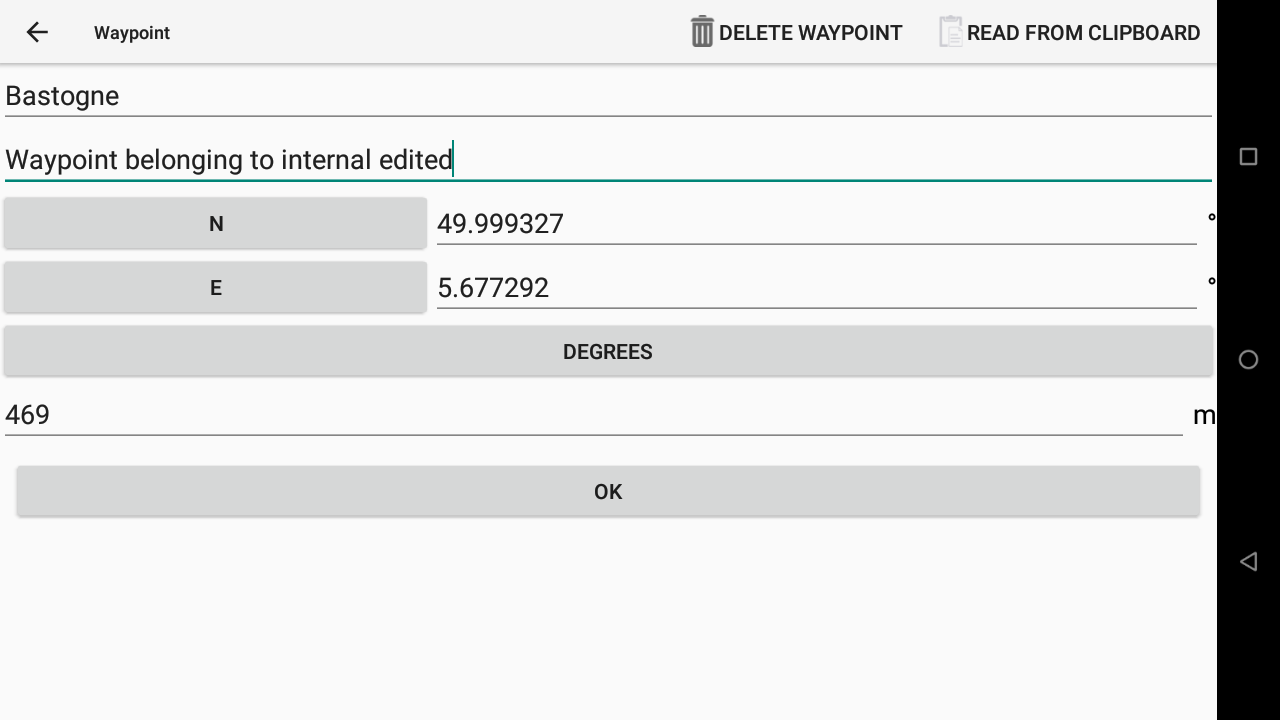
Waypoints belonging to “internals” can be edited.
Note that you can also create a new waypoint directly from this page. However, read below an easier way to create a new waypoint directly on the location you want to create it.
Edit the waypoint according to your needs. To exit the field edition, click on the back button (small triangle).
Click on “OK” to save your changes.
To create a waypoint, you can “add a waypoint” directly from the Waypoints menu… but you will need to enter all the details, including the location.
Create a waypoint from map
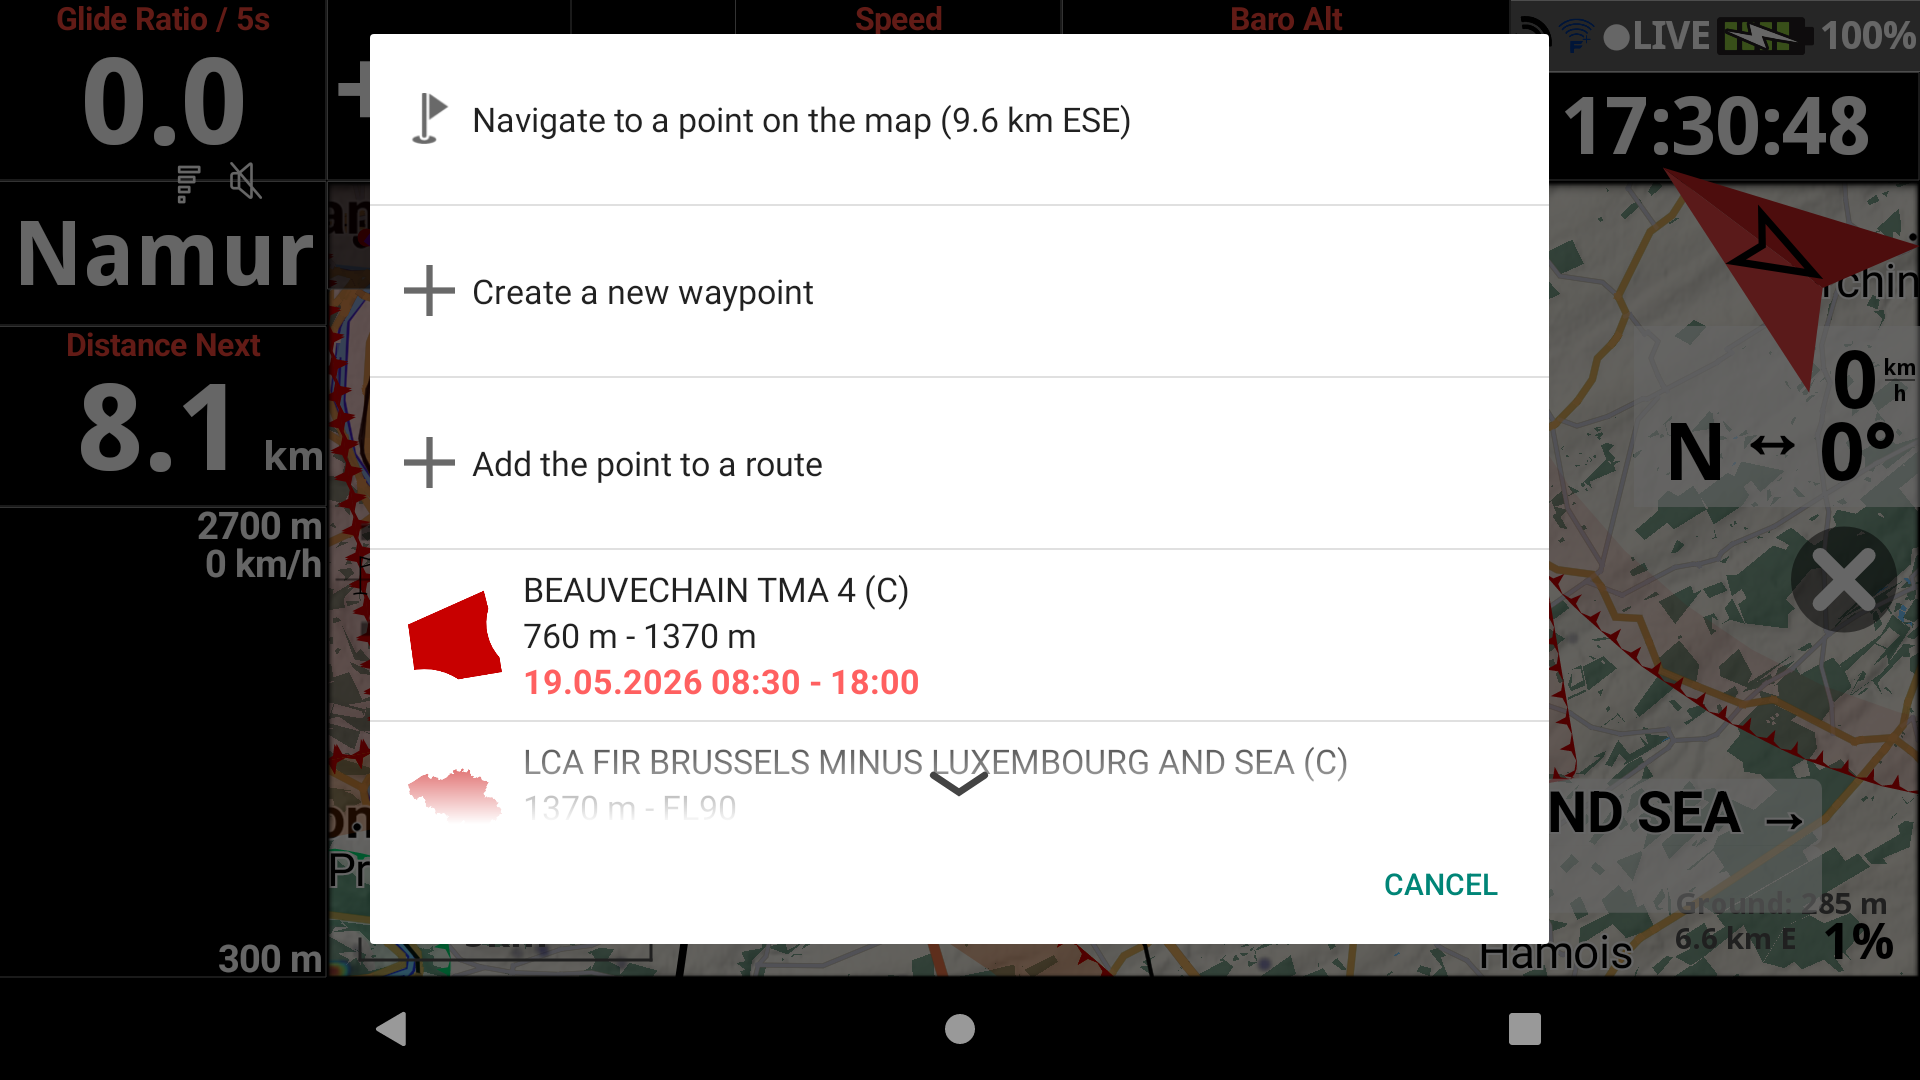
You can also create a waypoint through the pop-up menu on a map as explained in the Main features page of the XCTrack Pro Manual.
1) Swipe up with your finger to enter a special editing mode called Map Panning mode
2) Long press on the place where you want to create a new waypoint to get a pop-up menu
3) Choose “Create a new waypoint” in the pop-up menu. Read more details about map widgets : XC map widget in the Xcontest subsection of the XCTrack Pro widgets manual and Task map widget in the competition subsection of the XCTrack Pro widgets manual.


Add point to a route
If you have selected Waypoints / XC navigation or Competition mode (see below the different navigation modes), an additional pop-up menu item “Add point to a route” allows you to directly add this point to a route . A new waypoint is created and added to either your XC navigation route or your competition task.
In order to add points to a route:
1) After selecting the Waypoints/XC Navigation or Competition task mode in the navigation menu, swipe up with your finger on the map to enter the special editing mode, also called “Map Panning” mode
2) Long press where you want to create a new waypoint to get a pop-up menu
3) Choose “Add- the point to a route” in the pop-up menu
You can proceed the same way for the next points so that you can build your route directly from the map.
See more details in the Waypoints/XC Navigation or Competition task mode below.
If you want to edit the waypoint added to the route, as described above, you will need first to “copy waypoint to internals“.
Waypoints belonging to “internals” can be edited.

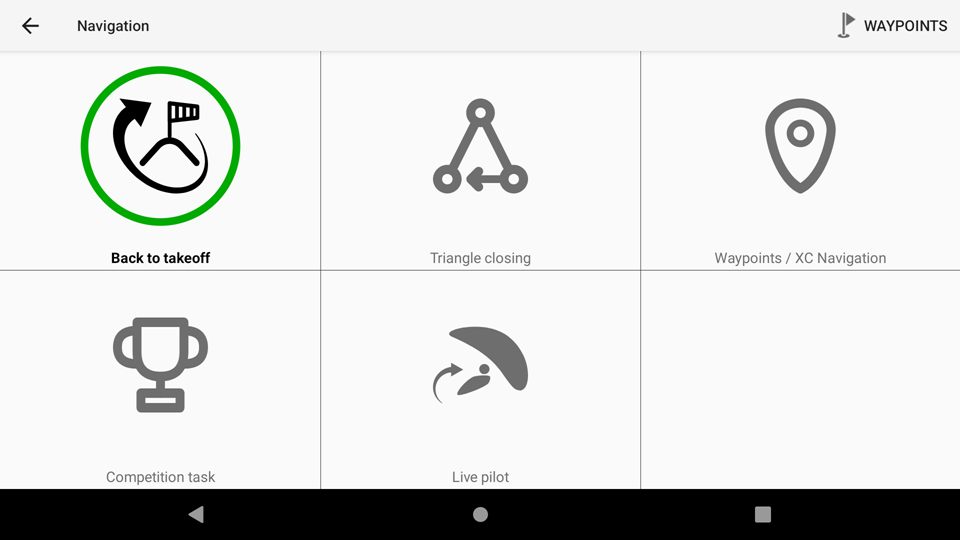
As indicated by the name, this navigation mode is used to indicate the direction of the takeoff.
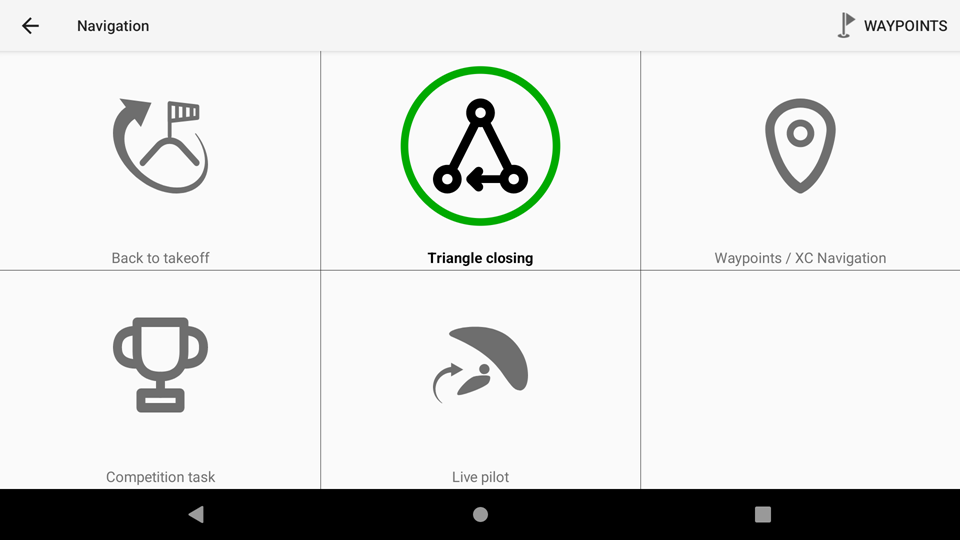
The triangle closing navigation mode is used to give you the direction of the best triangle you can fly depending on your position and the flown distance.
It navigates to the nearest point on closing cylinder first.
When you close the triangle (you have just crossed the closing cylinder), it navigates to the takeoff.
Using this mode, you should consider activating the XC tools related to triangles of the XC map widget available in the XC map settings subsection. Read more about these tools in the XC map widget configuration in the Xcontest subsection of the XCTrack Pro widgets manual.
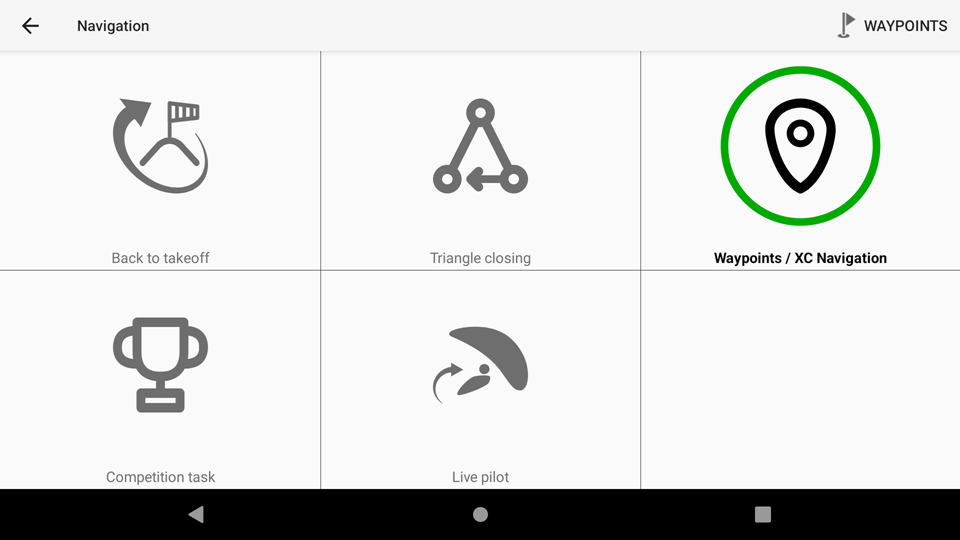
The Waypoints/XC Navigation mode is a simple way to navigate to (GO TO) a given waypoint or through different waypoints (XC Navigation).
Check the Waypoints explanation here above for more details on the way to activate a waypoint file, search for a waypoint, create a new waypoint or “add the point to a route”.
The Waypoints/XC Navigation mode is not considering any circle around the waypoint and will keep indicating the direction to the current choosen waypoint unless you manually switch to the next waypoint. Consider using the Competition task mode if you want to reach a circle around the waypoint with automatic switch to the next one once you have reached the circle around.
The Waypoints/XC Navigation mode is only considering the exact location of the waypoint. Consider using the Competition task mode if you want to calculate the route that is optimised based on circles around waypoints.
To create a new XC navigation route, there are multiple ways:
- Convert a Competition task to XC/waypoint task (check more details in the Competition task mode below).

- Create the route from a webpage such as AIR³ TDD Task Manager.
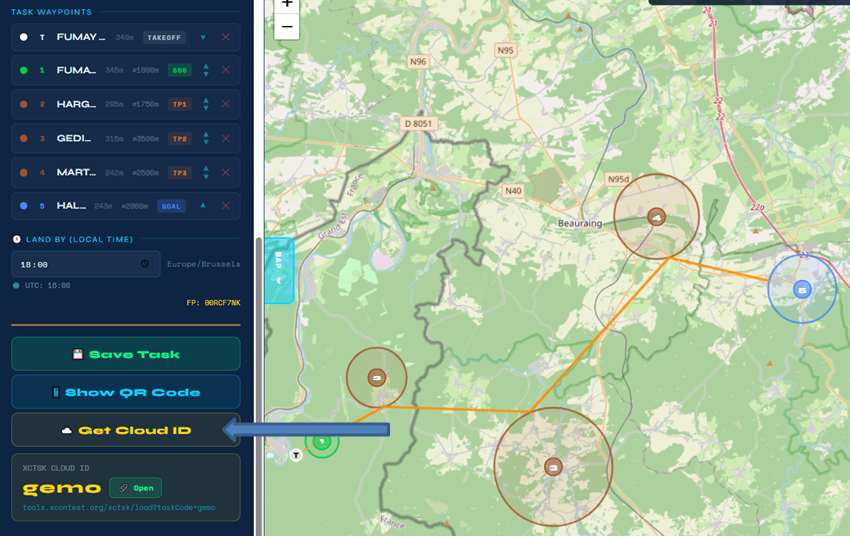
Click on the map on the take off to create your first waypoint, click on the map for each turnpoints and set the radius. Once finished, you can either save the task as a xctsk file, show the QR code or get a cloud ID.
Check more details how to get a task from AIR³ TDD Task Manager here.

- Create the route from another device using XCTrack, generate a QR code and scan it on the receiving device.
On the exporting device, once you have created the task, go to Navigation → Waypoints/XC Navigation Menu (3 dots) → Share task … → Display QR code.
On the receiving unit, go to Navigation → Waypoints/XC Navigation Menu (3 dots) → Load task from … → Scan QR code.


- Create the route from another device using XCTrack, generate a picture with the QR code and load it on the receiving device.
On the exporting device, once you have created the task, go to Navigation → Waypoints/XC Navigation Menu (3 dots) → Share task … → Display QR code → Click on the share icon to transfer the picture through any communication mean.
On the receiving unit, go to Navigation → Waypoints/XC Navigation Menu (3 dots) → Load task from … → Read QR code from a file → Click on the saved picture. - Create the route from another device using XCTrack, generate a task file and load it on the receiving device.
On the exporting device, once you have created the task, go to Navigation → Waypoints/XC Navigation Menu (3 dots) → Share task … → Save to other applications to share the file through any communication mean.
On the receiving unit, go to Navigation → Waypoints/XC Navigation Menu (3 dots) → Load task from … → Import from a file → Select the file you have just downloaded.


- Create the route from another device using XCTrack, generate a cloud task code ID and load it on the receiving device.
On the exporting device, once you have created the task, go to Navigation → Waypoints/XC Navigation Menu (3 dots) → Share task … → Upload to cloud → Click on the share URL or share CODE to communicate the task through any communication mean or just communicate the task code.
On the receiving unit, go to Navigation → Waypoints/XC Navigation Menu (3 dots) → Load task from … → Download from cloud → Type the code. If you have shared the URL on the exporting device, open the URL on the receiving device. You can either just type the code as just explained, or download the task file on the unit. Once done, go to Navigation → Waypoints/XC Navigation Menu (3 dots) → Load task from … → Import from a file → Select the file you have just downloaded.


- Click on the “+” sign once you are in the Waypoints/XC Navigation page and add waypoints manually, one by one.
- Use the “add the point to a route” option in the pop-up menu as described above to add different waypoints directly from the map.
- Use any of the 6 first methods and enhance the route/task with one of the 2 last methods to add more waypoints.

If you have added more than one waypoint to your Waypoints/XC Navigation route, you can easily delete a given waypoint in the list by swiping the waypoint on the right.

If you want to rearrange the waypoints, you can hold your finger for more than one second on the waypoint you want to move, then swipe up or down accordingly.

Once your route is created, you can see it either on the page with the XC Map widget or with the Task Map widget.

To switch manually to a different waypoint while flying, there are 3 different ways:
- Click on Menu/Navigation/ and select the other Waypoint you want to navigate to. Confirm by “yes”.
- Click for more than 1 second on the Next or previous waypoint widget. On the Route/Competition page of AIR³ by default, you can find such widget easily to change waypoint to navigate to.
- Click on the button associated with next or previous waypoint, previously configured in Menu/Preferences/Key bindings. Take advantage of the physical buttons of AIR³ to easily switch to a different waypoint.

Navigate to a point
There is another method to Navigate to a point on the map through the pop-up menu on a map widget (Read more details about XC Map or Task Map widgets in the XCTrack Pro widgets manual). Once you reach the pop-up menu, choose Navigate to a point on the map and XCTrack will guide you to this point. Read more details how to get the pop-up menu in the Main features of AIR³ in the XCTrack Pro Manual.
Whatever is the navigation mode (Back to takeoff, Triangle closing, Waypoints/XC Navigation or Competition task), if you select “Navigate to a point on the map” in the pop-up menu, XCTrack will automatically change the mode into Waypoints/XC Navigation mode and select that point to navigate to.
Next section