
For more information, check these related FAQs:
AIR³ 7.3 and AIR³ 7.35 have a 10,000 mAh battery. This gives AIR³ a pretty large battery life. So, how many hours does it mean?
Quick answer: when the device is new, 10 hours for AIR³ 7.3 and 12 hours for AIR³ 7.35. Read on for the details below.
Battery life is not a fixed number of hours
Battery life can be influenced by several factors.
1. How the battery was initialized
As explained in the battery lifespan and maintenance FAQ, battery capacity is optimal when 3 full charge and discharge cycles are performed the first time the battery is used.
2. Display theme
Using a black theme increases battery life by 30%. Not everybody likes it, but it uses much less energy. This is why AIR³ is preconfigured with a hybrid black theme with white maps.
3. Brightness level (the main factor)
Most of the time, when using a smartphone outside, brightness is set to maximum — otherwise information is hardly readable, because the screen brightness is weak on such devices. This is not the case for AIR³. Check the best brightness setting FAQ for more details about the link between brightness, readability, and battery life.
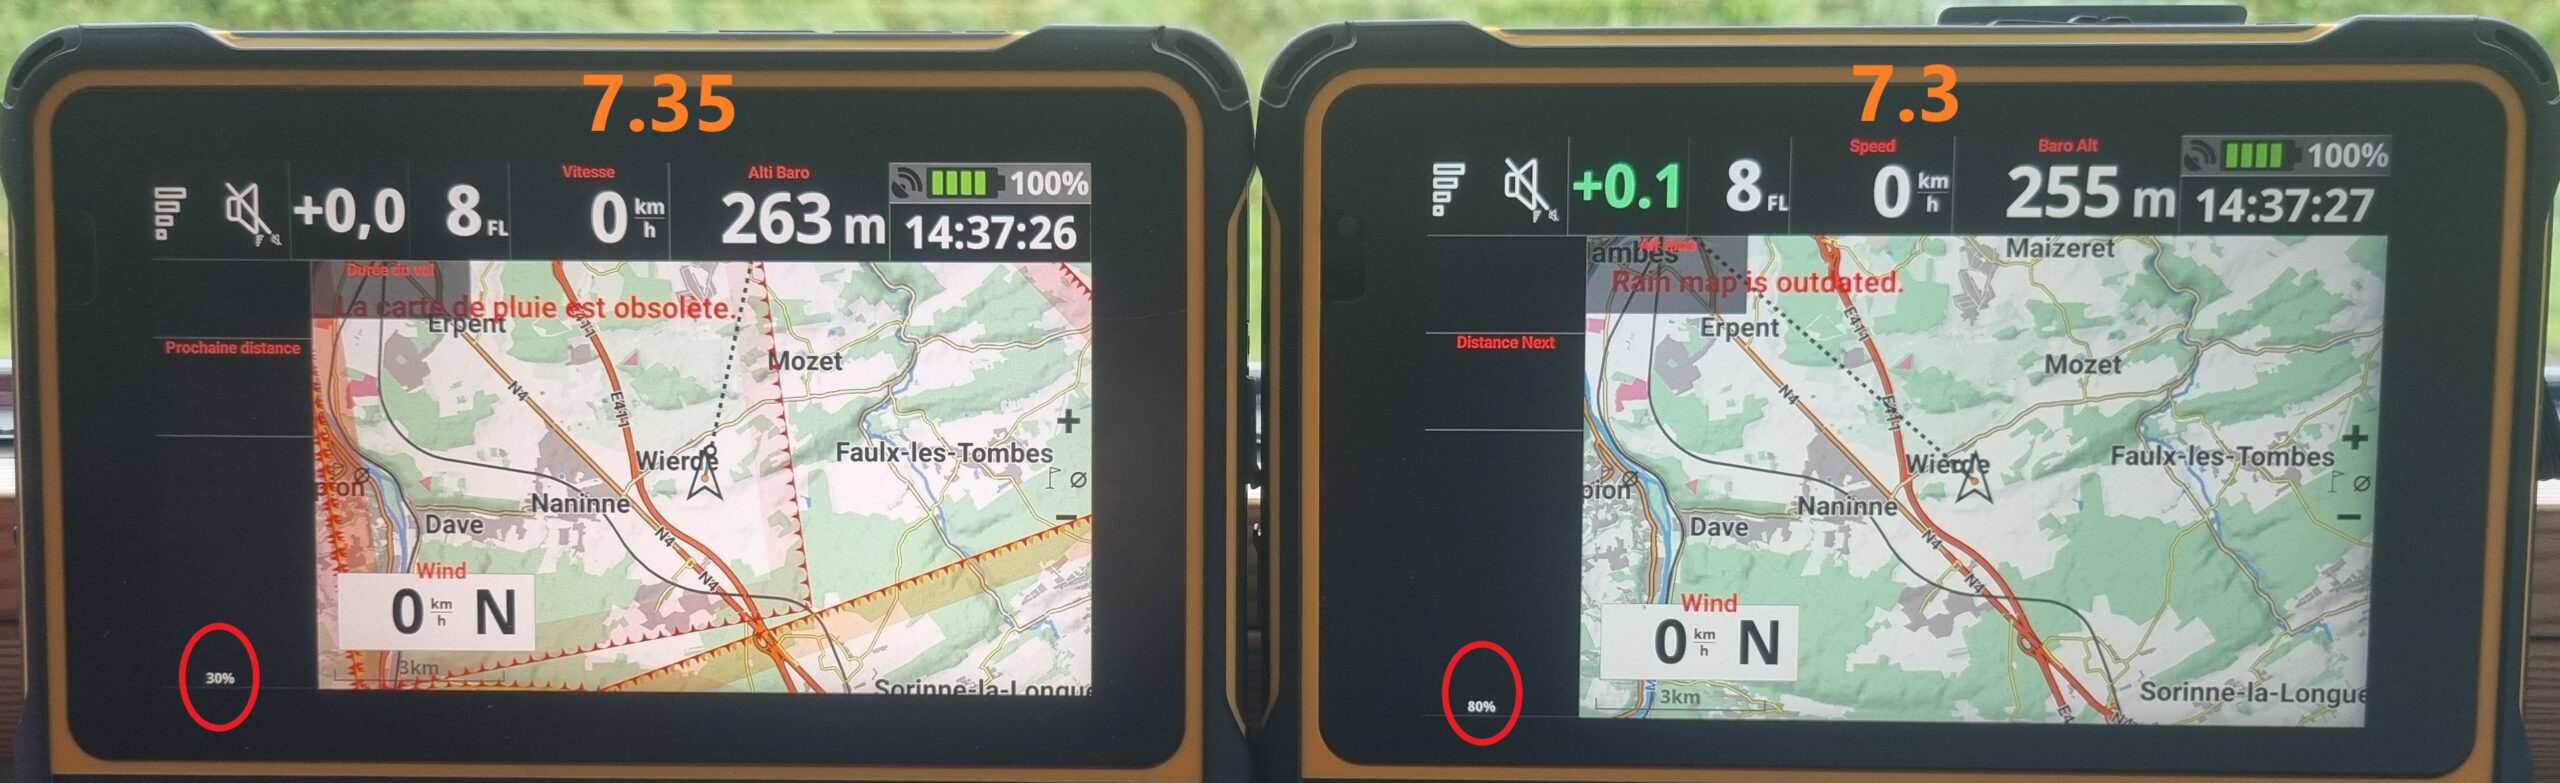
AIR³ 7.35 has a new screen that provides more brightness. To compare the two devices fairly, they should be compared at a similar level of readability. In a test with dynamic brightness disabled (to standardize the comparison) and starting from 100% battery:
- AIR³ 7.3 at 80% brightness is roughly equivalent, in readability, to AIR³ 7.35 at 30% brightness.
- At these equivalent settings, AIR³ 7.3 gets 9 hours of battery life, and AIR³ 7.35 gets 14 hours.
4. How the battery has been used and cared for over time
Battery capacity on a given flight depends on more than just the battery’s age:
- Normal usage. Every charge and discharge cycle gradually reduces the battery’s maximum capacity, even under ideal conditions. This is expected wear, not a defect.
- How the battery was stored between uses. If the device is stored for a while without a sufficient charge level, the battery cells can get damaged, permanently reducing capacity. See the battery lifespan and maintenance FAQ for the correct storage guidelines.
- External factors, such as exposure to excessive heat or a power surge, which can damage the battery’s electronics and reduce its capacity — independently of normal wear.
Noticed a sudden, significant drop in battery percentage during a flight? A drop that clearly cuts into your battery life is most likely a sign that the battery has aged and needs to be replaced, rather than a device malfunction. See the battery lifespan and maintenance FAQ to check the battery’s health and, if needed, order a replacement.
In summary
Using AIR³ the recommended way (correct battery initialization, dynamic brightness, dark theme), you should get 10 hours of battery life with 7.3 and 12 hours with 7.35 when you start using the device.
Without taking these recommendations into account, depending on your settings and the way you manage your flight, you should get:
- Between 7 and 12 hours with AIR³ 7.3
- Between 6 and 15 hours with AIR³ 7.35
In practice, you will probably be happy with our default settings and adaptive brightness — this gives you more than enough power.
Tips for very long flights
If you know you are going to fly for a very long flight, here are 4 tips to keep in mind:
- Start fully charged, as is the case with most smartphones or tablets.
- Let adaptive brightness do its job. AIR³ 7.3 and 7.35 have an advanced adaptive brightness sensor that adjusts brightness to current conditions. This significantly reduces the average brightness level compared to flying at full brightness all the time.
- Adjust brightness manually if needed. Brightness widgets and +/- buttons are easily accessible, so you can adjust energy consumption according to your needs and the duration of your flight.
- Turn off the screen when you don’t need it. A short click on the power button turns off the screen only — tracking, live tracking, and acoustic audio all remain active. With the screen off, battery life can be counted in days. So if you are on a very long flight and have already used an important part of the battery, turning off the screen this way whenever you have the chance will add hours to your battery life. A new short click on the power button turns the screen back on.
If you want to use maximum brightness at all times, are planning a very long flight, and don’t want to be bothered by a potential energy shortage, you should use a power bank together with the Pogopin USB cable once you reach a low remaining battery percentage (keeping the power bank always connected to the device is not ideal).
Check our Readability matters page to better understand the influence of tilt on readability.
For more information, check these related FAQs:
- Battery life of AIR³ — how long the battery lasts on a given flight
- Best brightness setting for AIR³
How long should the battery last?
AIR³’s lithium-ion batteries are expected to provide 300 to 500 full charge cycles.
The battery’s total lifespan works a bit like the tires on a car: how long it lasts depends heavily on how it’s used, and it can also be affected by external factors.
At any point in the battery’s lifespan, what determines how well it performs “on a given day” comes down to four factors:
- how well the battery has been maintained (calibration cycles, storage during long periods of non-use, etc.);
- how many times it has already been used (capacity naturally decreases with the number of charge/discharge cycles);
- how the battery was charged before that day’s use;
- external factors that may have affected the battery, such as a power surge or exposure to excess heat.
For how these factors play out on a specific flight, see Battery life of AIR³.
Understanding the displayed battery percentage
The percentage you see on screen isn’t a direct measurement — it’s an estimate calculated by a chip (a “fuel gauge”) based on voltage, charge/discharge current, temperature, and the battery’s usage history.
Because of this:
- Charging to 100% doesn’t always mean the battery is at its original full capacity. For an aged battery, a “100%” reading may only represent a fraction of its original capacity — for example, around 80%.
- The discharge curve isn’t perfectly linear. Voltage tends to drop faster in the final stretch (typically below 20%), so the displayed percentage can appear to fall more quickly toward the end of a charge.
- Using a power bank, or regularly giving the battery small partial charges instead of full ones, can also throw off the gauge’s estimate over time.
Performing 3 full charge/discharge cycles resets and recalibrates this gauge, giving you the most accurate reading — see below.
Setting up a new battery: the 3-cycle calibration
Once you receive your brand-new AIR³ — or after replacing the battery — you must perform 3 full discharge/recharge cycles to set the battery’s capacity gauge to its maximum.
- Launch XCTrack, set brightness to 80% (with adaptive brightness turned off so it stays fixed), and let it run until the battery reaches 5% or lower.
- Recharge for 6 hours or more using a charger rated at least 2.0 A.
- Repeat this full cycle two more times, for 3 complete cycles in total.
Download the 3-cycle instructions, fill in the table as you go, and keep it for future reference.
Unlike older NiCad batteries, lithium batteries don’t suffer from “charge memory,” so you don’t need to fully discharge the battery before every charge in daily use. That said, running a full charge/discharge cycle occasionally helps keep the percentage gauge properly calibrated — see below.
Daily use and long-term storage
Daily use
- No need to charge to 100% every time — keeping the battery roughly between 20% and 80% is perfectly fine for everyday flying.
- Whether you fly often or rarely, running one full charge/discharge cycle every month or so helps keep the percentage gauge accurate. If the device is not used at all for a while, do this at least once a month to keep the battery healthy.
- Avoid charging in very hot or very cold conditions.
- If the battery has often been run all the way down to 0%, don’t jump straight to a full charge — charge it to about 15% first, then continue normally.
- Avoid completely discharging the battery. Below roughly 2.5 volts per cell, a safety circuit inside the battery opens and the device will appear dead. If this happens, the unit won’t power back on until it has been sufficiently recharged — not necessarily to 100%, but enough to clear the safety threshold.
- Prioritize your original charger and cable, or ones matching the same voltage/current specifications.
Long-term storage
Never store the device discharged. Make sure it’s charged above 50%, ideally around 80%, before putting it away for a while.
Using a power bank
A power bank is best used only once your battery reaches a low level, so it can recharge during the flight rather than staying topped up the whole time. Keeping a power bank connected continuously isn’t ideal:
- A lower-quality or underpowered power bank can cause unstable charging current, or make the device repeatedly switch between charging and stopping.
- If the device draws more power than the power bank can supply, the battery can keep slowly discharging even while the screen shows “charging” — which throws off the percentage reading.
If you do use a power bank, choose a reliable, adequately-rated one (ideally supporting fast charging).
Signs your battery may need replacing
As a battery ages, you may start to notice some of the following:
- Noticeably shorter flight time after a full charge compared to before.
- Irregular jumps in the displayed percentage — for example, a sudden drop from 70% to 5%.
- The device shutting down on its own while the screen still shows a meaningful charge (e.g., 20–30%).
- Charging taking noticeably longer than it used to.
Sudden, large drops like these are usually caused by one of two things: the percentage gauge’s estimate was slightly off and corrects itself abruptly under load, or — more common as a battery ages — increased internal resistance causes the voltage (and so the displayed percentage) to fall quickly as soon as the device draws more power. Either way, this is normally a sign of an aging battery rather than a device fault.
Battery swelling or visible deformation is a safety issue. If your battery looks swollen or deformed, stop using the device immediately and replace the battery.
Before concluding you need a replacement
If you’re not satisfied with your battery’s capacity, before ordering a replacement we recommend:
- Re-running the 3 full charge/discharge cycles described above, to recalibrate the percentage gauge.
- Checking whether flight duration improves across the 3 cycles.
If, after completing 3 full cycles, the battery life is still insufficient, it’s time to replace the battery.
Why isn’t battery wear covered by the warranty?
Like the tires on a car, a battery is a component that naturally wears with use — this is expected behavior, not a manufacturing defect. Reduced capacity and shorter flight times over time are a normal part of a lithium-ion battery’s lifespan, and how soon they show up depends a lot on how the battery has been used, charged, and stored.
Battery degradation can also result from external factors rather than from a fault in the device itself. These include:
- Excessive heat or a power surge, which can accelerate battery degradation or damage the battery.
- Using a poor-quality or underpowered power bank, which can provide unstable or inappropriate charging and potentially contribute to battery degradation.
- Storing the device for a long period with a very low battery level, which can cause the battery voltage to fall too far and permanently reduce its capacity or, in some cases, prevent the battery from charging normally.
Because these factors are outside the control of the manufacturer and can affect the battery independently of any manufacturing defect, batteries are treated separately from the manufacturing defects that warranty coverage is designed to cover.
For this reason, as with most consumer electronics, normal battery wear and degradation caused by external factors fall outside our standard warranty coverage. You can read our full warranty terms here.
The good news: a replacement battery is simple and affordable to order, and restores your AIR³’s full flight time.
Ordering a replacement battery
You can order a replacement battery from our online store or from an AIR³ partner.
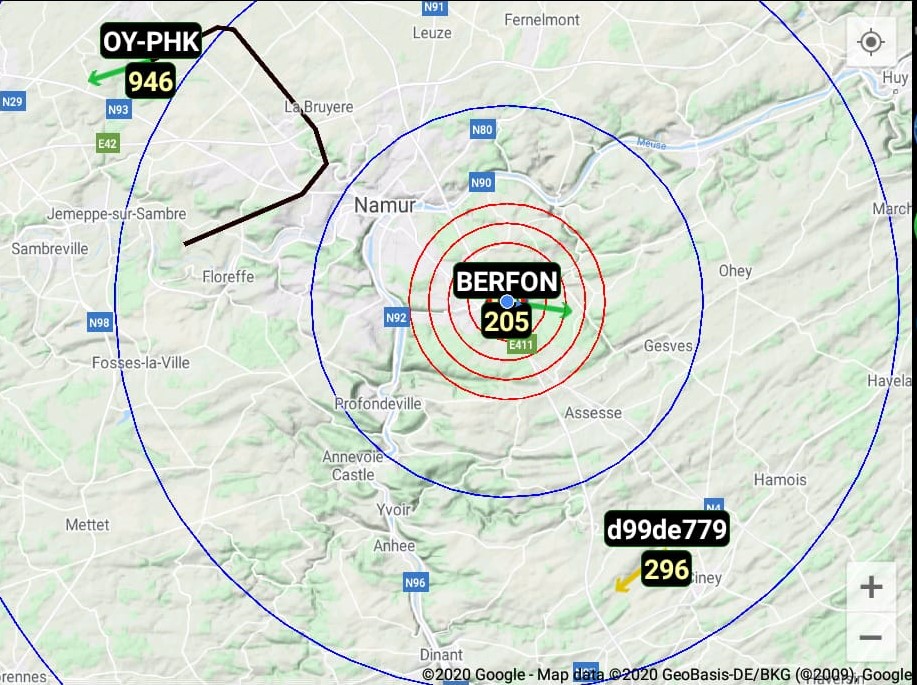
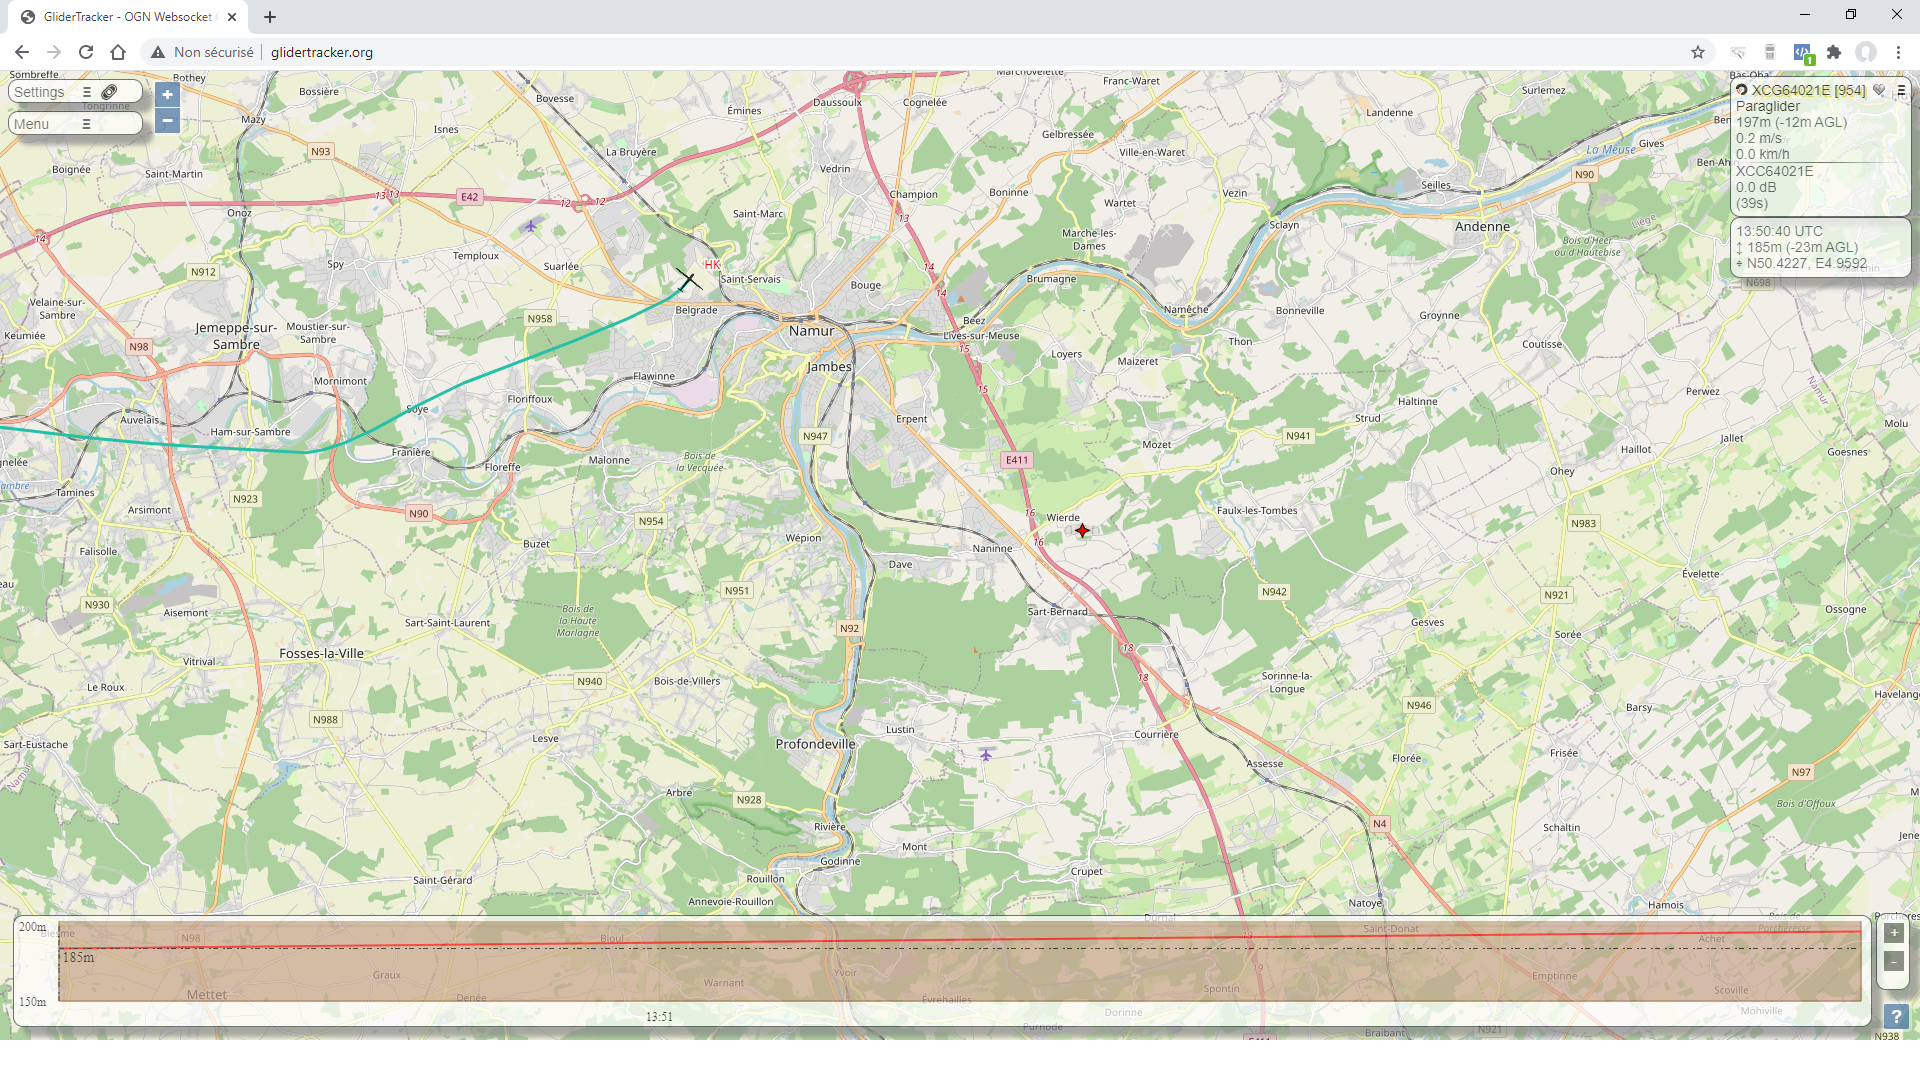
With any AIR³, XC Guide, running in the background, can display your position on OGN through an internet connection. With Air³ +, the FANET and FLARM module would display your position on OGN.
To know how to configure your Air³ to be seen on OGN through internet, read the procedure below or watch the tuto video to learn how to configure your AIR³ to be seen on OGN via XC Guide in the videos tuto page.
In XC guide, tap on the information blue button and scroll the XC guide status windows down to Open Glider Network
Tap on “New ID” and write down the Device ID and Competition ID provided.
Login with your OGN account. Add a new device and fill in the info that you wrote down. Select OGN as device type, select paraglider as aircraft type.
Once done, verify with XC guide that everything is working as expected (third button in the XC guide status window.
Go to Settings/Livetracking/Open Glider Network (OGN) and set your OGN options.
The level of brightness has a direct influence on both readability and energy consumption and therefore autonomy. If the brightness is set to its maximum, the energy consumption will be maximum and the autonomy minimum.
Check this FAQ related to readability.
Check this FAQ related to autonomy.
Most smartphones or tablets have a low screen brightness. This means that pilots set the brightness to maximum without really having good readability. So pilots are used to setting the brightness to maximum, regardless of the readability.
With AIR³ you have to look at things differently. The maximum screen brightness can be very high, higher than what is really needed. Those who can do the most can do the least… but the opposite is not true.
First of all, remember that the best readability is when your eyes are perpendicular to the screen. So most of the time you do not need maximum brightness.
Using maximum brightness all the time is like driving a powerful car at full throttle and using the handbrake to slow down most of the time.
With XCTrack Pro, there are 2 ways to manually increase brightness when needed: use the on-screen Brightness + widget or use one of the available physical buttons.
AIR³ has been greatly improved in terms of brightness management to improve readability and therefore autonomy. See below for more details.
As soon as the pilot increases the brightness manually (via the widget or a physical button), the brightness level is “overridden” by XCTrack. This overridden brightness value will be maintained until XCTrack returns the backlighting to normal intensity. XCTrack Pro has a new Brightness widget that displays the current percentage of brightness. If XCTrack overrides the system brightness, (!) is displayed next to the value. If XCTrack cannot determine the brightness value, (?) is displayed.
XCTrack Pro, as shipped with AIR³, has been configured to periodically return to the system brightness level through various events, setting the backlight to normal intensity.
AIR³ has an interesting feature: “Adaptive Brightness. By activating this Android feature, the system calculates the ideal brightness based on the lighting conditions. In a bright environment, the system increases the brightness level. In a darker environment, the system reduces the brightness level.
So whenever XCTrack Pro sets the backlighting to normal intensity, the brightness level is calculated by the system and modified, usually reduced, compared to a setting with maximum brightness.
Without adaptive brightness, we recommend setting the brightness to 60%. Whenever you feel the need to increase readability, tap the Brightness + widget. The brightness will return to the value you set at startup after one of the events has occurred.
In AIR³ with adaptive brightness enabled (default), the system calculates the best brightness value. You can increase the brightness at any time using the button or the Brightness + widget. Once XCTrack sets the backlight to normal intensity, the new value is determined by the system based on the lighting conditions.
It may take a short while to change the screen brightness once the light intensity on the screen changes. However, when the pilot starts to turn in a thermal, the sun’s light intensity will quickly change. This is why we recommend setting XCTrack to force the screen intensity to 80% (AIR³ 7.35) or 100% (AIR³ 7.3) when XCTrack detects a thermal start. When the end of the thermal is detected, set XCTrack to return to normal intensity. These settings will increase autonomy while maintaining the best readability according to need.
AIR³ 7.35 (+) has a very bright screen (up to 2200 nits). The higher the brightness, the more heat is generated by the screen itself. If you expose the unit to direct sunlight before take-off, the screen may start to flash if you have set the screen brightness to a very high level. It is strongly recommended that the unit is kept in the shade before take-off. We also recommend that you set the screen brightness to less than 90% to avoid overheating. As long as the brightness rarely reaches this level with Adaptive Brightness enabled, you should rarely find yourself in this situation.
Visit our Partner’s page here and contact one of them… or get a unit directly from our Webshop.
AIR³ has more than enough memory with 128GB of storage.
If you need more storage, you can use an SD card BUT after you insert the card, you will be asked if you want to use the SD card as phone storage or as portable storage. DO NOT select Phone storage with data migration! Otherwise, the SD card will be considered part of the internal memory and you will have problems with some applications that may not be able to manage the memory correctly. If you remove the SD card, it will be even worse.
You should set up the SD card as portable storage. This will allow you to store your large files on the SD card, but it will not be part of the system.
If you have accidentally selected Phone storage with data migration, go to Settings/Storage and select ‘This device’. Click the 3 dots in the top right hand corner to bring up the menu and select Data migration to revert to the previous state. Then select the SD card, go back to the menu and select ‘Format as portable storage’.
YES! But you need to have an internet access.
Whatsapp allows you to share your Whatsapp account across multiple devices. Once you have “connected” the AIR³ to your Whatsapp account on your phone, you can use Whatsapp installed on the AIR³ to make calls as long as you have an Internet connection (public wifi, phone hotspot,…).
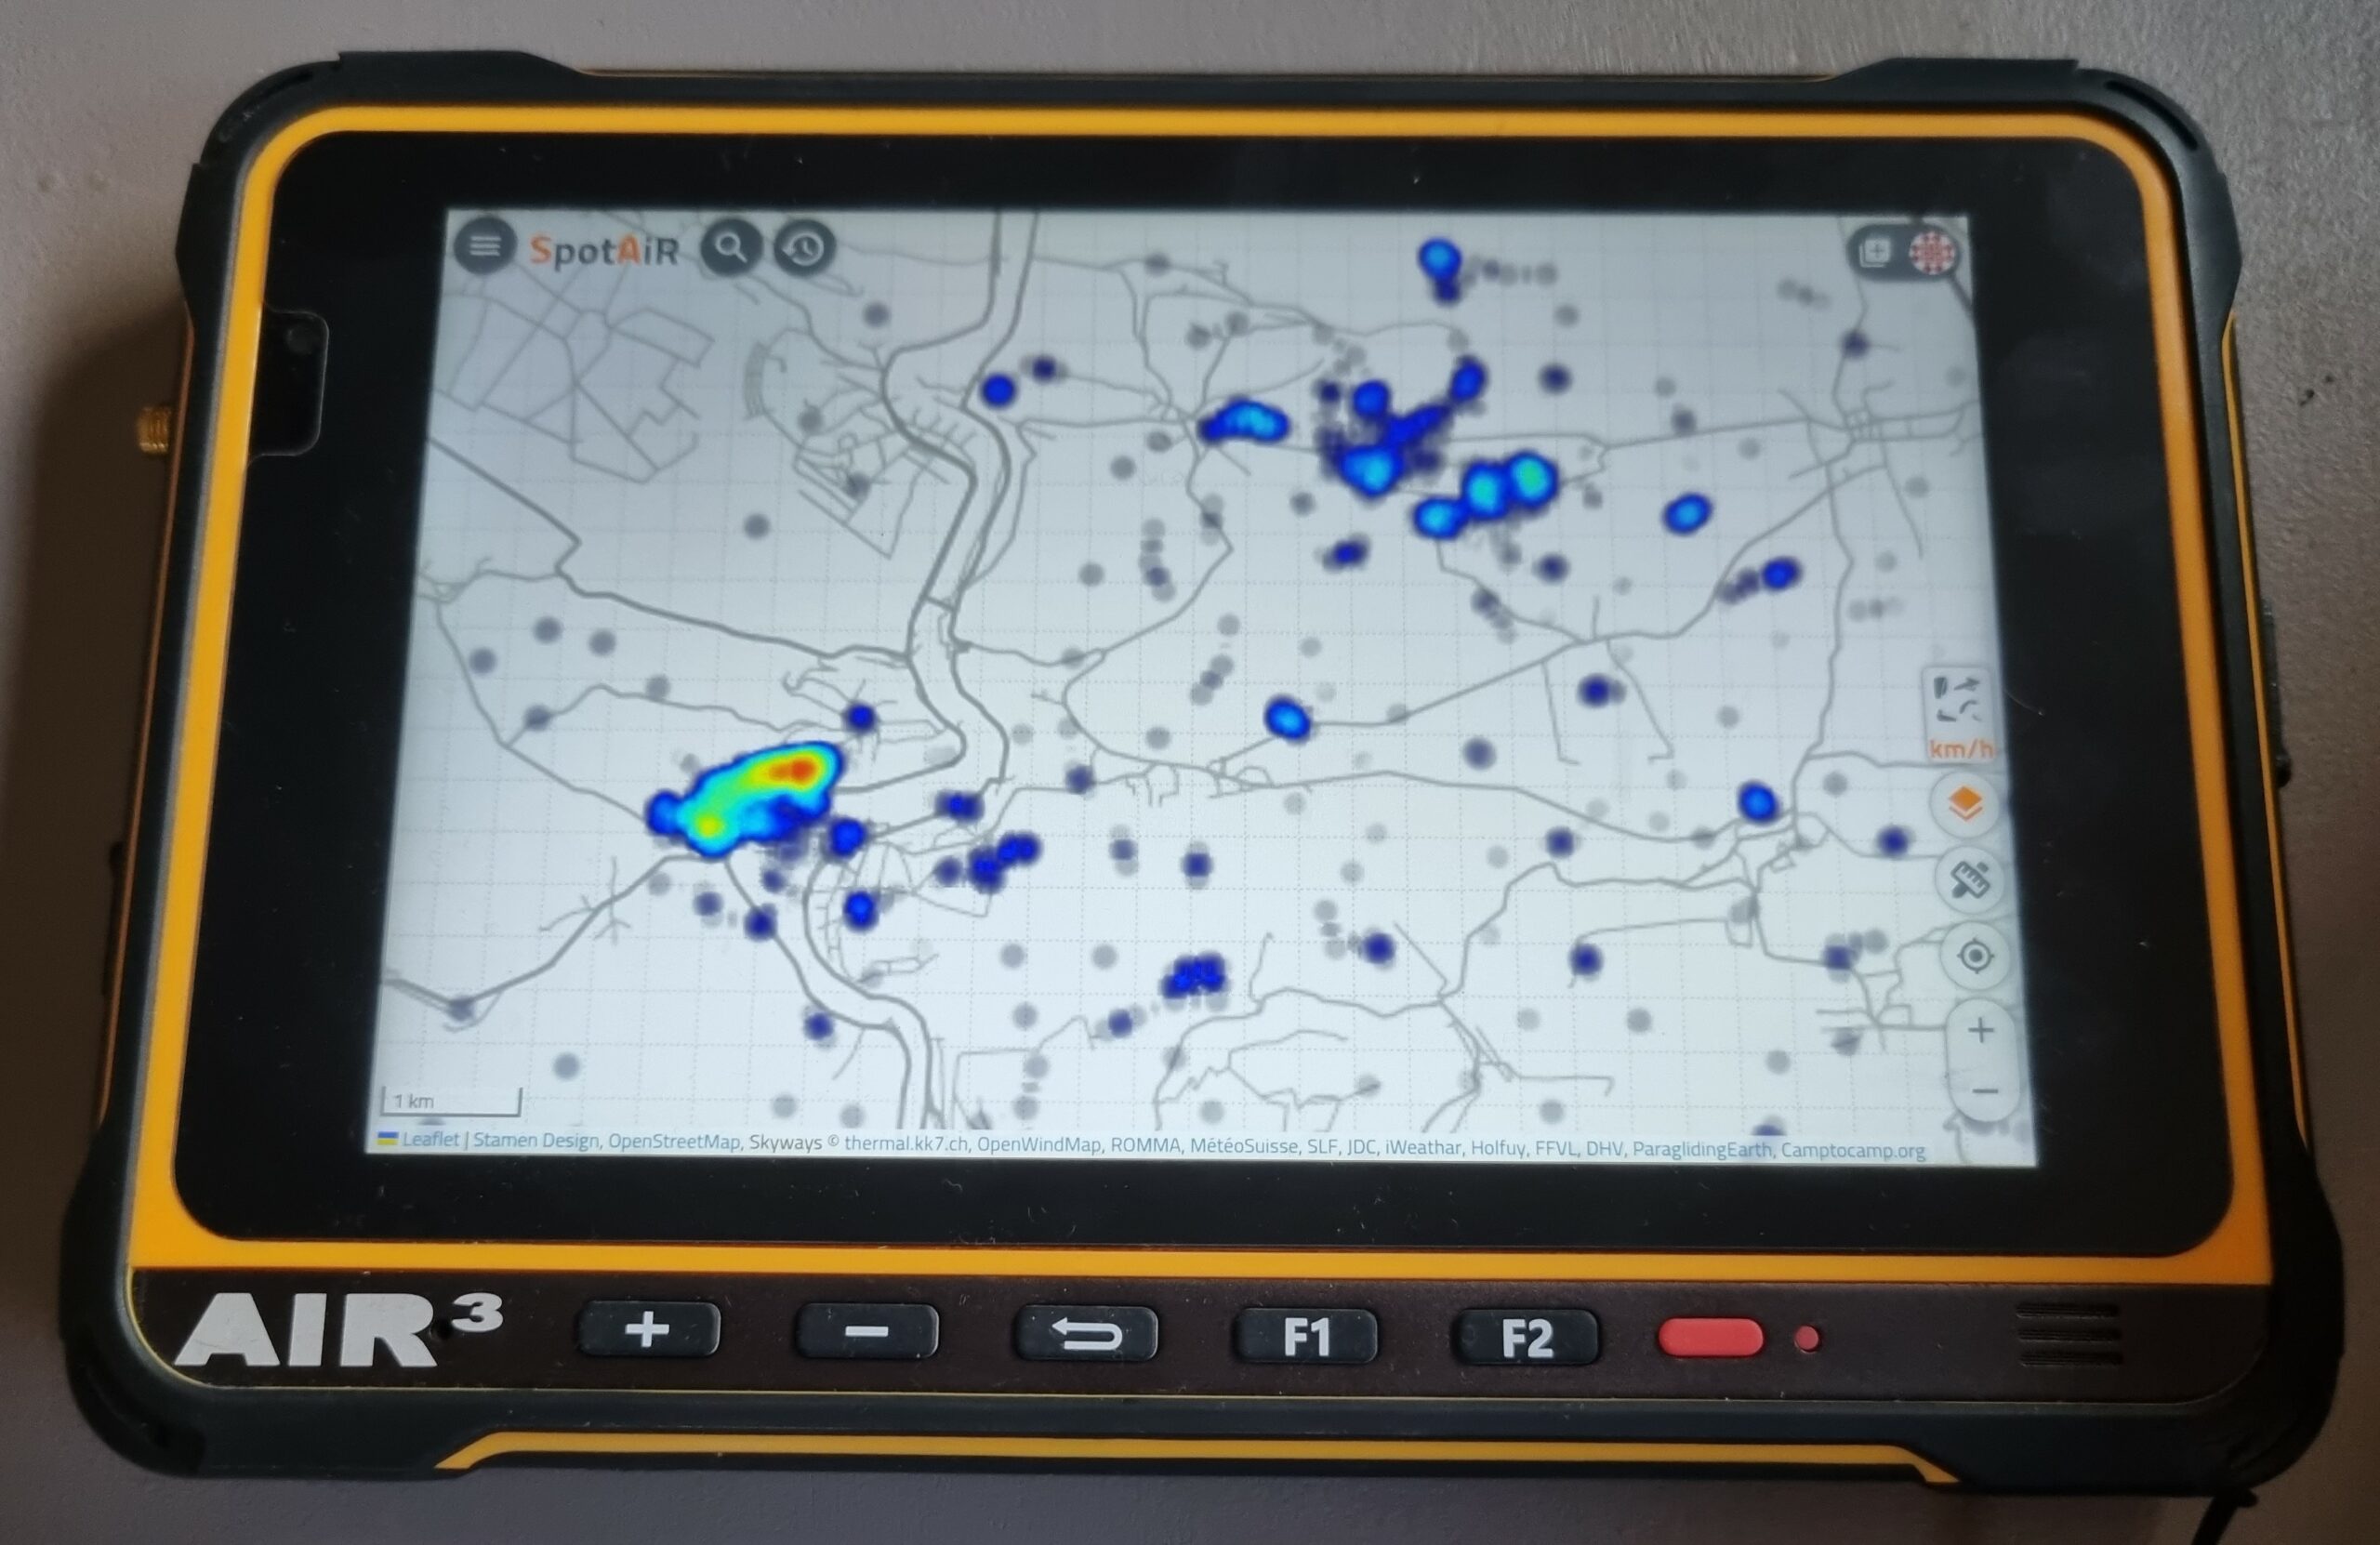
Since XCTrack 0.9.9.0 (beta) you can directly see the thermal map layer on both XC Map widget or Task Map widget.
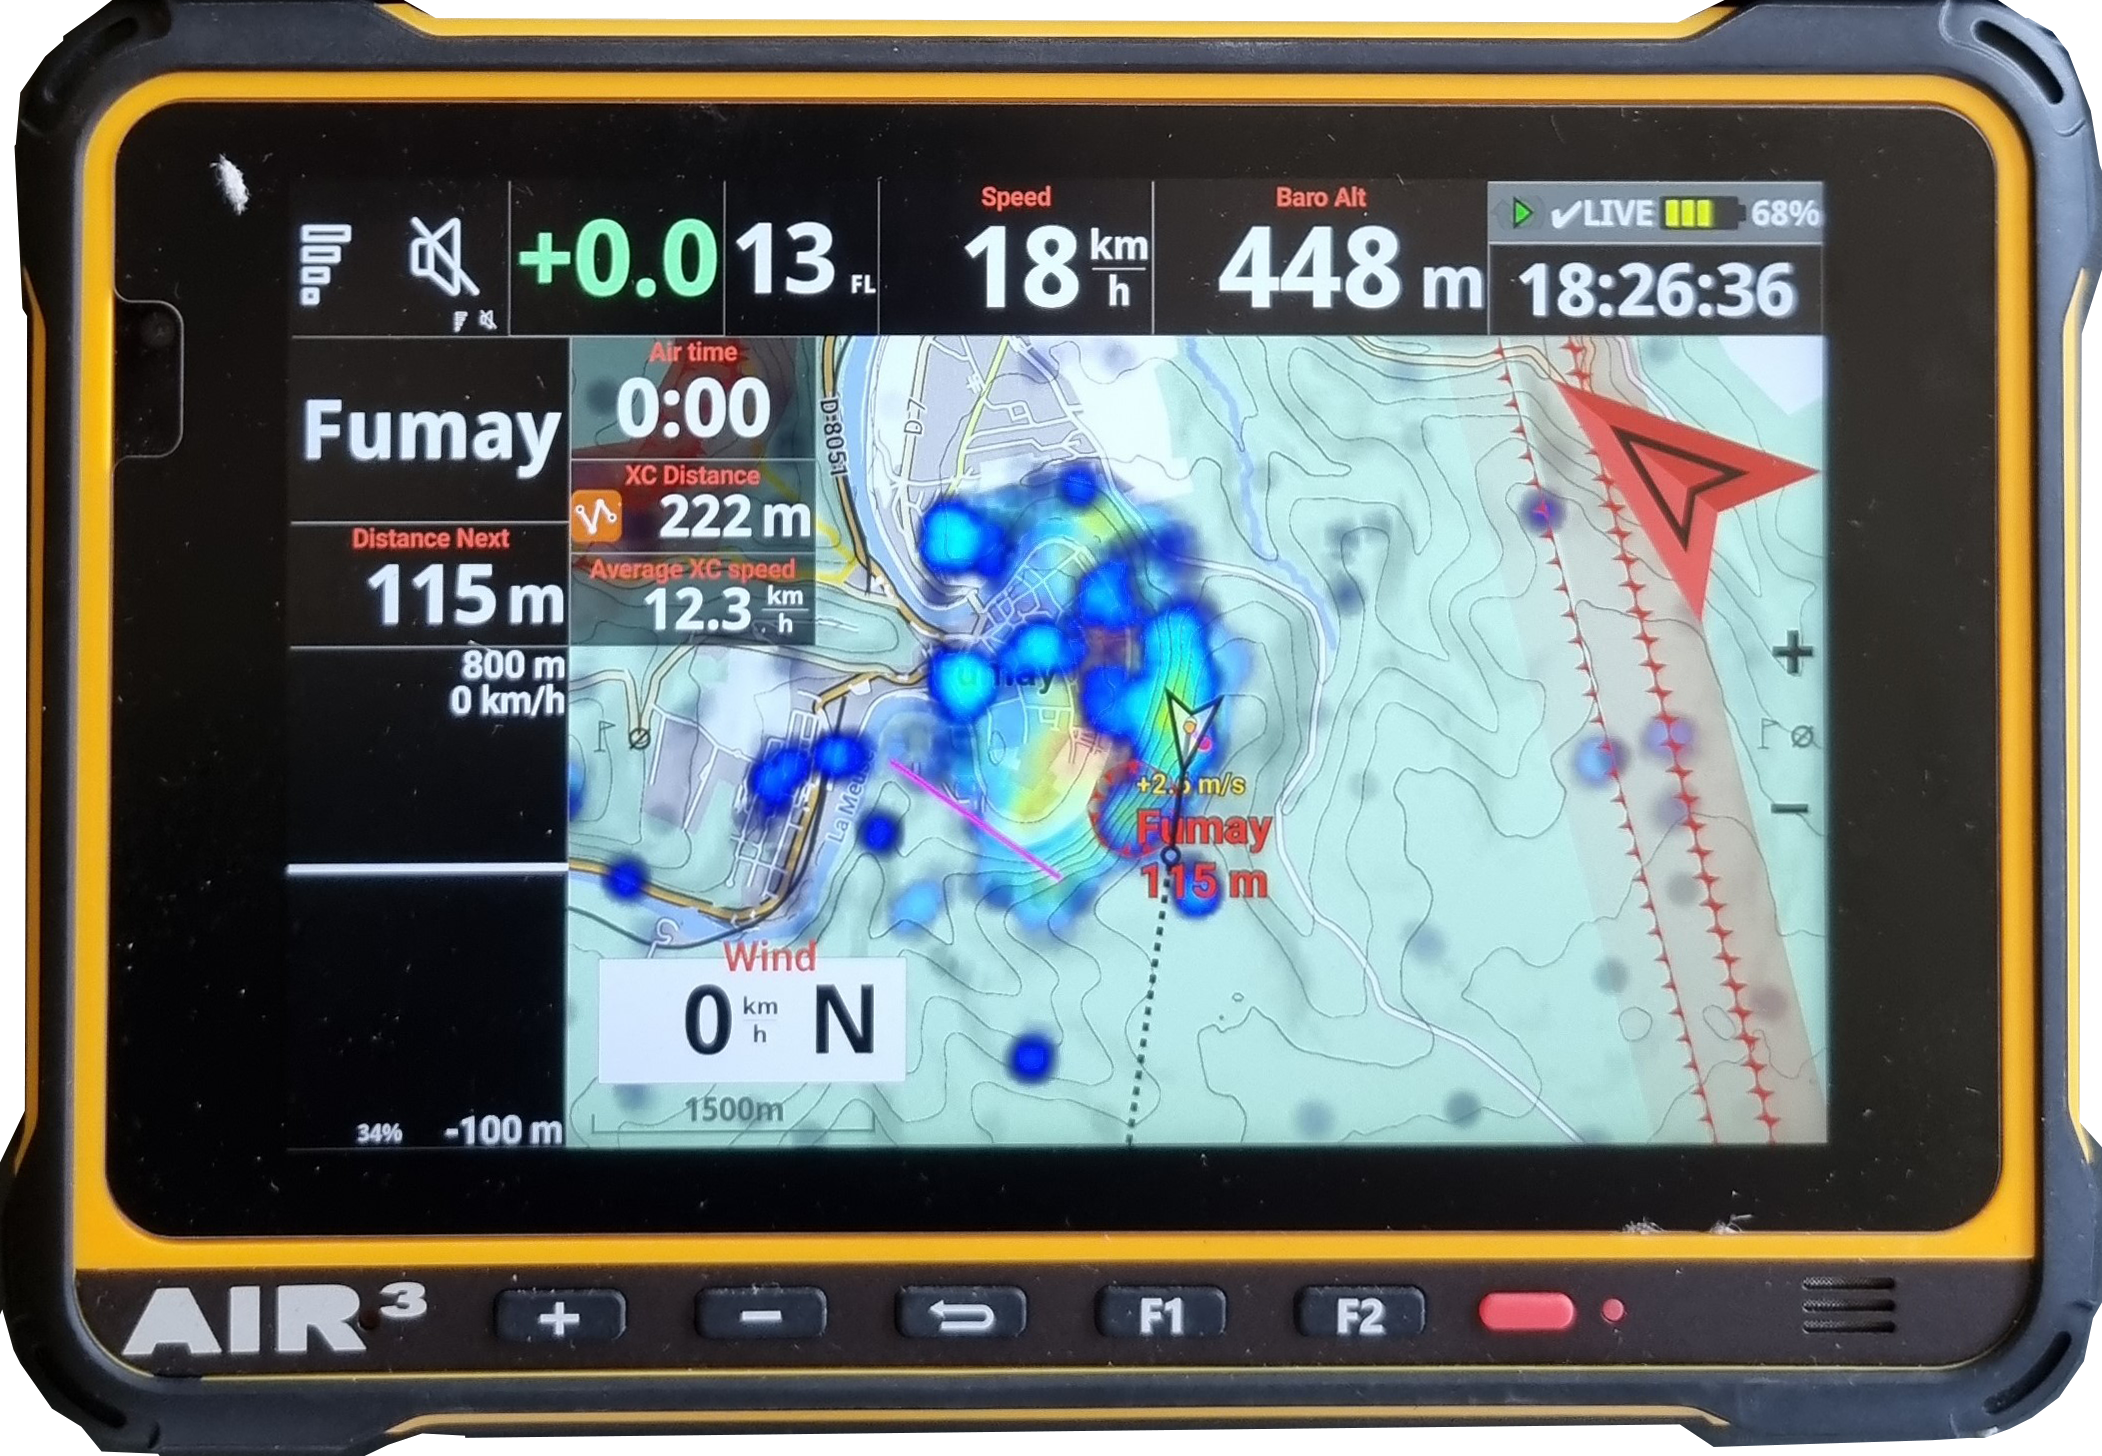
You can read below, other ways to get such thermal spots out of the kk7 database .
These are now considered as “Old way”…
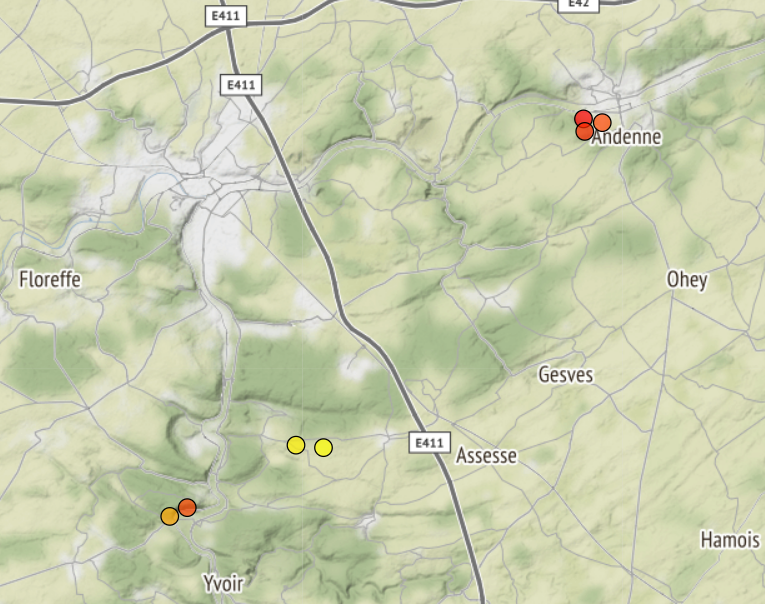
1/ Thermal hotspots
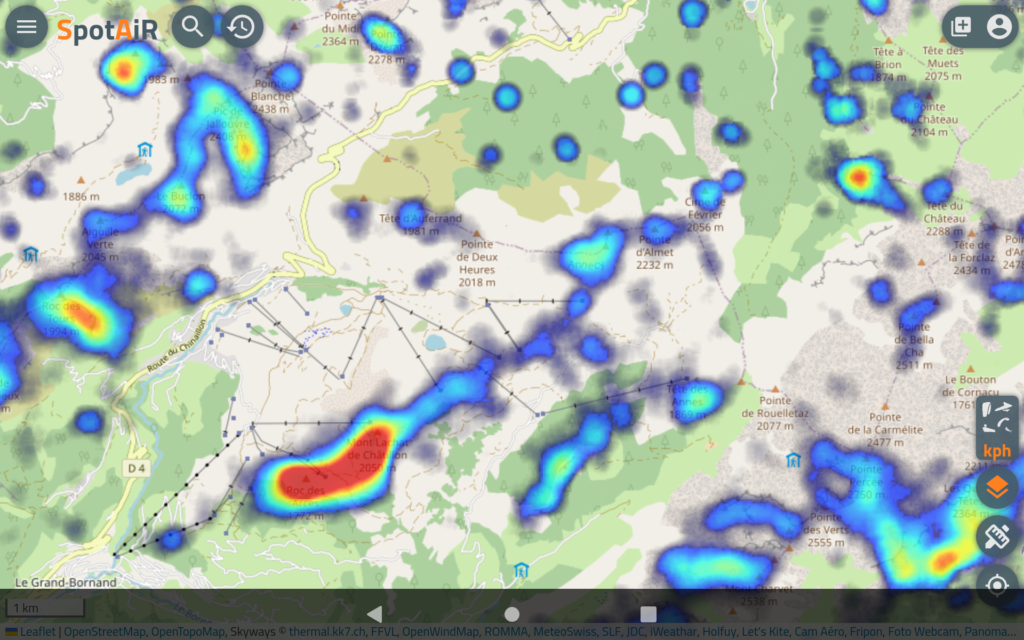
2/ Thermal map
1/ To get the thermal hotspots
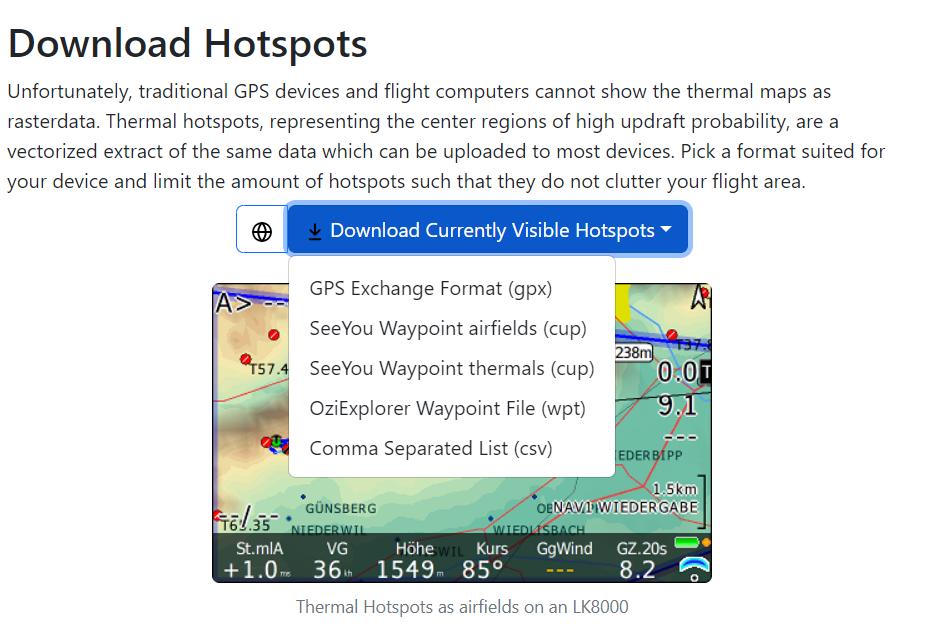
- Download the hotspots from https://thermal.kk7.ch/ when you have selected the region you want the hotspots from.
- Choose the wpt format and put that file in the waypoints folder of XCTrack.
- Read how to activate a waypoint file in XCTrack here.
- You will see the thermal hotspots as black dot on the map if you have activated “Display waypoints” in the Map configuration of the XC map or Task map widgets
2/ To have the thermal map directly within XCTrack:
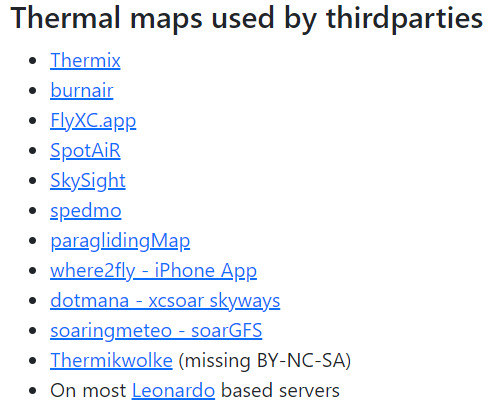
- Choose the thermal map provider you are happy with:
- Add a new page to XCTrack layout. See how to add a new page in Menu/Preferences/Page layout
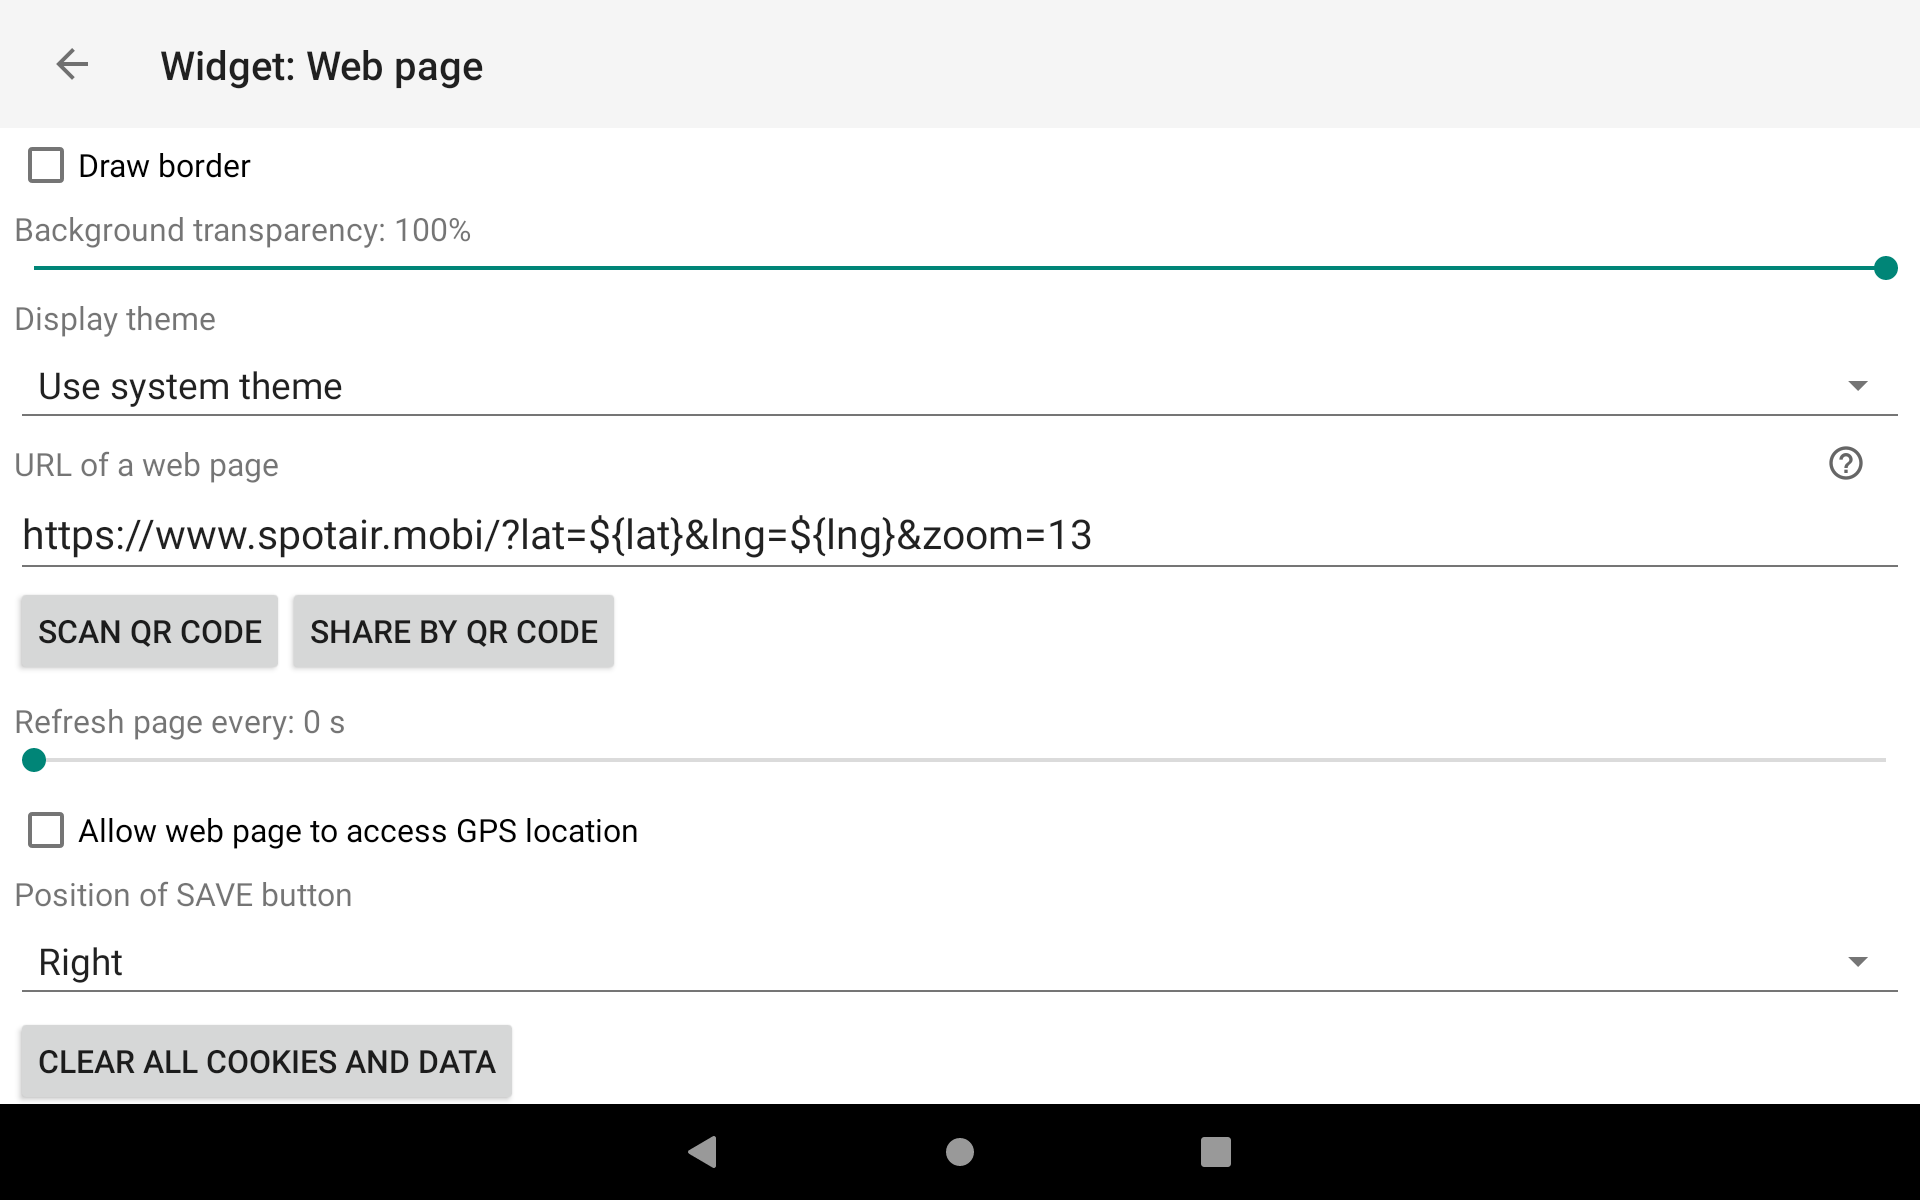
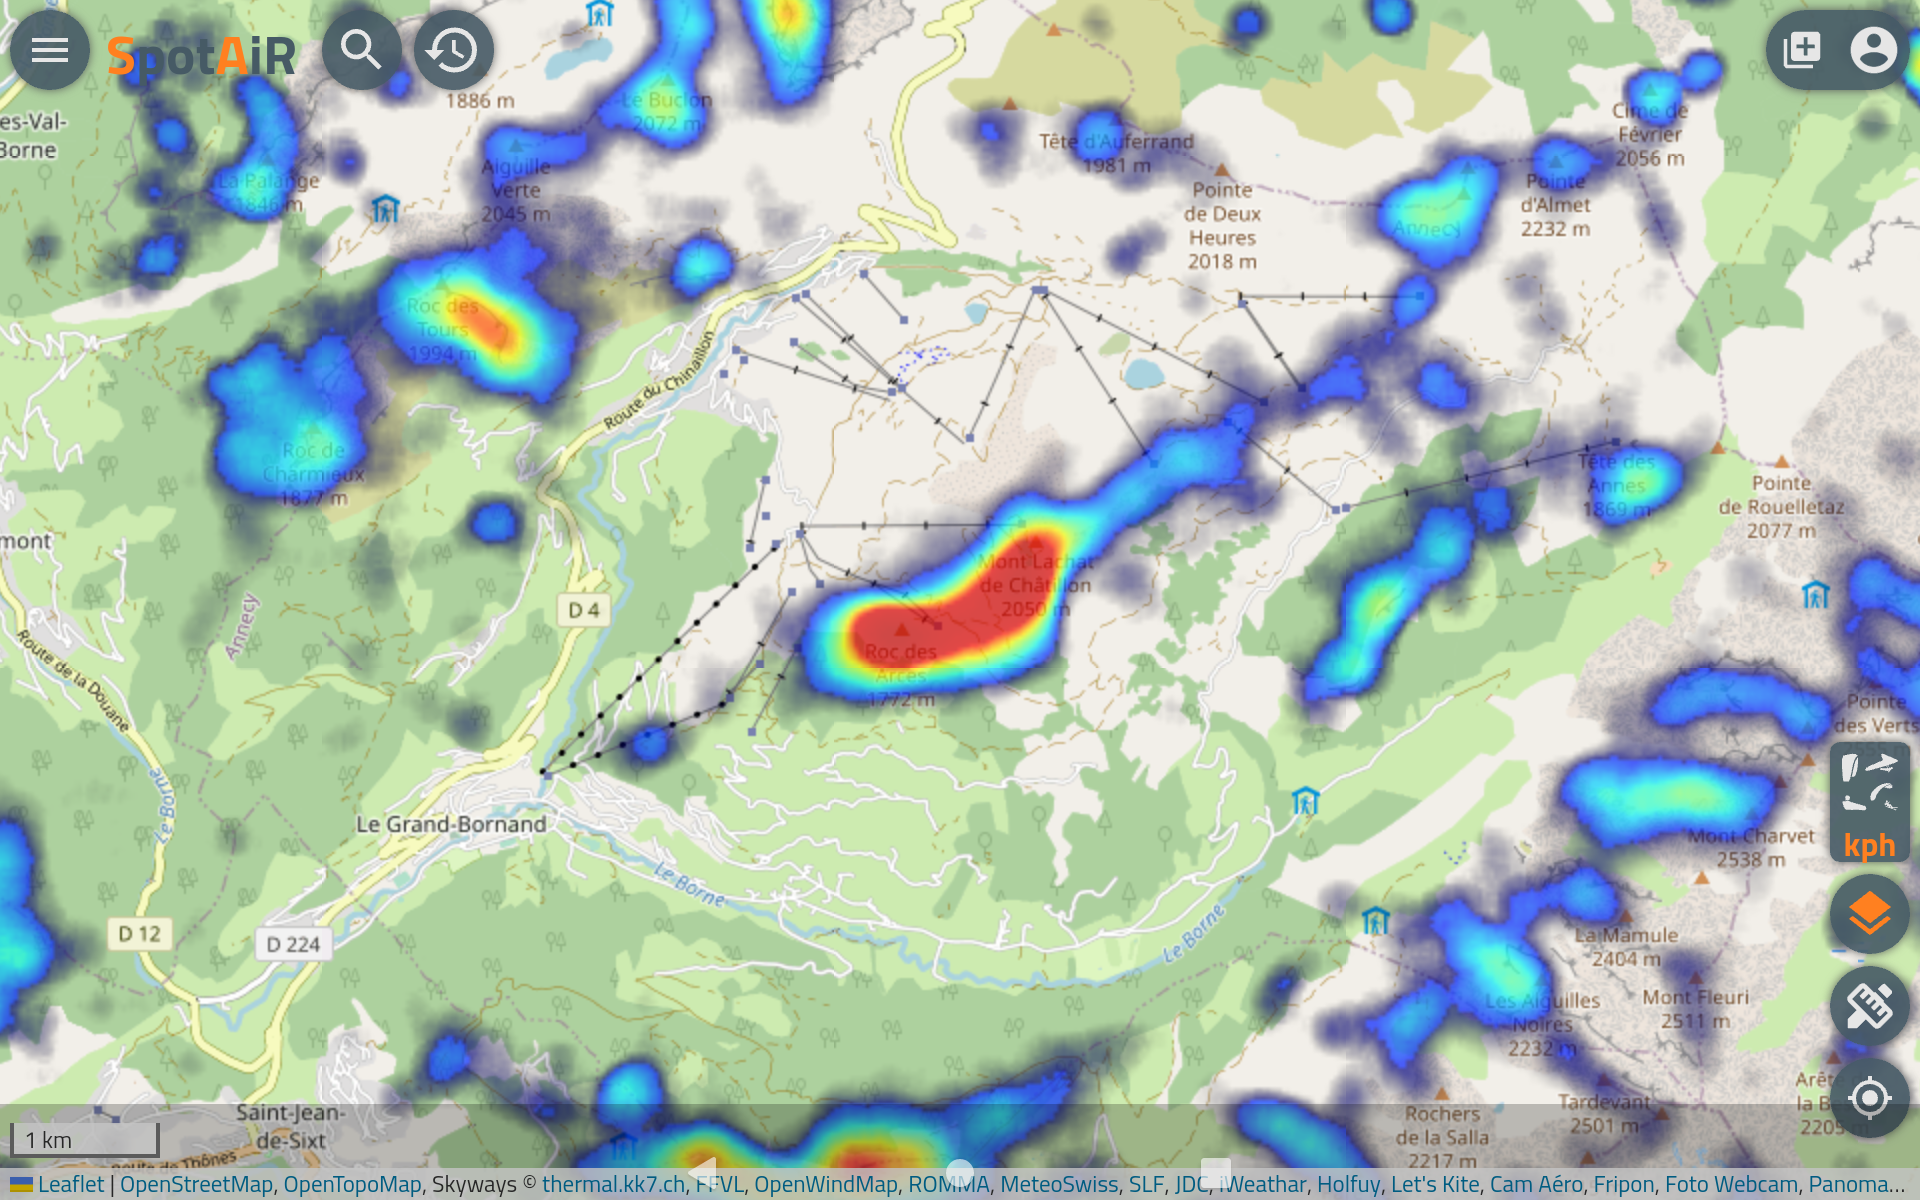
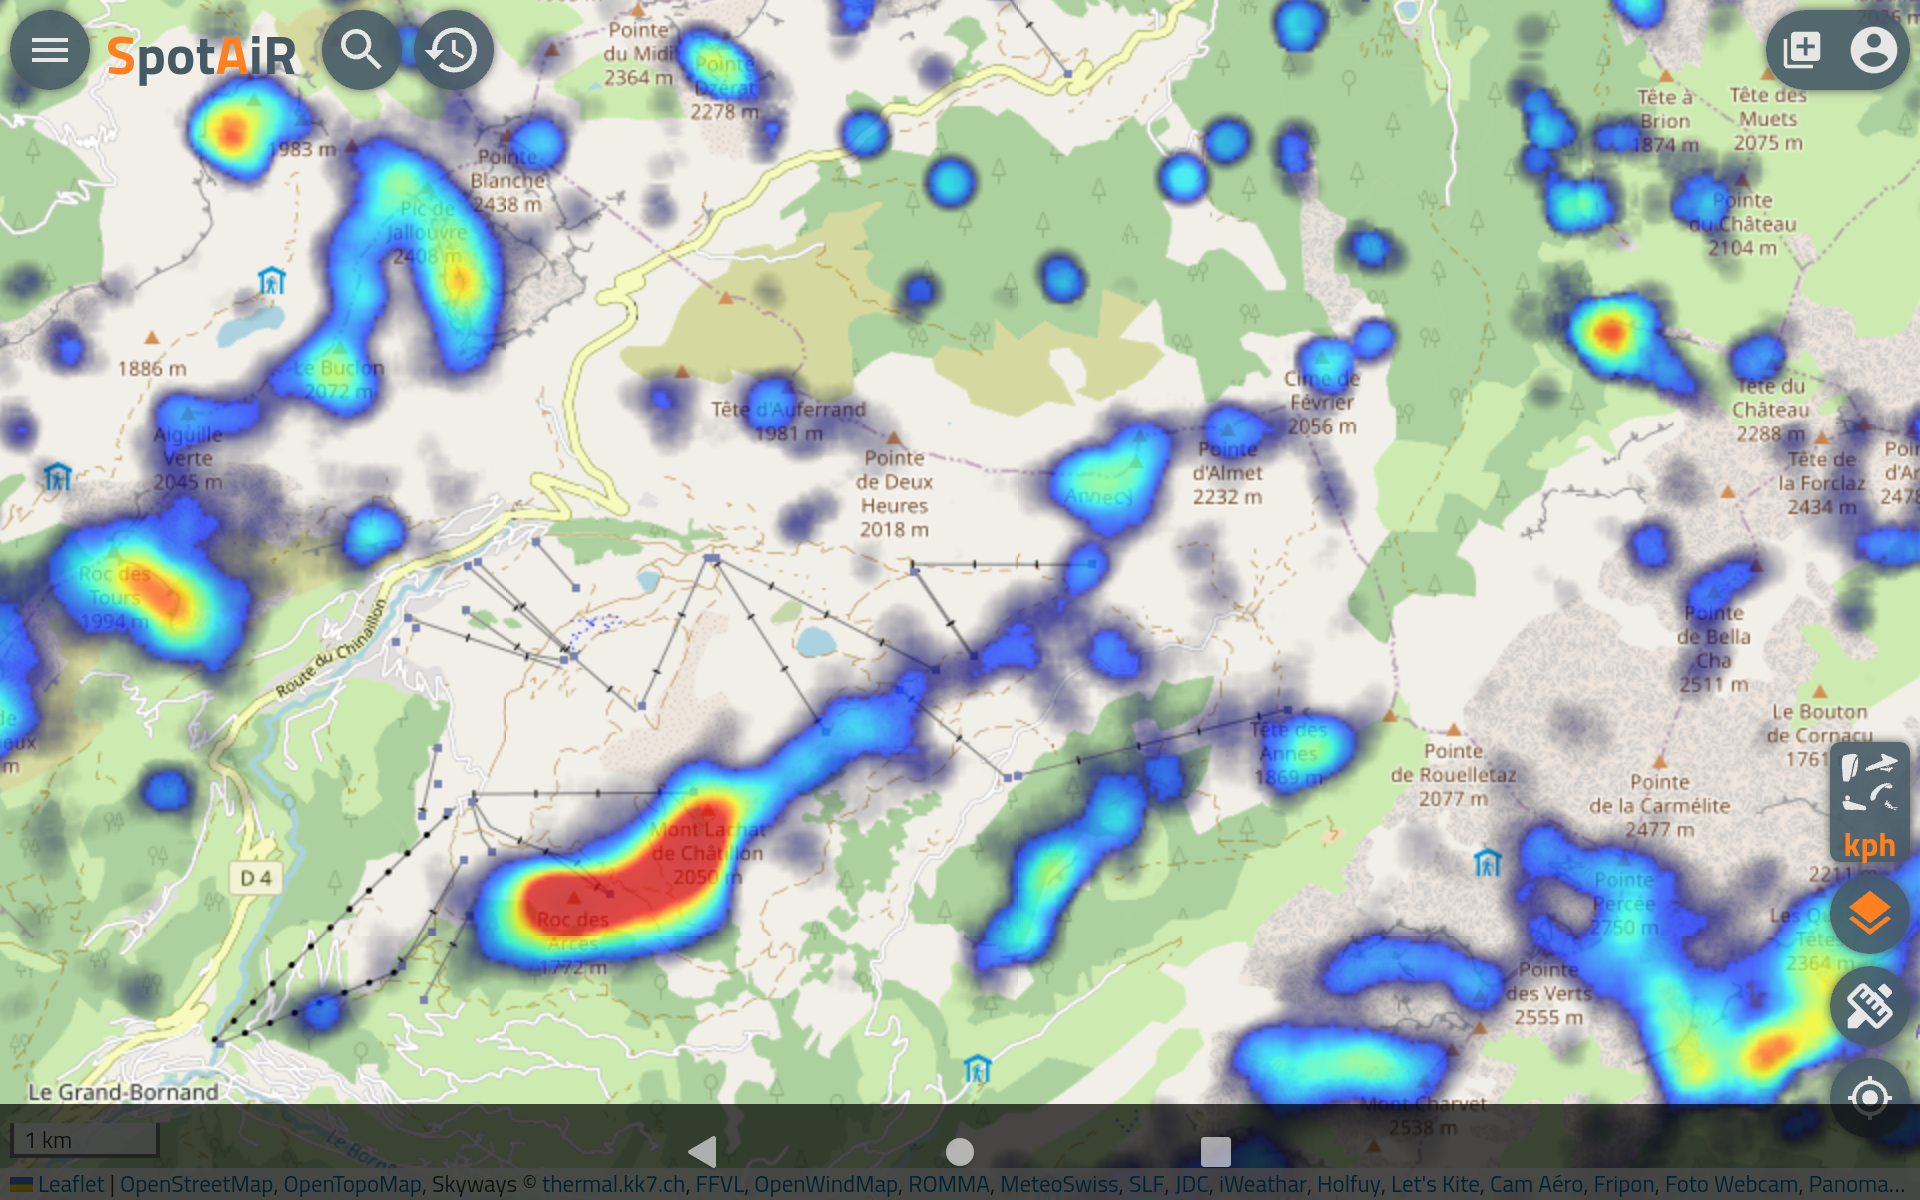
- Add the Webpage widget and use the URL of one of the map provider using thermal KK7 (see above the list). We would recommend Spotair. Read how to add the webpage widget and how to configure it here. Read below how to use Spotair with placeholders.
- Adjust the settings of the map to display only what you need. Reminder: swipe up to enter the webpage widget adjustment mode, save at the end your webpage adjusted.
Use placeholders in the URL instead of GPS centering

AIR³ has 2 cameras: front and back. Check AIR³ specifications for more details. So, you can take pictures or videos with Air³.
The back camera includes a high-sensitivity sensor that allows to take good pictures when the light is weak. The drawback of this high-sensitivity sensor is a “saturated” picture if you take the picture in light intense scenes or with a flash, if you are too close from the objects you are taking.
The are some workarounds: use the front camera, use the back camera with HDR mode.
This feature has been improved with AIR³ 7.3.
Yes! Of course.
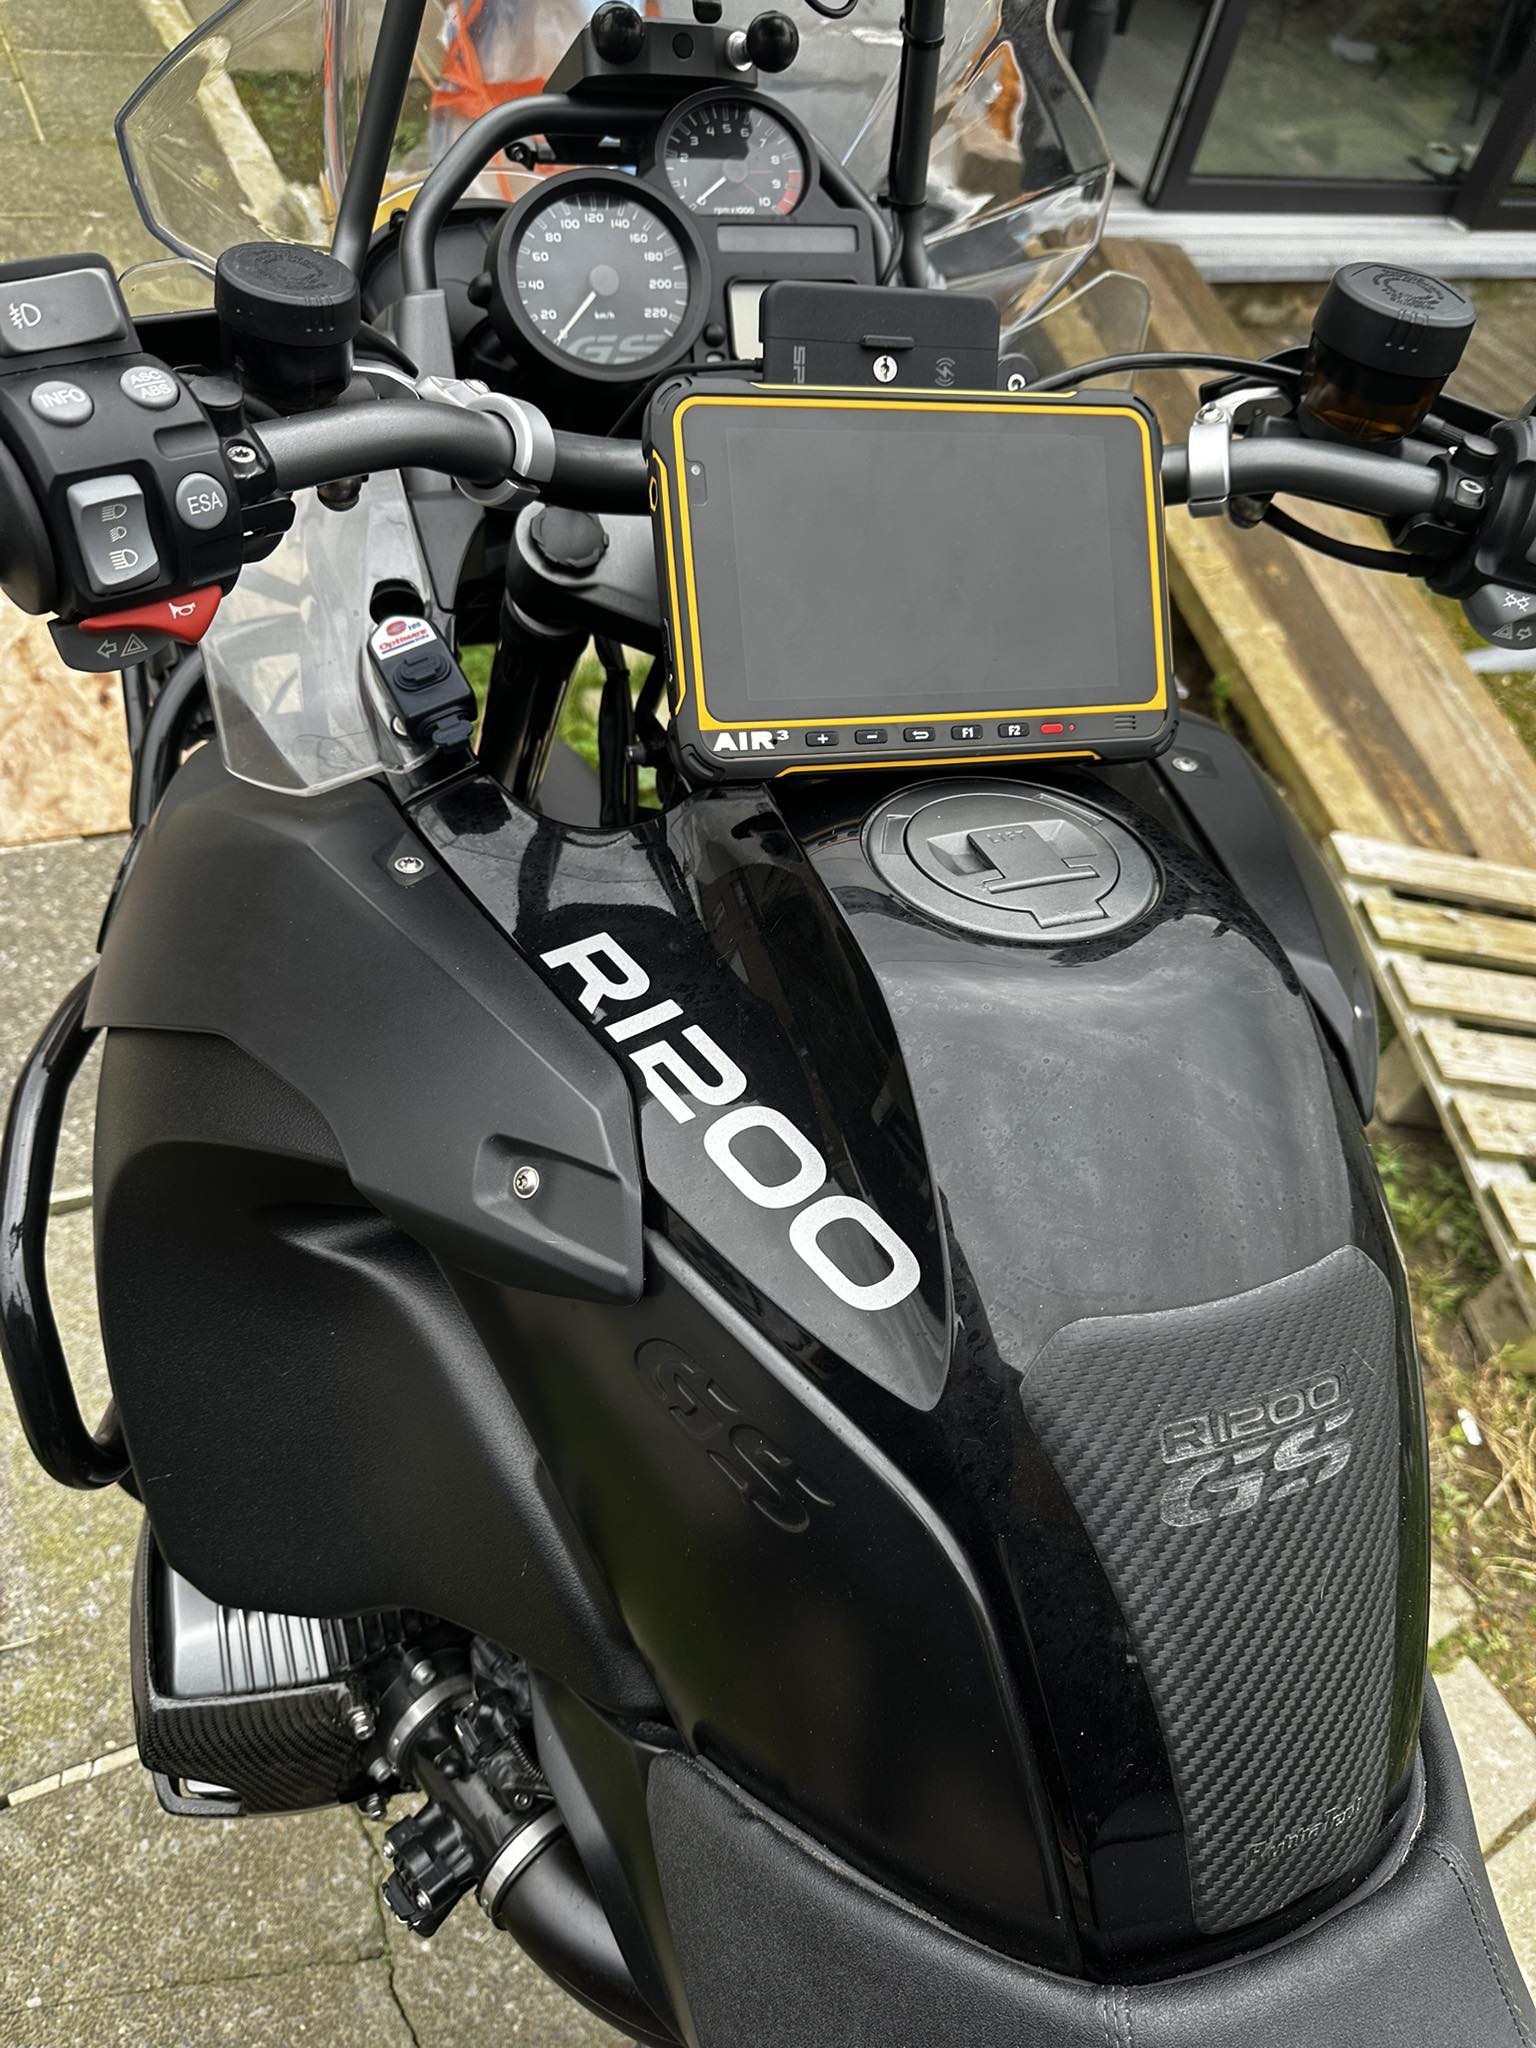
Originally designed for flying, AIR³ is also an ideal tool for many other types of outdoor activities. Based on Android, it can run any Android application. This expands the possible uses without limit. If you need a robust instrument, very readable in direct sunlight, with a large autonomy, waterproof, with a very powerful GPS, etc.. AIR³ will meet your needs perfectly. AIR³ is a mix of GPS, smartphone, tablet, ruggedized for heavy use.
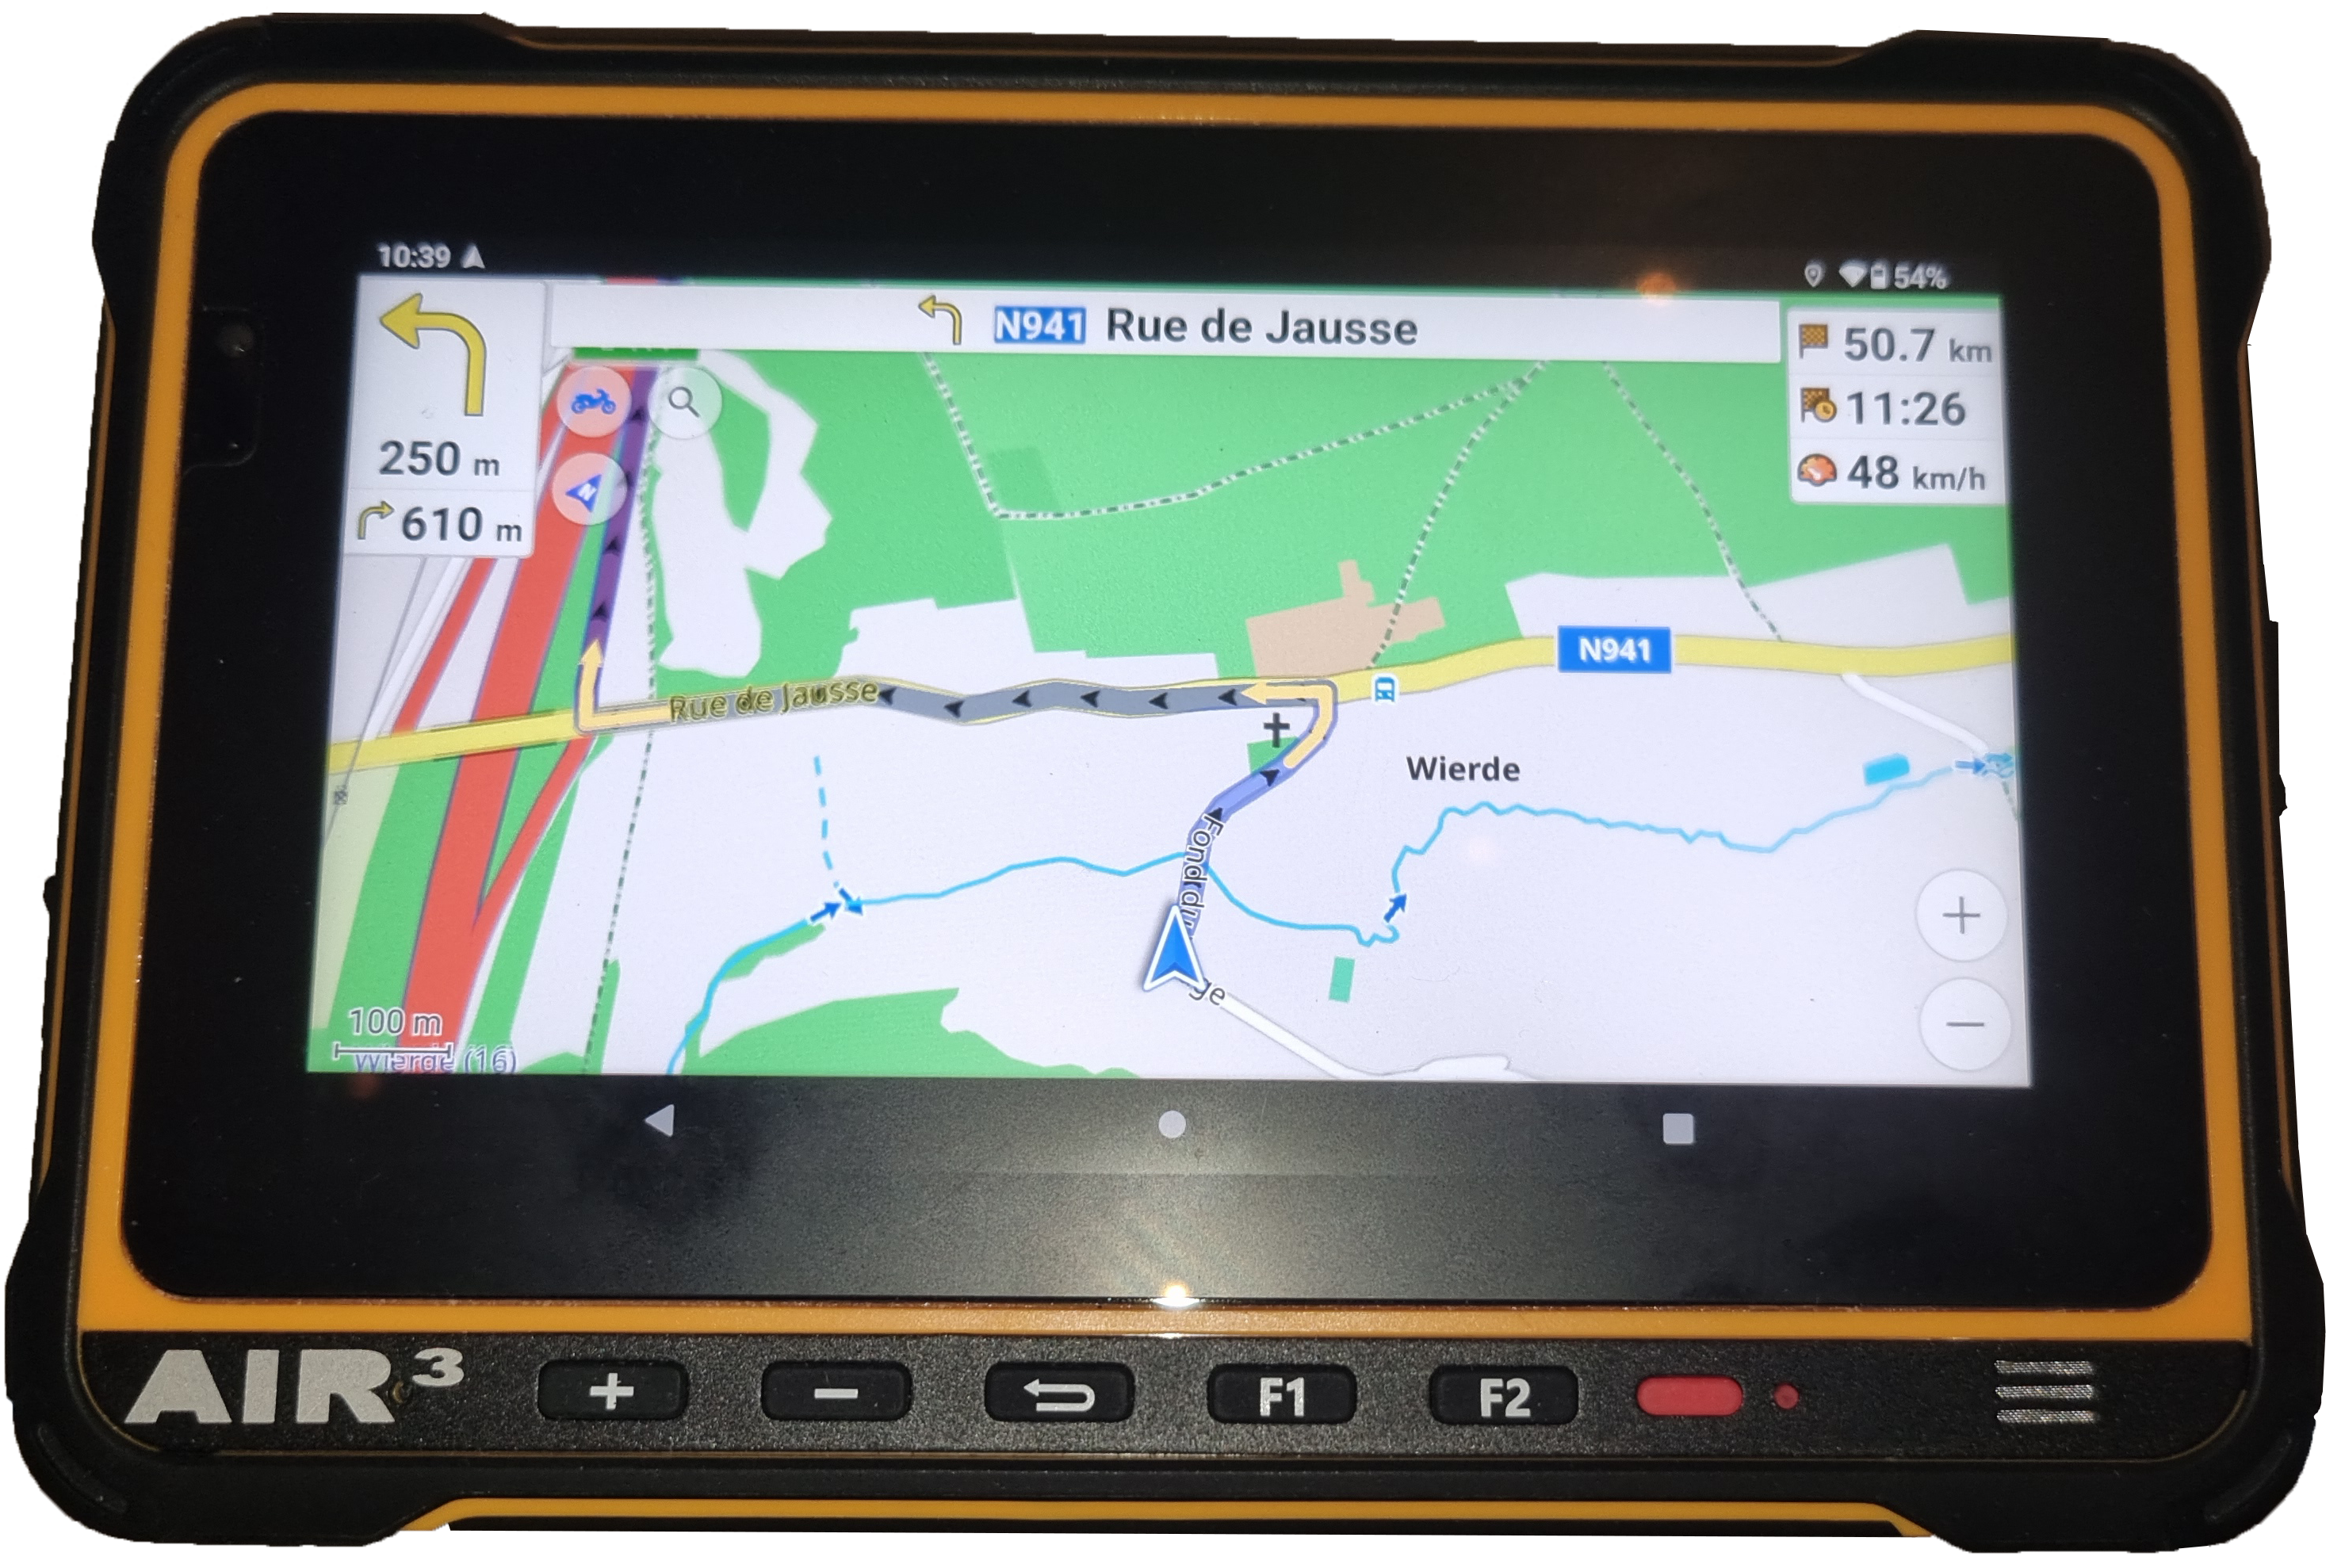
Different brackets have been designed to attach the AIR³ to different supports. For example, the paramotor base can be used to attach the AIR³ to a motorcycle handlebar and use it as a perfect navigation GPS.
Google maps app, OpenStreet maps app (OsmAnd) are for example two very good apps with navigation features and offline maps that will match most of navigation needs.
By default, the free version of OsmAnd allows you to download only 7 offline maps directly from the application. If you need to prepare your trip with more than 7 offline maps, you can either purchase an OsmAnd Pro license, which will allow you to download unlimited maps (and you will benefit from many other very interesting features), or you will need to copy the maps manually. Go to the Maps list on the OsmAnd website, select the map(s) you want to get. Extract the OBF file from the zipped file. Copy this OBF file to the OsmAnd directory: AIR3-7.3/Android/data/net.osmand/files/.
If you want to listen to music while driving, install your favorite music player and connect your headphones to AIR³ via Bluetooth or the 3.5 mm stereo jack.
The answer is YES!
However, you will need to use an eSIM card to convert the AIR³ into an eSIM compatible unit.
The eSIM.me solution has been successfully tested, click here.
With such eSIM card, where ever you go, you can easily get an eSIM profile to obtain an internet and/or a local phone number without the need of an additional physical SIM card.
YES.
This guide helps you connect your AIR³ to an iPhone’s Personal Hotspot via Wi-Fi or Bluetooth. Follow these steps to ensure compatibility and troubleshoot issues.
1. Set Up the iPhone Hotspot
– Enable Hotspot:
Open Settings > Personal Hotspot (or Settings > Cellular > Personal Hotspot).
Toggle Allow Others to Join ON.
Note the Wi-Fi password displayed.
– Enable Compatibility Mode:
Turn ON Maximize Compatibility to use 2.4 GHz Wi-Fi and WPA2 security (most AIR³s connect better to 2.4 GHz than 5 GHz, and WPA3 can cause issues).
– Simplify iPhone Name:
Go to Settings > General > About > Name.
Set a simple name (e.g., “Hotspot4AIR3”) using only letters and numbers, avoiding emojis, accents, or special characters like apostrophes.
– Keep Hotspot Active:
Leave the Personal Hotspot screen open on the iPhone until the AIR³ connects to ensure the hotspot remains discoverable.
– Check Carrier and iOS Settings:
Ensure your carrier allows hotspot usage (contact them if the hotspot option is grayed out).
Update iOS to the latest version (Settings > General > Software Update) to fix known hotspot bugs.
2. Connect from the AIR³
– Access Wi-Fi Settings:
Open Settings > Wi-Fi on your AIR³.
– Find the Hotspot:
Look for the iPhone’s hotspot name (SSID) in the Wi-Fi list.
If it doesn’t appear, tap Refresh or select Add Network to manually enter the SSID (exact iPhone name).
– Enter Password:
Select the hotspot, enter the password from the iPhone, and connect.
– Verify Connection:
Check for a Wi-Fi icon in the status bar and test internet access (e.g., open a browser).
– Enable Auto-Reconnect (if available):
In Wi-Fi settings, enable “Auto-connect” for the hotspot to avoid manual reconnection.
3. Troubleshoot Connection Issues If the AIR³ fails to connect or detect the hotspot, try these fixes:
– Wi-Fi Band Issue: Confirm Maximize Compatibility is ON in iPhone’s hotspot settings (forces 2.4 GHz, which AIR³s reliably detect).
– SSID Not Visible:
Ensure the iPhone’s hotspot screen is open.
Rename the iPhone to a simpler name (e.g., “iPhoneHotspot”).
On the Android, manually add the network (enter the exact SSID and password).
– Low Power Mode: On the iPhone, disable Low Power Mode (Settings > Battery) as it may disrupt hotspot functionality.
– Interference or Range:
Move the iPhone and tablet closer (within 50 cm).
Avoid Wi-Fi interference from other devices (e.g., microwaves, Bluetooth gadgets).
– Carrier Restrictions: Verify with your carrier that hotspot functionality is enabled on your plan.
– Bluetooth Tethering as Backup:
On iPhone: Go to Settings > Bluetooth and turn it ON.
On Android: Go to Settings > Bluetooth, pair with the iPhone (accept pairing prompts on both devices).
On iPhone: Enable Personal Hotspot and confirm Bluetooth tethering is active.
On Android: In Bluetooth settings, tap the paired iPhone and enable Internet Access.
Test internet access on the tablet.
4. Summary
Always enable Maximize Compatibility on the iPhone for 2.4 GHz and WPA2.
Use a simple iPhone name (letters/numbers only, e.g., “Hotspot4AIR3”).
Keep the iPhone’s Personal Hotspot screen open during initial connection.
If Wi-Fi fails, try Bluetooth tethering as a reliable alternative.
Contact your carrier if the hotspot option is unavailable or restricted.
Additional Recommendations
Check for iOS-Specific Bugs:
Some iOS versions (e.g., iOS 15/16) had hotspot bugs affecting Android compatibility. Ensure the iPhone is updated to the latest iOS.
AIR³ can be commanded through voice thanks to Voice Access.
To activate this feature:
- Go to Play store and type “Voice Access”. (you need a google account to access Play store)
- Install Voice Access
- Go to Settings/Accessibility/Voice Access to configure it. As it is most of the time the case, always allow permissions when requested.
- Enable Use Voice Access
- Enable Voice Access shortcut
- Click on Settings
- Click on Voice Access commands to learn about the available commands by category
Here are the most useful commands related to our needs:
- To switch pages, you can use “Scroll Right/Left”
- “Scroll down” allows you to enter into toggle map mode. You can then use “Scroll Up/down/left/right” to navigate.
- “Go Back” / “Again” are also pretty useful commands
- “Start Zooming” will magnify the screen. “Stop Zooming” will stop the magnification. Note that this is not similar as using the zoom button or the zoom widget of XCTrack.
- If you switch between two different apps (for example switching from XCTrack and XC Guide), make sure the 2 apps are running and use the command “Previous app” to switch from one and the other.
- “Show numbers” is a useful command depending on the app used. Then say “Tap + (the number)” and it is similar as clicking on that button.
- “Show grid” will split the screen into squares. You can then just say the number of the square or “Tap + (the number of the square)” to simulate a click on that zone. This can be very useful for zoom in/out or Previous/Next Waypoint widgets. Remember also that a widget can be hidden behind the map. Once finished, “Hide grid”…
A lot of AIR³ pilots are Apple minded. Before going AIR³, they are wondering if they will be able to use AIR³ and if AIR³ is compatible with their Apple computer.
AIR³ is based on Android, but you do not need to be familiar with Android to use AIR³. Unlike other flight instruments, AIR³ is based on current smartphone / tablet technologies. But to use it for flights, you don’t need to know all the ins and outs of Android. Once you get it, you turn it on and off you go flying.
There are many features that you can take advantage of, but you don’t need to activate them to use them.
AIR³ is compatible with any Apple computer just like an Android smartphone. That being said, it doesn’t really tell you if it’s compatible with your Apple computer.
Well, perhaps it’s important to remind you that compatibility between devices is done differently these days. Why is that? Because more and more we are using applications to let devices talk to each other, rather than trying to connect devices to each other with a cable.
For example, with a traditional flight instrument, if you want to load waypoints, share a task or route, upload your track to a competition website, etc., most of the time you need to connect your instrument to your computer by cable and then transfer these files to or from your instrument. With AIR³, most of these actions can be performed directly by connecting to the Internet. AIR³ is a computr by itself.
- To get a waypoint file, just go on the competition website with the browser, get the file on the web and save it in the right folder.
- To share a task, share it by whatsapp, by email, by Messenger or just share it through a QR code.
- To get your track, if you have set to automatically upload your track after landing, you can directly get your track on your Xcontest account either in IGC or KML format. If you have not automatically uploaded, just upload it in your cloud flights so that you can easily get it from any computer.
If you still want to connect the AIR³ to an Apple computer, the easiest way is to use an application based on your local network. You will then see the AIR³ as if it were connected by cable.
You can either create a route manually in Menu/Navigation/Competition task, adding one by one the different turnpoints you want to follow, or create a route easily on a webpage (on a map) and then transfer it to AIR³/XCTrack through QR code.
Watch the tuto video related to that topic in the Videos tuto page. The video shows different methods.
XCTrack Pro is delivered preconfigured with different profiles (see AIR³ Manager).
However, you may want to change the interface according to your preferences. You can remove widgets, add widgets, resize widgets, change widget configuration. Read more details in the customize page of the XCTrack Pro Manual and the XCTrack Pro Widgets Manual.
Watch also this short video:
AIR³ is equipped with a performing GPS. However, you may experience some problems to get a good GPS signal in certain cases. Here are a few hints to discover why you would have faced such issue.
- Be sure to try to obtain a GPS position (once the satellites are received correctly) outdoors. A roof above you can affect satellite reception.
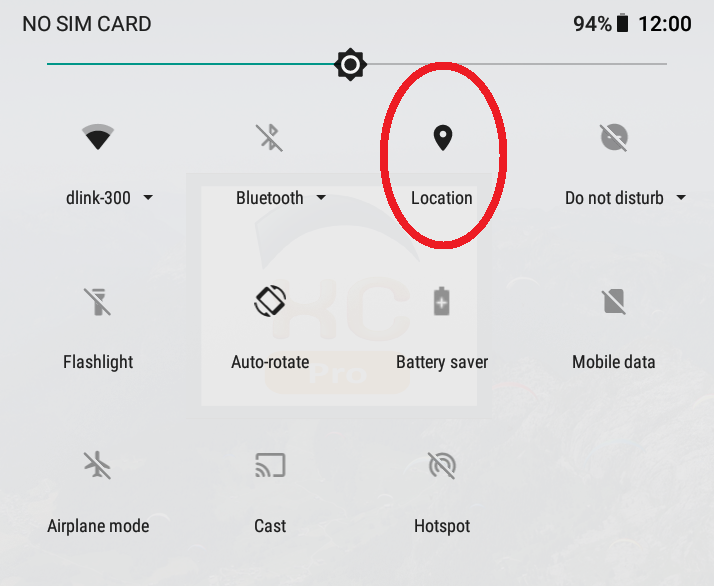
- The first thing to check is that you have location enabled. Swipe from up to down to get the main icons. Make sure the location icon is enabled
- The second thing to check is your time zone. The system will attempt to find satellites based on time zone and exact time. Go to settings/system/date & time and check the set time zone. Select the correct time zone by turning off “Auto Time Zone” if it is not set correctly. Once the correct time zone is set, make sure to enable “Auto Time Zone”.
- The third thing to check is the right time. The best way to set the correct time is to connect the device to Internet so that it can synchronize with a time server. Make sure to “Use network-provided time” in the date and time settings and make sure you have access to Internet (either with a SIM card or by connecting to Internet via Wifi ( via your phone’s hotspot for example if no wifi network is found)). Even a small time difference can delay very much the satellites detection.
- Once the time zone and time are set, launch the app “AndroiTS GPS test” (GPS fox for AIR³ 7.2). Select the list of satellites page to have a clear view on the satellites reception. Wait until you can see a green “ON” on top. Then close this app and launch XCTrack.
- The first time the unit tries to know where it is, it can take more time. This is called “Cold start”. Cold start is strongly reduced if you are connected to the network. If you have no internet, this is not a problem, but note that it can take more time to locate the first time.
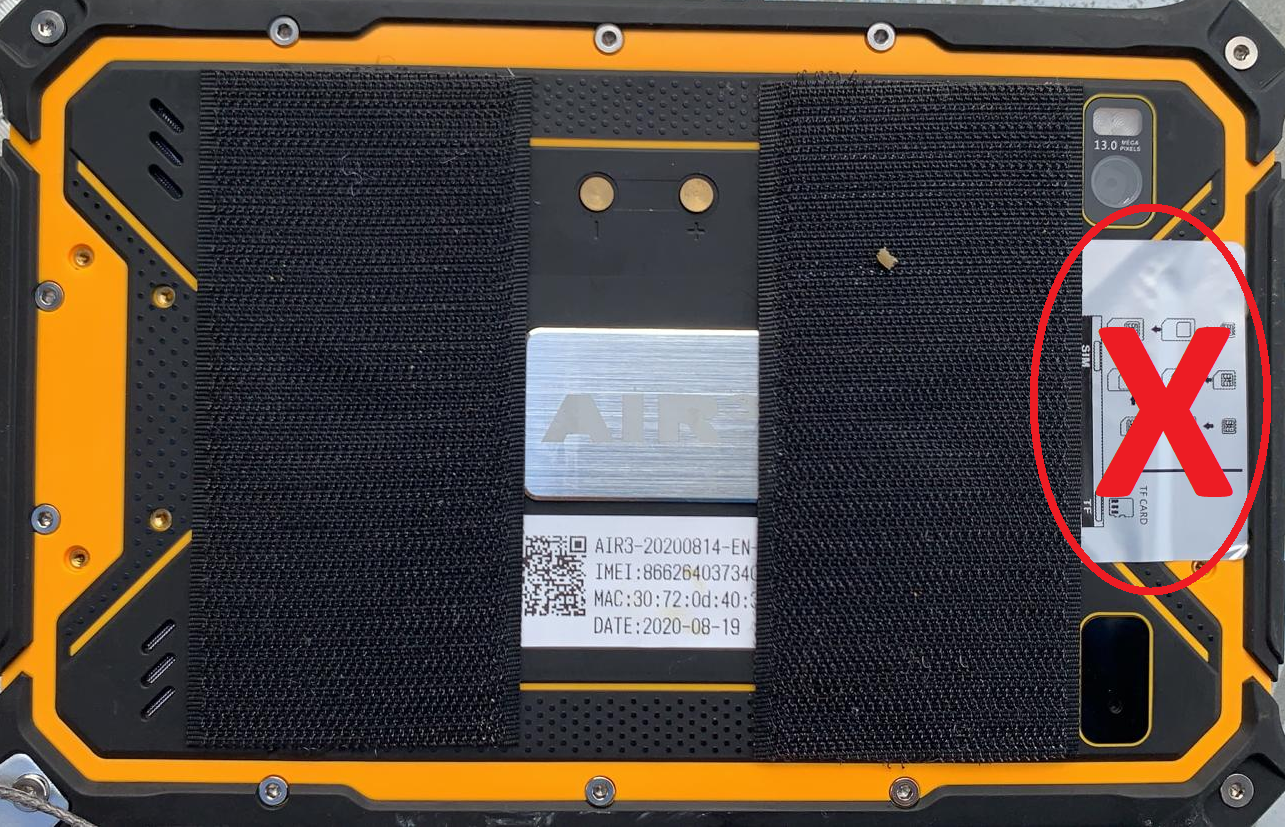
- GPS antenna should not be covered. Check that nothing is altering the signal received by the GPS antenna. Here is an example of a metal sticker that reduces the GPS signal received by the antenna.
If you still face issues after following these recommandations, send us a small video through whatsapp showing 1/ the settings of Android Date and time, 2/ the page with the list of satellites in AndroiTS GPS test app (allow minimum a couple of minutes without any shade above you).
By definition, an option is not necessary. However, options are available in case you want to take advantage of specific features. You can find all options here: http://shop.fly-air3.com/shop/category/air3-19.
Check the accessories page to know more about each option.
To know more about Fanet, Flarm and Livetracking, check this FAQ…
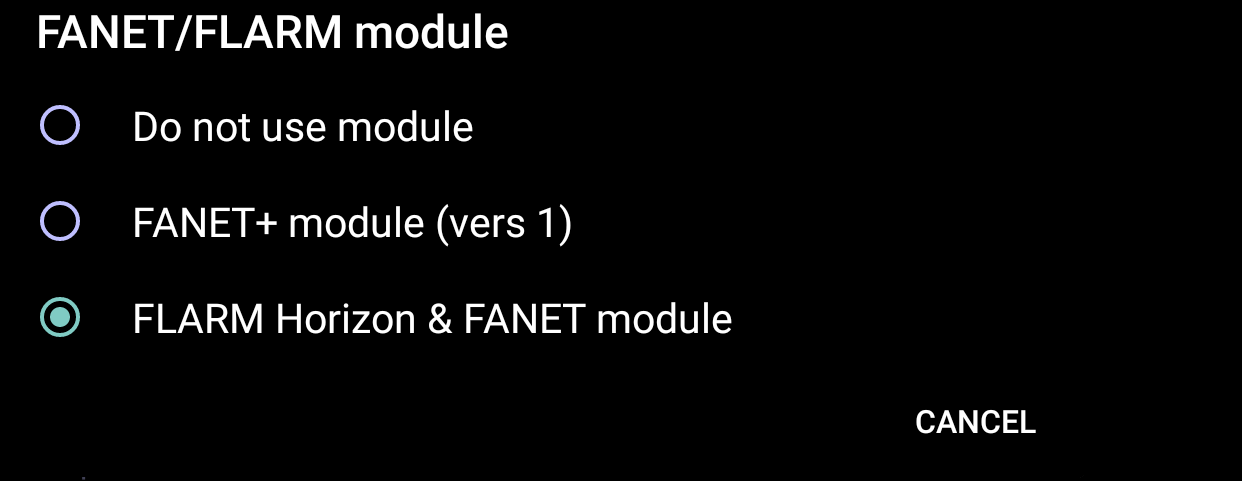
AIR³ 7.3+ or AIR³ 7.35+ has an integrated Fanet and Flarm module. To enable it for flying, you can either enable it with XCTrack, or with XC Guide.
WARNING: the module should be activated ONLY with XC Guide or with XCTrack. NOT both. The easy way is to enable it in XCTrack. In this case, make sure that it is not activated in XC Guide if you are using XC Guide in parallel.
You could also activate the module in XC Guide and then have XC Guide transmit the information to XCTrack through TCP, but this requires more complex settings.
So, to activate the module:
Check the FANET+ logo in the status line. 
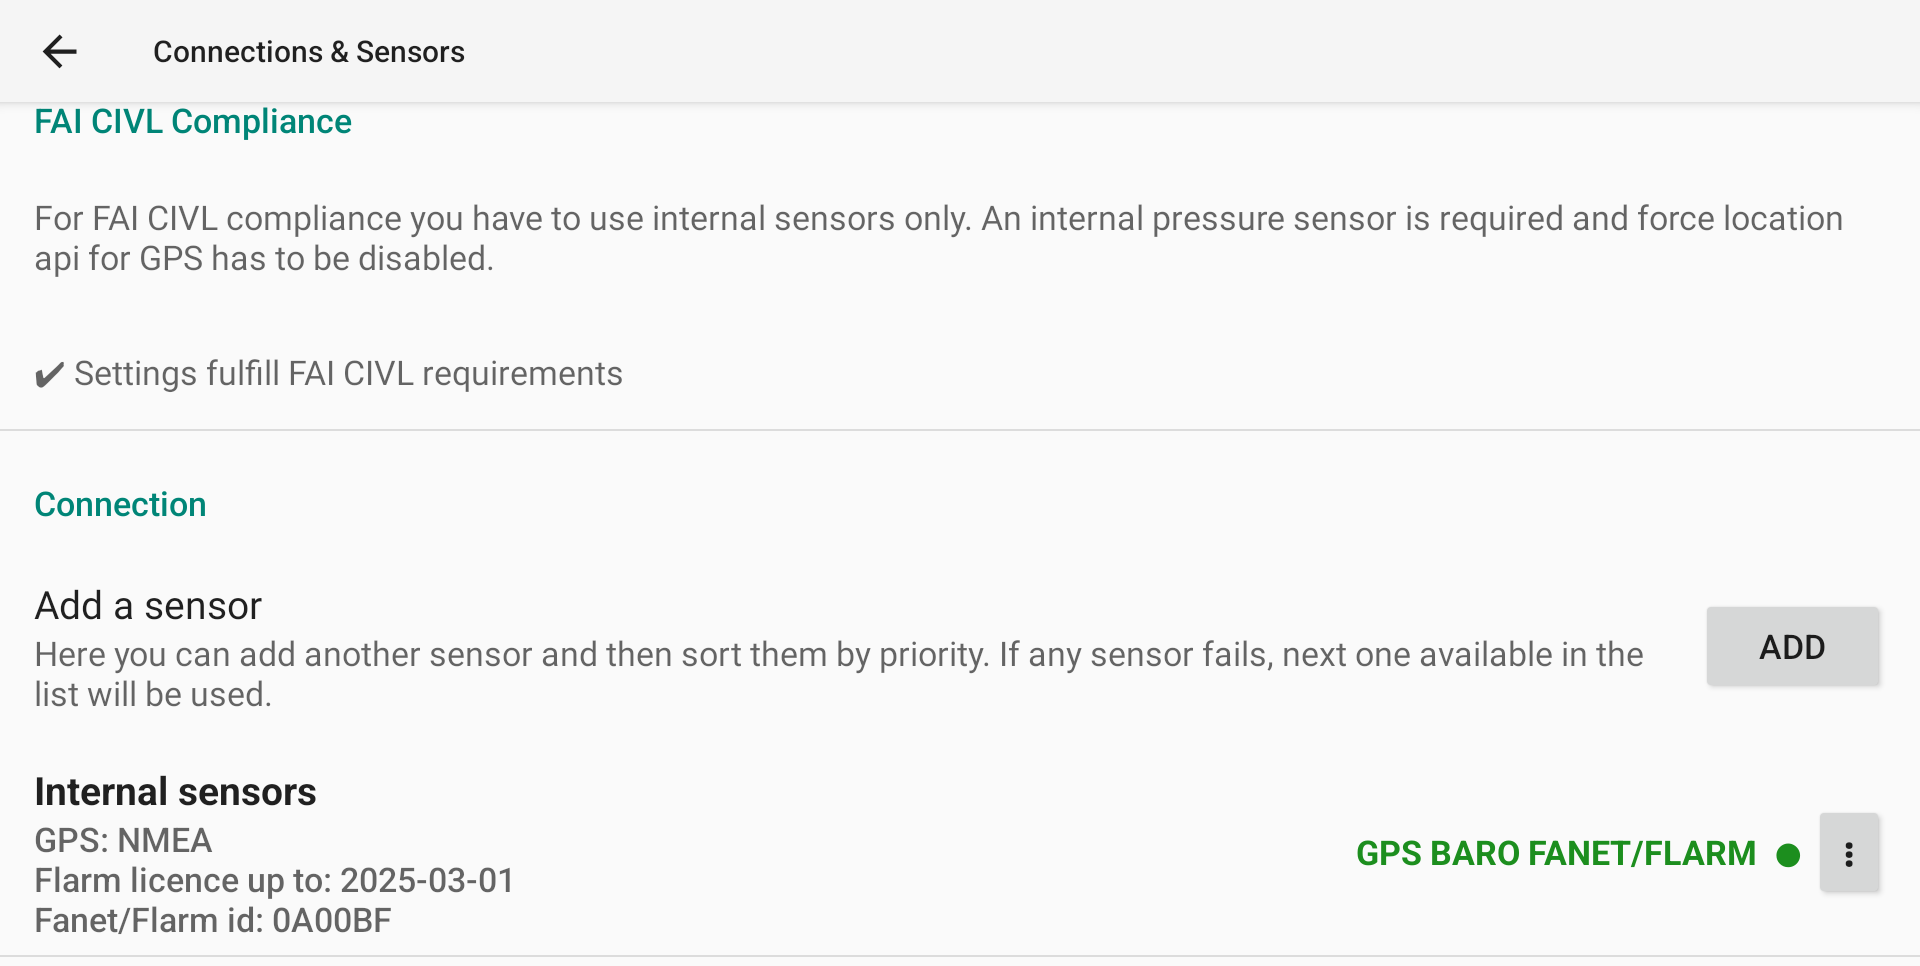
Once the module is enabled, a new line appears with the validity of the Flarm licence as well as the Fanet/Flarm ID. Check how to freely upgrade the FLARM licence through XC Guide in the XC Guide specific AIR³ features page.
FANET and FLARM ID are sent every second. The pilot name (Menu/Preferences/Pilot/Username is sent every minut. The type of aircraft (Menu/Preferences/Aircraft/FAI class) is sent together with the other data communicated through the module.
Note that a GPS fix is required to work properly. Fanet&Flarm data are sent once the pilot is considered as flying.
If you want to test the module without flying, check this FAQ.
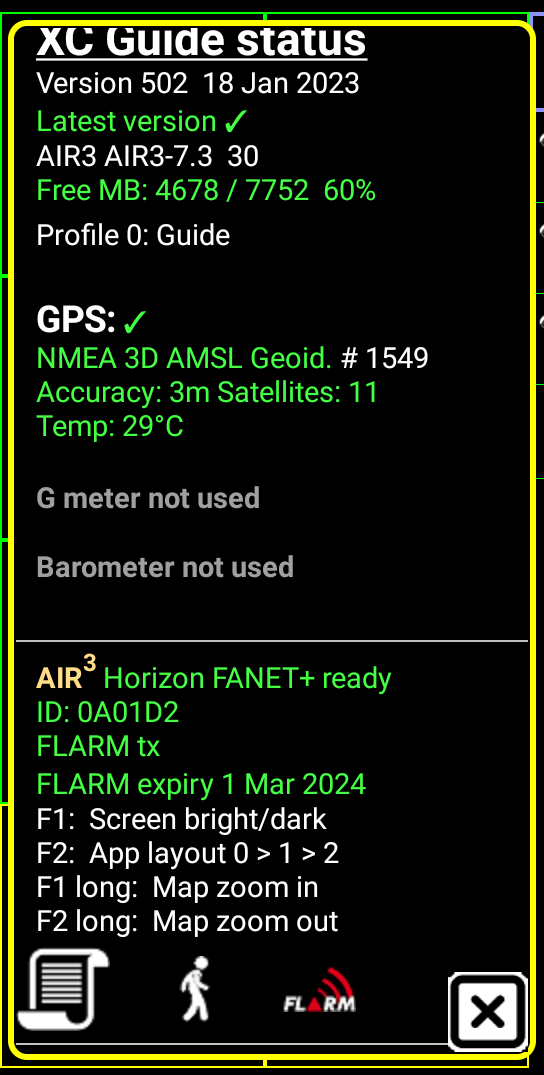
At any time, you can check if the FANET & FLARM module is enabled by looking into the info window.
FANET and FLARM ID are sent every seconds. The pilot name (Settings/Connected devices/FANET & FLARM settings/Your name on FANET) is sent every minut. The type of aircraft ( Settings/Connected devices/FANET & FLARM settings/Your aircraft type) is sent together with the other data communicated through the module.
Note that a GPS fix is required to work properly. Flarm data are sent once the pilot is considered as flying.
If you want to test the module without flying, check this FAQ.
WARNING!
Flarm licence has to be upgraded every year for free.
Read more details about XC Guide specific AIR³ features here.
AIR³ is provided with a version of XCTrack Pro with Livetracking features. To use this feature, you need to have an active internet connection (Ideally through a SIM card, but also through Wifi (data sharing through your mobile phone or Bluetooth).
You can of course see other pilots using XCtrack livetracking on the map, but you can also see other pilots using other livetracking technologies, directly on the map. For more info, read this FAQ.
You will be seen on the XContest Live page of course… but you can also be seen on Open Glider Network. For more info, read this FAQ.
So, the very first thing to check is that you have an internet connection. Go to Menu/Preferences/Pïlot and click on “Login to Xcontest”. Your status should be “Logged in to Xcontest”. Alternatively, you can also test to send a message through Whatsapp, open the browser to try to reach www.fly-air3.com.
Note that if you have just installed a new SIM card, you may need to configure an APN (Access Point Name). Go to Android Settings/Network & internet/Mobile network/Access Point Names and click on the plus sign to add the APN. You should get details about how to configure the APN from your mobile network provider.
First, make sure to enable Livetracking in Menu/Preferences.
See more details about Livetracking settings here.
Not successful? Troubleshooting…
In order to identify what may going wrong if you are not successful, check the different info that can be obtained thanks to the Status line widget in the System section of XCTrack Pro widgets manual.
You may face other issues:
1/ No Livetracking menu in Preferences.
2/ I have an active internet connection but Livetracking is not working.
1/ No Livetracking menu in Preferences.
The Livetracking feature is available in the new version XCTrack. This means that if youhave installed an old version of XCTrack, you may have a version without Livetracking.Install a recent version of XCTrack.
2/ I have checked that I have an internet connection working, but I still can’t enableLivetracking.
Most probably, you are not logged into XContest. Check in Menu/Preferences/Pilot your details that should correspond to your Xcontest account. Make sure you are logged into Xcontest before trying to enable livetracking.
XCTrack contains a “Weak lift indication” feature. If you fall down in calm air by 0.9 – 1m/s but, while flying, you are only falling down by 0.2 m/s, this means you are flying in air mass going up… This is indicated by the double beep vario sound. you can disable it by turning off the “Weak lift Indication volume” in Menu/Preferences/Sound/Acoustic Vario.
Read more details about settings in Menu/Preferences/Sound/Acoustic vario
Watch this short video regarding the weak lift vario sound
The Livetracking of XCTrack is a great feature to see, be seen and communicate with others. XCTrack runs on Xcontest LIVE platform.
There are many Livetracking solutions available. XContest Live is probably the most advanced with the largest number of pilots using it.
However, only pilots that are using XCTrack will be displayed on the map unless you use one of the hereunder described methods.
Internet and/or radio module
In order to be seen or see others on the map, you can either use an internet connection, or use an equipment that sends and receives these data through an integrated radio module. This is the case with Flarm and Fanet devices.
FLARM’s main goal is to avoid collisions between aircrafts. FLARM stands for Flight Alarm.
FANET’s main goal is to provide Livetracking features without the need of internet network. FANET stands for Flying Ad-hoc Network.
Livetracking through internet, Flarm, Fanet, ….each solution has its pros and cons. The “+” version of AIR³ has all the Pros of each solution.
To be seen …
First of all, to understand the ins and outs of each solution, we need to differentiate the “see others” from the “to be seen”. In both cases, the time occuring between 2 sets of data informing about the position of each aircraft around should also be taken into account to differentiate the solutions available.
As long as Flarm’s main goal is to avoid collisions , a lot of devices such as the “+” version of AIR³ are able to transmit Flarm data (Flarm Tx).
The “+” version of AIR³ is able to communicate its position to others both through internet and through an integrated radio module (this means even without internet available), both to FLARM and FANET devices.
Through internet, it will be seen by others depending on the configuration: Xcontest Livetracking, OGN, Livetrack24, SportstrackLive,…
The easiest way to be seen by many Livetracking platform is to run XC Guide and configure it accordingly. See more details in the XC Guide specificities for AIR³ page.
If you want to be seen on OGN network, visit the FAQ related to that topic.
See others …
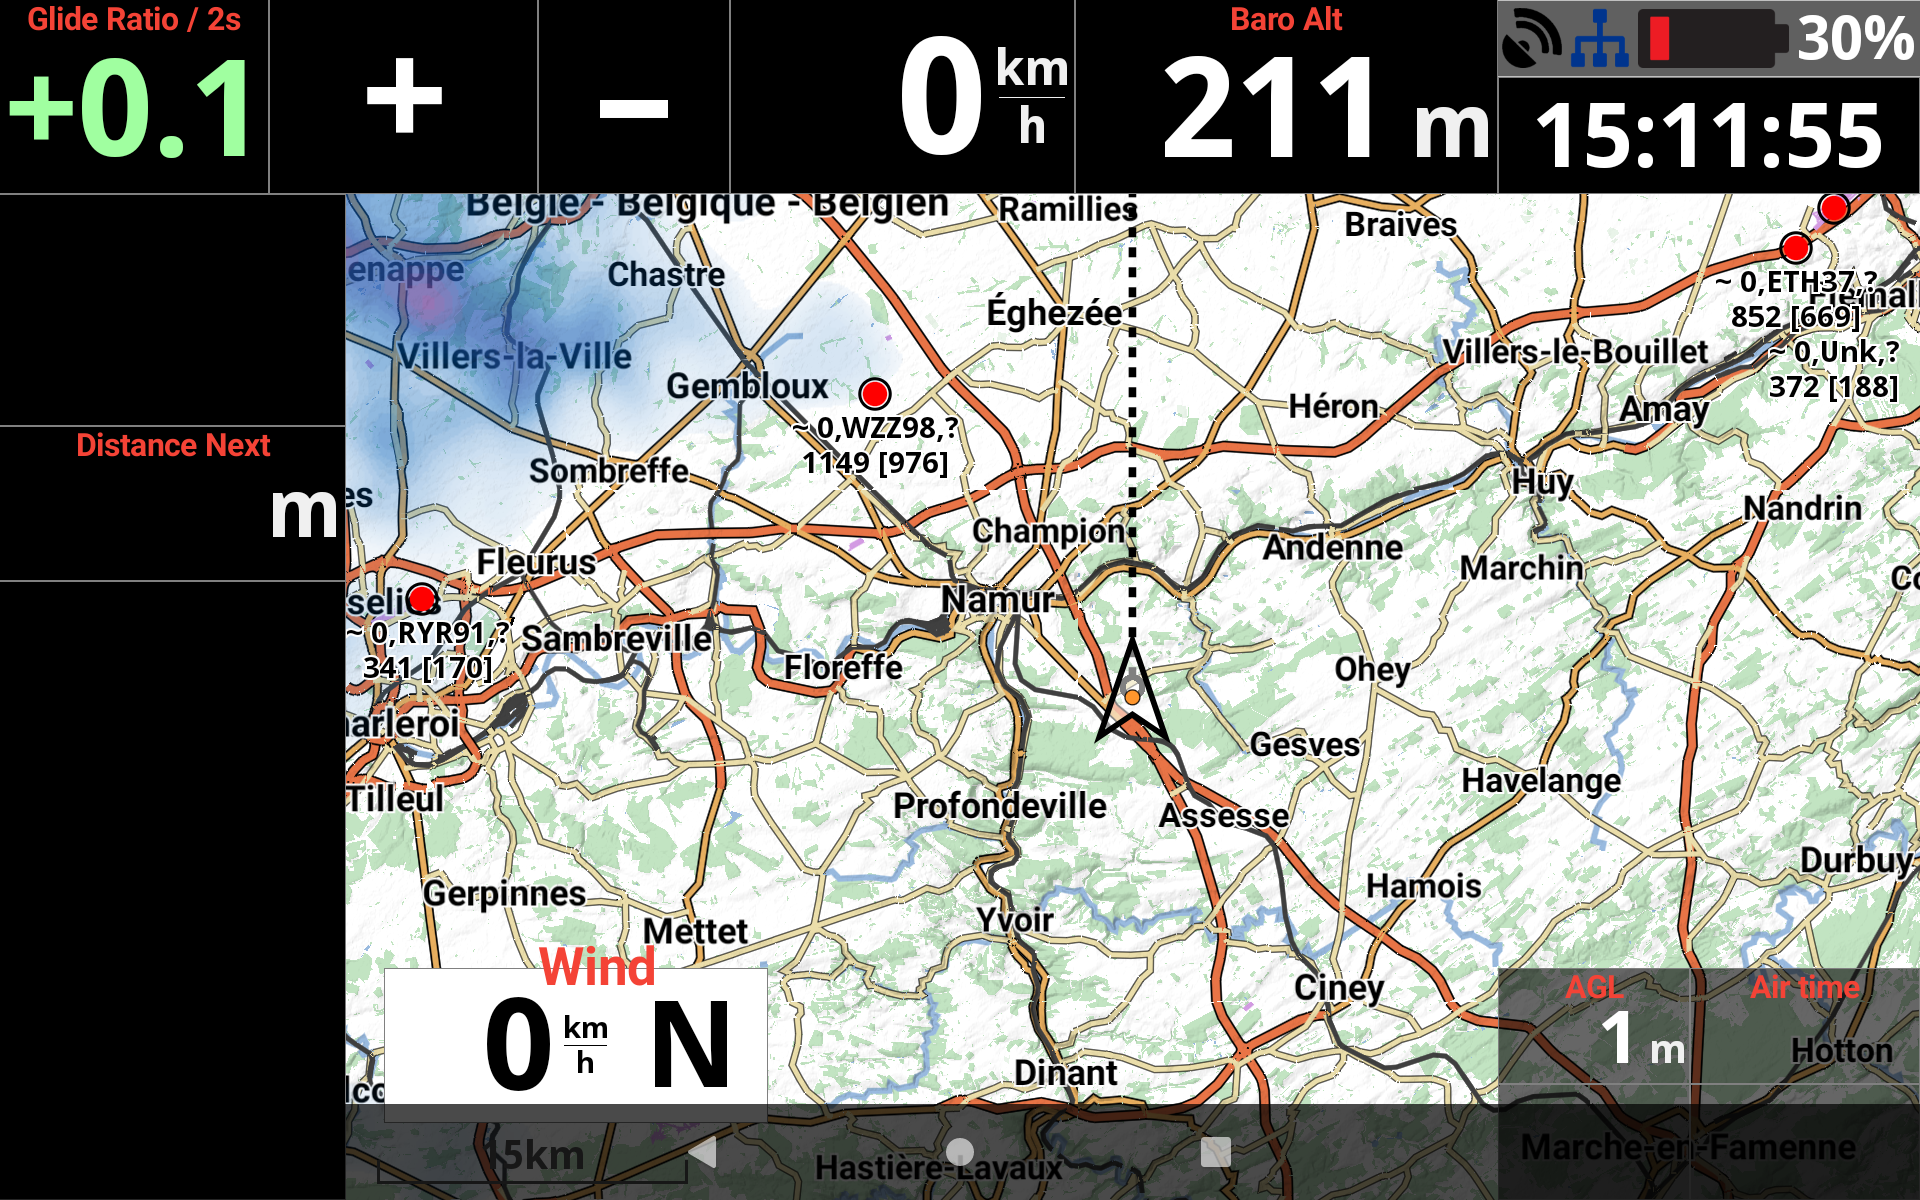
Flarm devices and others (OGN – Flymaster – Livetrack24 – XC Globe – Fanet,…) can be seen on the map of XCTrack Pro during the flight with any AIR³ (not only the “+” version of AIR³) via XC Guide and an internet connection.
The “+” version of AIR³ is also able to see FANET and Flarm (V2) aircrafts from its integrated radio module.
Note that you will only see other aircrafts if you have activated the “Display nearby pilots” in the map configuration of XC map widget in the Xcontest widgets page or the task map widget in the competition widgets page.
To be able to see others via XC Guide requires an internet connection. This can be obtained either through your SIM card (mostly recommended because it doesn’t require any concern before take off) or by sharing your phone’s internet (hotspot) through WIFI or Bluetooth. Without the need of a Flarm receiving device, this method allows you to get all aircrafts around you on XCTrack map.
Watch a video tuto that shows how to configure XC Guide and XCTrack in the videos tuto page.
Configure XC Guide, XCTrack and AIR³ Manager as described in the XC Guide page.
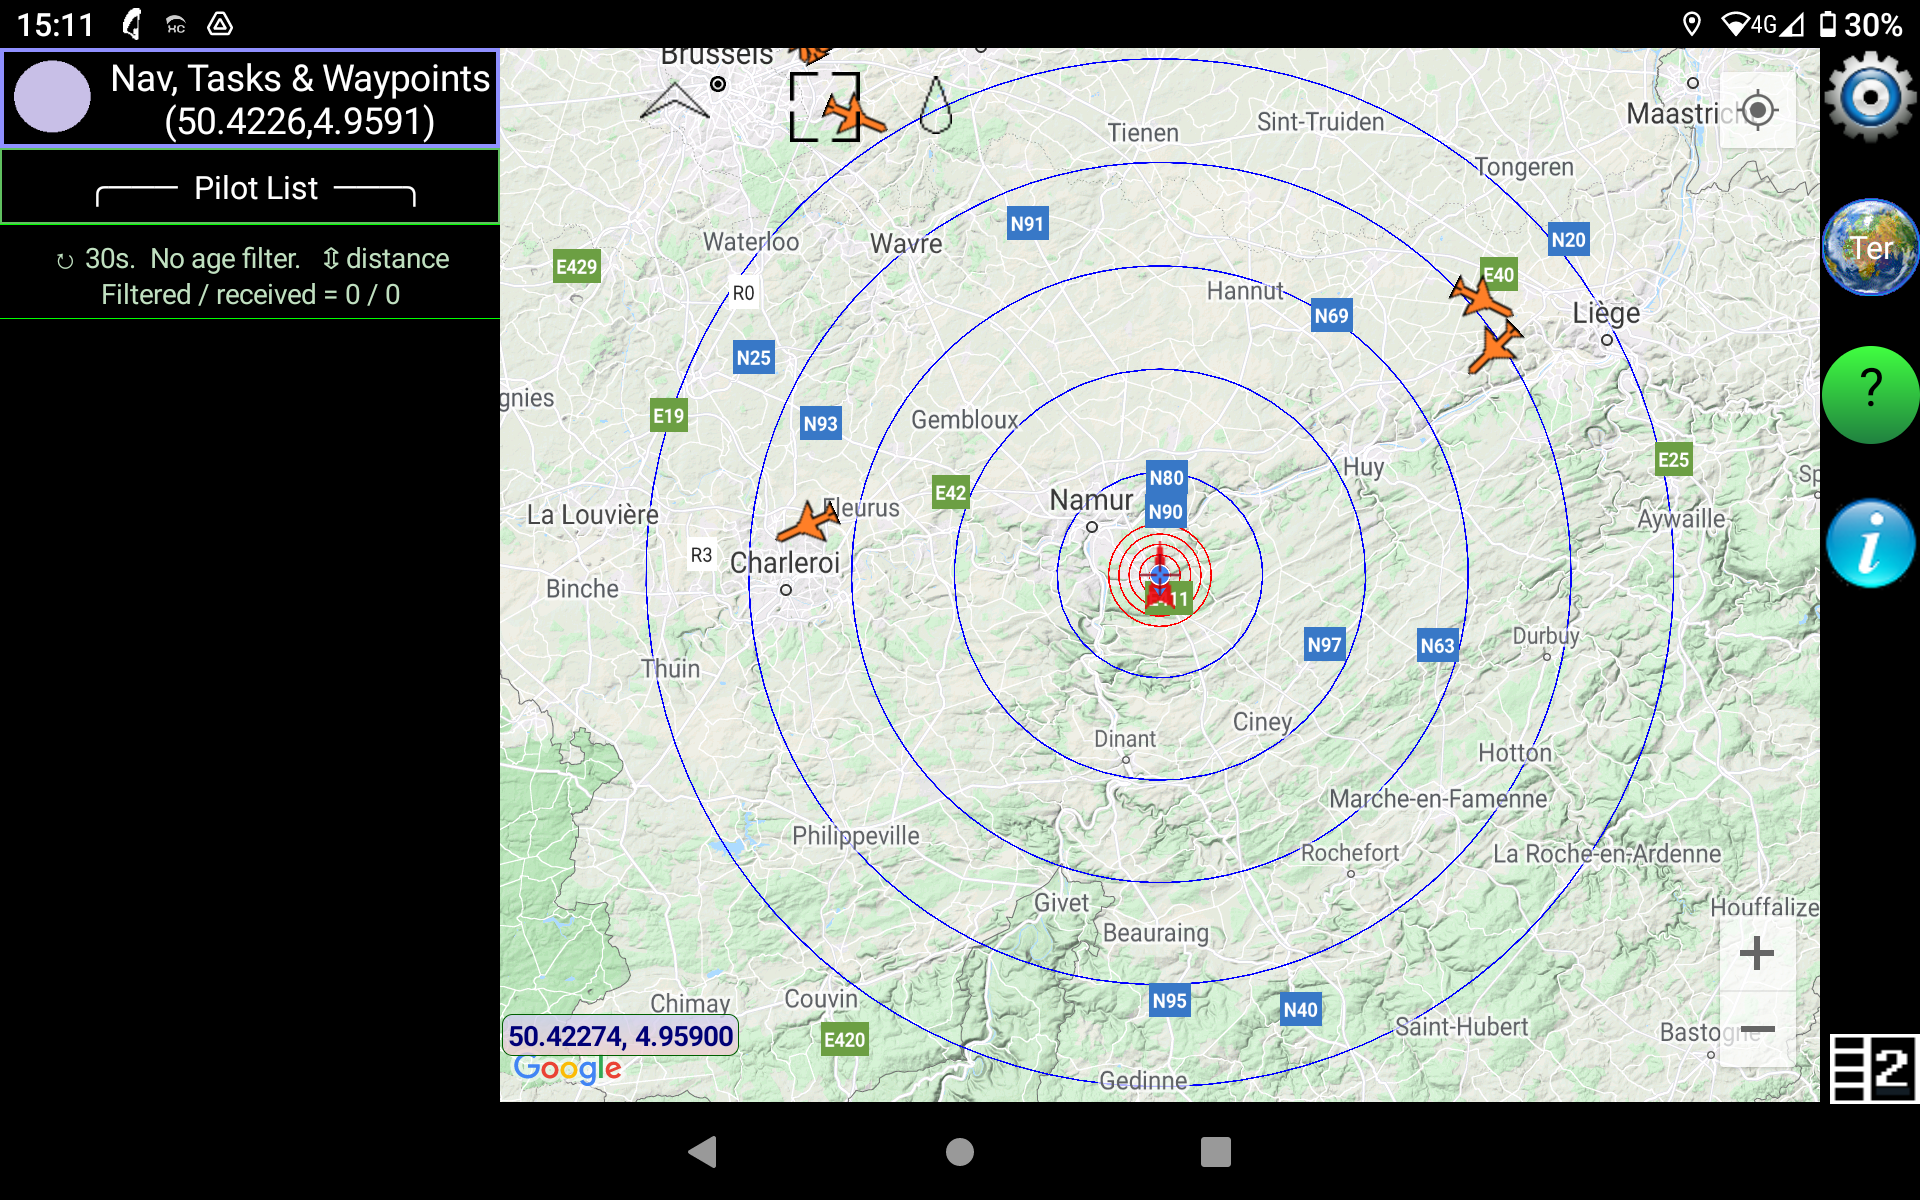
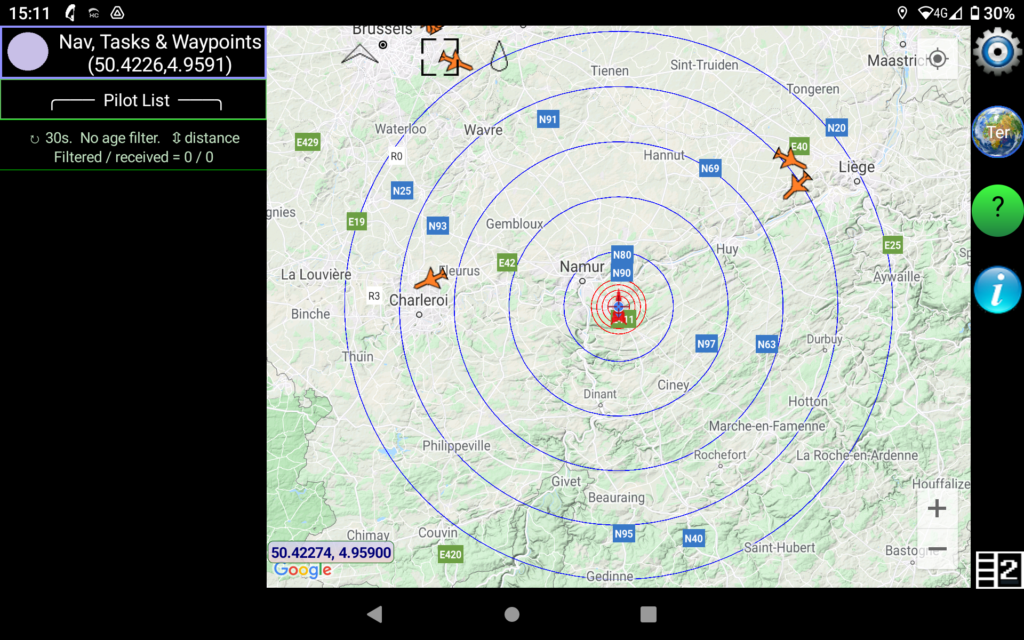
You can set what you want to display (filters) on the map by changing the settings in XC Guide. Note that XC Guide has to run in the background to let XCtrack get the info to display.
OGN will display the following livetracking pilots:
- Aircrafts using a Flarm
- Flymaster livetracking (to be confirmed)
- All aircrafts using an OGN tracker
- Garmin Inreach
- Spot
- Fanet
- PilotAware
- Spidertracks
In addition, you can configure XC Guide to also display the following livetracking pilots:
- Livetrack24
- Skylines
- Flymaster groups
- Airwhere
- XC Globe
- SPOT & Garmin inReach
We pre-install many maps and elevation files to make AIR³ ready to fly.
It’s easy to free up memory. Just go to /XCTrack/Map/RoadMap for AIR³ 7.1 and 7.2 or /Android/data/org.xcontest.xctrack/files/Map/RoadMap for AIR³ 7.3 and delete the maps you do not need. You will quickly get a lot of free space ! Watch the video on maps and elevation files to quickly get acquainted with these topics.
Read more in Menu/Preferences/Map details about RoadMaps and terrain in the XCTrack Pro Manual.
Alternatively, you can also get a 128 Gb SD-card with pre-installed maps of the world .
If you have lost your AIR³ or if it has been stolen, you can maybe find it back depending on what you have done when you received it and if you have inserted a SIM card or not.
As an Android tablet, you can set a Google account. Make sure to enable location history.
By logging in your Google account, you have two easy way to find your device (if the device is connected to internet):
- https://www.google.com/android/find allows you to quickly find where your device is, play a sound or secure your device (Lock device and sign out of your Google Account. You can also display a message or phone number on the lock screen).
- https://www.google.be/maps . Go to the burger menu while connected with your account and click on “Your timeline”. You can see the latest place saved with the device.
As an Android device, there are also many other ways to find your device. You can install an app such as “Wheres My Droid” that can be used for that purpose.
If you have inserted a SIM card, you can also just simply send a text message or call your device. There are many ways to find it back.
With AIR³ 7.2, just click on the emergency button (bottom). With AIR³ 7.3, click and hold F1 and click F2. The first time you activate the emergency, you will reach the Emergency information window within Android. If you want to reach this window without activating the button, click to enter the settings. Then type “Emergency” in the “search settings” window. Alternatively, you can also go to Settings/About tablet/Emergency information.
Add your name and any useful information such as your blood type. Add a contact of the person that is supposed to get the message in case of emergency. You can add other contacts if you want more than one person to receive the message in case of emergency.
You can even use AIR³ as a power supply to charge your phone.
For example, if your phone requires USB-C, use a USB-C to USB-C cable …. or use the small white USB-C/USB-A connector provided to use your regular USB-A to USB-C cable. Start AIR³, exit XCTrack if it starts automatically and turn off the screen with a short press on the power button.
The following instructions are valid for XCTrack and XC Guide. AIR³ Manager won’t upgrade automatically through Play store.
As mentioned in the Software upgrade instructions page, you can upgrade apps manually (watch the video), or automatically via Play store. It may happen that the Play store version is not as recent as the version provided on our server. However, some pilots may prefer this process to be done automatically, even if it does not provide the latest version.
For XCTrack, we recommend that you join the beta program of Xcontest to automatically get the latest version of the XCTrack beta channel, so that the version is the closest to the one provided manually.
Joining the beta program of XCTrack
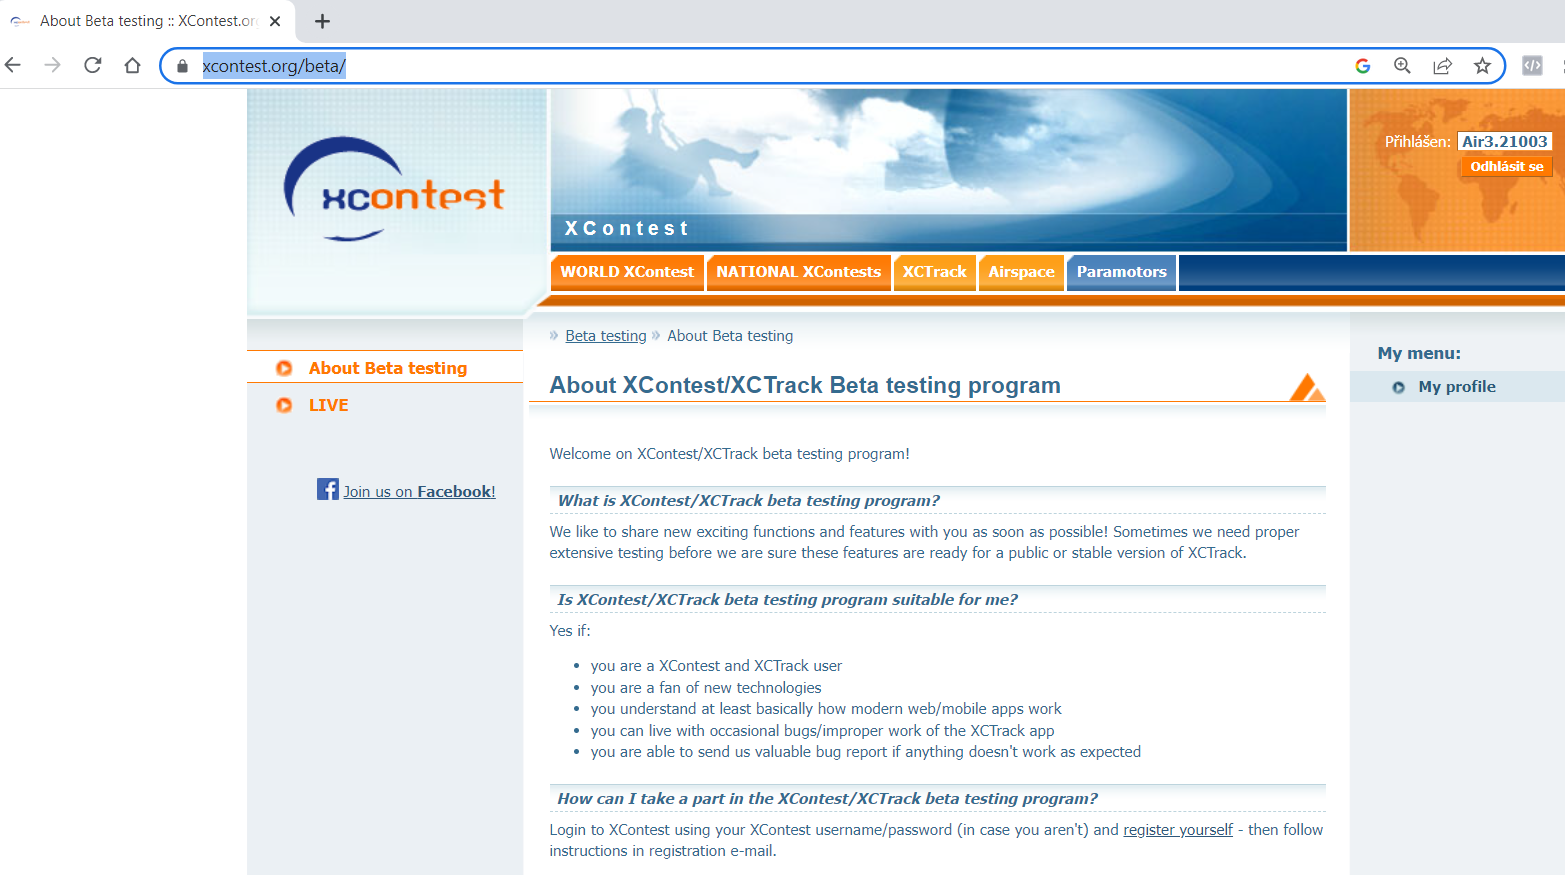
Click on the link here once you have logged into your Xcontest account. Read also below how to join the beta program on Play store.
Configure a Google account on AIR³
Make sure you have set up a Google account on the device. If you haven’t already, click on the Play store icon and sign in.

Once Play store is launched, search for “XCTrack”.
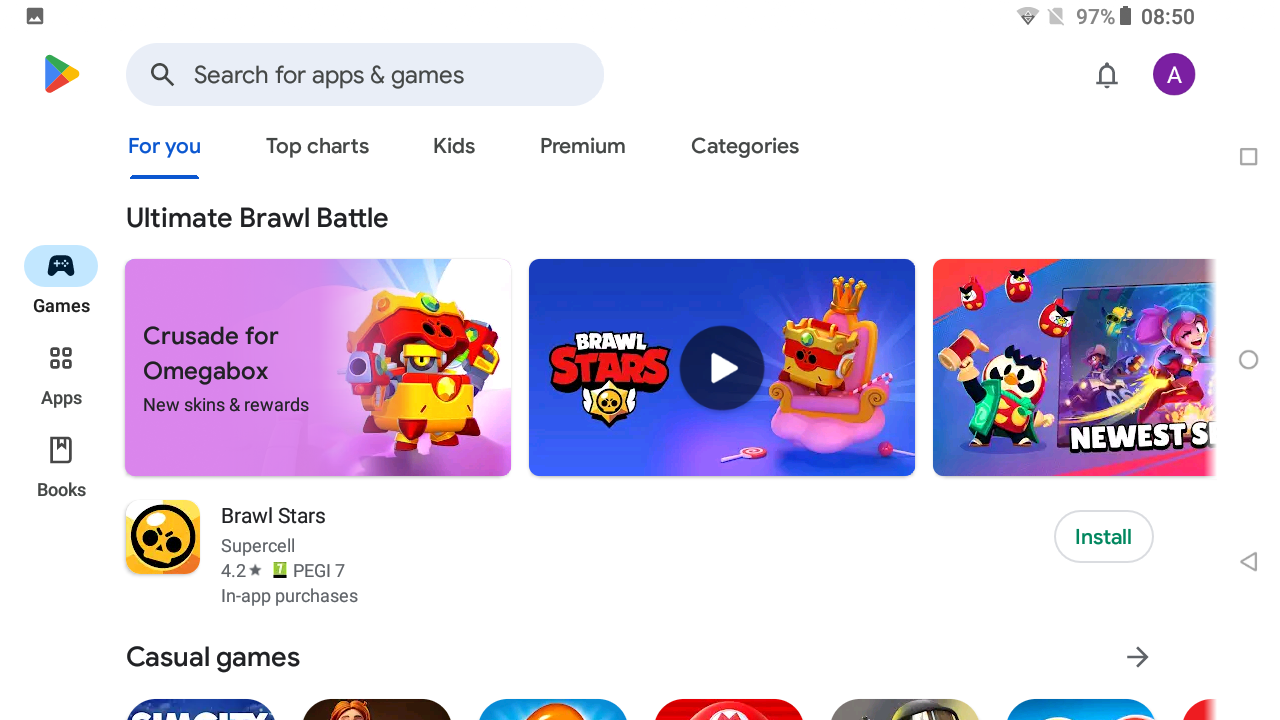
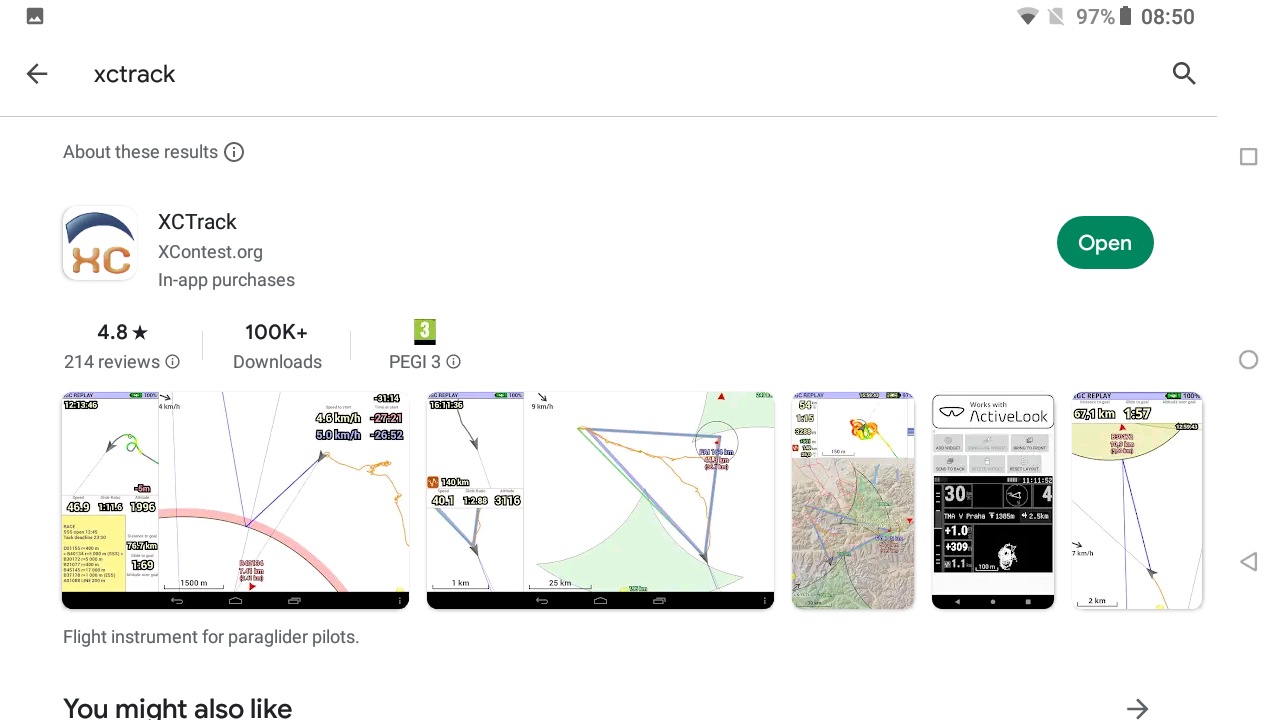
Click on XCTrack to see the details. Scroll down to “Join beta”.
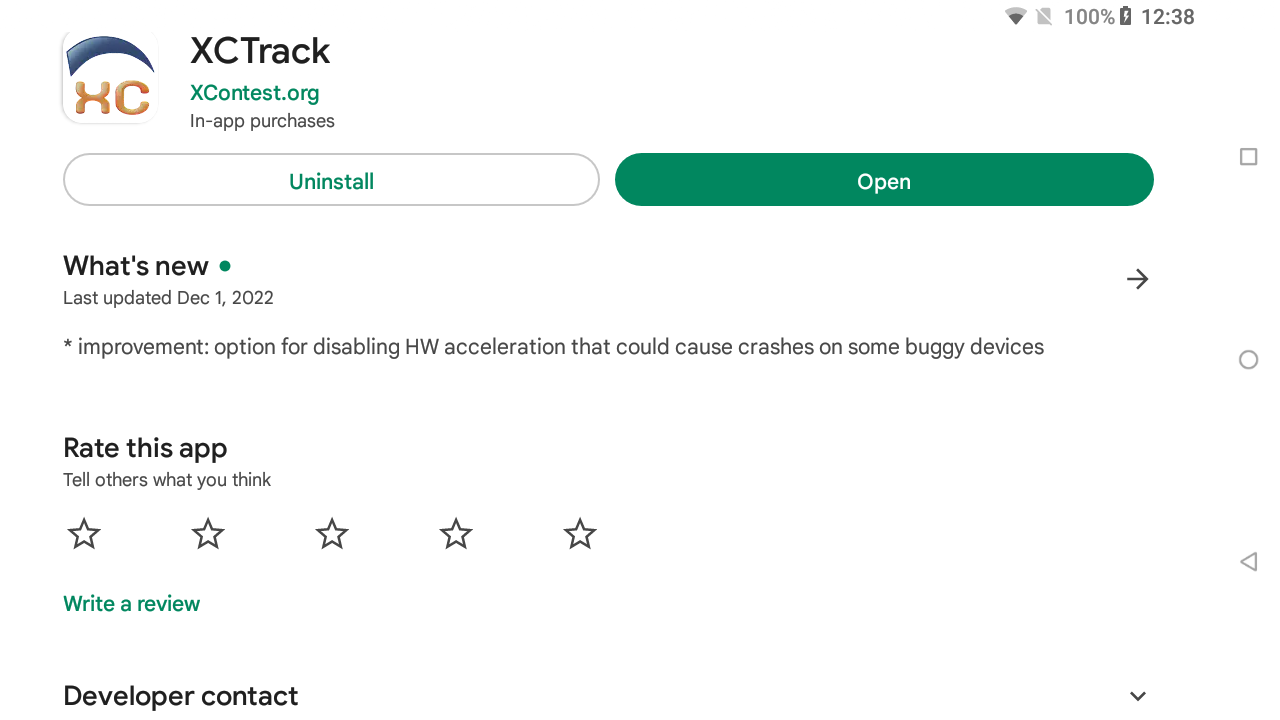
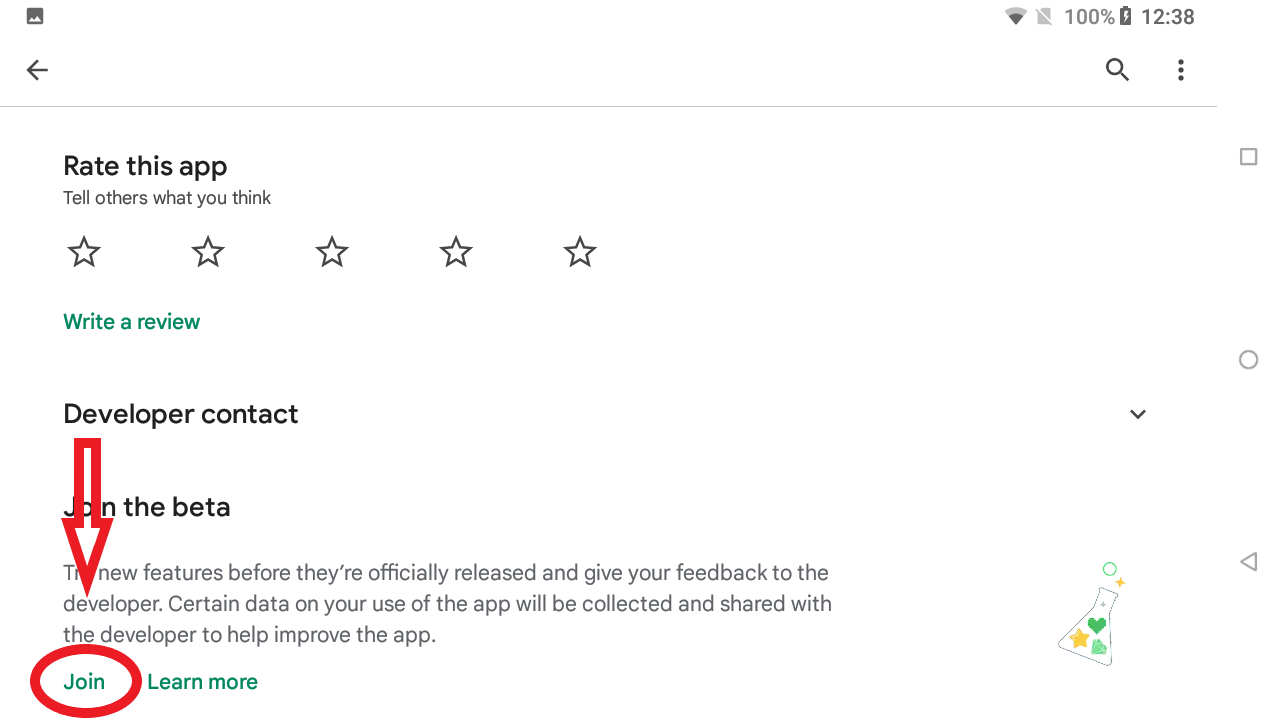
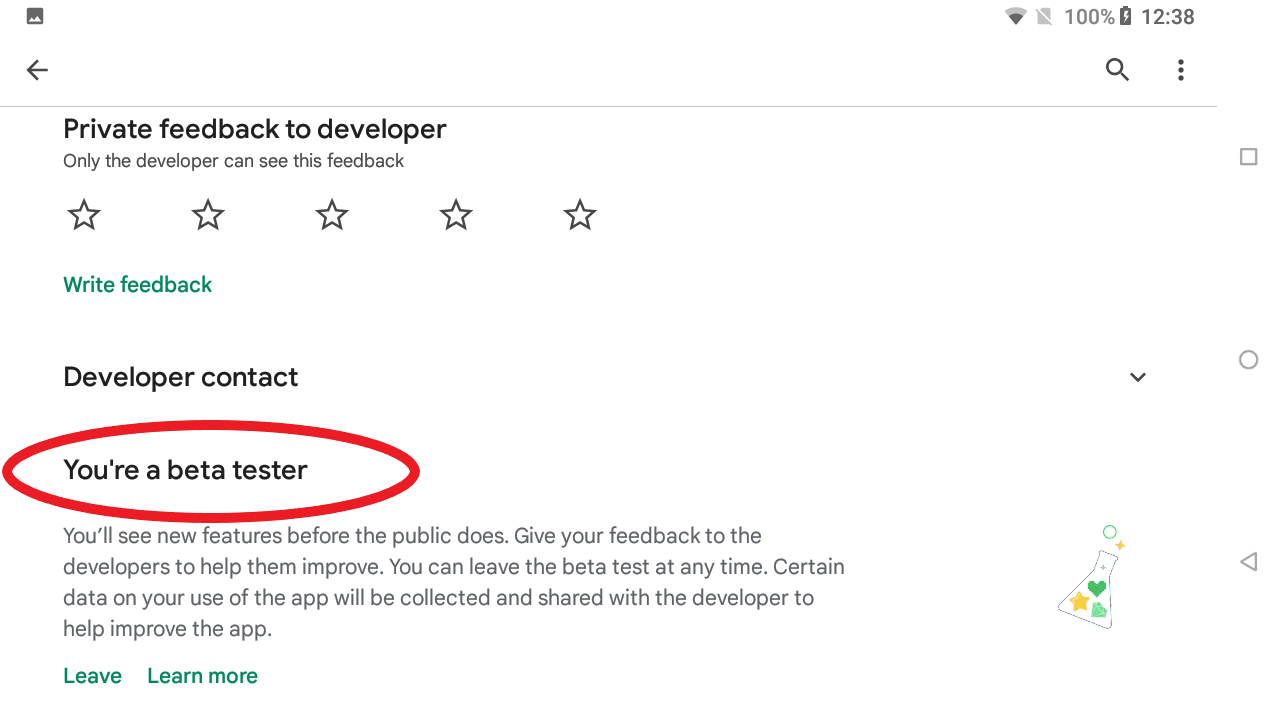
The following instructions are valid both for XCTrack and XC Guide. Replace “XCTrack” by “XC Guide” in the following instructions if you want to apply them for XC Guide.
Enable auto-update
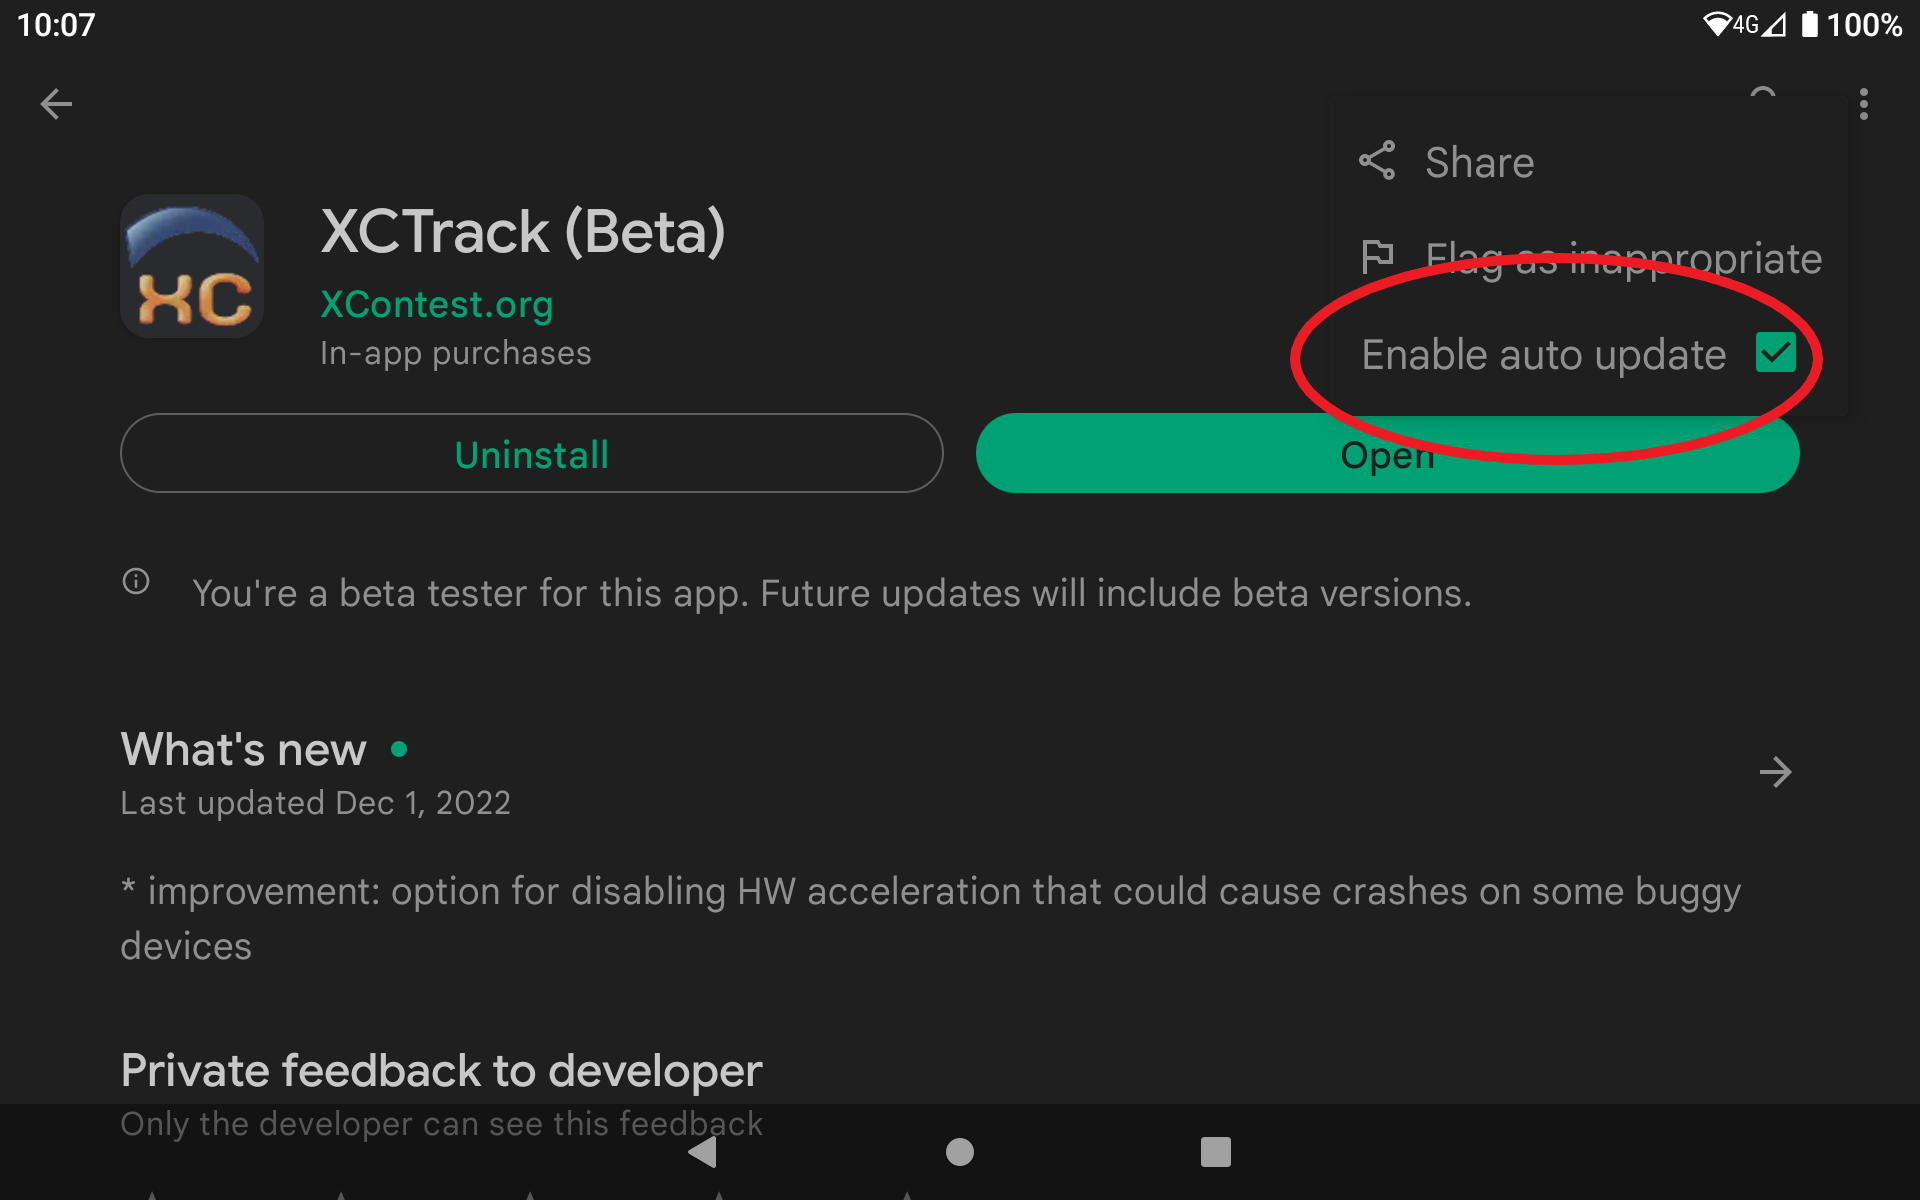
If XCTrack is not the latest version, click on “update” to update the app. Click the 3 dots in the top right and make sure “Enable auto update” is set.
Repeat the same operations for XC Guide to get automatic update of XC Guide.
Make sure General auto update is set
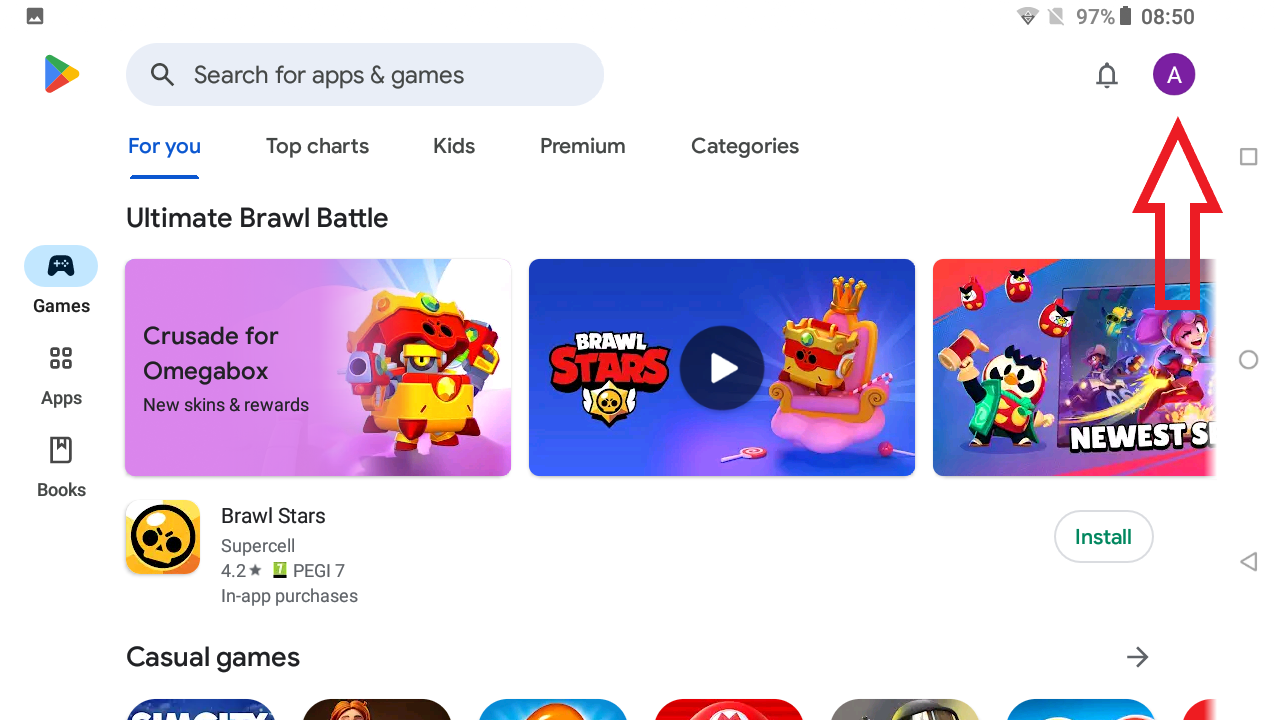
In Play store, click on your icon in the top right, click on settings.
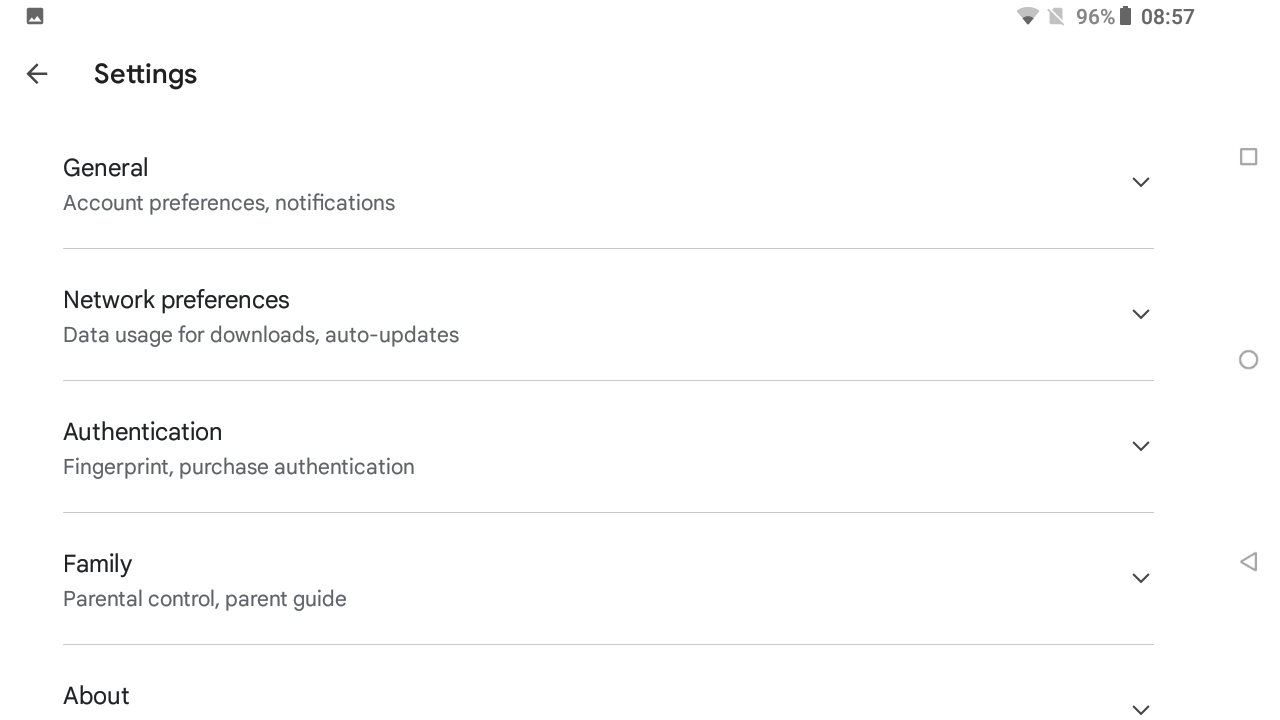
Click on Network preferences. Make sure that “Auto-update apps” is not set on “Don’t auto-update apps”.
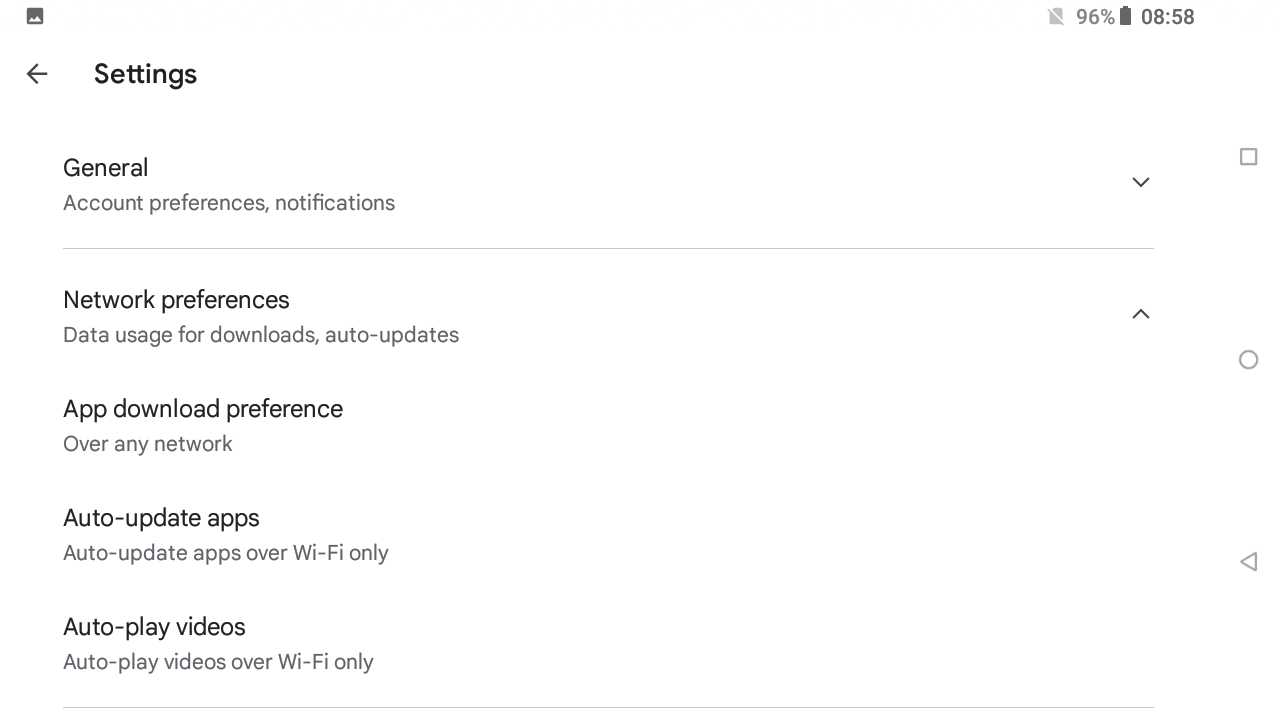
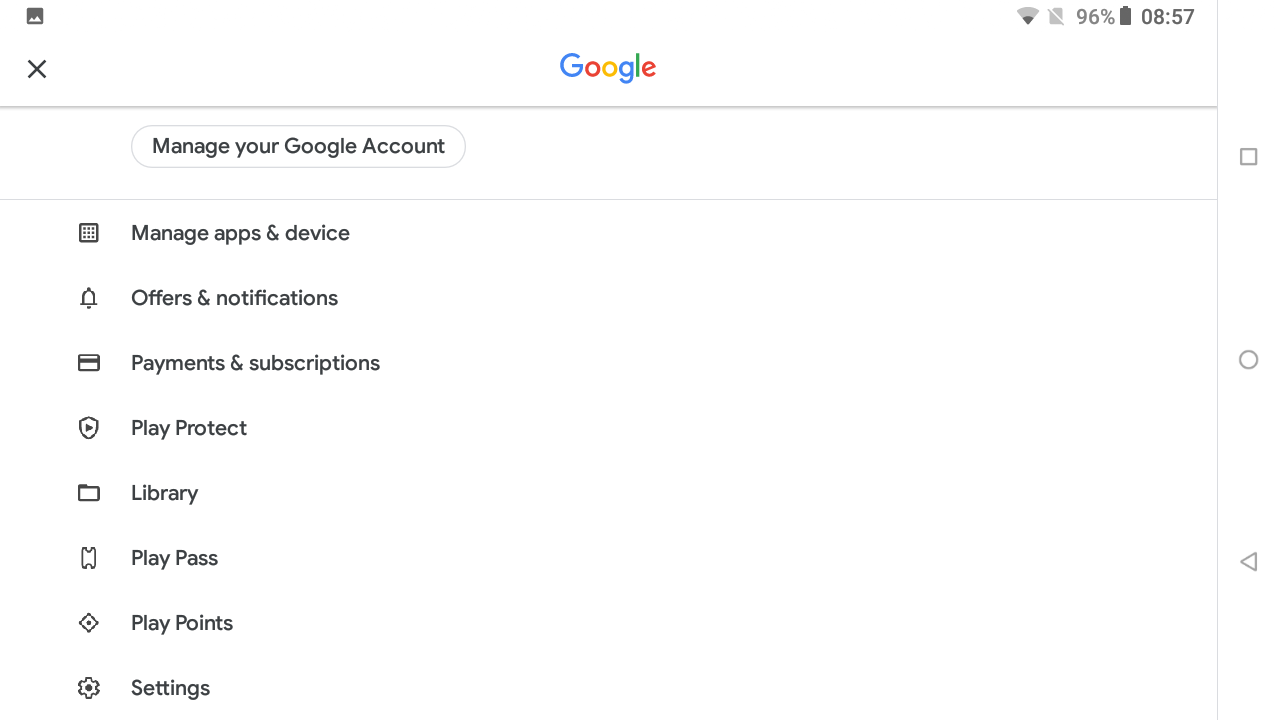
You are all set. When a new version of XCTrack or XC Guide becomes available, once AIR³ is connected to internet, the new version will automatically be downloaded and installed.
Note that this automatic update is not available for AIR³ Manager.
With old flight instruments, you had to connect the instrument to your computer to get your track.
While you can still do this in the same way (see the quick video showing how to convert your USB connection for file transfer), there are easier solutions with the new generation of instruments.
First of all, make sure that you are registered in Xcontest and that you have connected XCTrack to your Xcontest account (Menu/Preferences/Pilot).
If you have connected the AIR³ to the internet (e.g. for live tracking), your track should be automatically uploaded to your Xcontest account when you land (if you have not changed the default configuration). If the track has not been uploaded automatically, you can still upload it at any time when the Air³ is connected to the Internet. (Menu/Tracklogs/).
Otherwise, if you have installed a communication application such as Gmail, Whatsapp, Telegram, Messenger, Google Drive, etc., you can use it to transfer the track (IGC file), including yourself… Click on the “Share” widget at the top right, which will list the available communication applications installed.
If you want to return the device to its original state when it was new, check this FAQ.
AIR³-XCTrack is preconfigured with ideal settings, according to its specificities. AIR³ Manager communicates with XCTrack to set it ideally.
Maybe you have made some changes to the interface or to other settings but you actually prefer to use back the default settings. You can reset it with AIR³ Manager.
When new features become available in XCTrack, a new version of AIR³ Manager allows pilots to take advantage of the specific way to use these new features throughthe reset available in AIR³ Manager.
Check how to reset XCTrack to its default settings in the AIR³ Manager manual.
If you want to be able to get back your previous settings/layout, don’t forget to first export your configuration.
How do I completely reset the XCTrack app if it is ‘blocked’ due to incorrect configuration?
- Open the ‘File Manager +’ app. This app is available on most AIR³ devices by default. There is no need to install it.
- Go to Main storage > Android > data > org.xcontest.XCTrack > files.
- Select all the XCTrack subfolders. Click on the menu (three dots in the top right corner) and select ‘Select all’.
- Move these subfolders to Downloads. Click on the menu (three dots in the top right corner) and select ‘Move to…’. If not selected directly, browse to ‘Downloads’. Click the ‘Move’ button. If you have all the maps and terrain, this process may take some time.
- Clear storage and cache: Go to Android Settings > Apps > XCTrack. Click on ‘Storage and cache’. Click on the ‘Clear Storage’ and ‘Clear Cache’ buttons.
- Make sure you have the latest version of XCTrack by using the AIR³ Upgrader.
- Launch XCTrack and grant all requested permissions. You should now have the default XCTrack configuration, and you can check that the blocking issue has been resolved.
- Quit XCTrack (XCTrack menu > Quit).
- Copy back all XCTrack subfolders.
- Open the File Manager app.
- Go to Downloads.
- Select all the XCTrack subfolders. Long-click on the first folder until it is selected. Then select the next XCTrack subfolders.
- Copy these subfolders to Android/data/org.xcontest.XCTrack/files. Click on the ‘Copy’ button. Click on the Home button to display all storage. Click on ‘Main storage’, then ‘Android/data/org.xcontest.XCTrack/files’. Then click on the Paste button. If a dialogue box appears asking if you want to merge folders with the same name, tick the “Apply to all folders” box and click the Merge button. If you have all the maps and terrain, this process may take some time.
- Open the File Manager + app.
- Go to Downloads.
- Select all the XCTrack subfolders. Long-press the first folder until it is selected. Then select the remaining folders by clicking on each one.
- Copy these subfolders to Android/data/org.xcontest.XCTrack/files. Click on the ‘Copy’ button. Click on the Home button to display all storage. Click on ‘Main storage’, then ‘Android/data/org.xcontest.XCTrack/files’. Then click on the Paste button. If a dialogue box appears asking if you want to merge folders with the same name, tick the “Apply to all folders” box and click the Merge button. If you have all the maps and terrain, this process may take some time.
- Launch XCTrack again and observe how the layout changes in line with the XCTrack Pro licence file.
- Reset XCTrack to its latest recommended configuration: Check how to reset XCTrack to its default settings in the AIR³ Manager manual
First of all, DO NOT MAKE A FACTORY RESET! A factory reset will erase many information, including the XCTrack Pro licence (as well as all maps and terrain that will take a lot of time to reinstall).
So, here is a list of items that will allow you to set it back as it was originally:
- Remove your Google account: settings/accounts/ click on your account, then click on “Remove account” and confirm.
- Remove all apps that have been installed. Keep your finger on the app, then click on the (i) to open the APP info. Click on Uninstall. If you can’t uninstall, this means this is a system app that can’t be uninstall.
- Use Files app to browse the files stored on the unit. First check XCTrack subfolders. You may want to remove all tracklogs of your flights (igc files). Airspaces, Config, Log, Tasks and Waypoints may also contain files that are directly linked to your use of the unit. Check also Images, Videos, Audio, Documents and Downloads for possible files you may want to remove. Click on Gallery to check if any additional files are seen with this app.
- Use Contacts to check that you have not added your own contacts you may want to remove.
- Use Email to check that no messages are still available.
- Use AIR³ upgrader to make sure all the latest version of apps are installed.
- Use AIR³ Manager to reset XCTrack interface as described here.
- Make sure there is no SIM card and/or SD card left in the unit.
Adaptive brightness is a very useful feature of AIR³. It greatly increases autonomy. When the device is exposed to more light, the screen adapts and becomes brighter. When the device receives less light, the screen automatically decreases the brightness and thus reduces power consumption.
However, you can disable this feature (for example if the upper left part of the device, where the light sensor is located) is shaded but there is a lot of light on the screen.
This can be done temporarily or permanently.
Temporarily:
Click a button that is set to increase or decrease brightness (check Key bindings) (or one of the on-screen brightness widgets) to force the brightness level (higher or lower). This temporarily disables adaptive brightness. Each click increases the brightness by 10%. On various events such as thermal start, end of thermal, … XCTrack is configured (automatic actions) to return to system setting, so with adaptive brightness enabled.
Permanently:
To disable adaptive brightness for the entire flight, go to Android Settings/Display and disable “Adaptive brightness”. Set the default brightness level you wish to achieve (e.g. 70%). Launch XCTrack. Brightness will start at the default brightness level you set (e.g. 70%). You can change the brightness level during flight by clicking on an increase/decrease brightness button (or the on-screen brightness widgets) to force a different brightness level. Each click increases the brightness by 10%. At various events such as thermal start, thermal end, … XCTrack is configured to return to the system setting, i.e. the default brightness level (e.g. 70%).
Depending on your eyes, you may want to display cities with bigger font.
By default, all AIR³ are shipped with a custom file to display cities with bigger font.
If you have changed the settings of XCTrack that broke the bigger font display, use AIR³ Manager to reset the settings to their original state. Check more details here.
Villages, towns and cities will now displayed with a larger font.
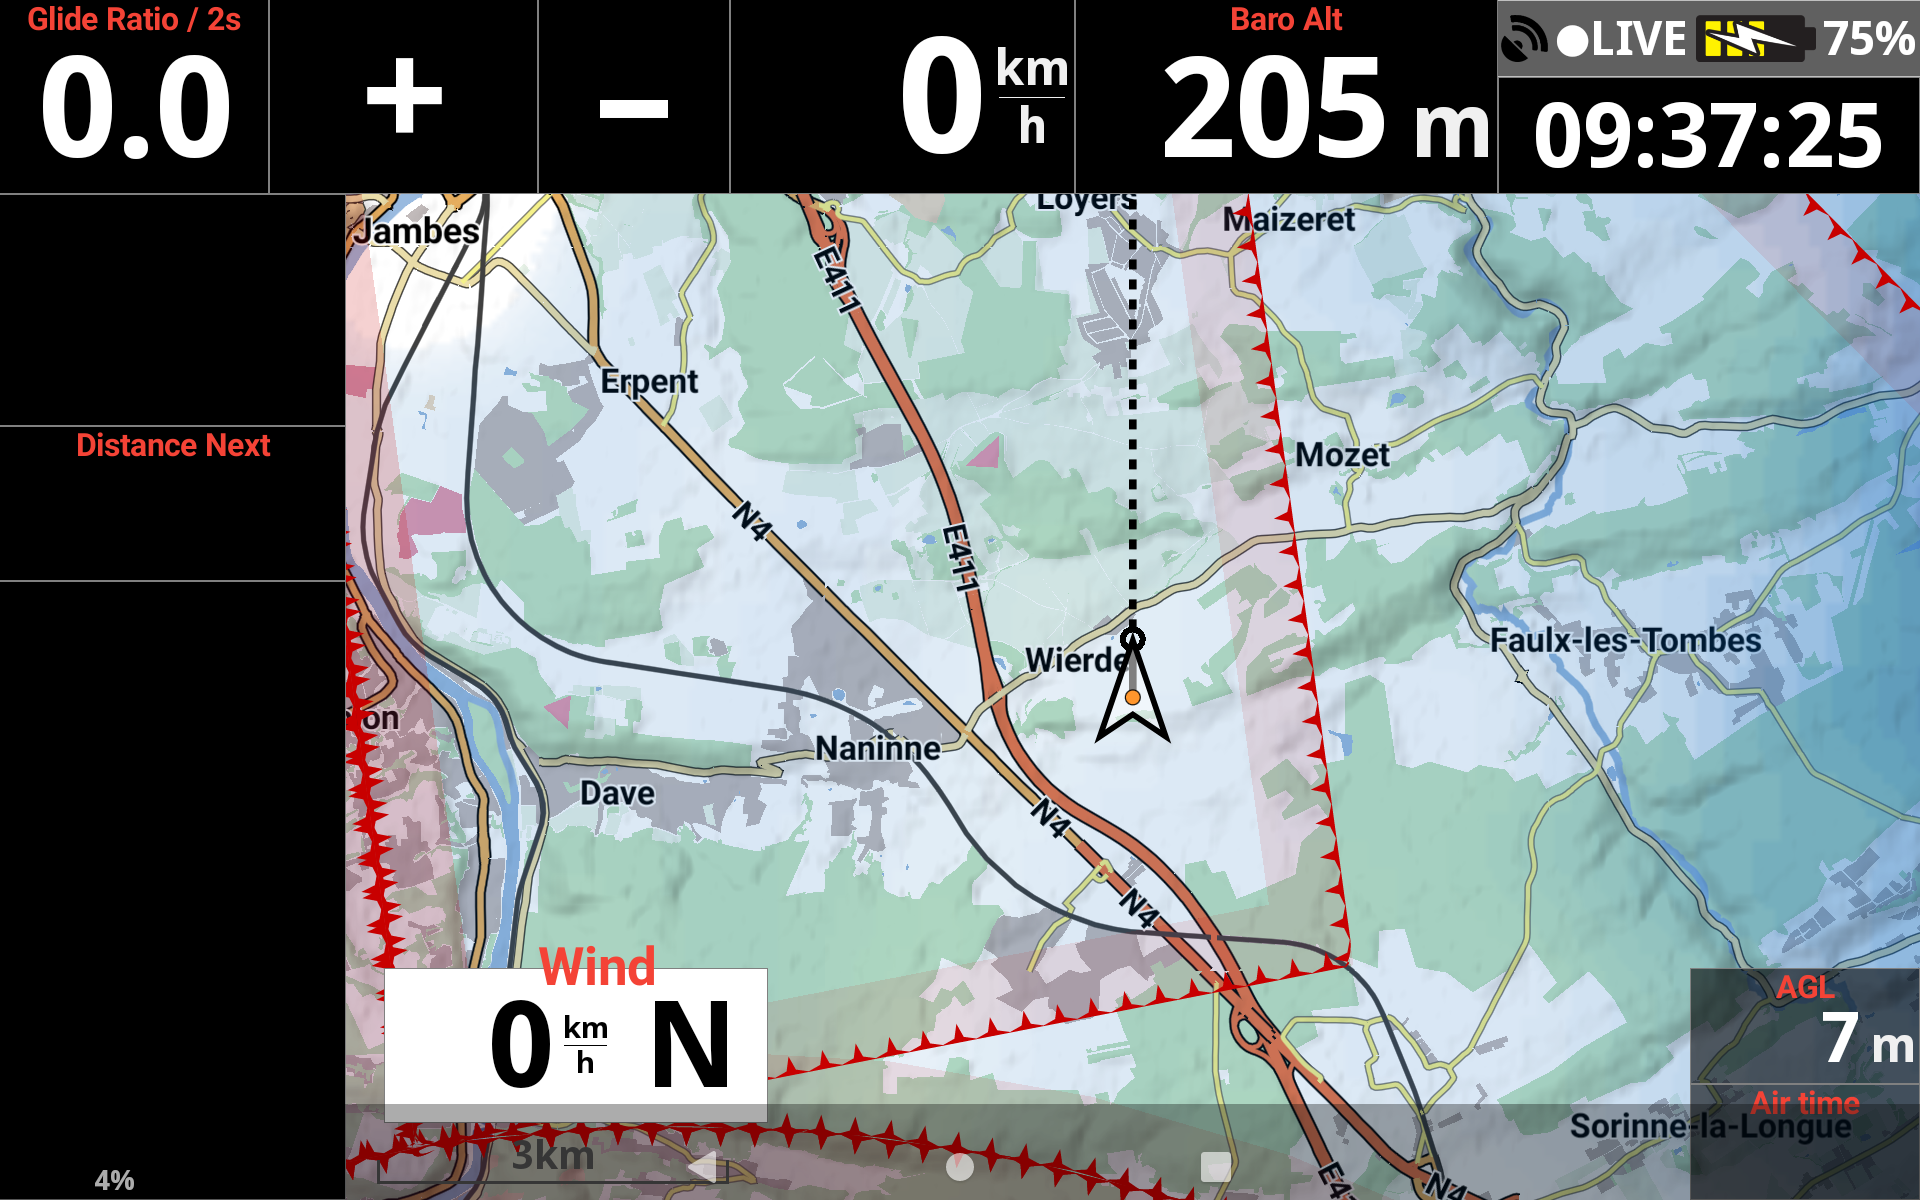
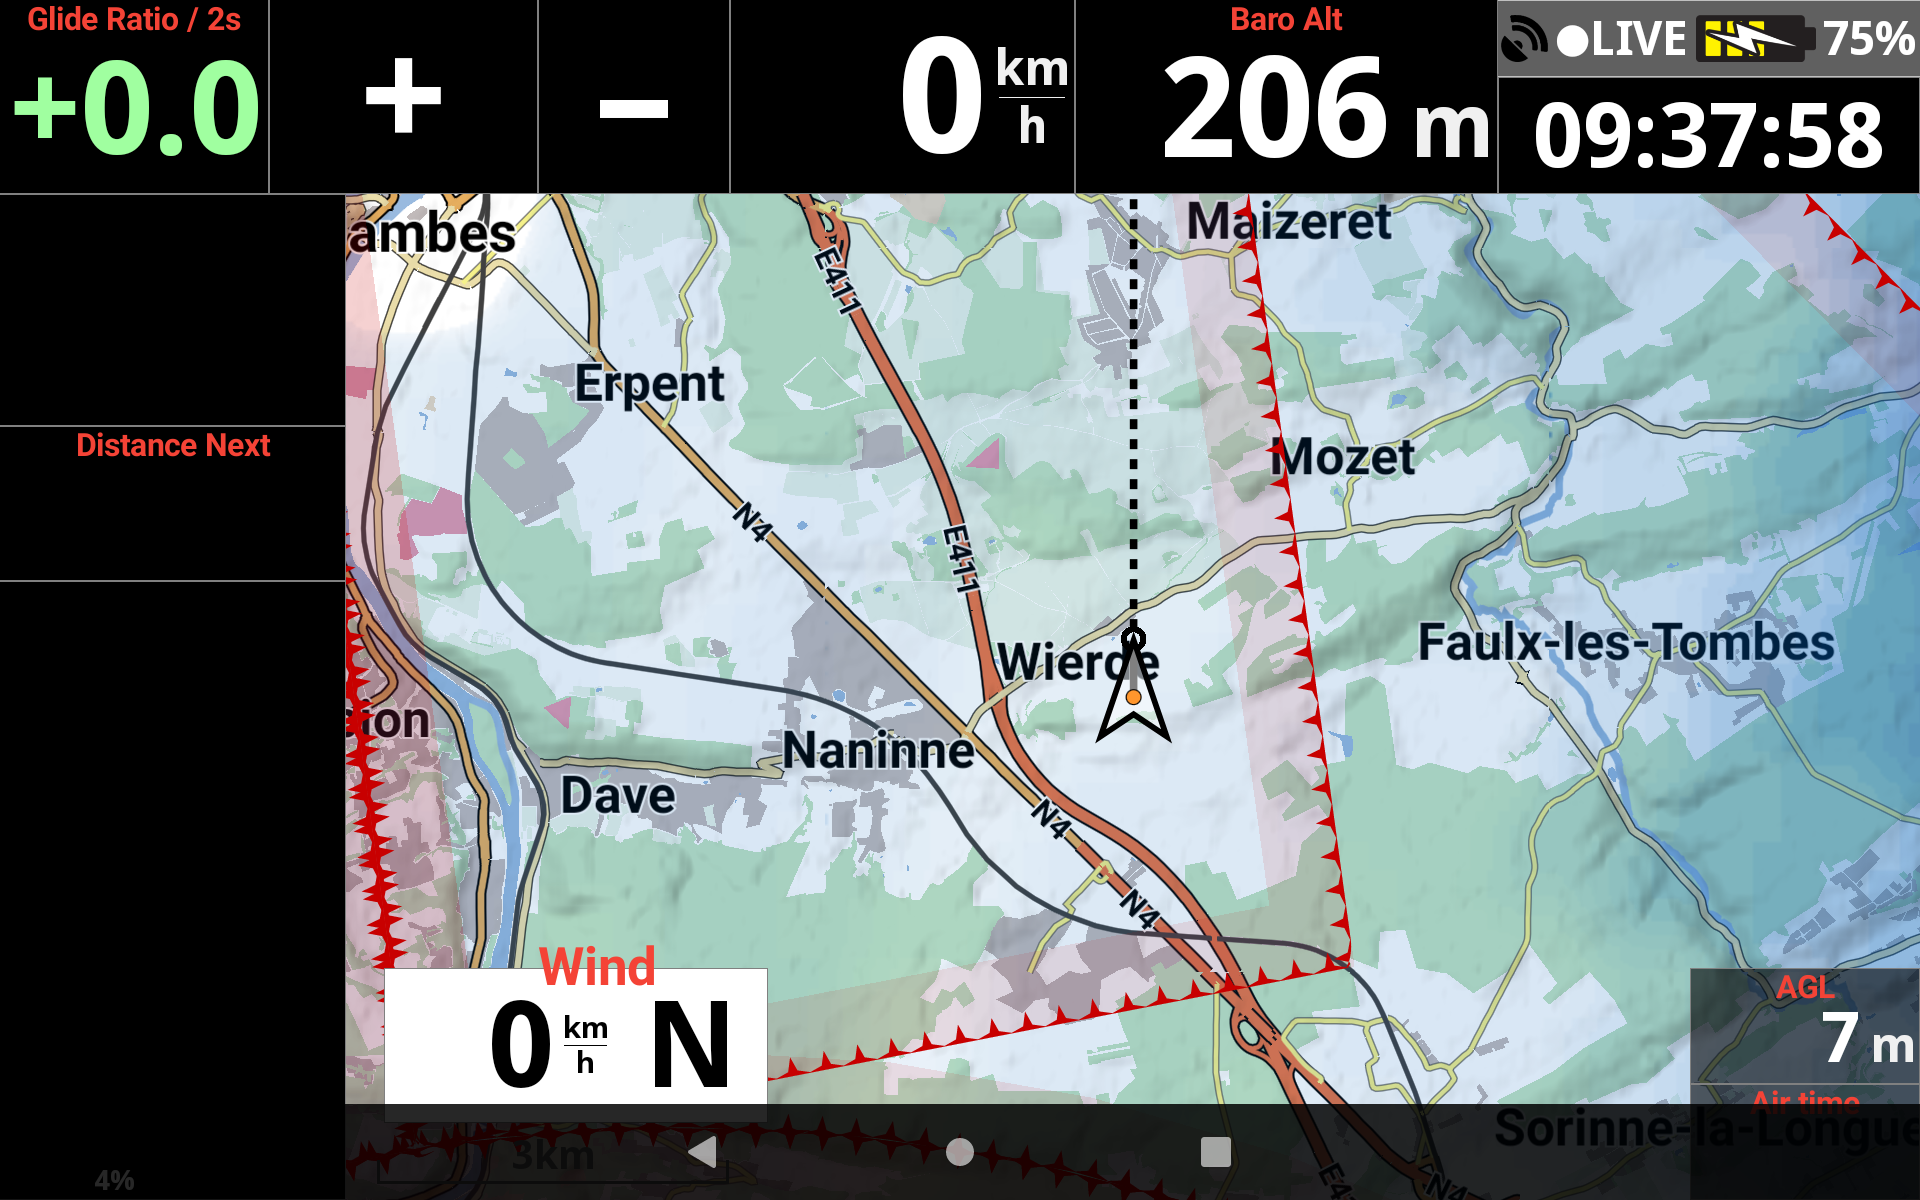
A large number of pilots think the only way to have a good readability is to increase the nits (~ brightness) or to use a eInk screen (black and white). The most important factor is the angle of the screen with the look (perpendicular) and not the nits/brightness).
Read more details about best brightness setting in this FAQ.
Read more details about link between brightness, readability and autonomy in this FAQ.
By default, your contacts will not sync unless you install an app that will allow to sync them.
You can either find the Google contacts sync on APKmirror or by following this link.
Use the app corresponding to your Android version.
If you want to test the Fanet&Flarm signal with another device, here are a couple of information to take into account:
- A GPS fix is needed in both devices
- On AIR³, you should enable Fanet/Flarm Module ONLY in XC Guide OR XCTrack but not both. Restart the device if you have enabled the module with the two apps as it may be blocked.
- Both devices need to be considered as flying to transmit.
- When some devices send both Fanet and Flarm, only Fanet is taken into account by the receiving AIR³
- Make sure to use the latest version of firmware and apps.
If you want to make some tests to understand the ins and outs, while not flying, you should first start with XC Guide. XC Guide provides more information about Flarm and Fanet, so that it is more easy to understand the ins and outs.
To test the module with XC Guide:
- Quit XCTrack and/or make sure the Fanet/Flarm module is not enabled in XCTrack (for more details about how to enable or disable the module within XCTrack, check this FAQ).
- Enable the module in XC Guide (for more details about how to enable or disable the module within XCTrack, check this FAQ). Select the right module (V1 or V2)
- Make sure the Flarm/Fanet module is activated and working in the info window of XC Guide
- Make sure to use the latest firmware of the Flarm/Fanet Module. Check here how to update the firmware.
- Activate the “Always in flight mode” in Settings/Connected devices/Fanet&Flarm settings/

- Check that Flarm Rx and Tx is enable in Settings/Connected devices/Fanet&Flarm settings/
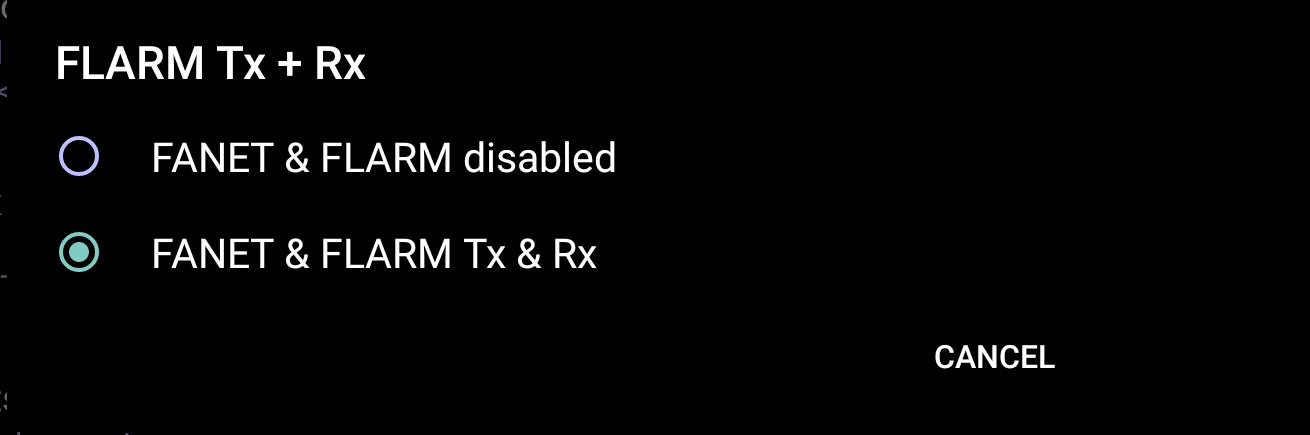
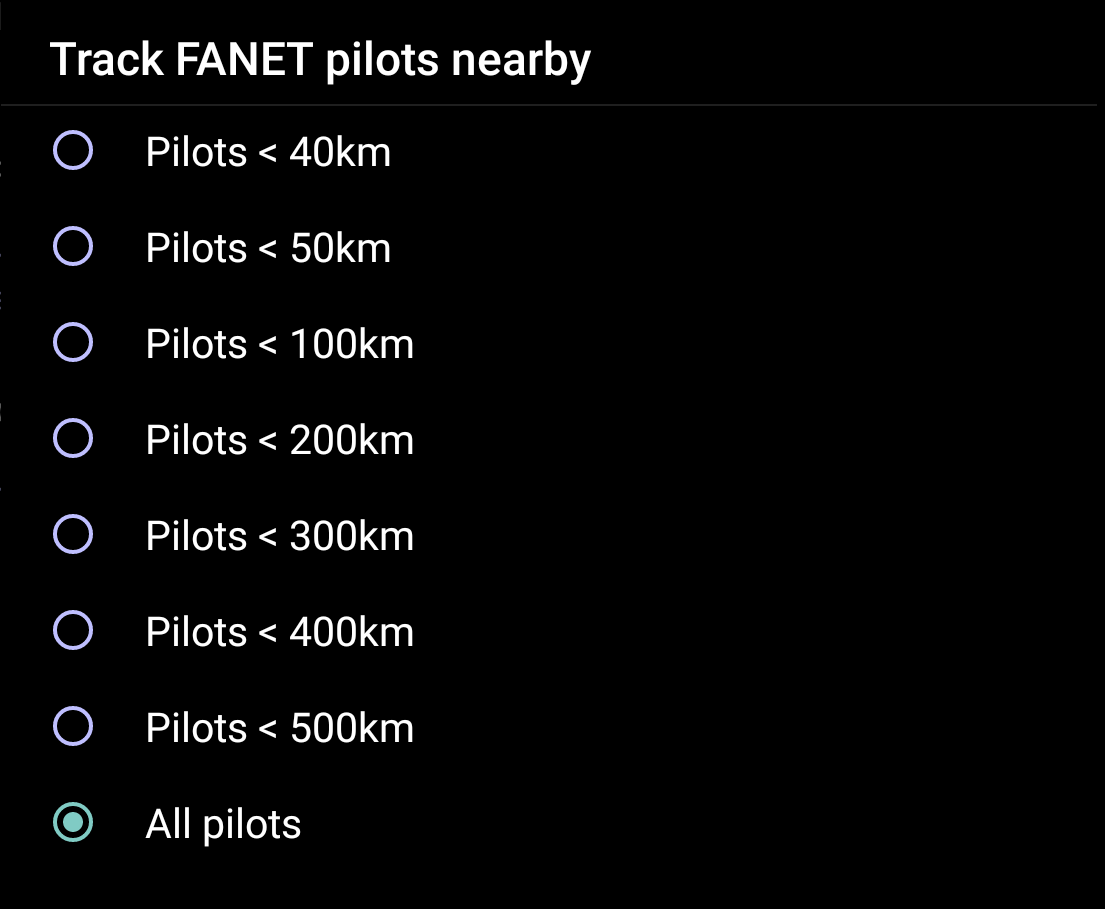
- Check that Fanet is set to detect all pilots in Settings/Livetracking/Fanet
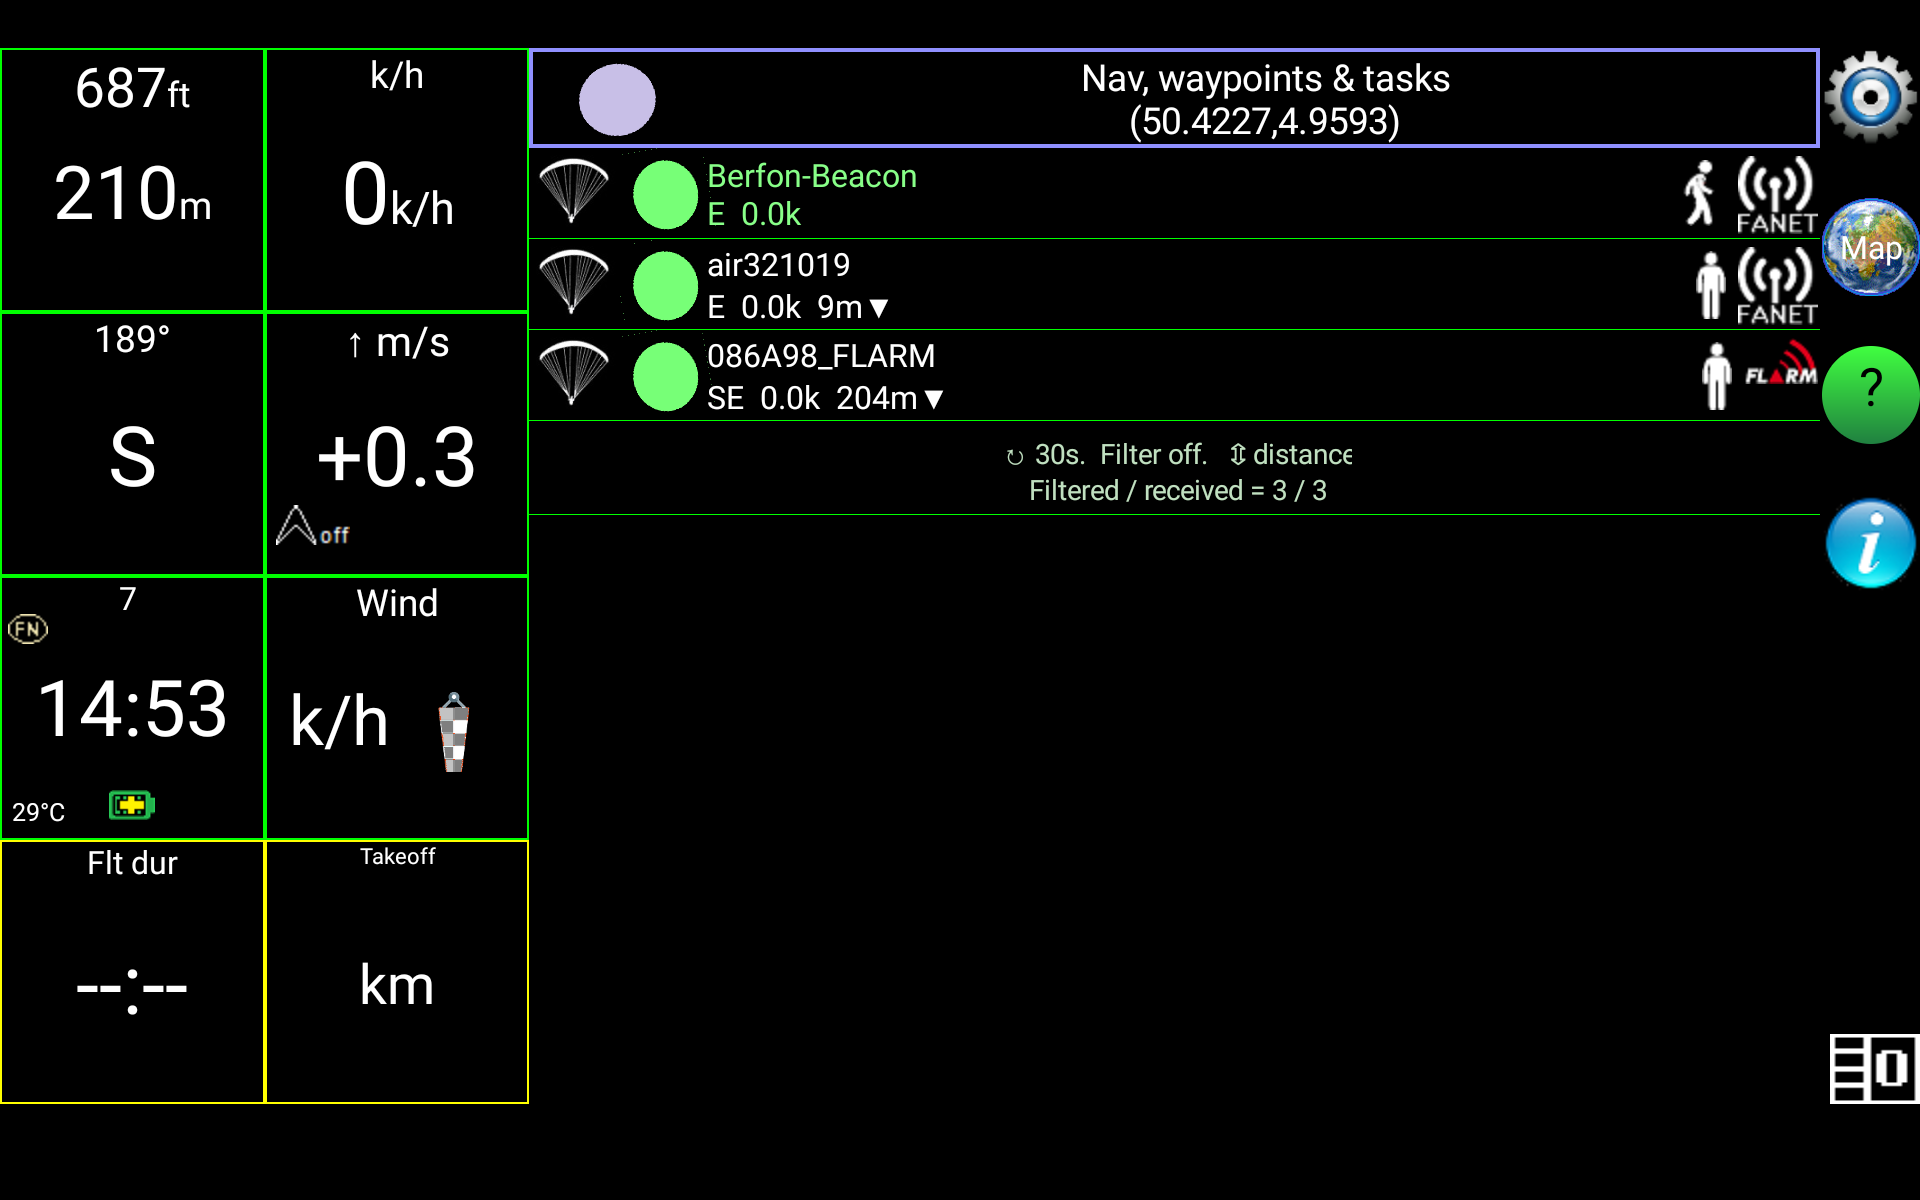
- Check in the XC Guide page the other devices detected. In the following screenshot, the following devices have been used for the test: Skytraxx Beacon (Fanet Tx-Rx, Flarm Tx), AIR³ 7.3+ V1 (Fanet Tx-Rx, Flarm Tx), AIR³ 7.3+ V2 ( Fanet Tx-Rx, Flarm Tx-Rx), GXAircom (Set to only receive and transmit Flarm). The screenshot is taken on the AIR³ 7.3+ V2.
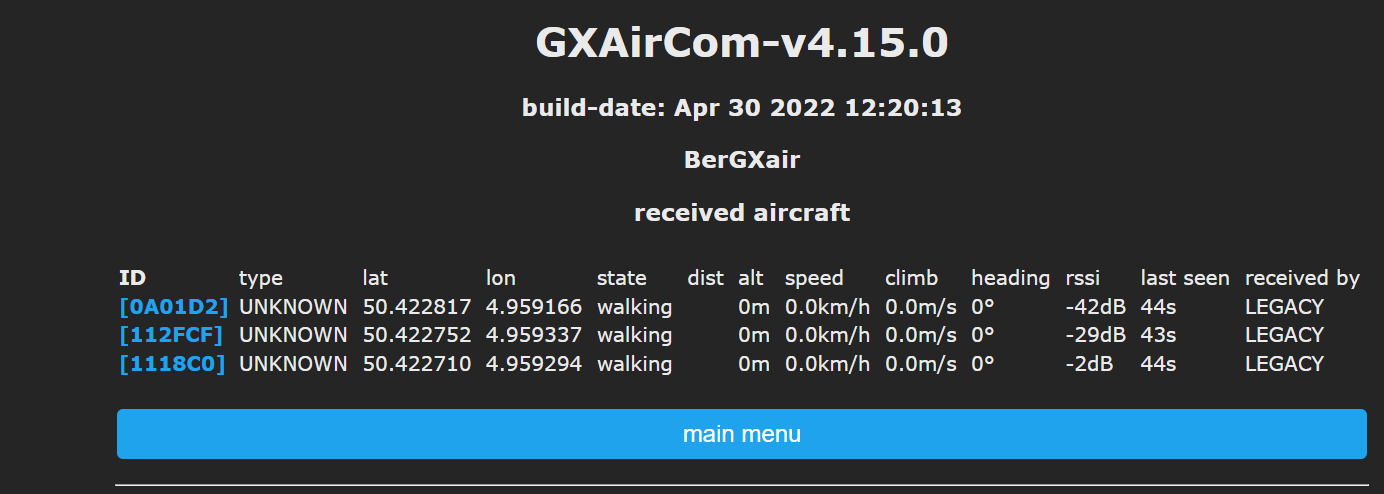
Here is an example coming from GXAircom listing the different devices detected (set to only receive Flarm).
Once the tests have been successful with XC Guide, you can disable the module in XC Guide and test with XCTrack. Check this FAQ to know how to disable the module in XC Guide and enable it in XCTrack.
Here are some advices to make sure you are testing it correctly within XCTrack.
- First of all, make sure you have activated the XCTrack livetracking, so that you can easily observe that you are considered as flying when “Live” is green in the status bar.
- In XCTrack, set the landing detection to “No detection” and set the takeoff detection to 1 km/h in Menu/Preferences/Automatic actions.
- Once both units (receiving and transmitting units) are set, move a little bit to activate the takeoff. Use an XCTrack map that displays “nearby pilots”.
Remember that both units have to be considered as flying.
This new Acoustic Vario feature is one of many provided by the AIR³ XCT addon. The app can be used with any Android device, but the new Acoustic Vario feature is only available on AIR³ devices 7.3 or above (it is recommended that you upgrade to Android 13 if you have Android 10 or 11. You can contact us for more information how to do it).
The first step is to download and install the latest version of the AIR³ XCT add-on. This can be done easily through the latest version of the AIR³ Upgrader.
During installation, you will be asked if you want to enable the acoustic variometer feature. Doing so will automatically set up everything needed to use this new feature within the AIR³ XCT add-on. Make sure you have the latest version of XCTrack (version 0.9.12.11.3 or later is required to communicate with the AIR³ XCT add-on). XCTrack will communicate with the add-on when you take off and land to start or stop the acoustic variometer.
Remember to turn off the acoustic vario in XCTrack to avoid playing two different sounds at the same time.
Finally, in the settings of AIR³ Manager, make sure to start the AIR³ XCT add-on on boot, so that AIR³ XCT Addon will always start when you start AIR³ for your next flight.
Note that you can start or stop the acoustic variometer at any time by tapping on the AIR³ XCT add-on notification.
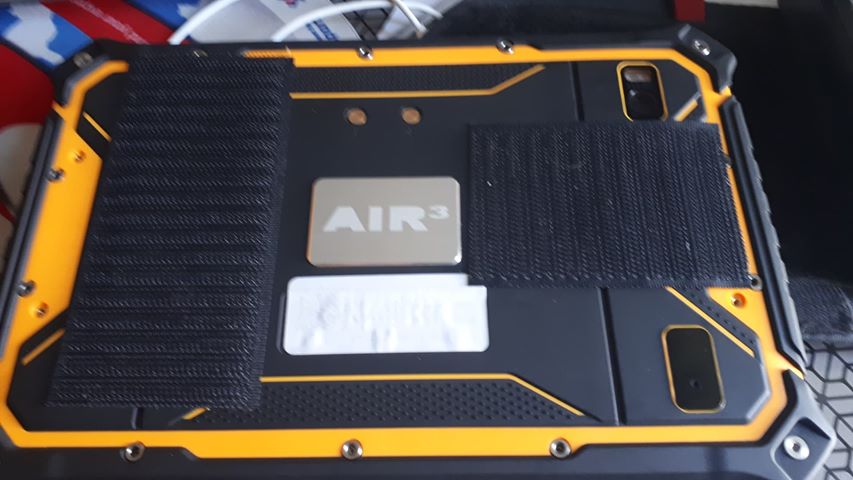
If you are not satisfied with the volume of the vario, you have most probably made one of these 2 errors: velcro on the speaker (AIR³ 7.2) or the volume is not set properly.
Velcro for AIR³ 7.2
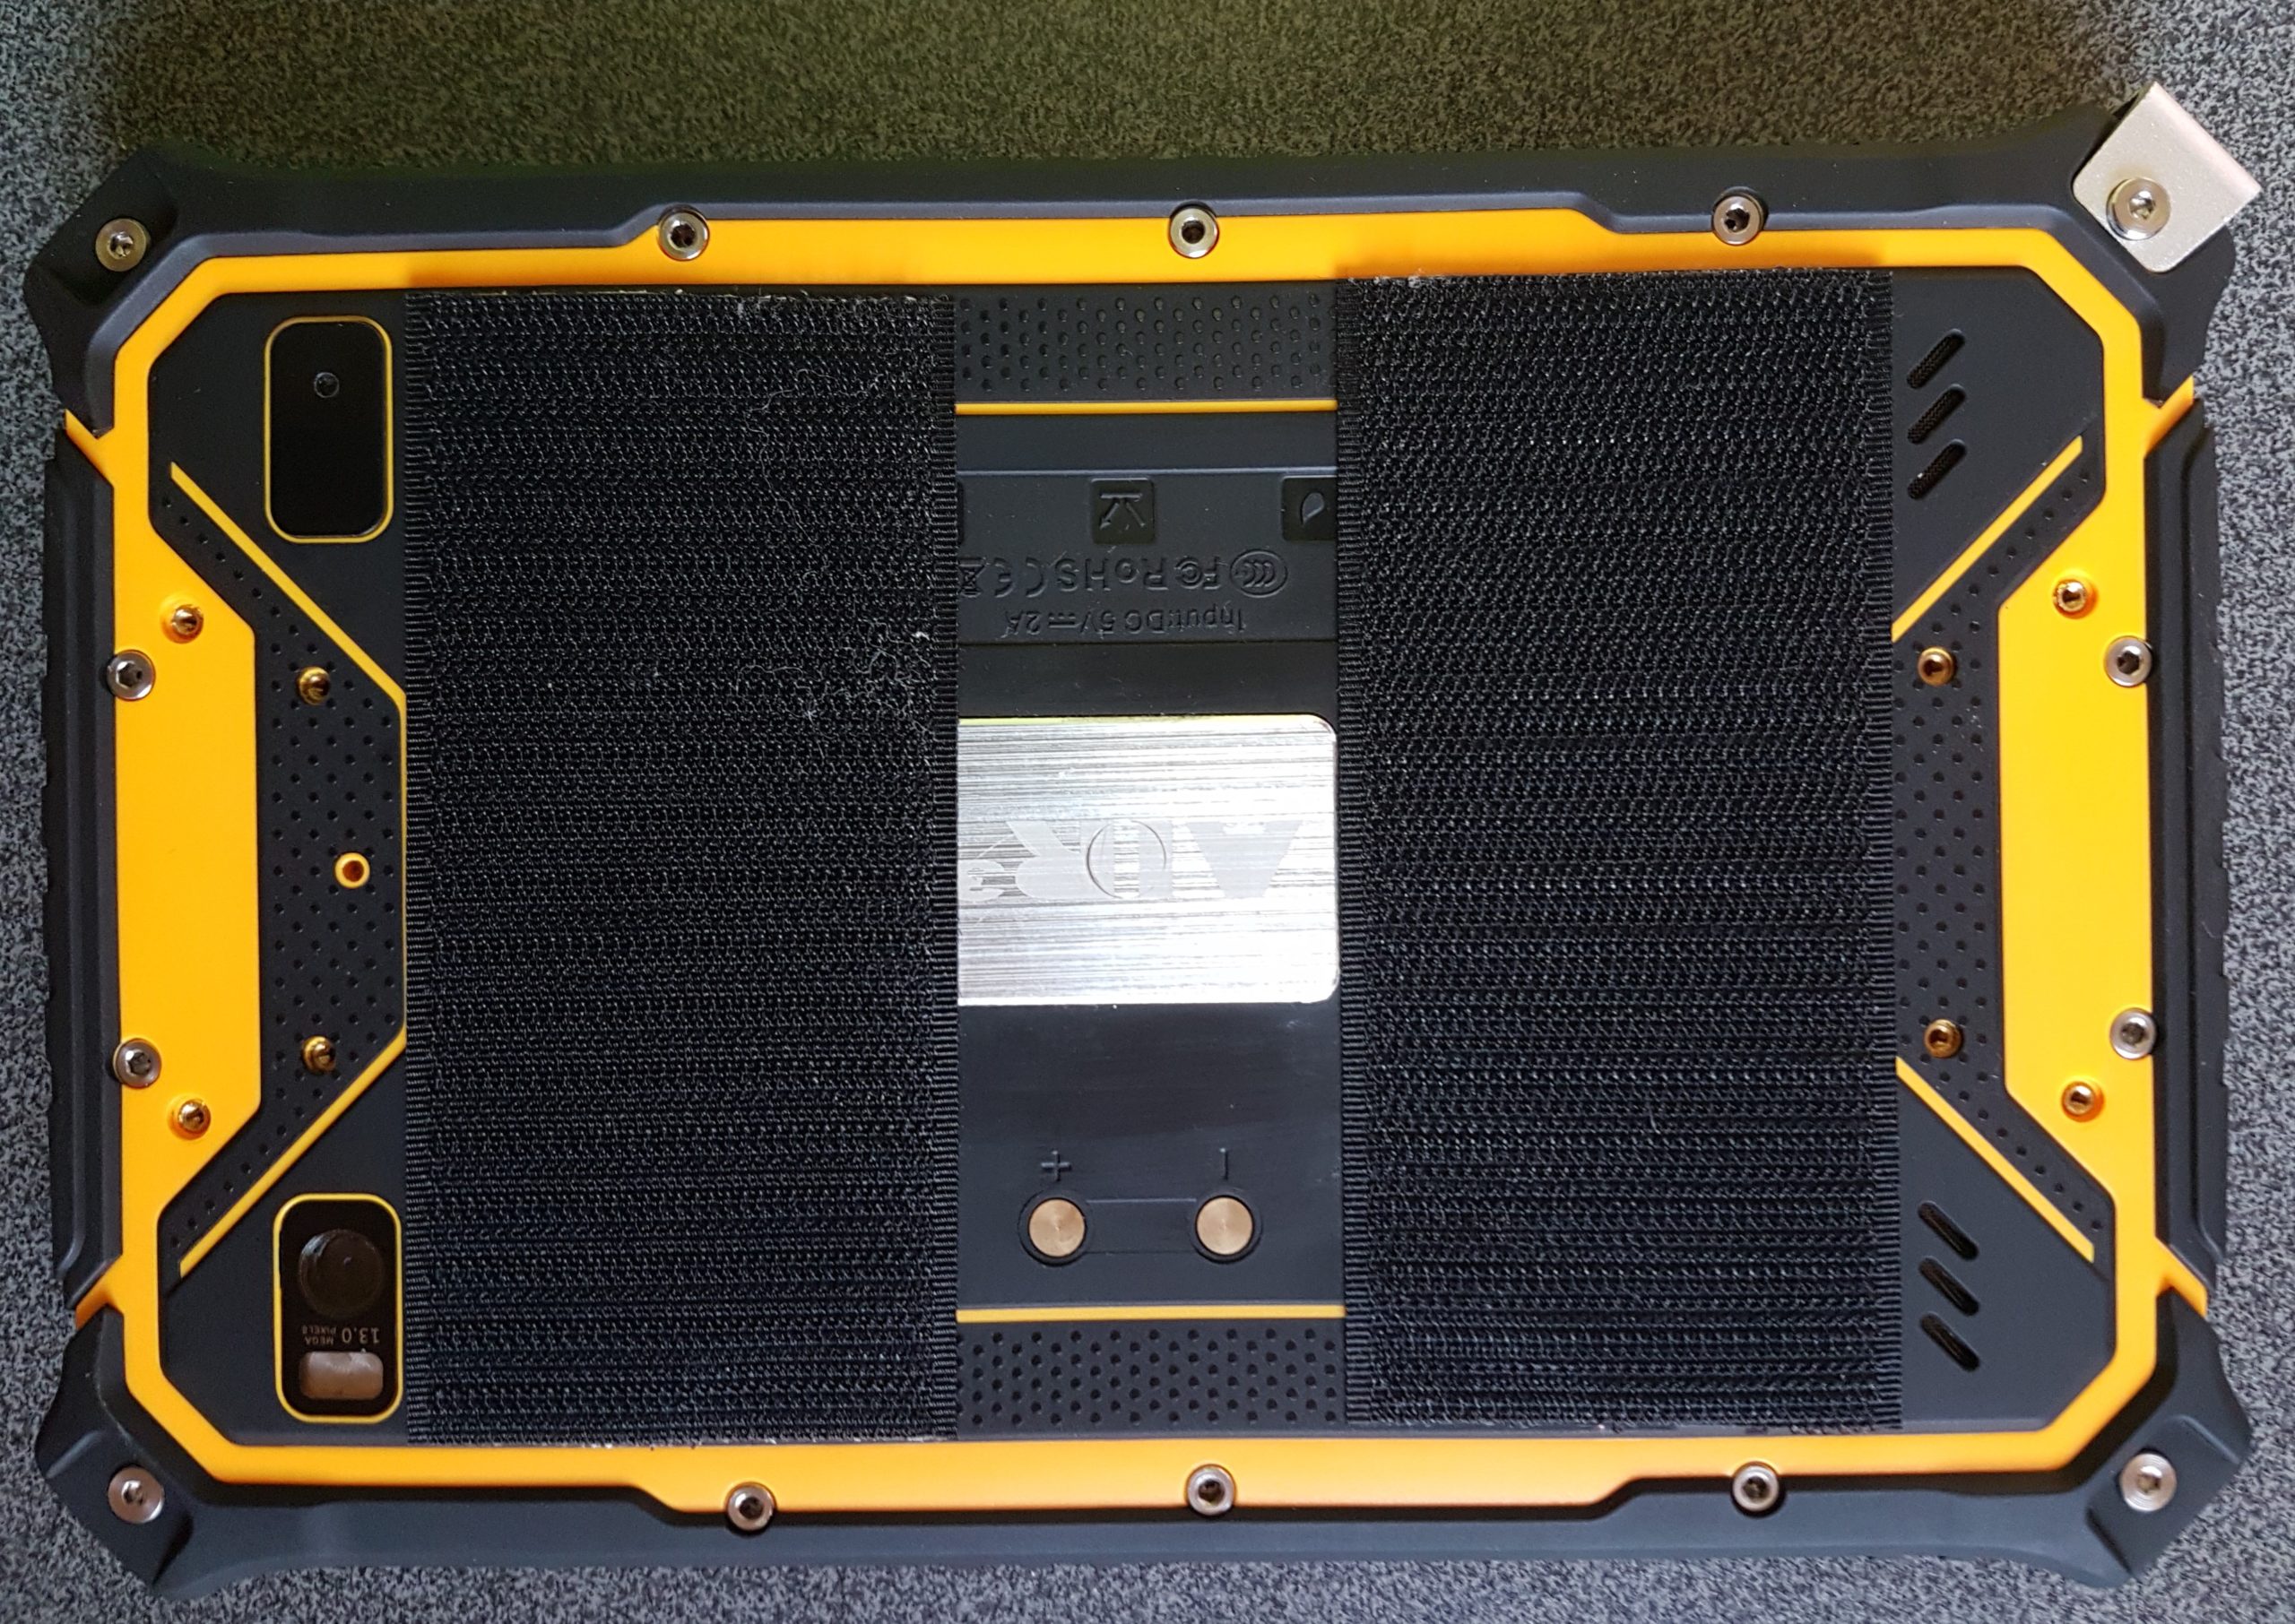
If you place the velcro as you can see in the following picture, you will definitely get the sound muted by the velcro:
Set the volume to maximum (100%)
You can set the volume of the vario in Menu/Preferences/Sound/Acoustic Vario/Volume. The percentage corresponds to the percentage of the system volume. This means that if you set the volume on 50% and the system volume is 50% of the maximum, you will get 25% of volume. Set the volume of the Acoustic vario to 100% to get the highest level of sound if you are not satisfied with the volume. In order to make sure that the system volume is maximum, please make sure to enable “Turn up the volume on startup” in Menu/Preferences/Sound/Automatic volume/ and set the “Pre-set master volume” on 100% .
Read more details about settings in Menu/Preferences/Sound/Acoustic vario
Yes. AIR³ is an Android tab/phone. Any Android app compatible with the android version of AIR³ will be compatible with AIR³
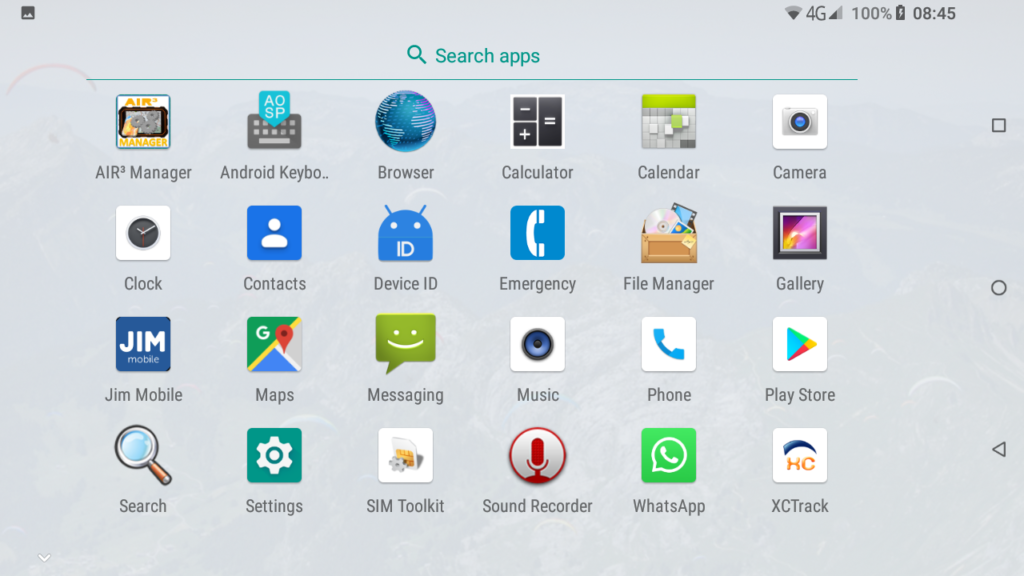
There is no problem with AIR³ 7.1 and AIR³ 7.2.
With AIR³ 7.3, the technology is different. There are different technologies used for polarisation.
With some polarised glasses, if you use AIR³ in portrait mode, there will be no problem; in landscape mode, the screen will be darker. With other polarised glasses, there will be no problem. So, the only way to answer correctly is to test the glasses with the AIR³ 7.3.
Yes, AIR³ is also a flight computer that computes all the info required to optimize your flight during competition. With a version of XCTrack > 0.6, AIR³ generates an IGC file that corresponds to the FAI standards and therefore belongs to the instrument accepted for FAI category 1 competitions.
See XCTrack in the list of instruments of the FAI instruments list here.
Watch the Competition video tutorial
You can also find more information about competition in the competition section of the Menu/Navigation page of XCTrack Pro Manual, as well as in the details regarding Competition widgets in the Competition subsection of the XCTrack Pro widgets Manual.
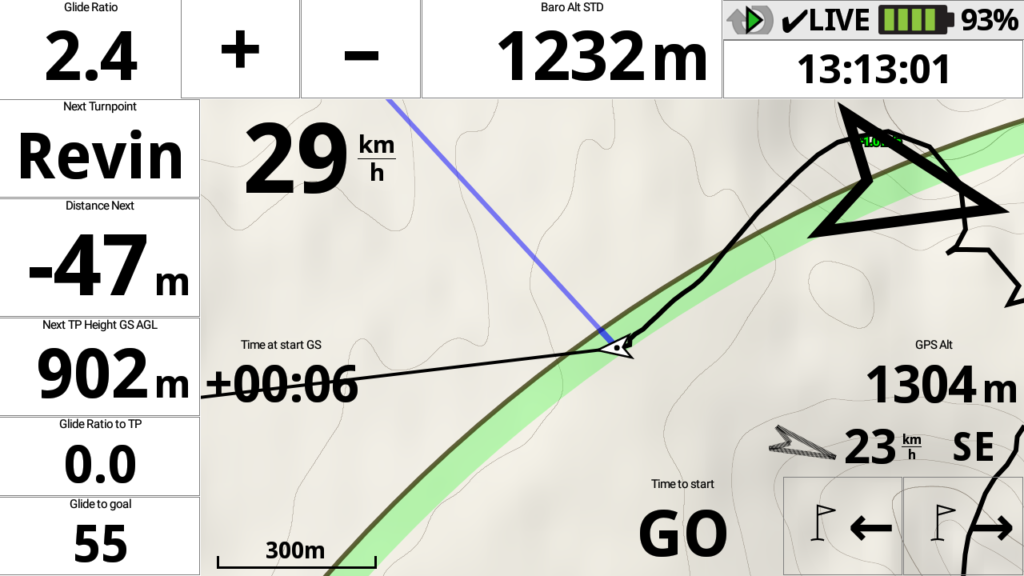
After the start, the green light tells you that you can “GO”
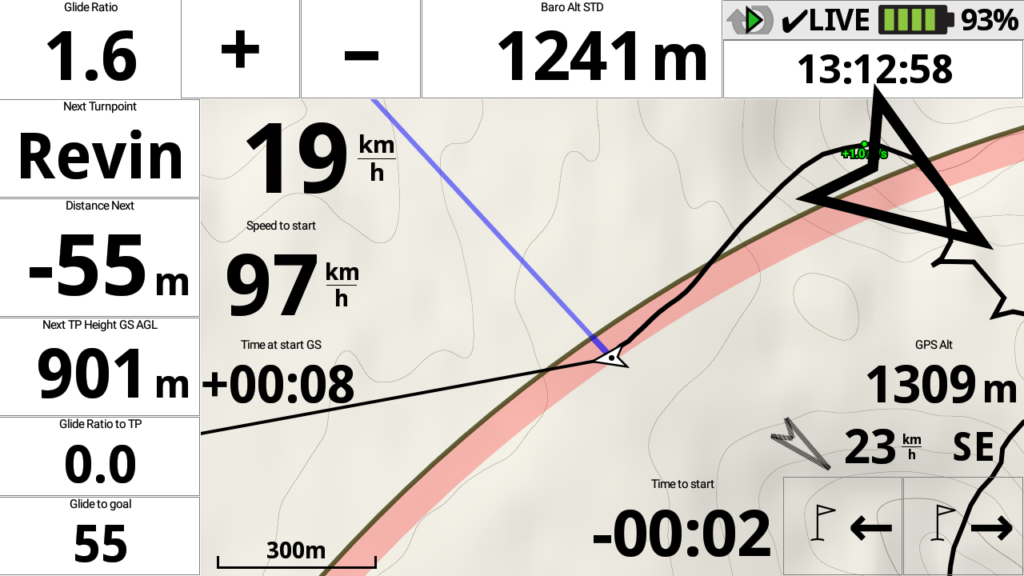
Before the start, you can check the speed required to reach the start line and the remaining time before the start
The automatic zoom will let you check at any time your position towards turnpoints, zooming in when you are approaching the turnpoint, zooming out when necessary.
At any time, keep an eye on the remaining distance to the goal, the glide ratio required to the goal and the glide ratio to the next turnpoint.
Once approaching the goal, keep an eye on the altitude over goal to optimize your score.
Yes. AIR³ is preconfigured with a customized and improved version of XCTrack Pro. It includes a perpetual license of XCTrack Pro. AIR³ is also preconfigured with all the Maps and all the Terrain files of the main countries where it is shipped. You can add easily more maps and more Terrain should you need other regions. Read more in Menu/Preferences/Map details in the XCTrack Pro Manual.
Check the video here how to install additional maps and terrain.
Alternatively, you can also get a 128 Gb SD-card with pre-installed maps of the world.
This SD card contains maps of every country in the world. When you travel to a new country, simply copy the corresponding country into the XCTrack subfolder. Watch this video to find out how.
Yes, who can do more can do less. With the KISS configuration (Keep Interface So Simple), AIR³ is just providing the most needed features once a pilot start requiring his first vario. Through his evolution, the pilot will benefit from the other powerfull features by just using the “Easy” config file or the “Expert” configuration provided with AIR³.
For more details about Flarm, Fanet and Livetracking, check this FAQ.
The Flarm module integrated in AIR³ 7.3+ is using 868 MHz data communication frequency currently.
The Flarm module integrated in AIR³ 7.3+ V2 and 7.35+ uses all frequencies used by Flarm worldwide. The module selects automatically the right frequency.
868.2-868.4 MHz (Europe, Africa)
869.2 MHz (New Zealand)
902-928 MHz (North America)
916.2 MHz (Israel)
917-926.6 MHz (Australia, South America)
Yes. AIR³ is using a performing barometer sensor from Te connectivity to determine the altitude and the altitude changes. It can detect an altitude change of less than 10 cm per second.
In case you face an issue with your device, here are some important things to keep in mind.
We receive a lot of support questions that are user-related and can often be solved easily. Before contacting us, please make sure to follow all the instructions and provide all the information requested in the “Before contacting us” section below. This will help us understand your situation and provide you with an efficient answer.
Also, please remember that a lot of information about AIR³ is already available online. The entire AIR³ support website is indexed by search engines, so Google is often the quickest way to find the right answer or the appropriate support page.
Simply describe your problem in Google, for example “AIR³ XCTrack GPS not working” or “AIR³ how to enable live tracking”, and Google will often point you directly to the relevant page on our support website.
AI assistants are also becoming increasingly useful for troubleshooting. They can often provide the solution directly, based on the information available on the AIR³ support website.
So, before contacting us, Google or an AI assistant may already have the answer you are looking for — and often much faster!
- Do not make a factory reset. Factory resetting the device will erase everything, including the XCTrack Pro licence, maps, terrrain files, etc. If you absolutely need to make a factory reset, contact us to get the procedure first.
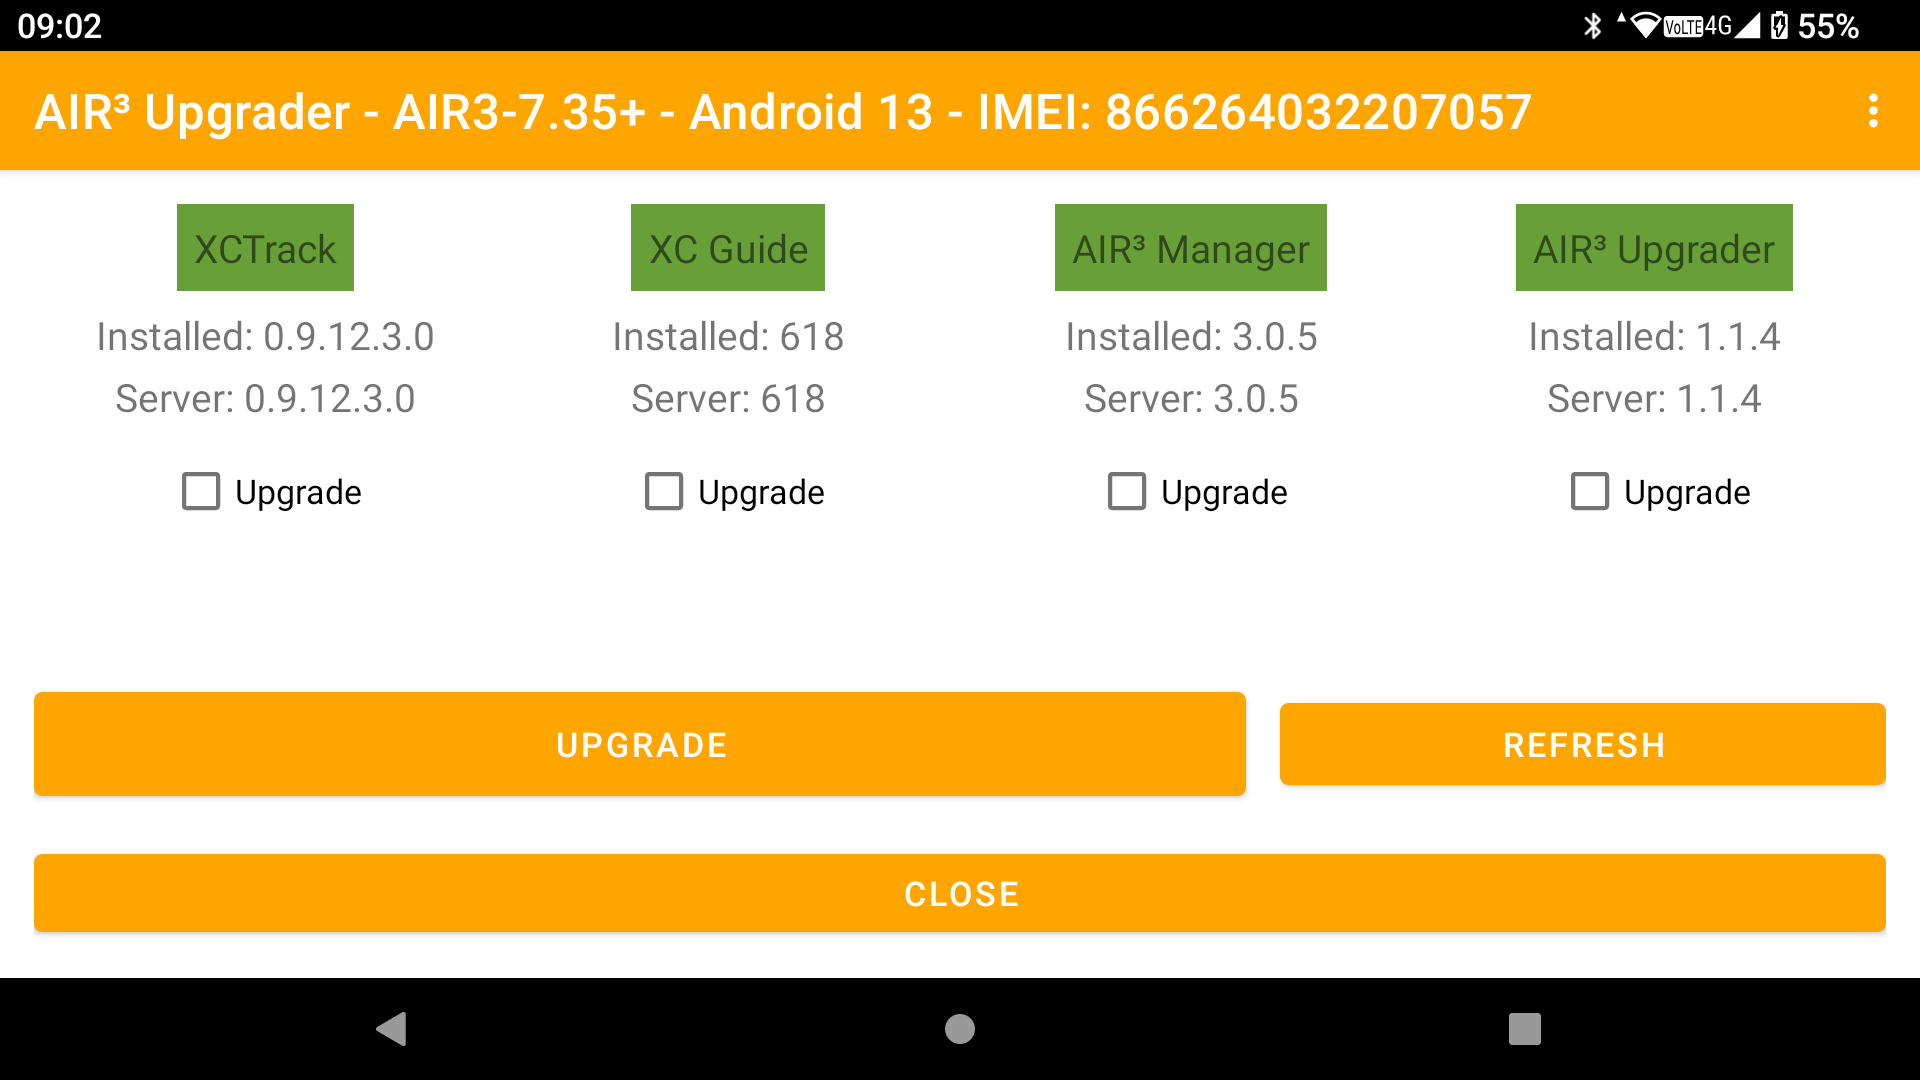
- Make sure you have all latest apps. Update all your apps using AIR³ upgrader. This step is important to make sure the issue you are facing has not already been solved in a more recent version of the app.
- Avoid configuration issues. In order to avoid any concerns related to an incorrect configuration, the first things to do are
- If you have a special XCTrack layout, export your XCTrack configuration (pages only). Check here more details how to export. This step allows you to import back your configuration afterwards.
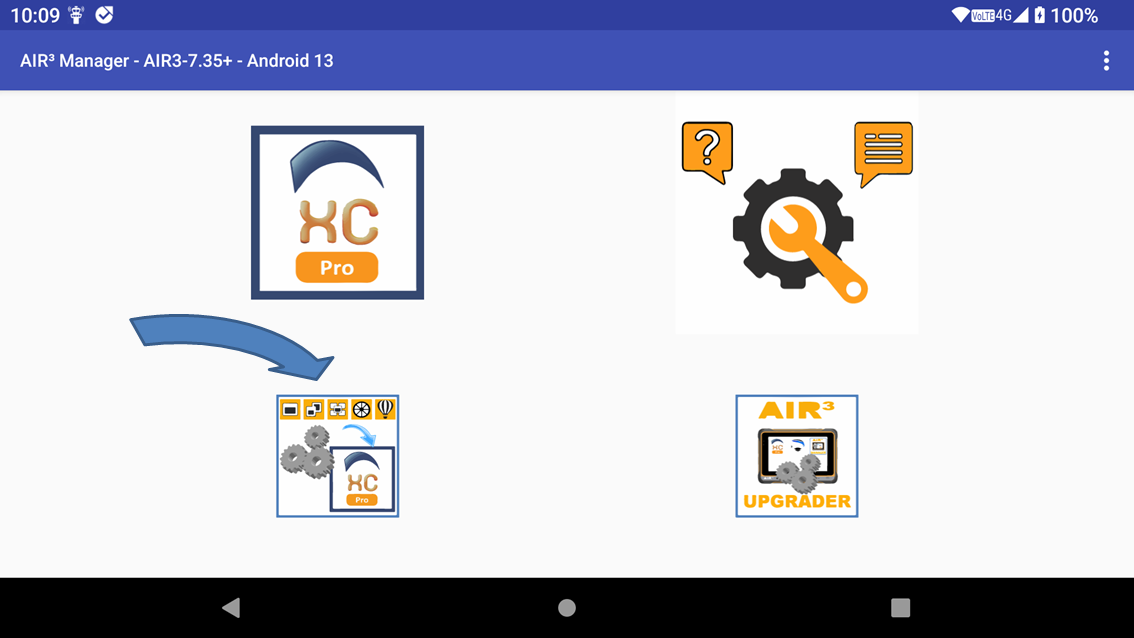
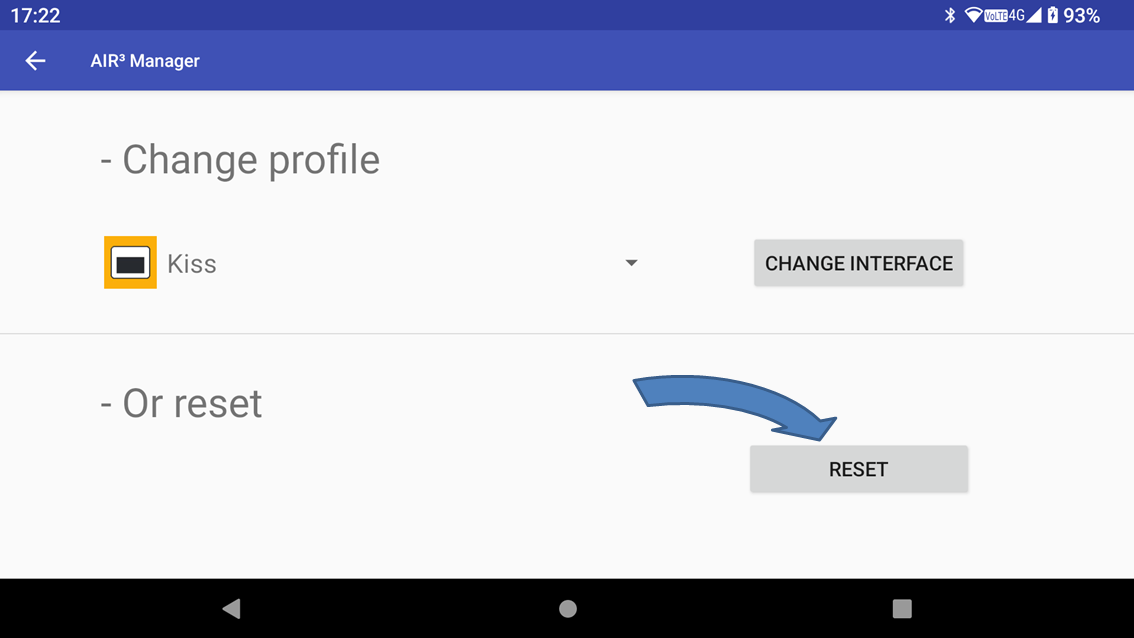
- Reset XCTrack configuration. With Air³ Manager, click on XCTrack interface button, then reset. Check here how to reset XCTrack interface. This step allows to make sure that the issue is not linked to a change you have made to XCTrack configuration. By using the default configuration of AIR³, we eliminate all possible errors coming from a wrong configuration.
- Restart XCTrack. Make sure to quit XCTrack from XCTrack menu before restarting
- Test again without doing any customization to check if the problem still appears with the latest apps and the default configuration.
- Note that there is full online manual available here: https://www.fly-air3.com/en/support/air3-xctrack-manual/ . This manual is online and therefore indexed by Google. Most of the time it is very easy to get to the right page by searching for some answers directly with Google. We strongly recommend that you read the instructions related to the problem you are having to make sure that it is not just a problem of understanding how things work.
- It is strongly recommended to read the faqs and watch our tuto videos here: https://www.fly-air3.com/en/support/ . There are many specific issues that are addressed in our FAQ. Have a look to make sure the issue has not already been addressed. Some people prefer to watch videos rather than read instructions. Check out our videos, which cover most of the questions you might have.
We offer free asynchronous support if you can’t find the answer to your question on our support pages.
To get quickly a solution, please show in your video all settings related to the problem that are set correctly.
A support request with a video clearly showing that all of these recommendations have been followed will be prioritized.
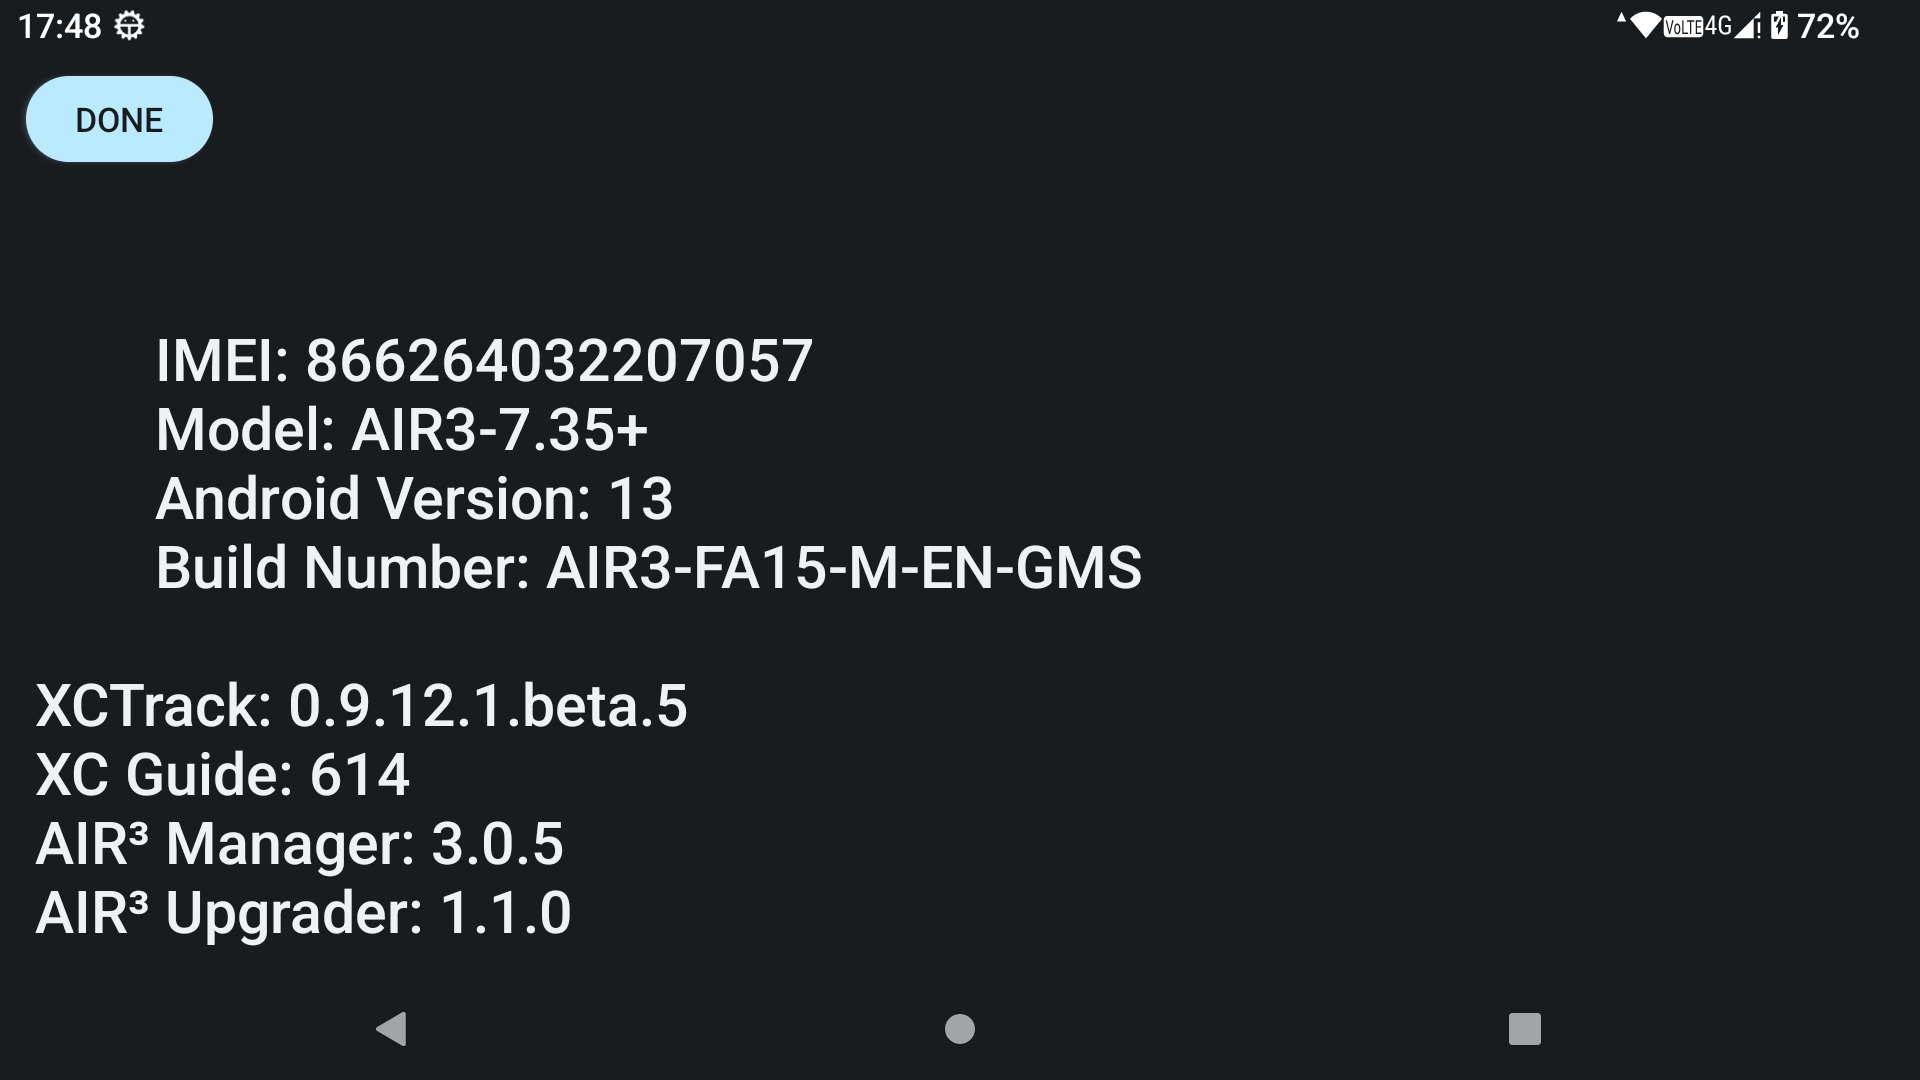
Here are other ways to find your IMEI.
IMEI number can also be found:
If you still can’t find your IMEI but found the MEID, please provide it to us (MEID is the same as IMEI with missing last number).
In the About menu of AIR³ Upgrader
On the box of the device when you bought it
On the back of the device
In Settings/About device/IMEI (depending on Android version, you may need to find it in Settings/System/About device/Status)
In XCTrack Preferences/About XCTrack by clicking on the XCTrack version and then scrolling down.
Watch this video to know how to get AIRSPACE and read more details about Airspace in Menu/Preferences/Airspaces
Airspaces information were traditionaly provided to the instrument through an Openair file. The AIRSPACE is continuously evolving. This means that Openair files should be regularly updated.
In an Openair file, there are prohibited zones 7 days a week, H24, but there are also a certain number of temporary prohibited zones that are announced by Notam (notification to air man).
This means that a different Openair file needs to be produced every day, or every hour according to the current situation.
There are different ways to let XCTrack use the right airspace. Read more details in Menu/Preferences/Airspaces.
XCTrack/Airspace/Web:
XCTrack can use airspace zones from http://airspace.xcontest.org automatically.
Choose countries in Menu/Preferences/Airspaces in the Web tab. Tap ‘’Refresh’’ .
Check this video to see how to get Airspace information of a given country.
Airspace activations are automatically checked upon XCTrack (re)start
Airspaces are computed automatically through a “notam analyser” in many countries.
AIR³ Manager/Openair file:
If XCTrack doesn’t support your region or for other specific reasons, you could use another method linked to AIR³ Manager, but for easy Airspace update, we strongly recommend using the previous method.
Openair files should ideally be produced based on a daily analysis of the Notam in order to humanly determine which airspaces are activated or not.
A group of pilots focusing on a given region should organise themselves to validate Openair files corresponding to their region and publish them on a Google Drive folder. Sharing that folder with the pilots that are interested, AIR³ manager can automatically download the latest Openair file published.
Air³ Manager will copy the airspace files in OpenAir format to the Airspaces directory of XCTrack as “Most_recent_OA.txt” and make a second copy in the directory. By choosing that individual airspace file “Most_recent_OA.txt” once for all, Air³ will automatically use the latest Openair file published on that shared folder without any difficuty.
Read more details in the Openair2AIR3 page and in the AIR³ Manager manual.
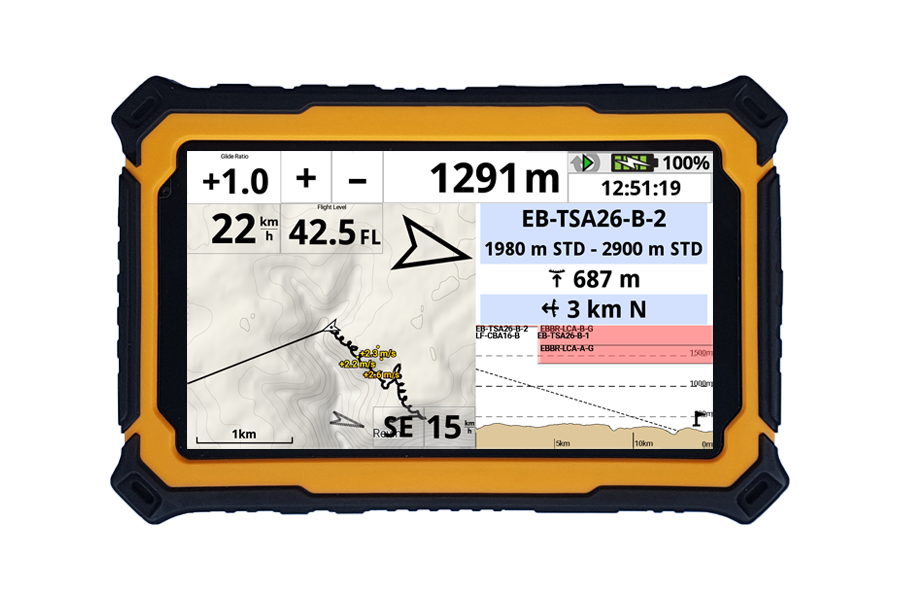
As indicated in the Bearing widget, it is important to understand Bearing and Heading. Heading is either determined by the internal compass (See Preferences/Connection & sensors) or calculated by XCTrack based on Bearing and wind if the internal compass is not enabled.
We recommend that you do not use the internal compass, but instead use your bearing and wind to determine your heading. Using the internal compass means that you need to keep it calibrated. A second reason is that there is a slight delay when the sensors calculate the heading based on the way the unit is held, i.e. tilted. On the other hand, the calculation of heading based on bearing and wind is instantaneous.
Here are most of the new or improved features in 7.2, compared with AIR³ 7.1:
- Vario, new pressure sensor: Te connectivity (Vs. Bosch)
- Android 8.1 (Vs. Android 5.1)
- Screen max brightness: 1000 nits (Vs. 400 nits)
- Deca core 2.4 Ghz (Vs. Quad core 1.3 Ghz)
- Ram/Rom: 4 Gb/64 Gb (Vs. 2Gb/16 Gb)
- Battery: 10.000 mAh (Vs. 7.000 mAh)
- Emergency quick button
- Easier to use physical button
| Quick comparison table | Without Fanet/Flarm module | With Fanet/Flarm module |
| 1300 nits screen | 7.3_A13 | 7.3+_A13 |
| 2200 nits screen | 7.35 | 7.35+ |
Until june 2024, all AIR³ 7.3 (plus and non plus) were delivered with Android 11. All these units can be upgraded with Android 13. AIR³ 7.3_A13 or AIR³ 7.3+_A13 are directly delivered with Android 13.
The main hardware difference between all AIR³ 7.3 and all AIR³ 7.35 is the screen. AIR³ 7.3 had a 1000 nits screen, while all AIR³ 7.35 have a 2200 nits screen.
AIR³ 7.3_A13 and AIR³ 7.3+_A13 have a 1300 nits screen. There are therefore 2 main differences between the AIR³ 7.3 family and the AIR³ 7.3_A13 family: a slightly brighter screen and Android 13. The rest is exactly the same.
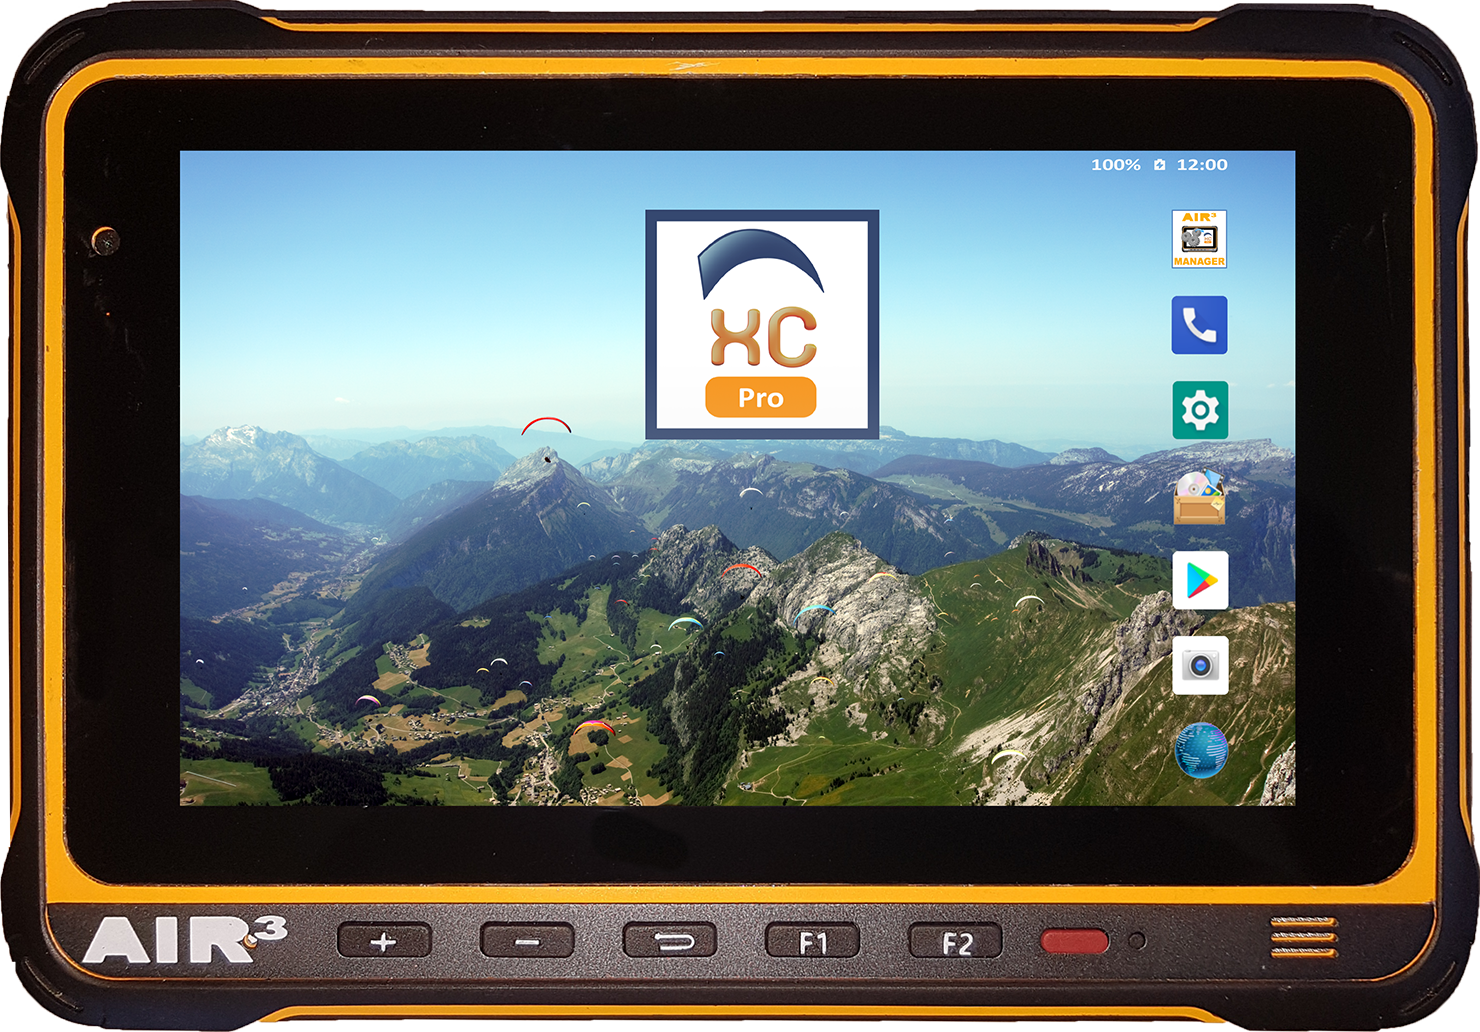
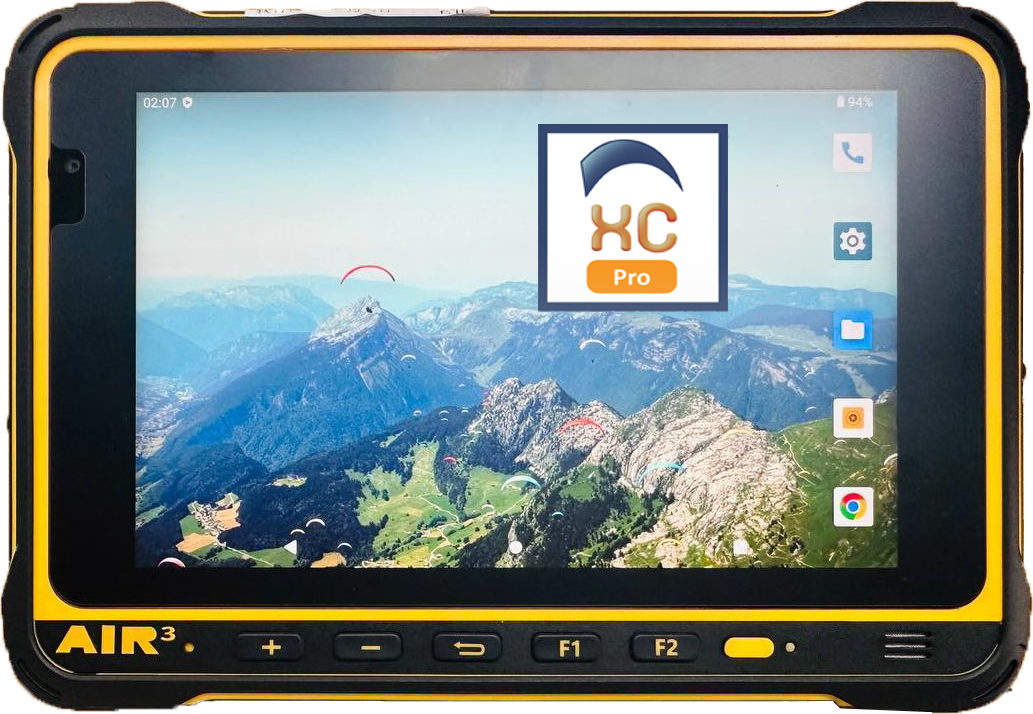
Visually, the difference between the 7.3(+) and 7.35(+) is the colour of the AIR³ logo on the front and the colour of the buttons. The 7.3(+) has a white logo and buttons, while the 7.35(+) has orange buttons.
Read this FAQ related to AIR³ autonomy to understand the impact of screen brightness on autonomy.
Another difference is that the AIR³ 7.35+ has a built-in antenna, whereas the AIR³ 7.3+ had an external antenna. As it is no longer easy to tell the difference between the AIR³ 7.35 and the AIR³ 7.35+, the AIR³ 7.35+ has a “+” sign printed to the right of the power button.
AIR³ 7.3+_A13 also has integrated antenna while AIR³ 7.3+ had an external antenna. AIR³ 7.3+_A13 has a white “+” sign printed to the right of the power button.
Of course, as the Plus version also includes the Flarm and Fanet module, you can also check that the module is responding by activating it with XCTrack or XC Guide. Check this FAQ for more details.
The only difference is the Fanet/Flarm module inside the unit.
The consequences are:
- Both modules can transmit and receive Fanet.
- V1 can only transmit Flarm, not receive. V2 can do both transmit and receive Flarm.
- V1 could only use 868 Mhz, which means only EU. However, with the latest firmware upgrade provided in december 2022, the module can now also communicate on other frequencies for Fanet.
V2 can use the different frequencies, both for Fanet and Flarm.
Note that V2 can receive both Fanet and Flarm but, if a Fanet signal is received from a given pilot, the Flarm signal will be ignored as it would become irrelevant.
How to identify if the unit is V1 or V2? There is nothing outside that can differentiate a V1 and a V2. All units produced after november 2022 are V2. All units produced before that date are V1.
Read more details about enabling Fanet and Flarm module in this FAQ.
The AIR³ Manager is an App developped to manage the main features of AIR³ besides XCTrack. Look at the AIR³ Manager page and the AIR³ Manager manual.
What is the difference between AIR³ and a low cost phone or tablet on which I can install XCTrack?
If you have reached this page, it means you are headed in the right direction. But you are not there yet. XCTrack is the most efficient and ergonomic flight software. Now using XCTrack is one thing, the hardware that XCTrack runs on is also essential to have a good flight instrument.
AIR³ is a tablet designed to be a flight instrument, eliminating all the limitations and weaknesses of a device not designed for flight.
Are there many pilots who only use their phone or tablet as the ONLY flight instrument? Probably not, here are some reasons (not sorted by importance) that differentiate AIR³ from such a solution.
- Readability is a key characteristic of a flight instrument. AIR³ has a very bright screen with up to 2200 nits. This gives the possibility of reading information even in the worst cases.
- A large majority of phones or tablets do not have a pressure sensor. Now, having a pressure sensor does not guarantee a good vario. The quality of the sensor is also important, as well as the way the system and the software are using the data coming from the sensor.
- AIR³ is a rugged tablet IP67. This means it is robust, shock proved, water resistant. As long you are very cautious, doing very soft landing and take off, etc, it may not be an advantage but if not, it is one for sure. The counterpart of this is that it is more heavy (strong material, rubber, protection, etc.) than usual instrument.
- AIR³ has a 7″ display, which allows to have very large widgets easily readable, very large Map on screen, etc. This is certainly an advantage, compared with a phone. Most tablets have a 8 or 10″ display. We beleive it is too large and unnecessary. 7″ is the ideal size.
- AIR³ plus version has a Flarm and Fanet module allowing to see and be seen by others. Check here for more information about Flarm and Fanet.
- AIR³ is the only device sold with a perpetual licence of XCTrack Pro. This gives the opportunity to use certain widgets that are not available in the free version of XCTrack. The set of Pro features will increase in the future and will of course be available for AIR³ users that have a Pro version of XCTrack.
- AIR³ has easily accessible physical buttons to interface with the application. When wearing winter gloves, the interface with the touch screen function may become difficult. With the physical buttons, you can easily zoom in or out, change pages, change the waypoint to follow, increase or decrease the brightness, etc..
- AIR3 Manager is an additional app preinstalled on AIR³ that manages some basic features, including the way to choose XCTrack profile and theme (both applications are communicating with each other so that the user do not need to know all the different settings to change into XCTrack to change profile or theme). AIR³ Manager also offers a way to automatically download the latest openair file validated by the local group of pilots that are concerned by Airspace compliance. See this video that details the way AIR³ is managing AIRPACE.
- AIR³ is sold “Ready to fly”, preconfigured with 5 different profiles and 3 different themes. XCTrack is a very powerfull application but it is sometimes too complex for some users to take advantage of it. With AIR³, no need to learn all the different advanced features of XCTrack to take the best out of it.
- The autonomy of AIR³ is large with 10.000 mAh…It gives the opportunity to keep your phone battery,… and keep having the chance to use your phone once landed.
- AIR³ speaker and microphone gives you the opportunity to call or receive calls, keeping your hands on the breaks. (except to hang on or to execute the preconfigured call widget). Few tablets have the opportunity to use it as a phone. Being able to receive calls and make calls can be very usefull in many situations
- AIR³ has a pogopin (magnetic) USB connector. If you need to charge the device in flight with an external battery, you can easily connect. In the event of a hard landing, there is no risk of breakage with the USB connector.
- AIR³ is sold through distribution. This mean that you should have the opportunity to test it before buying it if you are not yet convinced. Not sure which local distributor is selling the AIR³? Contact us. If there is no local dealers yet, take advantage of our “satisfied or refunded” commitment.
Firstly, please note that an internet connection is not required to use AIR³ as a flight instrument. However, if you do not have an internet connection, you will not be able to access online features such as automatic airspace downloads, live tracking, QNH synchronisation, thermal map downloads, …
To access the internet, you can either use a SIM card or set up your phone as a hotspot. However, note that using your phone as a hotspot can result in an unstable connection and drain your phone’s battery, which can be stressful before taking off. Therefore, we strongly recommend using a SIM card.
Depending on how you use AIR³, you may only need a small amount of data. For example, if you only download airspaces and use Livetracking, you will need less than 1 GB per year.
Some operators offer a second SIM card as part of your existing plan. Others offer prepaid SIM cards with no time limit, such as BNESIM. Check your region and click on ‘Lifetime data’.
You can also get an eSIM card from eSIM.me to add eSIM features to your AIR³. Once you have this card, you can purchase any eSIM plan.
What is AIR³ XCT Addon?
The AIR³ XCT add-on is an advanced companion app for XCTrack that enhances your flying experience with specific features. In this FAQ, we will focus only on the vario features, even though the AIR³ XCT Add-On has many other functionalities.
It works alongside XCTrack, but it can also be used as a standalone vario (in such rare case, it must be started manually because XCTrack will not trigger it automatically at takeoff).
Can I use both XCTrack vario and AIR³ XCT Addon vario at the same time?
Technically yes, you can run both simultaneously, but this is NOT recommended as:
- You’ll hear overlapping audio feedback which can be confusing
- Both systems will consume battery and processing power
- The audio cues may conflict and cause distraction while flying
Recommendation: Choose one vario system and disable the other. Use AIR³ Manager to choose which vario sound you want to use.
Feature Comparison
What are the main differences between XCTrack vario and AIR³ XCT Addon vario?
| Feature | XCTrack Vario | AIR³ XCT Addon Vario |
|---|---|---|
| Instant Lift Detection | Not available | ✅ Hardware-based instant lift detection with AIR³ accelerometers and gyroscopes |
| Weak Lift Audio | Basic feature | ✅ Advanced weak lift feature |
| Sound Types | Single beep pattern | ✅ Many sound types: Classic, Triplet, Sawtooth, Chirp, Pulse, Organic |
When to Choose XCTrack Vario
XCTrack vario is best for you if:
✅ Simplicity is your priority
- You want a straightforward, out-of-the-box vario experience
- You are used to the sound of the XCTrack Vario and prefer to stick with what you know.
✅ Universal compatibility
- You fly with different devices and want consistent behavior
- You don’t have AIR³ hardware
✅ Proven stability
- You value XCTrack’s mature, extensively tested vario system
When to Choose AIR³ XCT Addon Vario
AIR³ XCT Addon vario is best for you if:
✅ You own an AIR³ device
- You want to leverage the AIR³’s hardware sensors
- You want instant lift detection (instant response)
- You want the most responsive vario experience possible
✅ Advanced audio customization
- You enjoy experimenting with different sound types (Triplet, Organic, etc.)
✅ Enhanced situational awareness
- You want to hear the lift without any lag
- You want weak lift info to help you identify lift edges
Quick Decision Guide
Choose XCTrack Vario if you want:
- Simple, reliable, tested solution
- Minimal setup and configuration
- Known sound “color”
Choose AIR³ XCT Addon Vario if you want:
- Instant lift detection
- Advanced audio customization
- Weak lift advanced sound
- Multiple sound types
Both systems are excellent. Your choice depends on your flying style, experience level, and preference for simplicity/legacy vs. advanced vario features.
Can I contribute to AIR³ XCT Addon development?
Yes! The project welcomes:
- Bug reports with detailed reproduction steps
- Feature suggestions based on flying experience
- Sound configuration profiles for different conditions
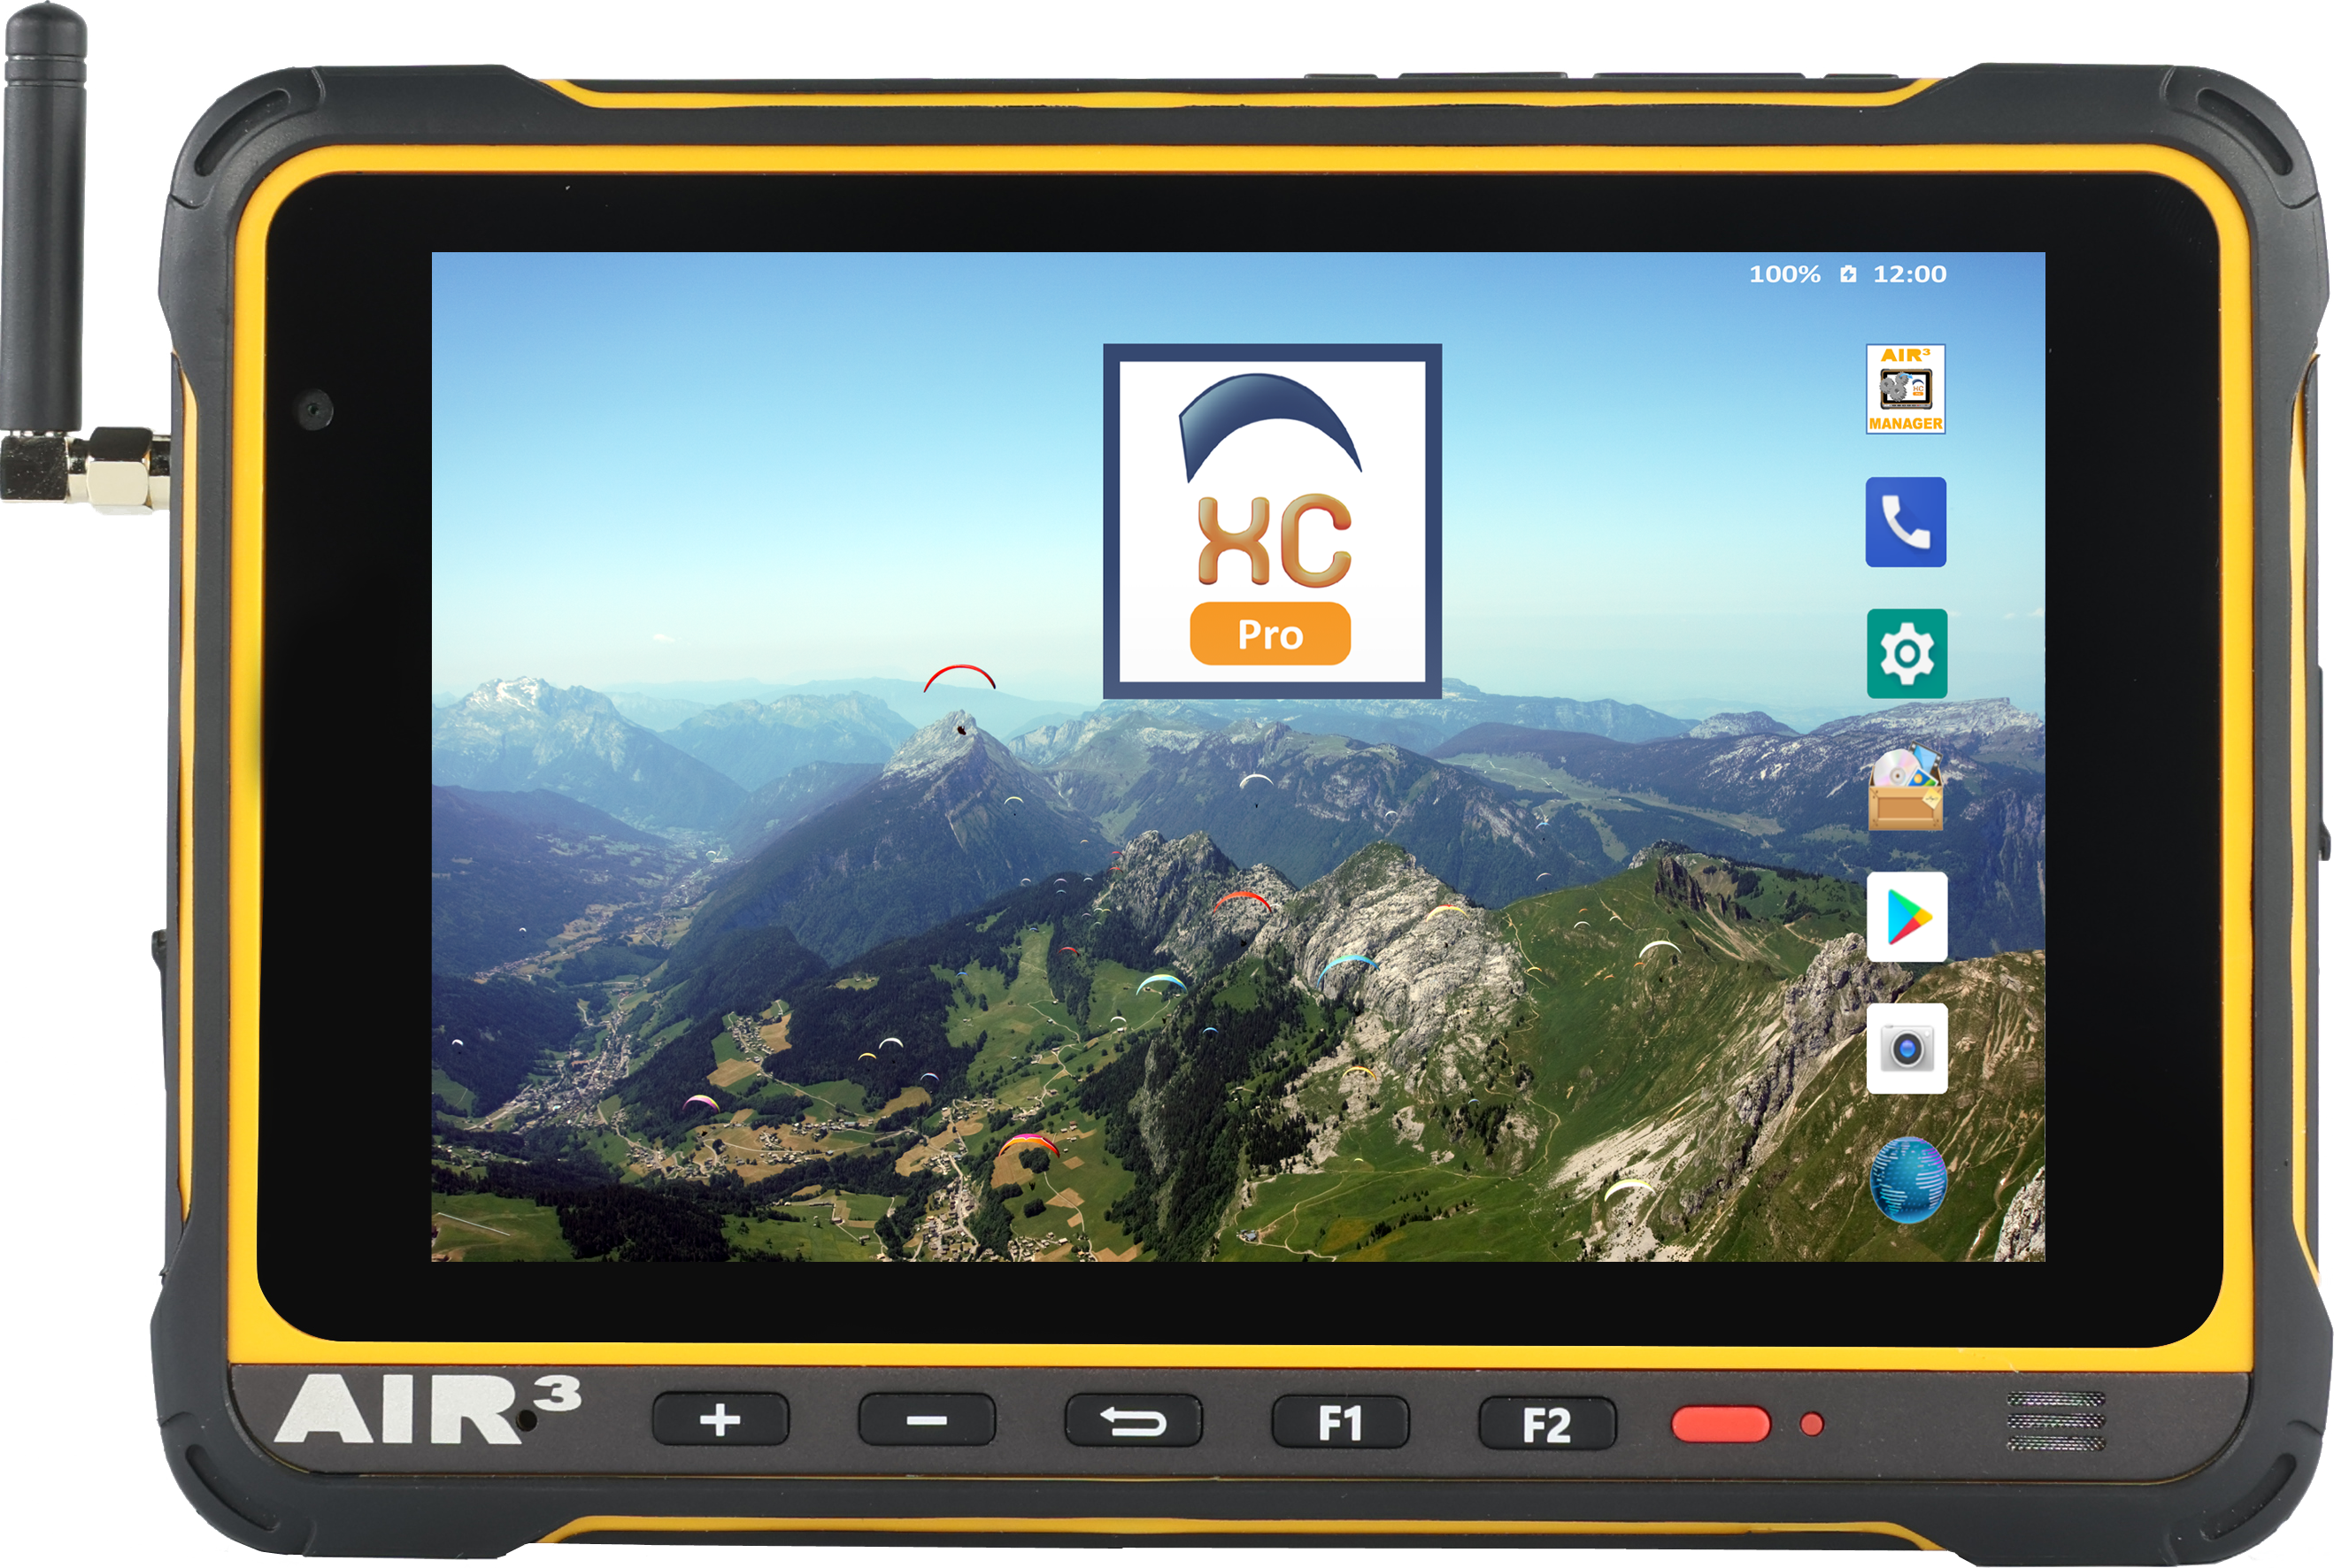
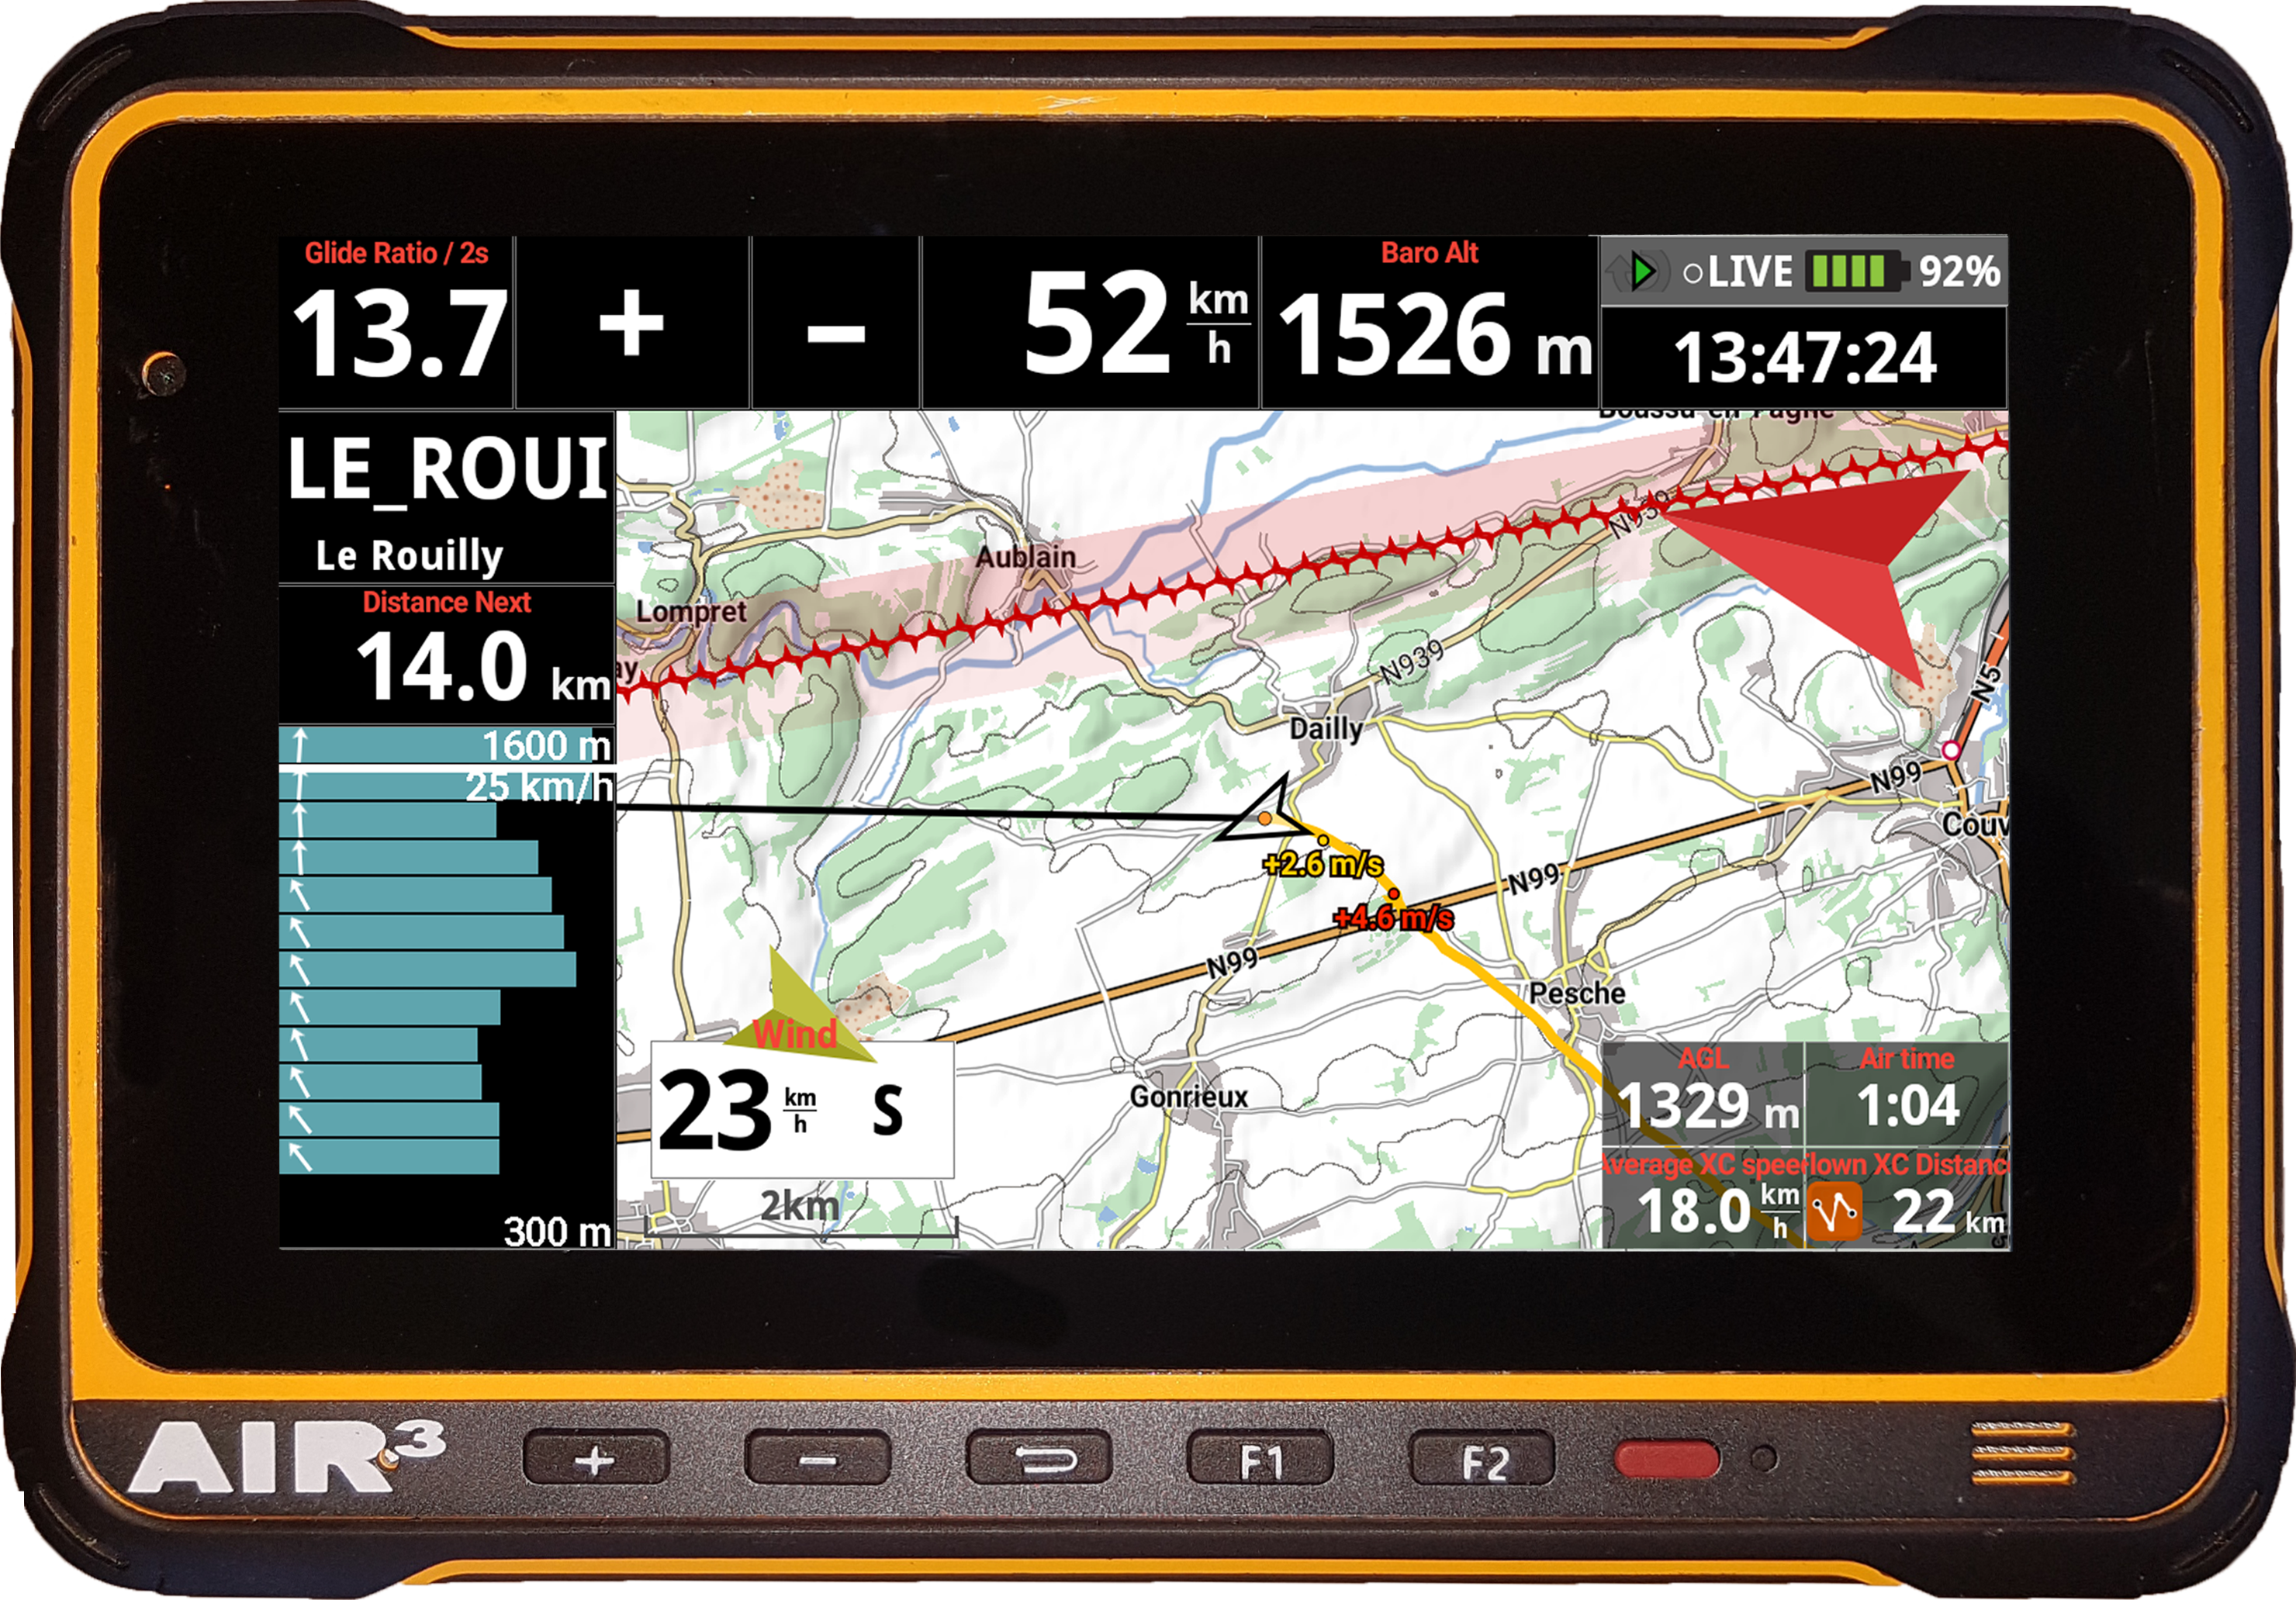
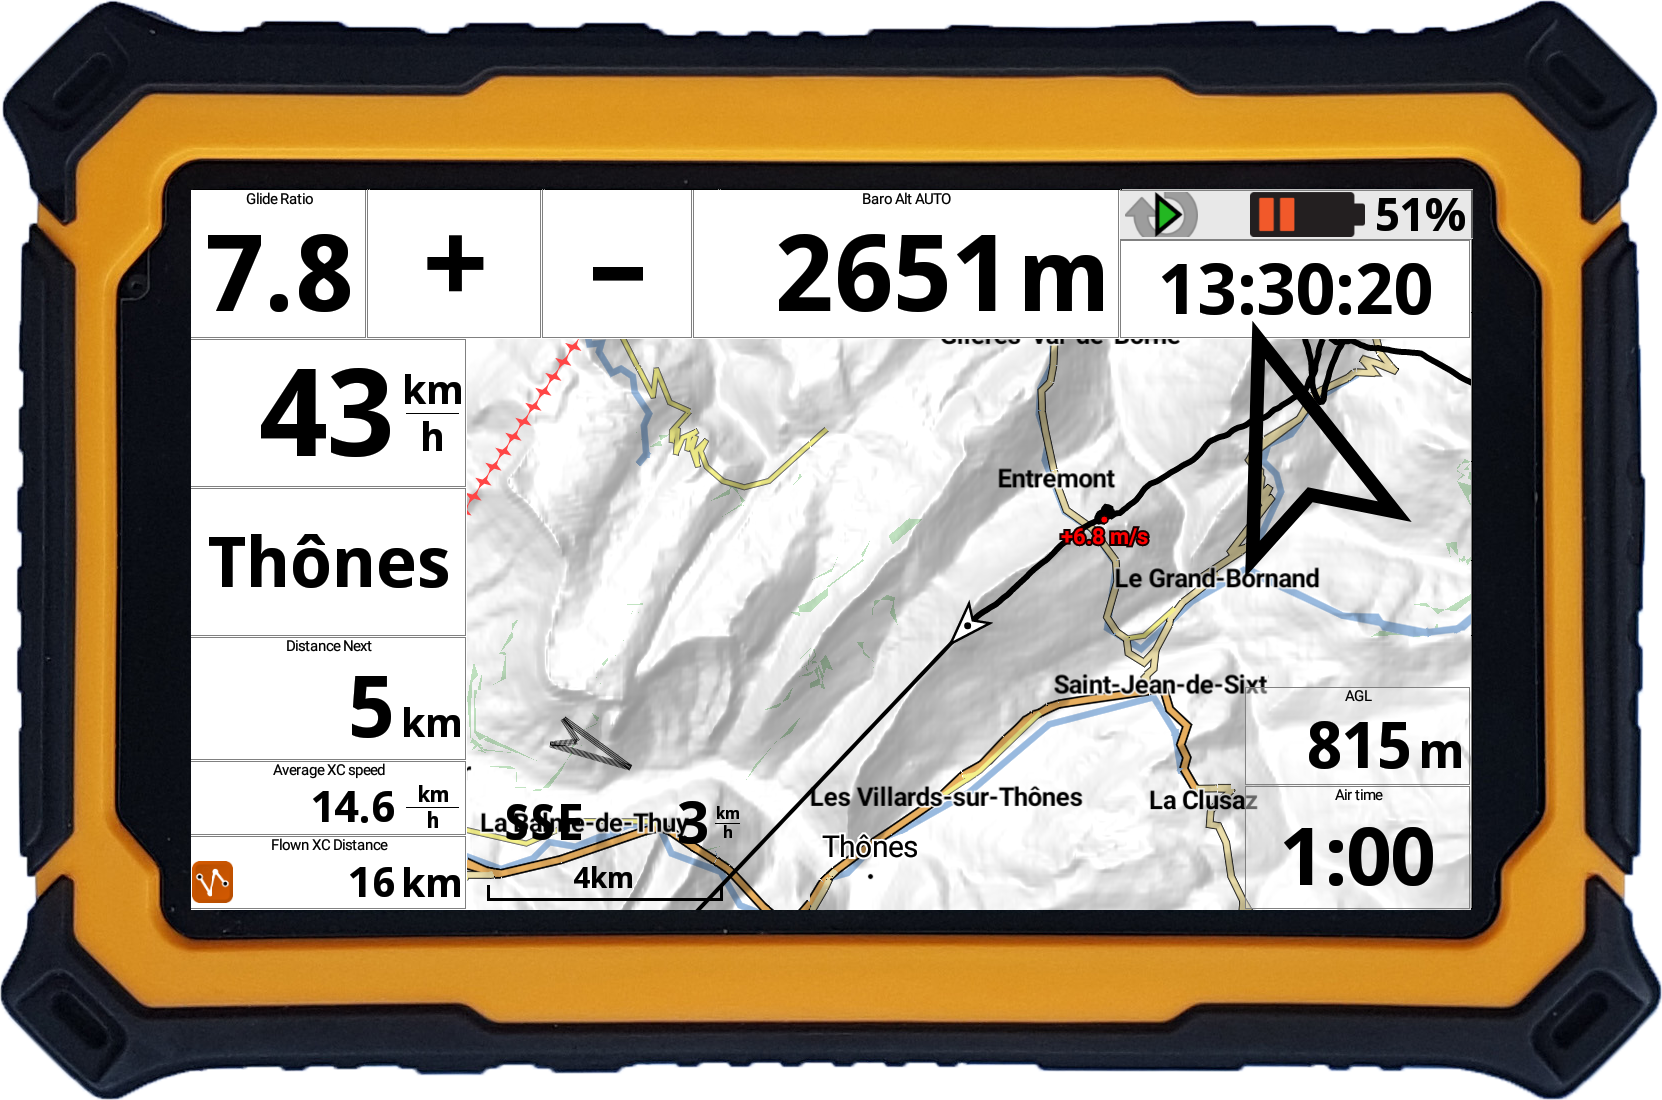
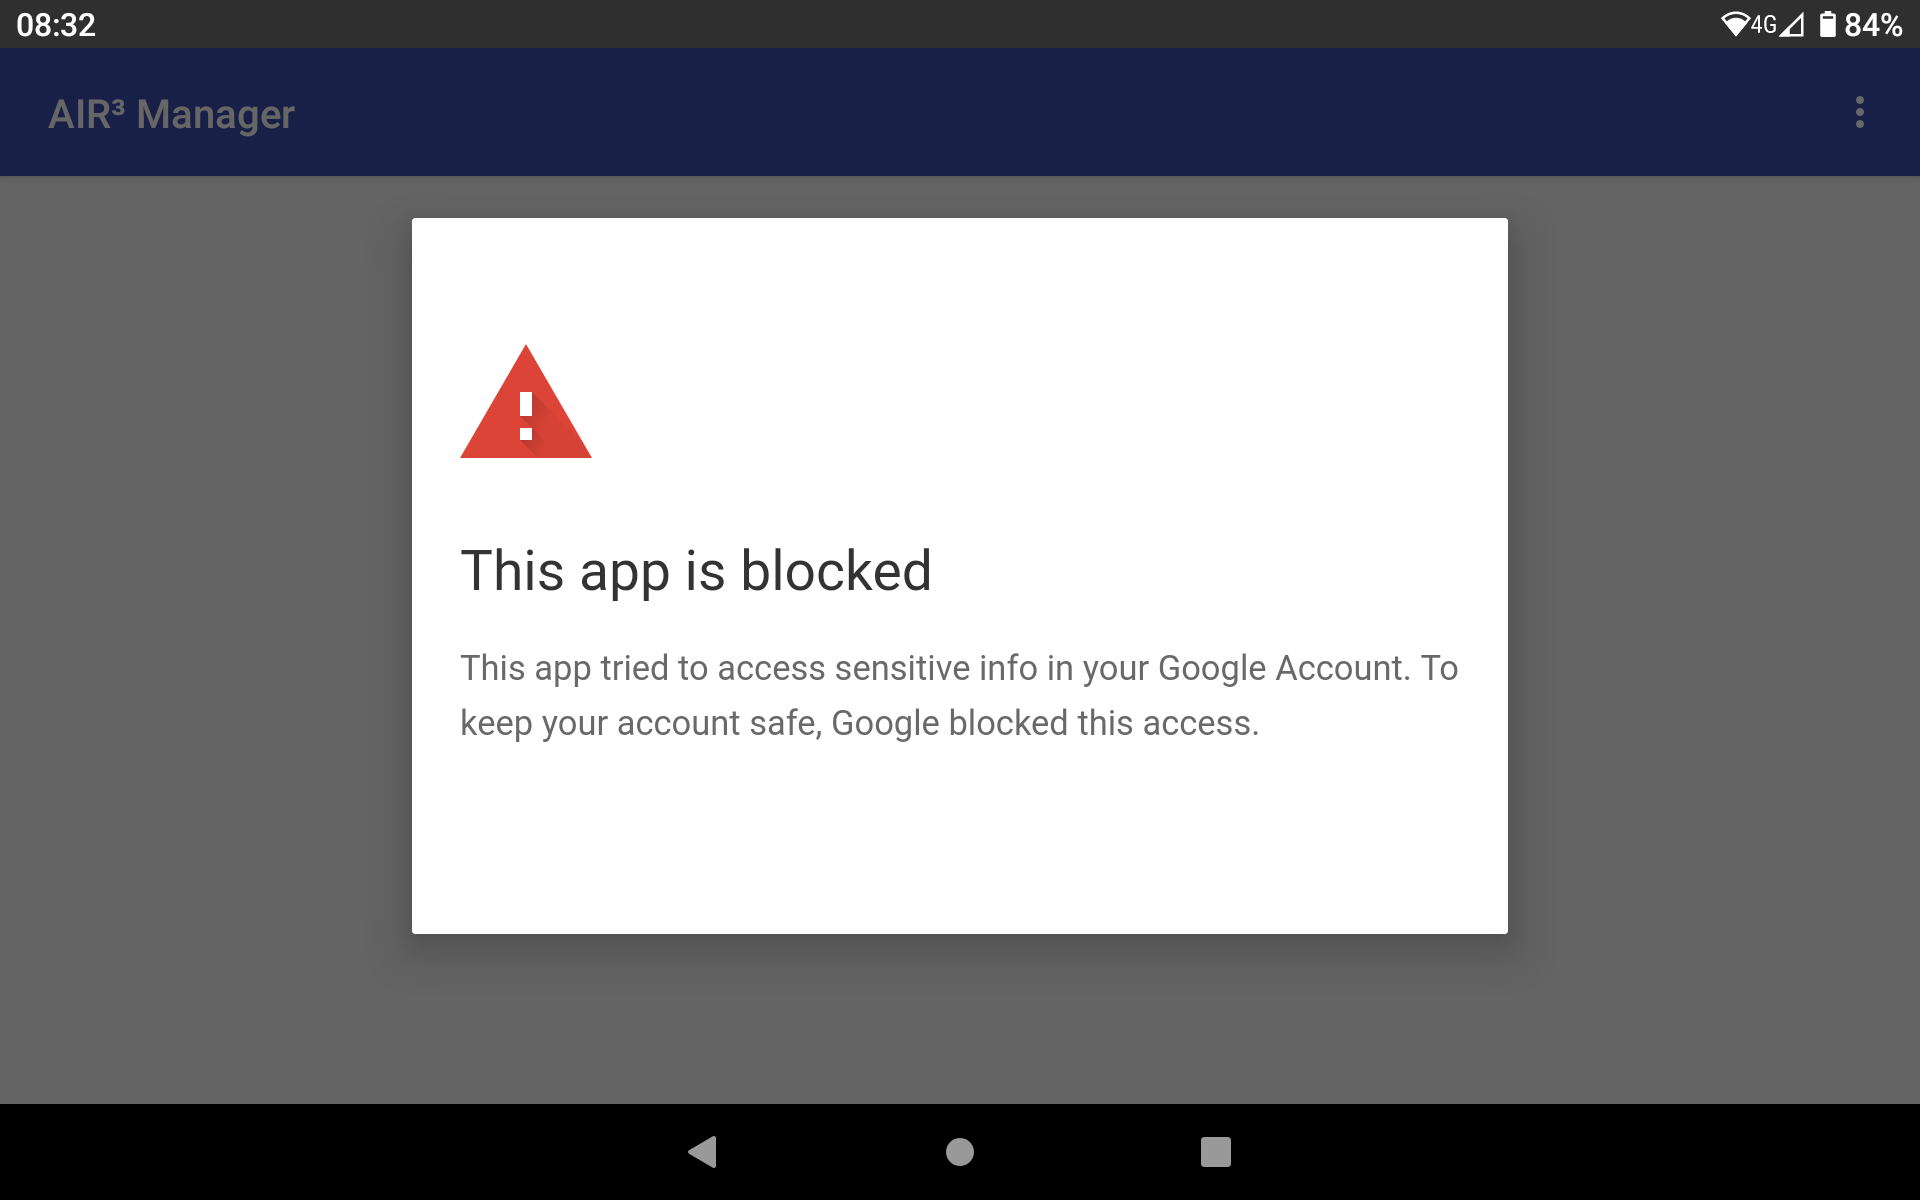
XCTrack relies on GPS data to determine whether you are moving and flying.
When the tablet is used indoors, inside a car, or in any location with poor satellite reception, the GPS position can become inaccurate and unstable.
In these conditions, the reported location may randomly jump by several meters even though the device is not actually moving. XCTrack can interpret these false position changes as real movement and may therefore detect a “takeoff”.
After a short time, since there is no consistent movement anymore, XCTrack recognizes that the device is stationary and automatically detects a “landing”.
This behavior is normal and is caused by weak GPS reception, not by a problem with AIR³.
If you want to reduce unwanted takeoff detections, you can increase the takeoff speed threshold in XCTrack: Preferences → Automatic actions → Takeoff speed
A higher threshold makes XCTrack less sensitive to small GPS position fluctuations.
For best results, use the device outdoors with a clear view of the sky before starting a flight.
If the device recognises your SIM card and you can make calls/SMS (and receive calls/SMS), but you do not have internet, you may need to configure an APN (Access Point Name). Go to Android Settings/Network & Internet/Mobile Network/Access Point Names and click on the plus sign to add the APN. Don’t forget to save (top right menu) once you’ve set the APN details.
You should contact your mobile operator for details on how to configure the APN.
Here are a few tips to help you identify what was not set up correctly. Before proceeding, please read the AIR³ XCT Add-On instructions carefully.
Make sure you have installed the latest version of XCTrack and AIR³ XCT Addon.
- Are events being sent correctly from XCTrack to the AIR³ XCT add-on?
- First, check that XCTrack is correctly sending events to the AIR³ XCT add-on. The simplest way to do this is to:
- Create a new row in the AIR³ XCT add-on and select ‘Takeoff’ as the XCTrack event.
- Click on ‘Select Task’ and then select ‘Sound’. Select a sound and click “Confirm”.
- In the new row, click on the triangle to play the sound.
- Open XCTrack and go to Menu > Preferences > Testing & Debug > Others. Click on ‘Manual takeoff’. You should immediately hear the sound you have just configured.
- The simplest way to check whether you can catch a widget click event is to:
- Open the AIR³ XCT Add-on menu (three dots), then go to Settings > Add a new trigger event > Add a new XCTrack event. Select the ‘Others’ category, then type ‘TEST’ (capital letters) in the ‘Event Name’ field and click ‘Confirm’.
- Check that you have a ‘TEST (Others)’ event configured in the ‘Added XCTrack Events’ list.
- Go back to the main AIR³ XCT add-on page, create a new row, select the ‘TEST’ event in the ‘Others’ category, select ‘Task’ and select a sound as you did to test the XCTrack take-off event.
- Open XCTrack and go to Menu > Customise > Add widget > Intent launcher (in Action buttons). Open it to check that the event is ‘TEST’ (org.xcontest.XCTrack.Event.TEST).
- Go back to the normal XCTrack interface. Long-press the widget. You should hear the sound. Note that you can deactivate “Long click to activate” in the widget configuration menu if you want to activate with a simple click.
- To check whether you can catch a button click event, the simplest way is to:
- Open the AIR³ XCT Add-on menu (three dots), then go to Settings > Add a new trigger event > Add a new XCTrack event. Type ‘KeyEvent’ (this is case sensitive) in the ‘Event Name’ field, then click ‘Confirm’.
- Check that you have a ‘KeyEvent (Zello)’ event configured in the ‘Added XCTrack Events’ list. Note that creating a new “KeyEvent” event will go to the Zello category, as the main goal is to use a button with Zello. You can use a button for other reasons.
- Go back to the main AIR³ XCT Add-on page, create a new row, select the ‘KeyEvent’ event in the Zello category, select ‘Task’ and select a sound as you did to test the XCTrack Take-off event.
- Open XCTrack and go to Menu > Preferences > Key bindings. Click on Launch Android Intent and press the button you want to associate.
- Go back to the normal XCTrack interface. Click on the button. You should hear the sound. Note that ‘long click’ and ‘short click’ are two different button codes for Android in most cases. If you configure the button to make a long click, You should only make a long click to trigger the event. If you are using a Bluetooth button, make sure you have paired it with the AIR³ correctly before proceeding.
- First, check that XCTrack is correctly sending events to the AIR³ XCT add-on. The simplest way to do this is to:
These initial tests will enable you to verify that XCTrack can communicate with the XCT add-on via various methods, such as automatic events, widget events and button events.
- Is Zello correctly configured?
- First of all, use the Echo to test your audio and make sure Zello is working correctly.
- Ensure that you have configured the hardware button correctly, as indicated in the AIR³ XCT Add-on instructions (toggle mode).
- Ensure that you have enabled Zello in the AIR³ XCT Add-on. Open the AIR³ XCT Add-on menu (three dots), then go to Settings > Zello Configuration and enable Zello.
- Check that Zello rows have been created in the combination rows.
- In the new row, click on the triangle to launch the Zello event and hear it. Click a second time to close the communication, as per the Zello hardware button configuration (toggle mode). You should hear your voice.
- Using the previous instructions, you have checked that the link between the AIR³ XCT Add-on and XCTrack is working correctly. Create a new widget in XCTrack as indicated above, but enter ‘Zello’ as the event action name. Note that if you use the Expert-Zello profile with AIR³ Manager, this widget will be created automatically.
- Click on the Zello widget in XCTrack to test Zello.
- Once you have successfully completed the Echo tests, select the Zello group you want to use and make sure you set this group as the default.
- If you encounter any issues, please refer to the manual for detailed instructions. For example, make sure that you have correctly defined the battery management on Unrestricted.
These tests should enable you to use Zello directly via XCTrack.
- Is the configuration of Telegram correct?
- First of all, make sure it is working properly on your AIR³. Test by sending a message and your location to a group.
- Ensure that you have correctly configured a task to send your position or location, as indicated in the instructions.
- Create a new row in the AIR³ XCT add-on and select ‘Takeoff’ as the XCTrack event.
- Click on ‘Select Task’ and select the Telegram task that you have configured.
- In the new row, click on the triangle to check that the Telegram task has been executed.
- Open XCTrack > Open Menu > Preferences > Testing & Debug > Others. Click on ‘Manual takeoff’. You should immediately see the Telegram task that you have just configured.
In the event of a rapid descent with a large change in pressure, you might feel a short moment with the sound of the vario, weaker than usual, while using AIR³ 7.3 or 7.3+. This is due to a significant pressure difference between the inside of the unit and the outside. The pressure will quickly equalize and the sound will return to normal, but sometimes this can take precious seconds. To avoid such a situation, you can open the USB-C cover in advance, so that the inside is not sealed and the pressure equalizes instantly.
AIR³ is provided with a perpetual licence of XCTrack Pro. The licence is linked to the device, not the pilot.
The perpetual licence is generated by a long file name (called Bootstrap file) located in the Bootstrap folder of XCTrack, ending by .xcbs.
The Bootstrap folder can be accessed from the Files application. Scroll down the left hand menu to XCTrack. Click on XCTrack and you will see XCTrack subfolders.
That perpetual licence file is based on the IMEI number of the device and is linked to the product name registered in the system. In other words, the licence can only work with the specific AIR³ for which the Bootstrap file has been produced.
Here are a few comments related to the Pro licence mechanism, in case you experience difficulties with XCTrack PRO.
The device name and product name should be AIR3
- The xcbs file (Bootstrap file) has to be located in the Bootstrap folder of XCTrack (it is case sensitive)
- The xcbs file is directly related to the IMEI number for which it has been produced, make sure to use the right xcbs file
- Check the date and time of the device. Wrong date and/or time may drive to Pro activation failure.
- Check the permissions given to XCtrack. If you are having trouble getting the Pro licence, check that XCtrack has permissions to do everything. Go to Settings/Apps/XCTrack/Permissions/ and give permissions to the Not allowed items. Check the Phone is allowed.
If you have performed a factory reset, which you should never do, please contact us to let us know. This will speed up the process.
If you have accidentally erased the bootstrap file and you try to activate back the pro licence, here are a few comments to take into account:
- Layout change. First of all, XCTrack needs to recognize the file, check that it is related to the IMEI of the device and the name of the device. The xcbs file contains pages layout made for AIR³. If you see the pages layout that has changed after starting XCTrack, it means that the xcbs file has been recognized by XCTrack. This is the first important step.
If there is no layout change, it means that the xcbs file is not correctly recognised. Check the name of the file, check the extension “xcbs” and check the size of the file (it should be more or less 100 Ko). - Time check and GPS fix. Once the file has been taken into account, XCTrack licence mechanism will check the date and time of the unit and compare it with the GPS time. Therefore, the date and time has to be set correctly on the device (Check settings/system/date and time), the time zone needs to be set correctly and the unit needs to have a GPS fix (GPS time should be indicated in the widget “Time”). Once the unit has a GPS fix, restart XCTrack.
Note that the name of the .xcbs file must remain exactly the same. Make sure that you have not changed the name, or that it has not been changed during the copying or downloading process. Sometimes an .txt extension is added when downloading the file. If this happens, you will need to rename the file to remove the .txt extension. Use File Manager+. Locate the file in Android > data > org.xcontest.XCTrack > files > Bootstrap. Select the file by pressing and holding it. Click on ‘Rename’ and make sure the file name is correct.
If you have checked all the previous points and still cannot get the Pro features within XCTrack, send us a video or photos via whatsapp showing the various details explained hereabove:
1. With the Files application, show the .xcbs file in the Bootstrap folder of XCTrack to allow to see the file’s path.
2. The full name of the XCBS file, from start to finish. To view the full name, select the file (long click on the file) and click on the three dots at the top right, then select Get Info.
3. The IMEI, as obtained by XCTrack, can be found in XCTrack Preferences/About XCTrack by clicking on the XCTrack version and then scrolling down to the QR code. If you see the word ‘error’ next to the IMEI number, check the permissions as indicated above.
4. Take a screenshot of the XCTrack interface to check if the XCBS file has already been taken into account, but the Pro validation has not yet been validated due to a time discrepancy with the GPS. See the “Layout change” explanations above.
5. Take a picture of the ‘Date and Time’ Android settings as explained above.
If, for some reason, you don’t have any xcbs file related to your device in XCTrack’s Bootstrap folder, first check your device’s root folder if you have a folder name that contains numbers. This number should match your IMEI. In this folder you should find the xcbs file. Just copy it to the Bootstrap folder of XCTrack.
Here is how to proceed…
If you no longer have this folder containing the xcbs file (after a factory reset for example. Note that before performing any factory reset you must first save this xcbs file), then you must contact us to get a new xcbs file. In this case, you must provide us with your IMEI.
IMEI number can be found:
- on the box of the device when you bought it
- on the back of the device
- in Settings/About device/IMEI (depending on Android version, you may need to find it in Settings/System/About device/Status)
- in XCTrack Preferences/About XCTrack by clicking on the XCTrack version and then scrolling down. (*1)
- If you still can’t find your IMEI but found the MEID, please provide it to us (MEID is the same as IMEI with missing last number).
(*1) If you have a fresh firmware installation, you may need to give permission to the phone for XCTrack in Settings/Apps (click on XCTrack and check Permissions).